2023 TESLA MODEL 3 light
[x] Cancel search: lightPage 24 of 296

Center Console
In addition to housing an RFID transmitter that reads key fobs and key cards (see
Key Card on page 10), the
center console includes cup holders, two storage
compartments, and
a wireless phone charger.
To open the main storage compartment, pull its cover upward. Open the front storage compartment by sliding its cover forward.
Second Row Console
Your Model 3 has a rear console integrated in the center
of the second row seat back. Pull the console down to
access the rear cup holders, or use it as an armrest.
Glovebox
To open the glovebox, touch Controls > Glovebox. The
glovebox automatically opens and its light turns on.
To close the glovebox, push it upward until it clicks into its closed position.
For additional glovebox security, touch Controls >
Safety > Glovebox PIN to set a 4-digit PIN (see
Glovebox PIN on page 127).
NOTE: If you leave the glovebox open, its light
eventually turns
off.
NOTE: The glovebox locks whenever closed and you
lock
Model 3 using the mobile app, key card, you leave
Model 3 carrying your phone key (if Walk-Away Door
Lock is turned on), or if Valet mode is active (see
Valet
Mode on page 46). It does not lock when Model 3 is
locked by touching the lock icon on the touchscreen.
WARNING: When driving, keep the glovebox
closed to prevent injury to a passenger if a
collision or sudden stop occurs.
Wireless Phone Charger
A wireless phone charger (if equipped), is integrated
into the front console to provide up to 15W of power to charge a Qi-enabled phone. Simply place your phone on
the charger. Your device may feel warm while charging, but this is a normal
effect of inductive charging.
When placed on the wireless charger, your phone
charges whenever the vehicle is powered on (the
touchscreen is on and you are inside the vehicle). Your
phone will not charge after exiting the vehicle
unless a
feature (such as Sentry mode) is enabled and providing
power to the USB ports. Model 3 will also not charge a
phone if the vehicle
Page 27 of 296

Correct Driving Position
The seat, head support, seat belt and airbags work
together to maximize your safety. Using these correctly ensures greater protection.
Position the seat so you can wear the seat belt correctly, while being as far away from the front airbag as possible:
1.
Sit upright with both feet on the floor and the seat
back reclined no more than 30 degrees.
2.
Make sure you can easily reach the pedals and that your arms are slightly bent when holding the steering wheel. Your chest should be at least
10 inches
(25 cm) from the center of the airbag cover.
3.
Place the shoulder section of the seat belt mid-way between your neck and your shoulder. Fit the lap section of the belt tightly across your hips, not across your stomach.
Model 3 seats include integrated head supports that
cannot be adjusted or removed.
Adjusting the Front Seats1.
Move seat forward/backward and adjust the seat
Page 31 of 296

Wearing Seat Belts
Using seat belts and child safety seats is the most
effective way to protect occupants if a collision occurs.
Therefore, wearing a seat belt is required by law in most jurisdictions.
Both the driver and passenger seats are equipped with three-point inertia reel seat belts. Inertia reel belts are automatically tensioned to allow occupants to move
comfortably during normal driving conditions.
To
securely hold child safety seats, all passenger seating
positions are equipped with an automatic locking
retractor (ALR) feature that, by fully extracting the seat
belt (beyond the length needed for a typical adult
occupant), locks the belt into place until the seat belt is
unbuckled.
The seat belt reel automatically locks to prevent
movement of occupants if
Model 3 experiences a force
associated with hard acceleration, braking, cornering, or
an impact in a collision.
Seat Belt Reminders
The seat belt reminder on the touchscreen
alerts you if a seat belt for an occupied driver or passenger seat is unbuckled. If all
occupants are buckled up and the
reminder stays on, re-buckle seat belts to
ensure they are correctly latched. Also
remove any heavy objects (such as a
briefcase) from an unoccupied seat. If the
reminder light continues to stay on,
contact Tesla.
You can temporarily disable a seat belt reminder associated with a rear seating position. This is useful when you are carrying an object in a rear seat that
triggers the seat belt reminder alert. To disable the
reminder, touch the associated seat on the seat belt reminder popup message that displays on the touchscreen when a seat belt reminder is active. When a reminder is disabled, the seat belt reminder icon is replaced by a seat icon, for the current drive only. Touch the seat again to re-enable the reminder.
WARNING: Seat belts must be worn by passengers
in all seating positions. Do not disable a seat belt
reminder when the seating position is occupied by
a passenger.
To Fasten a Belt
1.
Ensure correct positioning of the seat (see Correct
Driving Position on page 25).
2.
Draw the belt out smoothly, ensuring the belt lays flat
across the pelvis, chest and mid-point of your collar
bone, between the neck and shoulder.
3. Insert the latch plate into the buckle and press
together until you hear a click indicating it is locked
in place.4.
Pull the belt to check that it is securely fastened.
5.
Pull the diagonal part of the belt toward the reel to
remove excess slack.
To Adjust the Shoulder Anchor
Height
Model 3 is equipped with an adjustable shoulder anchor
for each front seat to ensure that the seat belt is positioned correctly. The seat belt should lay
flat across
the mid-point of your collar bone while in the correct driving position
(see Correct Driving Position on page
25). Adjust the height of the shoulder anchor if the seat
belt is not positioned correctly:
1.
Press and hold the button on the shoulder anchor to release the locking mechanism.
2.
While holding the button, move the shoulder anchor up or down, as necessary, to correctly position the seat belt.
3.
Release the button on the shoulder anchor so that it
locks into position.
4.
Without pressing the button, pull on the seat belt webbing and attempt to move the shoulder anchor
downward to check that it is locked into position.
Seat Belts
29Seating and Safety Restraints
Page 39 of 296

Testing a Child Safety Seat
Before seating a child, always make sure the child safety seat is not loose:
1.
Hold the child safety seat by the belt path and try to slide the safety seat from side to side and front to back.
2.
If the seat moves more than one inch (2.5 cm), it is
too loose. Tighten the belt or reconnect the
LATCH
retained child safety seat.
3.
If you are unable to reduce slack, try a different seat
location or try another child safety seat.
Child Safety Seat Warnings
WARNING: Extreme hazard! Do not seat a child on
the front passenger seat even if you are using a
child safety seat. This seat has an airbag in front of
it. Although this airbag is disabled when Model 3
detects a lightweight passenger, do not rely on
technology to protect your child.
WARNING: Child restraint systems are designed to
be secured in vehicle seats by lap belts or the lap
belt portion of a lap-shoulder belt. Children could
be endangered in a crash if their child restraints
are not properly secured in the vehicle.
WARNING: According to collision statistics,
children are safer when properly restrained in the
rear seating positions than in the front seating
positions.
WARNING: Do not use a forward facing child
safety seat until your child weighs over 20 lbs (9
kg) and can sit independently. Up to the age of
two, a child
Page 55 of 296

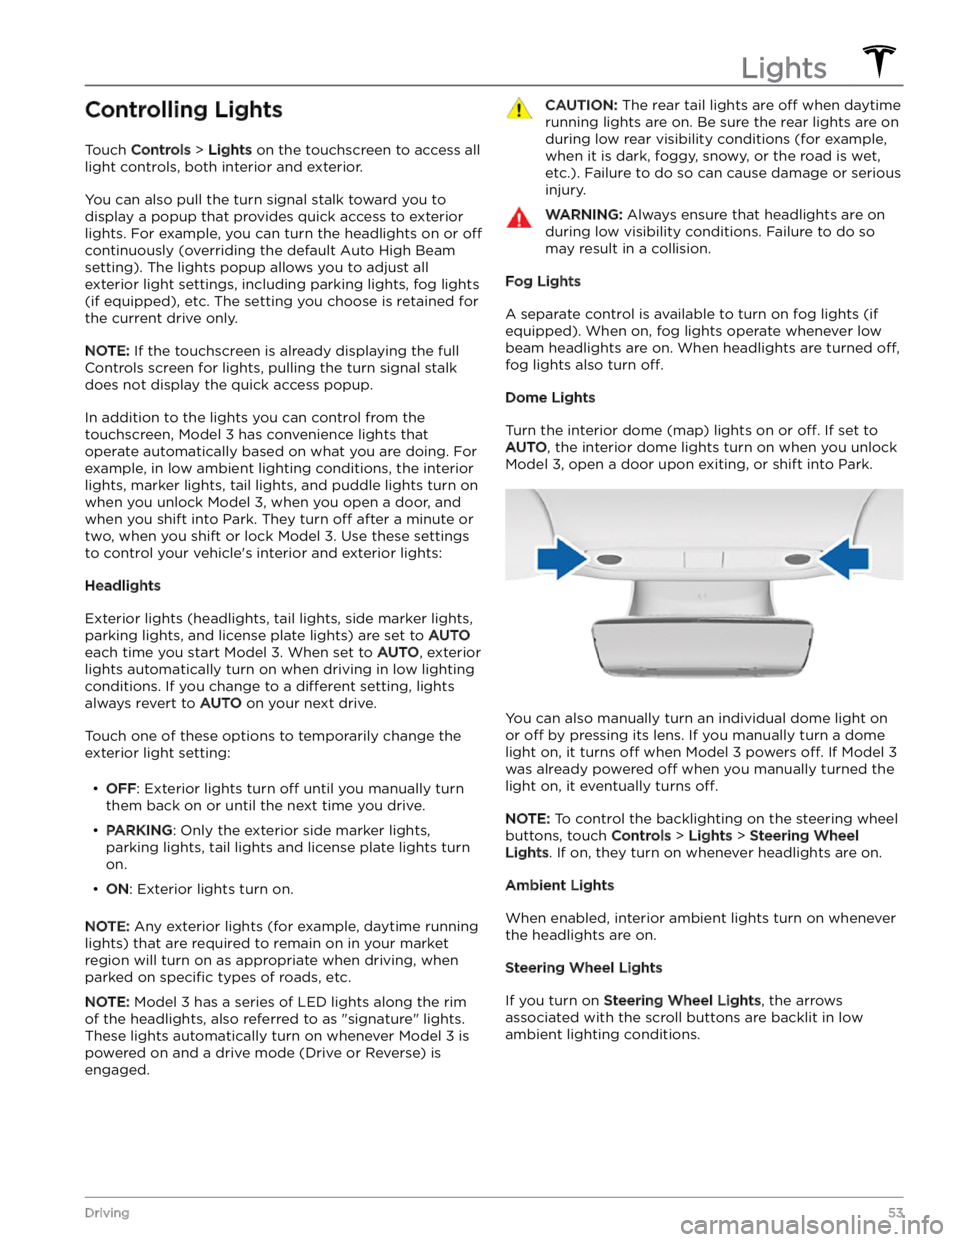
Controlling Lights
Touch Controls > Lights on the touchscreen to access all
light controls, both interior and exterior.
You can also pull the turn signal stalk toward you to
display a popup that provides quick access to exterior lights. For example, you can turn the headlights on or
off
continuously (overriding the default Auto High Beam
setting). The lights popup allows you to adjust all
exterior light settings, including parking lights, fog lights
(if equipped), etc. The setting you choose is retained for
the current drive only.
NOTE: If the touchscreen is already displaying the full
Controls screen for lights, pulling the turn signal stalk does not display the quick access popup.
In addition to the lights you can control from the touchscreen,
Model 3 has convenience lights that
operate automatically based on what you are doing. For
example, in low ambient lighting conditions, the interior lights, marker lights, tail lights, and puddle lights turn on when you unlock
Model 3, when you open a door, and
when you shift into Park. They turn
off after a minute or
two, when you shift or lock
Model 3. Use these settings
to control your vehicle
Page 56 of 296

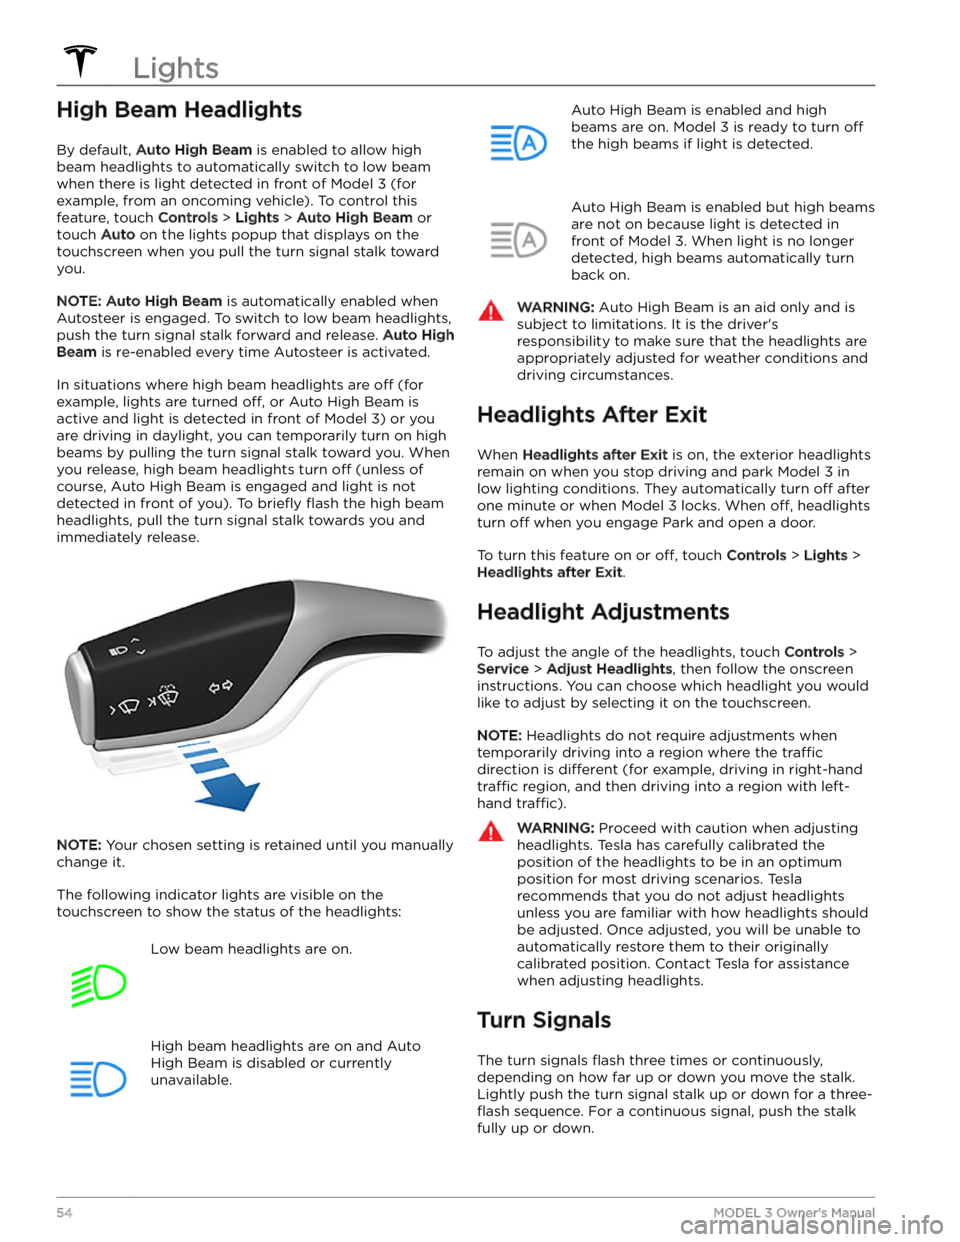
High Beam Headlights
By default, Auto High Beam is enabled to allow high
beam headlights to automatically switch to low beam when there is light detected in front of
Model 3 (for
example, from an oncoming vehicle). To control this
feature, touch
Controls > Lights > Auto High Beam or
touch
Auto on the lights popup that displays on the
touchscreen when you pull the turn signal stalk toward
you.
NOTE: Auto High Beam is automatically enabled when
Autosteer is engaged. To switch to low beam headlights, push the turn signal stalk forward and release.
Auto High
Beam is re-enabled every time Autosteer is activated.
In situations where high beam headlights are off (for
example, lights are turned
off, or Auto High Beam is
active and light is detected in front of
Model 3) or you
are driving in daylight, you can temporarily turn on high
beams by pulling the turn signal stalk toward you. When
you release, high beam headlights turn
off (unless of
course, Auto High Beam is engaged and light is not detected in front of you). To
briefly flash the high beam
headlights, pull the turn signal stalk towards you and immediately release.
NOTE: Your chosen setting is retained until you manually
change it.
The following indicator lights are visible on the touchscreen to show the status of the headlights:
Low beam headlights are on.High beam headlights are on and Auto
High Beam is disabled or currently
unavailable.Auto High Beam is enabled and high
beams are on.
Model 3 is ready to turn off
the high beams if light is detected.
Auto High Beam is enabled but high beams
are not on because light is detected in front of
Model 3. When light is no longer
detected, high beams automatically turn
back on.
WARNING: Auto High Beam is an aid only and is
subject to limitations. It is the driver
Page 57 of 296

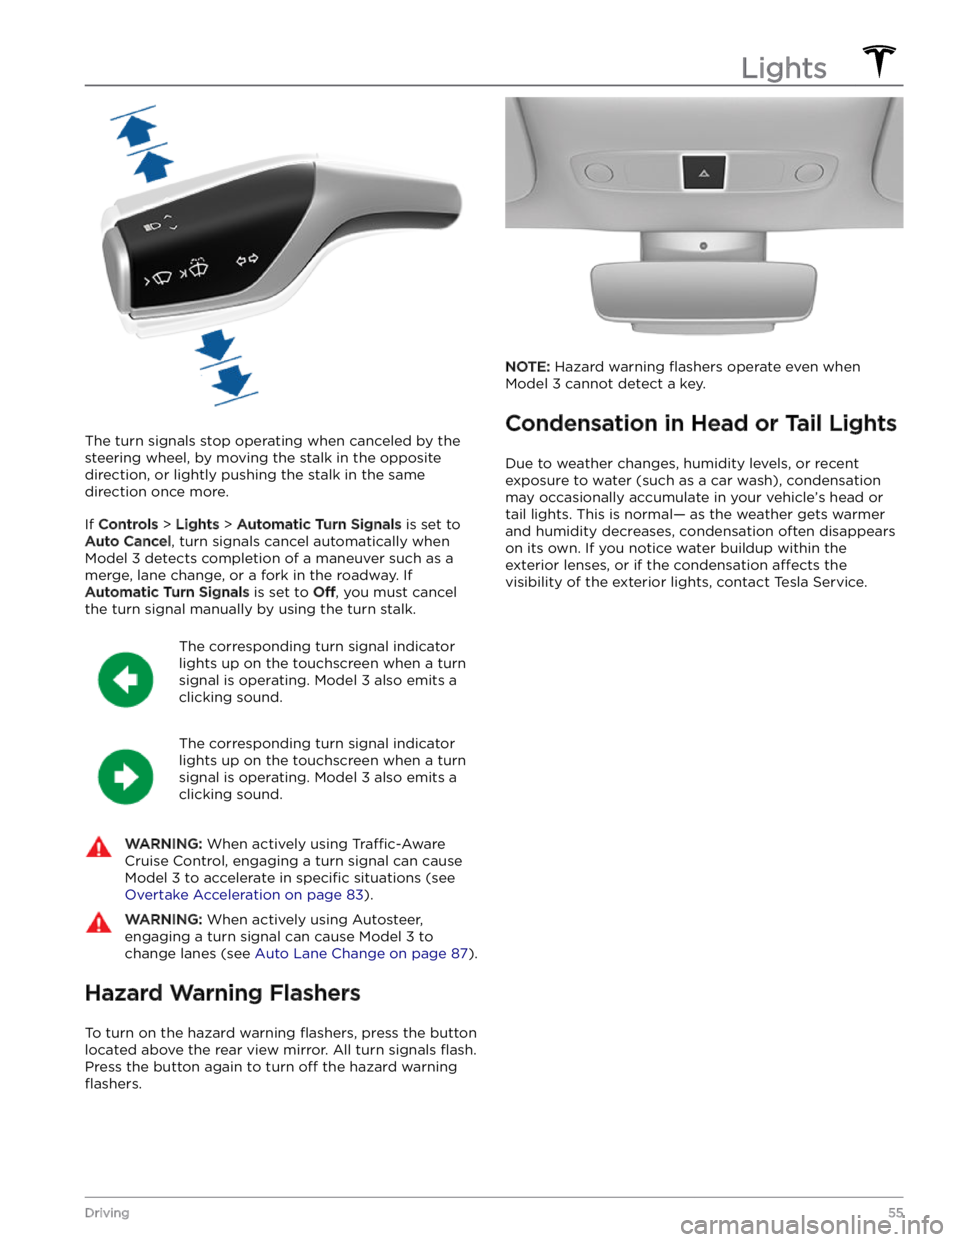
The turn signals stop operating when canceled by the steering wheel, by moving the stalk in the opposite direction, or lightly pushing the stalk in the same
direction once more.
If Controls > Lights > Automatic Turn Signals is set to
Auto Cancel, turn signals cancel automatically when
Model 3 detects completion of a maneuver such as a
merge, lane change, or a fork in the roadway. If
Automatic Turn Signals is set to Off, you must cancel
the turn signal manually by using the turn stalk.
The corresponding turn signal indicator
lights up on the touchscreen when a turn
signal is operating.
Model 3 also emits a
clicking sound.
The corresponding turn signal indicator
lights up on the touchscreen when a turn
signal is operating.
Model 3 also emits a
clicking sound.
WARNING: When actively using Traffic-Aware
Cruise Control, engaging a turn signal can cause
Model 3 to accelerate in specific situations (see
Overtake Acceleration on page 83).
WARNING: When actively using Autosteer,
engaging a turn signal can cause Model 3 to
change lanes (see Auto Lane Change on page 87).
Hazard Warning Flashers
To turn on the hazard warning flashers, press the button
located above the rear view mirror. All turn signals
flash.
Press the button again to turn off the hazard warning
flashers.
NOTE: Hazard warning flashers operate even when
Model 3 cannot detect a key.
Condensation in Head or Tail Lights
Due to weather changes, humidity levels, or recent
exposure to water (such as a car wash), condensation may occasionally accumulate in your vehicle
Page 59 of 296

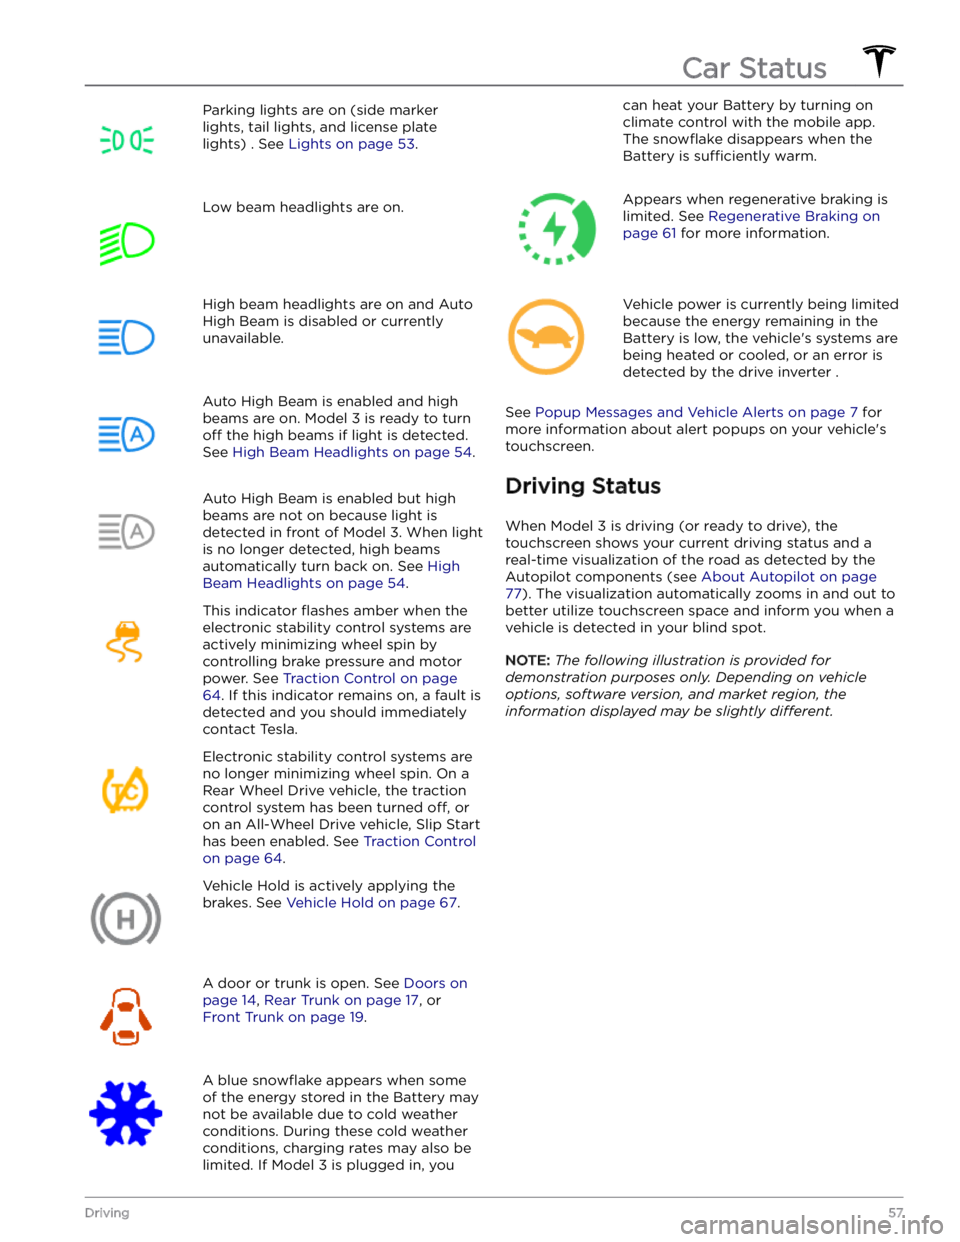
Parking lights are on (side marker
lights, tail lights, and license plate lights) . See
Lights on page 53.
Low beam headlights are on.High beam headlights are on and Auto
High Beam is disabled or currently
unavailable.Auto High Beam is enabled and high
beams are on.
Model 3 is ready to turn
off the high beams if light is detected.
See
High Beam Headlights on page 54.
Auto High Beam is enabled but high beams are not on because light is
detected in front of
Model 3. When light
is no longer detected, high beams
automatically turn back on. See
High
Beam Headlights on page 54.
This indicator flashes amber when the
electronic stability control systems are actively minimizing wheel spin by
controlling brake pressure and motor
power. See
Traction Control on page
64. If this indicator remains on, a fault is
detected and you should immediately contact Tesla.
Electronic stability control systems are no longer minimizing wheel spin. On a
Rear Wheel Drive vehicle, the traction
control system has been turned
off, or
on an All-Wheel Drive vehicle, Slip Start has been enabled. See
Traction Control
on page 64.
Vehicle Hold is actively applying the brakes. See
Vehicle Hold on page 67.
A door or trunk is open. See Doors on
page 14, Rear Trunk on page 17, or
Front Trunk on page 19.
A blue snowflake appears when some
of the energy stored in the Battery may not be available due to cold weather conditions. During these cold weather
conditions, charging rates may also be
limited. If
Model 3 is plugged in, you
can heat your Battery by turning on climate control with the mobile app.
The
snowflake disappears when the
Battery is
sufficiently warm.
Appears when regenerative braking is limited. See
Regenerative Braking on
page 61 for more information.
Vehicle power is currently being limited
because the energy remaining in the
Battery is low, the vehicle