2023 PEUGEOT LANDTREK turn signal
[x] Cancel search: turn signalPage 13 of 164
11
Dashboard instruments
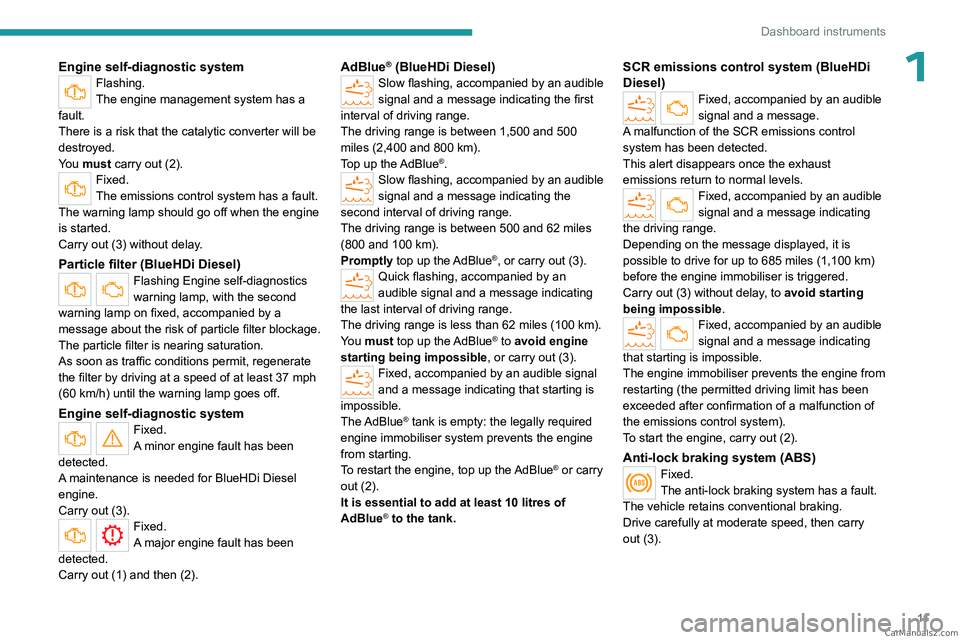
1Engine self-diagnostic systemFlashing.
The engine management system has a
fault.
There is a risk that the catalytic converter will be
destroyed.
You must carry out (2).
Fixed.
The emissions control system has a fault.
The warning lamp should go off when the engine
is started.
Carry out (3) without delay.
Particle filter (BlueHDi Diesel)Flashing Engine self-diagnostics
warning lamp, with the second
warning lamp on fixed, accompanied by a
message about the risk of particle filter blockage.
The particle filter is nearing saturation.
As soon as traffic conditions permit, regenerate
the filter by driving at a speed of at least 37
mph
(60
km/h) until the warning lamp goes off.
Engine self-diagnostic system
Fixed.
A minor engine fault has been
detected.
A maintenance is needed for BlueHDi Diesel
engine.
Carry out (3).
Fixed.
A major engine fault has been
detected.
Carry out (1) and then (2).
AdBlue® (BlueHDi Diesel)Slow flashing, accompanied by an audible
signal and a message indicating the first
interval of driving range.
The driving range is between 1,500 and 500
miles (2,400 and 800
km).
Top up the AdBlue
®.Slow flashing, accompanied by an audible
signal and a message indicating the
second interval of driving range.
The driving range is between 500 and 62 miles
(800 and 100
km).
Promptly top up the AdBlue
®, or carry out (3).Quick flashing, accompanied by an
audible signal and a message indicating
the last interval of driving range.
The driving range is less than 62 miles (100
km).
You must top up the AdBlue
® to avoid engine
starting being impossible , or carry out
(3).
Fixed, accompanied by an audible signal
and a message indicating that starting is
impossible.
The AdBlue
® tank is empty: the legally required
engine immobiliser system prevents the engine
from starting.
To restart the engine, top up the AdBlue
® or carry
out (2).
It is essential to add at least 10
litres of
AdBlue
® to the tank.
SCR emissions control system (BlueHDi
Diesel)
Fixed, accompanied by an audible
signal and a message.
A malfunction of the SCR emissions control
system has been detected.
This alert disappears once the exhaust
emissions return to normal levels.
Fixed, accompanied by an audible
signal and a message indicating
the driving range.
Depending on the message displayed, it is
possible to drive for up to 685 miles (1,100
km)
before the engine immobiliser is triggered.
Carry out (3) without delay, to avoid starting
being impossible .
Fixed, accompanied by an audible
signal and a message indicating
that starting is impossible.
The engine immobiliser prevents the engine from
restarting (the permitted driving limit has been
exceeded after confirmation of a malfunction of
the emissions control system).
To start the engine, carry out (2).
Anti-lock braking system (ABS)Fixed.
The anti-lock braking system has a fault.
The vehicle retains conventional braking.
Drive carefully at moderate speed, then carry
out (3). CarM an uals 2 .c o m
Page 24 of 164
22
Access
Anti-theft protection
Do not modify the electronic vehicle
immobiliser, as this might result in
malfunctions.
For vehicles with a key ignition switch,
remember to remove the key and turn the
steering wheel to engage the steering lock.
Locking the vehicle
Driving with the doors locked could make
it more difficult for the emergency services
to enter the passenger compartment in an
emergency.
As a safety precaution, remove the key from
the ignition or take the electronic key with you
when leaving the vehicle, even for a short
time.
Purchasing a second-hand vehicle
Have the key codes memorised by a
PEUGEOT dealer, to ensure that the keys
in your possession are the only ones able to
start the vehicle.
Keyless Entry and Start
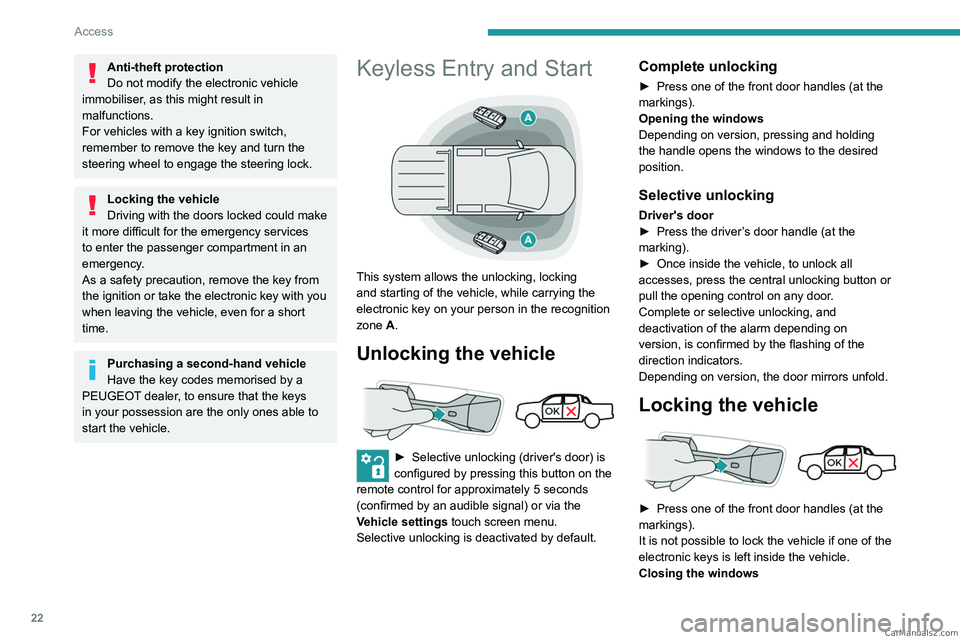
This system allows the unlocking, locking
and starting of the vehicle, while carrying the
electronic key on your person in the recognition
zone A.
Unlocking the vehicle
► Selective unlocking (driver's door) is
configured by pressing this button on the
remote control for approximately 5 seconds
(confirmed by an audible signal) or via the
Vehicle settings touch screen menu.
Selective unlocking is deactivated by default.
Complete unlocking
► Press one of the front door handles (at the
markings).
Opening the windows
Depending on version, pressing and holding
the handle opens the windows to the desired
position.
Selective unlocking
Driver's door
► Press the driver ’s door handle (at the
marking).
►
Once inside the vehicle, to unlock all
accesses, press the central unlocking button or
pull the opening control on any door
.
Complete or selective unlocking, and
deactivation of the alarm
depending on
version,
is confirmed by the flashing of the
direction indicators.
Depending on version, the door mirrors unfold.
Locking the vehicle
► Press one of the front door handles (at the
markings).
It is not possible to lock the vehicle if one of the
electronic keys is left inside the vehicle.
Closing the windows CarM an uals 2 .c o m
Page 49 of 164
47
Lighting and visibility
4Exterior lighting control
stalk
Main lighting
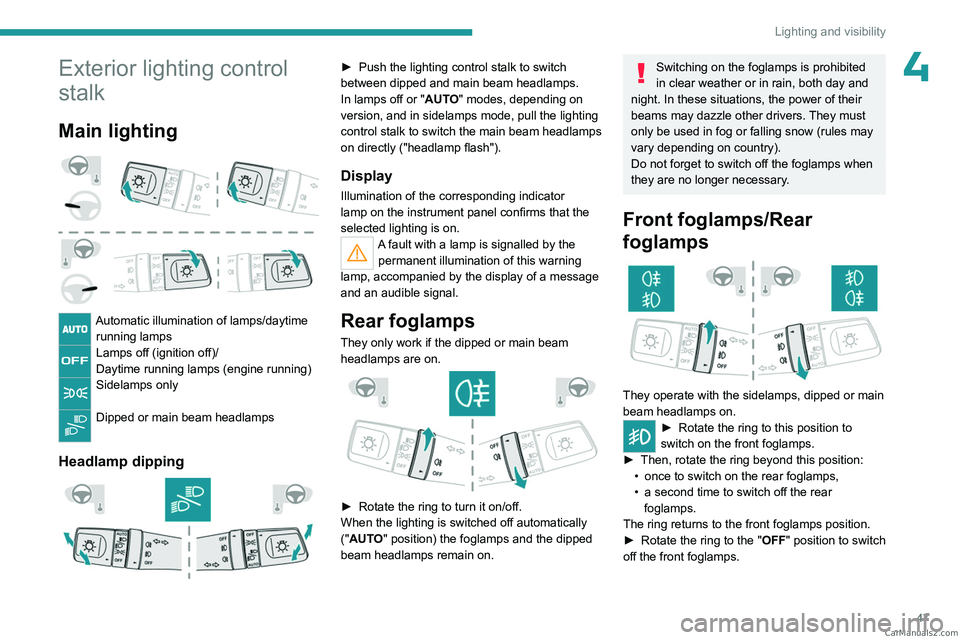
Automatic illumination of lamps/daytime running lamps
Lamps off (ignition off)/
Daytime running lamps (engine running)
Sidelamps only
Dipped or main beam headlamps
Headlamp dipping
► Push the lighting control stalk to switch
between dipped and main beam headlamps.
In lamps off or "
AUTO" modes, depending on
version, and in sidelamps mode, pull the lighting
control stalk to switch the main beam headlamps
on directly ("headlamp flash").
Display
Illumination of the corresponding indicator
lamp on the instrument panel confirms that the
selected lighting is on.
A fault with a lamp is signalled by the permanent illumination of this warning
lamp, accompanied by the display of a message
and an audible signal.
Rear foglamps
They only work if the dipped or main beam headlamps are on.
► Rotate the ring to turn it on/off.
When the lighting is switched off automatically
("
AUTO" position) the foglamps and the dipped
beam headlamps remain on.
Switching on the foglamps is prohibited
in clear weather or in rain, both day and
night. In these situations, the power of their
beams may dazzle other drivers. They must
only be used in fog or falling snow (rules may
vary depending on country).
Do not forget to switch off the foglamps when
they are no longer necessary.
Front foglamps/Rear
foglamps
They operate with the sidelamps, dipped or main
beam headlamps on.
► Rotate the ring to this position to
switch on the front foglamps.
►
Then, rotate the ring beyond this position:
•
once to switch on the rear foglamps,
•
a second time to switch off the rear
foglamps.
The ring returns to the front foglamps position.
►
Rotate the ring to the "
OFF" position to switch
off the front foglamps. CarM an uals 2 .c o m
Page 50 of 164
48
Lighting and visibility
If the lighting is switched off automatically (with
AUTO model) or the dipped beam headlamps
are switched off manually, the foglamps and
sidelamps remain on.
►
Rotate the ring to the "
OFF" position to switch
off the foglamps; the sidelamps will then switch
off.
Switching off of the lighting when the
ignition is switched off
When the ignition is switched off, all of the
lamps turn off immediately, except for the
dipped beam headlamps if automatic guide-
me-home lighting is activated.
Switching on the lamps after
switching off the ignition
To reactivate the lighting control, rotate the
ring, depending on version, to the " OFF"
position - lamps off, or to the "AUTO" position,
then to the desired position.
If the driver's door is opened, a temporary
audible signal warns the driver that the lamps
are on.
They will go off automatically after a period
of time that depends on the level of charge in
the battery (entering energy economy mode).
In some weather conditions (e.g. low
temperature or humidity), misting on the
internal surface of the glass of the headlamps
and rear lamps is normal, and will disappear
after the lamps have been on for a few
minutes.
Never look too closely at the light beam
of LED technology lamps - risk of serious
eye injury!
Travelling abroad
Vehicles equipped with halogen
headlamps:
If planning to use your vehicle in a country
that drives on the other side of the road, the
dipped beam headlamps must be adjusted to
avoid dazzling oncoming drivers. Consult a
PEUGEOT dealer or a qualified workshop.
Daytime running lamps/
Sidelamps
These lamps at the front and rear of the vehicle
light up automatically when the engine starts.
They perform the following functions:
–
Daytime running lamps (lighting control stalk
at position "
OFF" or "AUTO" with adequate
ambient light).
–
Sidelamps (lighting control stalk at position
"
AUTO" with low ambient light or "Sidelamps
only" or "Dipped/main beam headlamps").
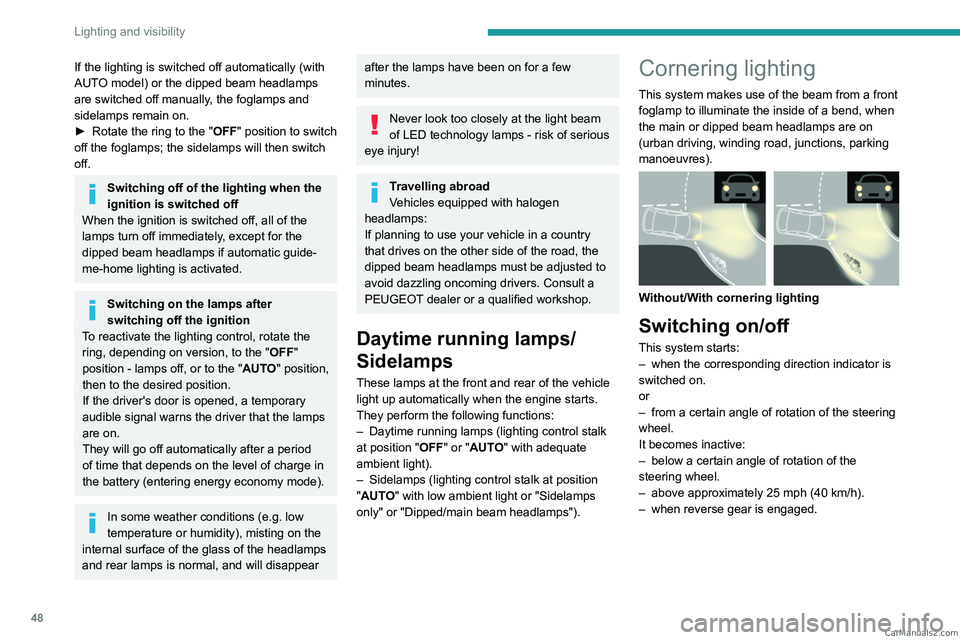
Cornering lighting
This system makes use of the beam from a front
foglamp to illuminate the inside of a bend, when
the main or dipped beam headlamps are on
(urban driving, winding road, junctions, parking
manoeuvres).
Without/With cornering lighting
Switching on/off
This system starts:
– when the corresponding direction indicator is
switched on.
or
–
from a certain angle of rotation of the steering
wheel.
It becomes inactive:
–
below a certain angle of rotation of the
steering wheel.
–
above approximately 25 mph (40
km/h).
–
when reverse gear is engaged. CarM an uals 2 .c o m
Page 51 of 164
49
Lighting and visibility
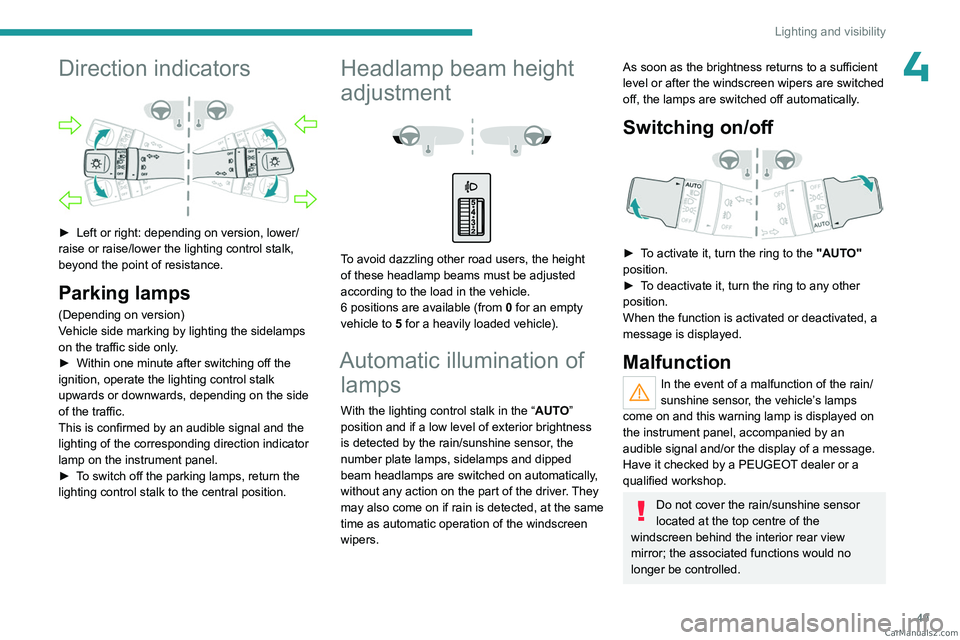
4Direction indicators
► Left or right: depending on version, lower/
raise or raise/lower the lighting control stalk,
beyond the point of resistance.
Parking lamps
(Depending on version)
Vehicle side marking by lighting the sidelamps
on the traffic side only.
►
Within one minute after switching off the
ignition, operate the lighting control stalk
upwards or downwards, depending on the side
of the traffic.
This is confirmed by an audible signal and the
lighting of the corresponding direction indicator
lamp on the instrument panel.
►
T
o switch off the parking lamps, return the
lighting control stalk to the central position.
Headlamp beam height
adjustment
To avoid dazzling other road users, the height
of these headlamp beams must be adjusted
according to the load in the vehicle.
6 positions are available (from 0 for an empty
vehicle to 5 for a heavily loaded vehicle).
Automatic illumination of lamps
With the lighting control stalk in the “ AUTO”
position and if a low level of exterior brightness
is detected by the rain/sunshine sensor, the
number plate lamps, sidelamps and dipped
beam headlamps are switched on automatically,
without any action on the part of the driver. They
may also come on if rain is detected, at the same
time as automatic operation of the windscreen
wipers.
As soon as the brightness returns to a sufficient
level or after the windscreen wipers are switched
off, the lamps are switched off automatically.
Switching on/off
► To activate it, turn the ring to the "AUTO"
position.
►
T
o deactivate it, turn the ring to any other
position.
When the function is activated or deactivated, a
message is displayed.
Malfunction
In the event of a malfunction of the rain/
sunshine sensor, the vehicle’s lamps
come on and this warning lamp is displayed on
the instrument panel, accompanied by an
audible signal and/or the display of a message.
Have it checked by a PEUGEOT dealer or a
qualified workshop.
Do not cover the rain/sunshine sensor
located at the top centre of the
windscreen behind the interior rear view
mirror; the associated functions would no
longer be controlled. CarM an uals 2 .c o m
Page 57 of 164
55
Safety
5In the event that a wheel has poor grip, anti-slip
regulation brakes the spinning wheel and returns
the engine torque to the wheel that has the best
grip in order to prevent being bogged down.
If there is a difference between the vehicle’s
trajectory and the path desired by the driver, the
dynamic stability control system automatically
uses engine braking and the brakes on one or
more wheels to return the vehicle to the desired
path, within the limits of the laws of physics.
These systems are activated automatically every
time the vehicle is started.
These systems are activated in the event of a problem with grip or trajectory
(confirmed by this warning lamp flashing on the
instrument panel).
Deactivation/Reactivation
In exceptional conditions (e.g. starting a vehicle
which is bogged down, stuck in snow, on soft
ground, etc.), it may be advisable to deactivate
the ASR and DSC systems, so that the wheels
can turn freely and regain grip.
Reactivate the systems as soon as the level of
grip permits.
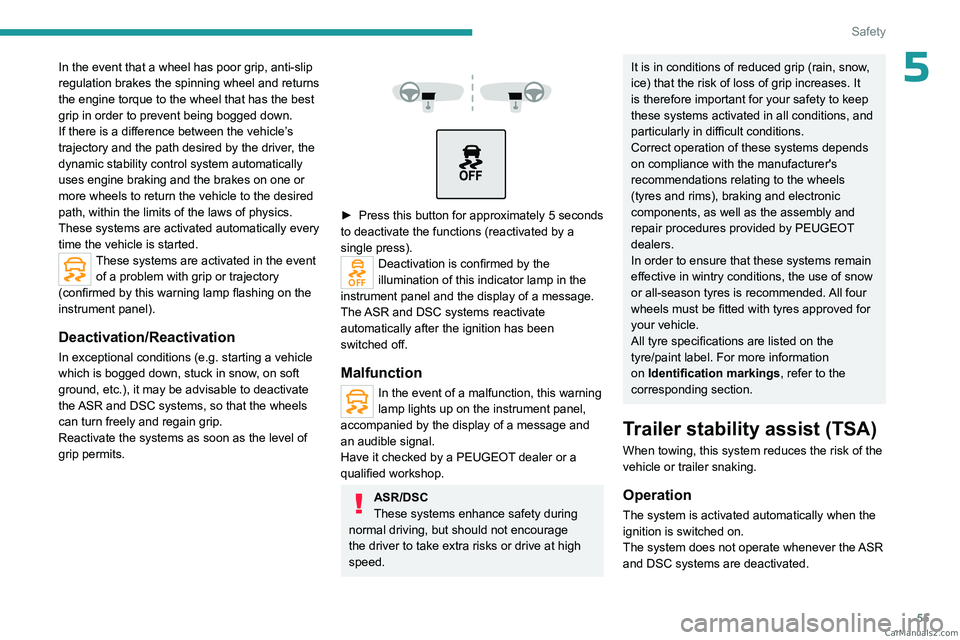
► Press this button for approximately 5 seconds
to deactivate the functions (reactivated by a
single press).
Deactivation is confirmed by the
illumination of this indicator lamp in the
instrument panel and the display of a message.
The ASR and DSC systems reactivate
automatically after the ignition has been
switched off.
Malfunction
In the event of a malfunction, this warning
lamp lights up on the instrument panel,
accompanied by the display of a message and
an audible signal.
Have it checked by a PEUGEOT dealer or a
qualified workshop.
ASR/DSC
These systems enhance safety during
normal driving, but should not encourage
the driver to take extra risks or drive at high
speed.
It is in conditions of reduced grip (rain, snow,
ice) that the risk of loss of grip increases. It
is therefore important for your safety to keep
these systems activated in all conditions, and
particularly in difficult conditions.
Correct operation of these systems depends
on compliance with the manufacturer's
recommendations relating to the wheels
(tyres and rims), braking and electronic
components, as well as the assembly and
repair procedures provided by PEUGEOT
dealers.
In order to ensure that these systems remain
effective in wintry conditions, the use of snow
or all-season tyres is recommended. All four
wheels must be fitted with tyres approved for
your vehicle.
All tyre specifications are listed on the
tyre/paint label. For more information
on Identification markings , refer to the
corresponding section.
Trailer stability assist (TSA)
When towing, this system reduces the risk of the
vehicle or trailer snaking.
Operation
The system is activated automatically when the
ignition is switched on.
The system does not operate whenever the ASR
and DSC systems are deactivated. CarM an uals 2 .c o m
Page 66 of 164
64
Safety
Vehicles not equipped with a
deactivation/reactivation control
Installing a "rearward
facing" child seat on
the front passenger seat is strictly prohibited
- risk of death or serious injury in the event of
airbag deployment!
Deactivating/Reactivating the front
passenger airbag
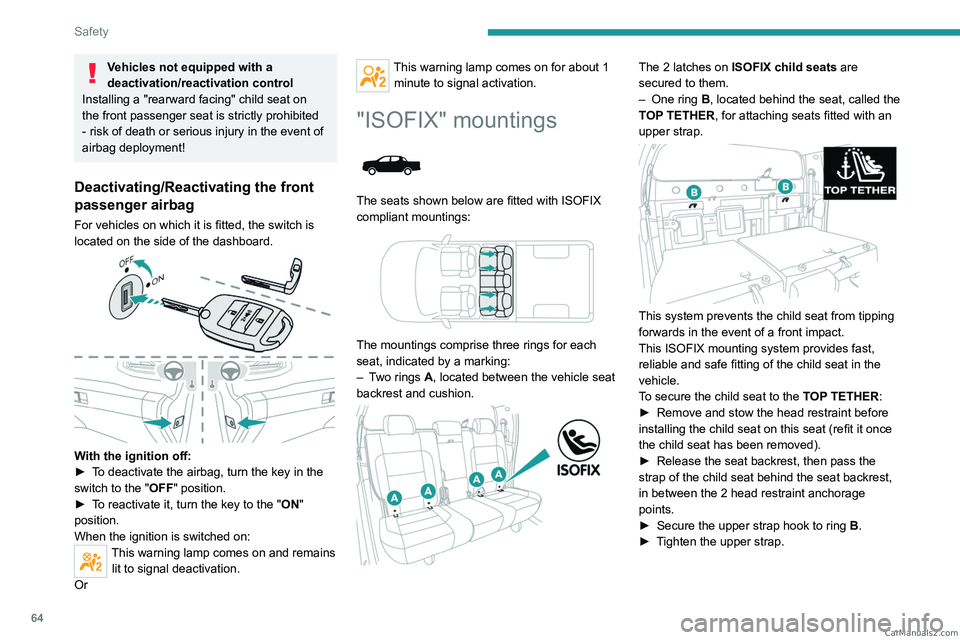
For vehicles on which it is fitted, the switch is
located on the side of the dashboard.
With the ignition off:
► T o deactivate the airbag, turn the key in the
switch to the "OFF " position.
►
T
o reactivate it, turn the key to the "ON"
position.
When the ignition is switched on:
This warning lamp comes on and remains lit to signal deactivation.
Or
This warning lamp comes on for about 1 minute to signal activation.
"ISOFIX" mountings
The seats shown below are fitted with ISOFIX
compliant mountings:
The mountings comprise three rings for each
seat, indicated by a marking:
–
T
wo rings A, located between the vehicle seat
backrest and cushion.
The 2 latches on ISOFIX child seats are
secured to them.
–
One ring
B, located behind the seat, called the
TOP TETHER, for attaching seats fitted with an
upper strap.
This system prevents the child seat from tipping
forwards in the event of a front impact.
This ISOFIX mounting system provides fast,
reliable and safe fitting of the child seat in the
vehicle.
To secure the child seat to the TOP TETHER:
►
Remove and stow the head restraint before
installing the child seat on this seat (refit it once
the child seat has been removed).
►
Release the seat backrest, then pass the
strap of the child seat behind the seat backrest,
in between the 2 head restraint anchorage
points.
►
Secure the upper strap hook to ring
B
.
►
T
ighten the upper strap. CarM an uals 2 .c o m
Page 72 of 164
70
Driving
Never switch off the ignition before the
complete immobilisation of the vehicle.
With the engine off, the braking and steering
assistance systems are also cut off - risk of
loss of control of the vehicle!
Check that the parking brake is correctly
applied, particularly on sloping ground.
When leaving the vehicle, keep the key in
your possession and lock the vehicle.
Key left in
When the driver's door is opened, a
message is displayed, accompanied by an
audible signal, if the key has been left in the
ignition switch in position 1.
If the key has been left in the ignition switch
in position 3, the ignition will be switched off
automatically after one hour.
To switch the ignition back on, turn the key to
position 1, then back to position 3.
Starting/Switching off the
engine with Keyless Entry
and Start
The electronic key must be present in the
passenger compartment.
If the electronic key is not detected, a
message is displayed.
Move the electronic key so that the engine
can be started or switched off.
If there is still a problem, refer to the "Key
not detected - Back-up starting or Back-up
switch-off" section.
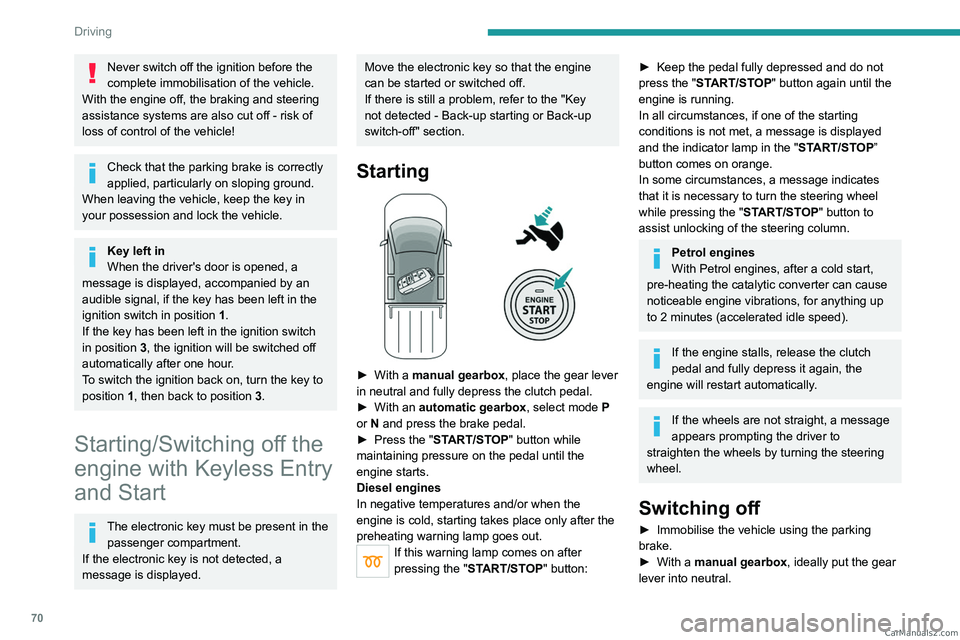
Starting
► With a manual gearbox, place the gear lever
in neutral and fully depress the clutch pedal.
►
With an
automatic gearbox, select mode P
or
N and press the brake pedal.
►
Press the "
START/STOP" button while
maintaining pressure on the pedal until the
engine starts.
Diesel engines
In negative temperatures and/or when the
engine is cold, starting takes place only after the
preheating warning lamp goes out.
If this warning lamp comes on after
pressing the " START/STOP" button:
► Keep the pedal fully depressed and do not
press the " START/STOP" button again until the
engine is running.
In all circumstances, if one of the starting
conditions is not met, a message is displayed
and the indicator lamp in the " START/STOP”
button comes on orange.
In some circumstances, a message indicates
that it is necessary to turn the steering wheel
while pressing the " START/STOP" button to
assist unlocking of the steering column.
Petrol engines
With Petrol engines, after a cold start,
pre-heating the catalytic converter can cause
noticeable engine vibrations, for anything up
to 2 minutes (accelerated idle speed).
If the engine stalls, release the clutch
pedal and fully depress it again, the
engine will restart automatically.
If the wheels are not straight, a message
appears prompting the driver to
straighten the wheels by turning the steering
wheel.
Switching off
► Immobilise the vehicle using the parking
brake.
►
With a
manual gearbox, ideally put the gear
lever into neutral. CarM an uals 2 .c o m