2023 PEUGEOT 508 start stop button
[x] Cancel search: start stop buttonPage 115 of 244

11 3
Driving
6In the event of a windscreen replacement,
contact a PEUGEOT dealer or a qualified
workshop to recalibrate the camera;
otherwise, the operation of the associated
driving aids may be disrupted.
Other cameras
The images from the camera(s)
displayed on the touch screen or on the
instrument panel may be distorted by the
terrain.
In the presence of areas in shade, or in
conditions of bright sunlight or inadequate
lighting, the image may be darkened and with
lower contrast.
Obstacles may appear further away than they
actually are.
Sensors
The operation of the sensors, as well as
any associated functions, may be disrupted
by noise pollution such as that emitted by
noisy vehicles and machinery (e.g. lorries,
pneumatic drills), by the accumulation of
snow or dead leaves on the road or in the
event of damaged bumpers and mirrors.
When reverse gear is engaged, an audible
signal (long beep) indicates that the sensors
may be dirty.
A front or rear impact to the vehicle can
upset the sensors’ settings, which is not
always detected by the system: distance
measurements may be distorted.
The sensors do not systematically detect
obstacles that are too low (pavements, studs)
or too thin (trees, posts, wire fences).
Certain obstacles located in the sensors’ blind
spots may not be detected or may no longer
be detected during the manoeuvre.
Certain materials (fabrics) absorb sound
waves: pedestrians may not be detected.
Maintenance
Clean the bumpers and door mirrors and
the field of vision of the cameras regularly.
When washing your vehicle at high pressure,
direct the spray from at least 30
cm away
from the radar, sensors and cameras.
Mats/Pedal trims
The use of mats or pedal trims not
approved by PEUGEOT may interfere with
the operation of the speed limiter or cruise
control.
To avoid any risk of jamming the pedals:
–
Ensure that the mat is secured correctly
.
–
Never fit one mat on top of another
.
Units of speed
Ensure that the units of speed displayed
on the instrument panel (mph or km/h) are
those for the country you are driving in.
If this is not the case, when the vehicle is
stationary, set the display to the required
units of speed so that it complies with what is
authorised locally.
In case of doubt, contact a PEUGEOT dealer
or a qualified workshop.
Shortcuts for driving aids
The full list of available driving aids can be found
in the Functions tab.
Driving aids can be accessed directly to quickly
activate/deactivate them.
By default, driving aids are already stored in the
Shortcuts tab (e.g.
Stop & Start, Lane keeping
assist).
Other driving aids can be added or deleted from
this tab.
It is configured in the ADAS>Functions
touch screen application.
► Press the button corresponding to the
driving assistance concerned:
•
Full symbol: the function is added to the
Shortcuts
tab.
•
Empty symbol: the function is deleted from
the
Shortcuts tab.
►
Check the modification in the Shortcuts
tab.
Page 116 of 244

11 4
Driving
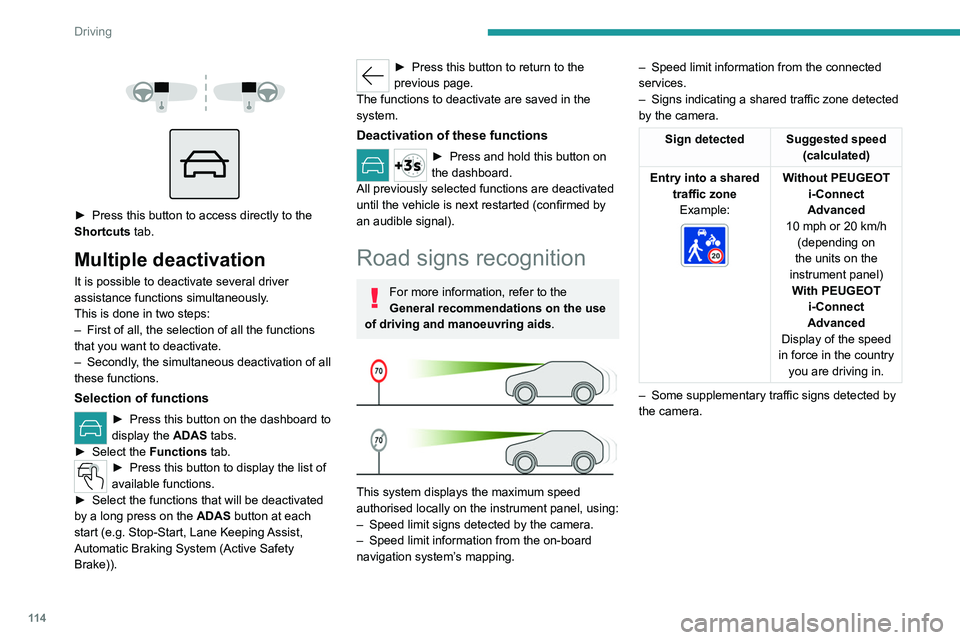
► Press this button to access directly to the
Shortcuts tab.
Multiple deactivation
It is possible to deactivate several driver
assistance functions simultaneously.
This is done in two steps:
–
First of all, the selection of all the functions
that you want to deactivate.
–
Secondly
, the simultaneous deactivation of all
these functions.
Selection of functions
► Press this button on the dashboard to
display the ADAS
tabs.
►
Select the
Functions tab.
► Press this button to display the list of
available functions.
►
Select the functions that will be deactivated
by a long press on the ADAS
button at each
start (e.g.
Stop - Start, Lane Keeping Assist,
Automatic Braking System (Active Safety
Brake)).
► Press this button to return to the
previous page.
The functions to deactivate are saved in the
system.
Deactivation of these functions
► Press and hold this bu tton on
the dashboard.
All previously selected functions are deactivated
until the vehicle is next restarted (confirmed by
an audible signal).
Road signs recognition
For more information, refer to the
General recommendations on the use
of driving and manoeuvring aids .
This system displays the maximum speed
authorised locally on the instrument panel, using:
–
Speed limit signs detected by the camera.
–
Speed limit information from the on-board
navigation system’
s mapping. –
Speed limit information from the connected
services.
–
Signs indicating a shared traffic zone detected
by the camera.
Sign detected Suggested speed (calculated)
Entry into a shared traffic zoneExample:
Without PEUGEOT
i-Connect
Advanced
10 mph or 20
km/h
(depending on
the units on the
instrument panel) With PEUGEOT i-Connect
Advanced
Display of the speed
in force in the country you are driving in.
–
Some supplementary traffic signs detected by
the camera.
Page 122 of 244

120
Driving
to drive at a steady speed and maintain an
adequate safety distance.
Remain vigilant while cruise control is
activated. If you press and hold one of the
speed setting modification buttons, your
vehicle may change speed very abruptly.
When descending a steep hill, the cruise
control system cannot prevent the vehicle
from exceeding the set speed. Brake if
necessary to control the vehicle speed.
On steep climbs or when towing, the set
speed may not be reached or maintained.
Exceeding the programmed speed
setting
You can temporarily exceed the speed
setting by pressing the accelerator pedal (the
programmed speed flashes).
To return to the speed setting, release the
accelerator pedal (when the set speed is
reached again, the displayed speed stops
flashing).
Operating limits
Never use the system in the following
situations:
–
In an urban area with the risk of
pedestrians crossing the road.
–
In heavy traffic (except versions with the
Stop
& Go function).
–
On winding or steep roads.
–
On slippery or flooded roads.
– In poor weather conditions.
– In the event of restricted visibility for the
driver
.
–
Driving on a speed circuit.
–
Driving on a rolling road.
–
When using a ‘space-saver
’ type spare
wheel.
–
When using snow chains or non-slip
covers.
Programmable cruise
control
For more information, refer to the
General recommendations on the use
of driving and manoeuvring aids and the
Specific recommendations on cruise
control.
This system automatically maintains the vehicle’s speed at the value programmed
by the driver (speed setting), without the use of
the accelerator pedal.
Cruise control is switched on manually.
It requires a minimum vehicle speed of 25 mph
(40
km/h).
The mode
D or second gear or higher in mode
M
of the automatic gearbox must be engaged.
Cruise control remains active after
changing gear on engines fitted with the
Stop & Start function.
Switching off the ignition cancels any
speed setting.
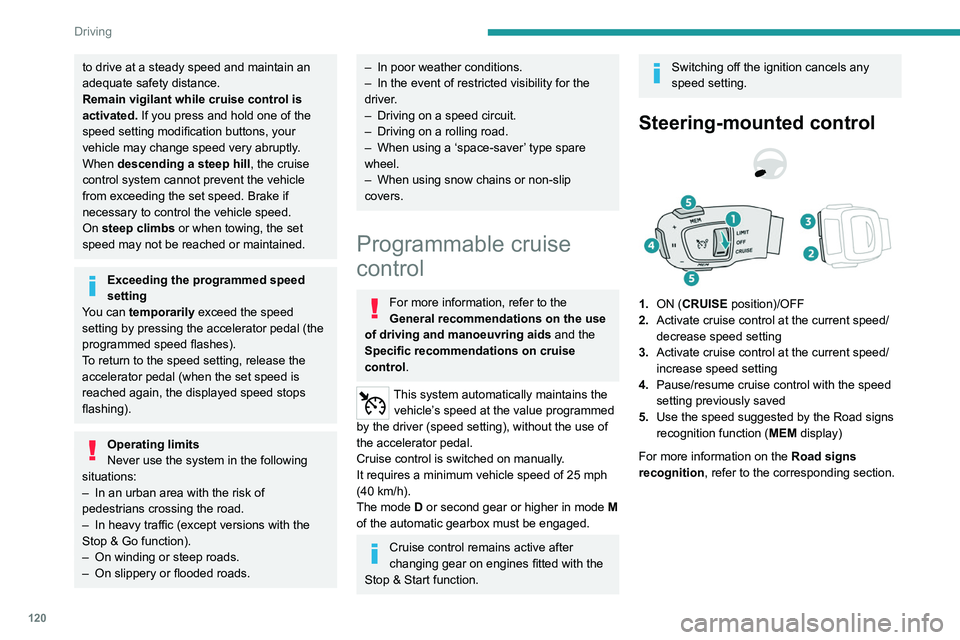
Steering-mounted control
1. ON (CRUISE position)/OFF
2. Activate cruise control at the current speed/
decrease speed setting
3. Activate cruise control at the current speed/
increase speed setting
4. Pause/resume cruise control with the speed
setting previously saved
5. Use the speed suggested by the Road signs
recognition function ( MEM display)
For more information on the Road signs
recognition , refer to the corresponding section.
Page 141 of 244

139
Driving
6and the vehicle (white: more distant, orange:
close, red: very close).
When the obstacle is very close, the "Danger"
symbol is displayed on the screen.
Closing the system display windowPressing this button closes the
system display window.
This warning lamp flashes during obstacle detection on the instrument panel.
Muting the audible assistance /
Closing the visual assistance
If the audible detection signal is muted or
the system display window is closed by the
driver during the obstacle detection, only
the warning lamp continues to flash on the
instrument panel.
Front parking sensors
Supplementing the rear parking sensors, the
front parking sensors are triggered when an
obstacle is detected in front and the speed of the
vehicle is below 6 mph (10
km/h).
Front parking sensor operation is suspended if
the vehicle stops for more than three seconds in
forward gear, if an obstacle is no longer detected
or the vehicle speed exceeds 6
mph (10 km/h).
The sound emitted by the speaker (front or rear) locates the obstacle relative to
the vehicle, whether in front of or behind it on
its path.
Side parking sensors
Using four additional sensors located on the
sides of the bumpers, the system records the
position of obstacles during the manoeuvre and
indicates them when they are located alongside
the vehicle.
Only fixed obstacles are indicated
correctly. Moving obstacles detected at
the beginning of the manoeuvre may be
indicated mistakenly, while moving obstacles
that appear alongside the vehicle but were
not previously recorded will not be indicated.
Objects memorised during the
manoeuvre will no longer be stored after
switching off the ignition.
Deactivation/Activation
(Depending on country of sale)
By default, the audible signal is automatically
activated at each time the reverse gear is
engaged.
The system cannot be deactivated.
You can start the system manually and activate/deactivate the audible signal in
the ADAS touch screen application.
The rear parking sensors are deactivated automatically if a trailer or bicycle carrier
is connected to a towing device installed in
accordance with the Manufacturer's
recommendations.
In this case, the outline of a trailer is displayed
at the rear of the image of the vehicle.
When starting the vehicle, the graphic
and audible aids are only available after
the touch screen has started up.
Operating limits
If the boot is heavily loaded, the vehicle may tilt,
affecting distance measurements.
In case of a gearbox failure, the system is not
active, when the reverse gear is engaged.
Page 171 of 244

169
Practical information
7Important: in the event of a top-up after
an AdBlue breakdown, you must wait
about 5
minutes before switching on the
ignition, without opening the driver's door,
unlocking the vehicle or bringing the
electronic key into the passenger
compartment.
Switch on the ignition, then wait for 10
seconds before starting the engine.
►
Press the "
START/STOP" button to switch off
the engine.
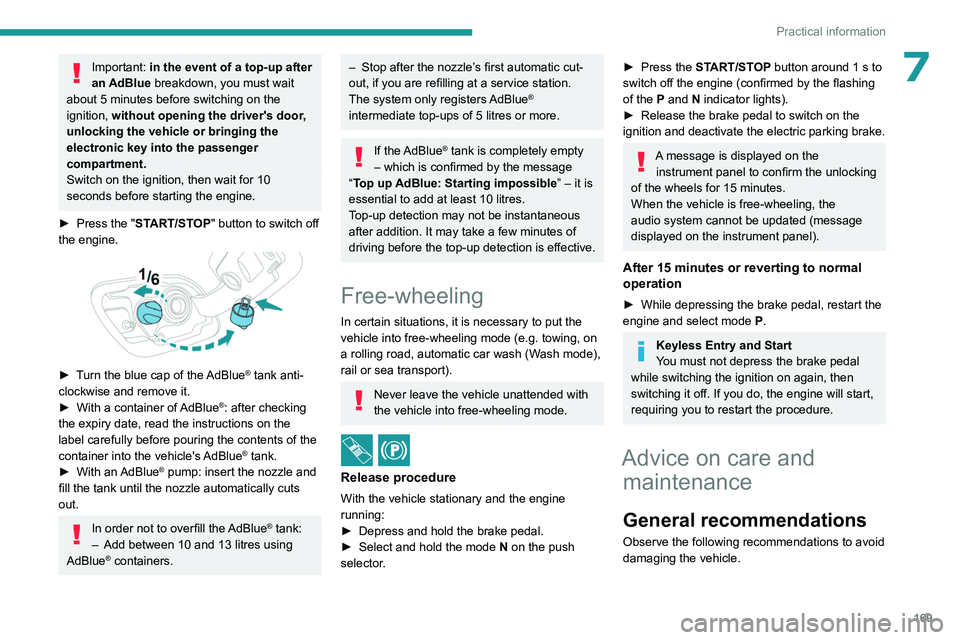
► Turn the blue cap of the AdBlue® tank anti-
clockwise and remove it.
►
With a container of
AdBlue
®: after checking
the expiry date, read the instructions on the
label carefully before pouring the contents of the
container into the vehicle's AdBlue
® tank.
►
With an
AdBlue® pump: insert the nozzle and
fill the tank until the nozzle automatically cuts
out.
In order not to overfill the AdBlue® tank:
–
Add between 10 and 13 litres using
AdBlue® containers.
– Stop after the nozzle’ s first automatic cut-
out, if you are refilling at a service station.
The system only registers AdBlue
®
intermediate top-ups of 5
litres or more.
If the AdBlue® tank is completely empty
– which is confirmed by the message
“Top up AdBlue: Starting impossible ” – it is
essential to add at least 10
litres.
Top-up detection may not be instantaneous
after addition. It may take a few minutes of
driving before the top-up detection is effective.
Free-wheeling
In certain situations, it is necessary to put the
vehicle into free-wheeling mode (e.g. towing, on
a rolling road, automatic car wash (Wash mode),
rail or sea transport).
Never leave the vehicle unattended with
the vehicle into free-wheeling mode.
/
Release procedure
With the vehicle stationary and the engine
running:
►
Depress and hold the brake pedal.
►
Select and hold the mode
N
on the push
selector.
► Press the START/STOP button around 1 s to
switch off the engine (confirmed by the flashing
of the P and N indicator lights).
►
Release the brake pedal to switch on the
ignition and deactivate the electric parking brake.
A message is displayed on the instrument panel to confirm the unlocking
of the wheels for 15
minutes.
When the vehicle is free-wheeling, the
audio system cannot be updated (message
displayed on the instrument panel).
After 15 minutes or reverting to normal
operation
► While depressing the brake pedal, restart the
engine and select mode P .
Keyless Entry and Start
You must not depress the brake pedal
while switching the ignition on again, then
switching it off. If you do, the engine will start,
requiring you to restart the procedure.
Advice on care and maintenance
General recommendations
Observe the following recommendations to avoid
damaging the vehicle.
Page 178 of 244

176
In the event of a breakdown
► Stop to check the repair and the tyre
pressure using the kit:
•
If the tyre pressure is incorrect, contact a
PEUGEOT
dealer to have the tyre changed.
•
If the tyre pressure is correct, drive a second
time for approximately 3
miles (5 kilometres)
at reduced speed (between 12 and 37
mph
(20 and 60
km/h)), stop then check again
the tyre pressure using the kit to confirm the
effective repair of the tyre.
With a tyre repaired using this type of kit,
do not exceed a speed of 50 mph
(80
km/h) and do not drive more than
125
miles (200 km).
You must contact a PEUGEOT dealer or a
qualified workshop to have the repair checked
and the tyre changed.
Checking/adjusting tyre
pressures
The compressor can be used, without injecting
sealant, to check and, if necessary, adjust the
tyre pressures.
►
Remove the valve cap from the tyre and keep
it in a clean place.
►
Uncoil
the pipe stowed under the compressor.
►
Screw the pipe onto the valve and tighten
firmly
.
►
Check that the compressor switch is in
position
"O".
► Fully uncoil the electric cable stowed under
the compressor .
►
Connect the compressor's electric plug to the
vehicle's 12
V socket.
►
Switch the ignition on.
►
Start the compressor by placing the switch at
position
"I" and adjust the pressure to the value
shown on the vehicle's tyre pressure label. To
deflate: press the black button located on the
compressor pipe, near the valve connection.
If after 7 minutes the pressure of 2 bar is
not reached, the tyre is damaged;
contact a PEUGEOT
dealer or a qualified
workshop for assistance.
►
Once the correct pressure is reached, put the
switch in position
"O".
►
Remove the kit and stow it.
►
Refit the cap on the valve.
Should the pressure of one or more tyres
be adjusted, it is necessary to reinitialise
the under-inflation detection system.
For more information on Tyre under-inflation
detection, refer to the corresponding section.
Spare wheel
Visit this link to view explanatory videos:
http://q-r.to/bagGl9
For more information on the Tool kit,
refer to the corresponding section.
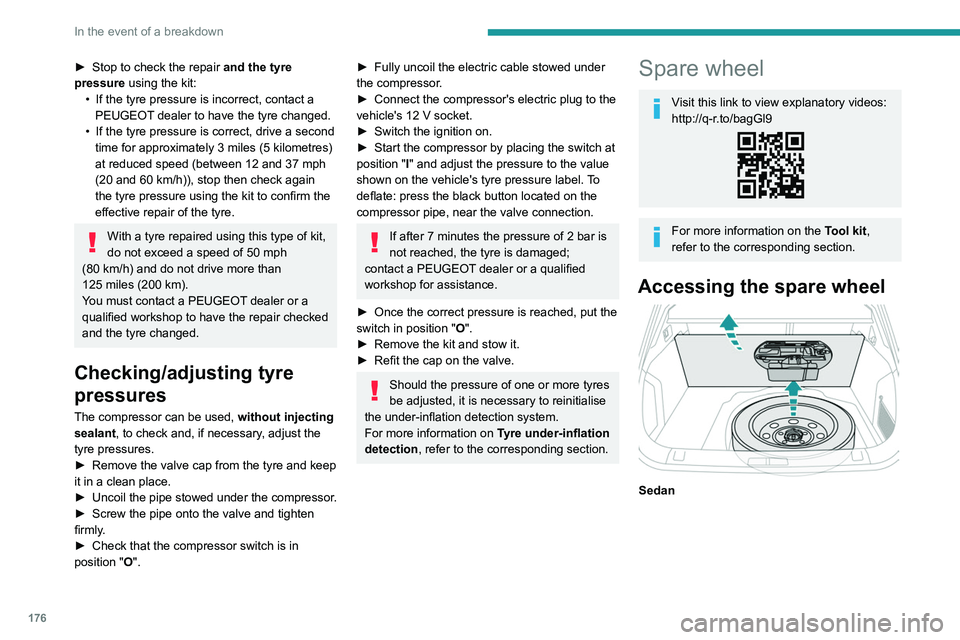
Accessing the spare wheel
Sedan