2023 PEUGEOT 308 air conditioning
[x] Cancel search: air conditioningPage 55 of 260
53
Ease of use and comfort
3Temperature
synchronisation
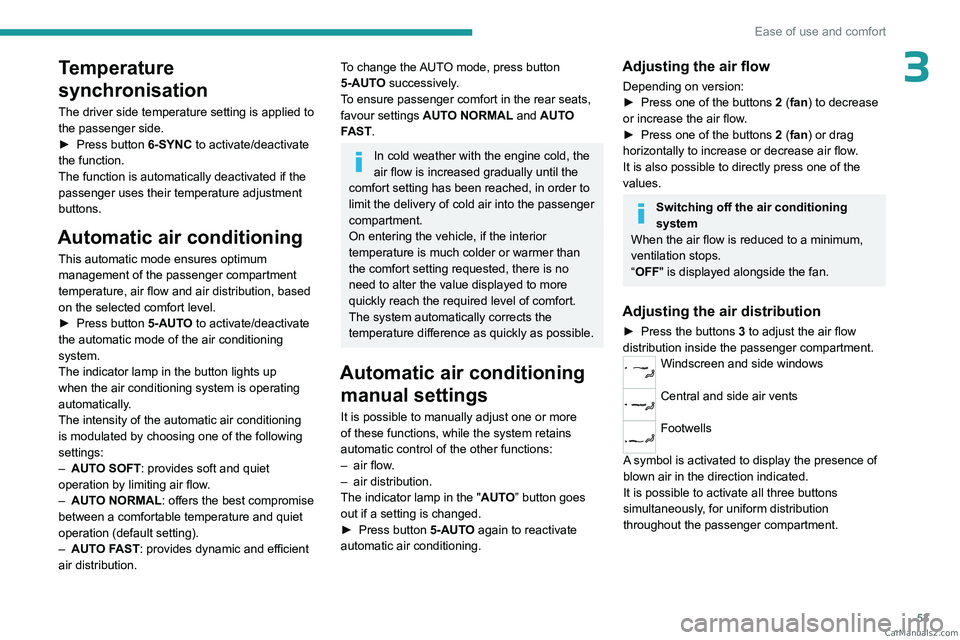
The driver side temperature setting is applied to
the passenger side.
►
Press button
6-SYNC to activate/deactivate
the function.
The function is automatically deactivated if the
passenger uses their temperature adjustment
buttons.
Automatic air conditioning
This automatic mode ensures optimum
management of the passenger compartment
temperature, air flow and air distribution, based
on the selected comfort level.
►
Press button
5-AUTO to activate/deactivate
the automatic mode of the air conditioning
system.
The indicator lamp in the button lights up
when the air conditioning system is operating
automatically.
The intensity of the automatic air conditioning
is modulated by choosing one of the following
settings:
–
AUT
O SOFT : provides soft and quiet
operation by limiting air flow.
–
AUT
O NORMAL: offers the best compromise
between a comfortable temperature and quiet
operation (default setting).
–
AUT
O FAST: provides dynamic and efficient
air distribution.
To change the AUTO mode, press button
5-AUTO successively.
To ensure passenger comfort in the rear seats,
favour settings AUTO NORMAL and AUTO
FAST.
In cold weather with the engine cold, the
air flow is increased gradually until the
comfort setting has been reached, in order to
limit the delivery of cold air into the passenger
compartment.
On entering the vehicle, if the interior
temperature is much colder or warmer than
the comfort setting requested, there is no
need to alter the value displayed to more
quickly reach the required level of comfort.
The system automatically corrects the
temperature difference as quickly as possible.
Automatic air conditioning manual settings
It is possible to manually adjust one or more
of these functions, while the system retains
automatic control of the other functions:
–
air flow
.
–
air distribution.
The indicator lamp in the " AUT
O” button goes
out if a setting is changed.
►
Press button
5-AUTO again to reactivate
automatic air conditioning.
Adjusting the air flow
Depending on version:
► Press one of the buttons 2 (fan) to decrease
or increase the air flow.
►
Press one of the buttons
2 (fan) or drag
horizontally to increase or decrease air flow.
It is also possible to directly press one of the
values.
Switching off the air conditioning
system
When the air flow is reduced to a minimum,
ventilation stops.
“OFF" is displayed alongside the fan.
Adjusting the air distribution
► Press the buttons 3 to adjust the air flow
distribution inside the passenger compartment.
Windscreen and side windows
Central and side air vents
Footwells
A symbol is activated to display the presence of
blown air in the direction indicated.
It is possible to activate all three buttons
simultaneously, for uniform distribution
throughout the passenger compartment. CarM an uals 2 .c o m
Page 56 of 260

54
Ease of use and comfort
Clean Cabin function
It includes the AQS (Air Quality System) and
Clean Air functions.
►
T
o activate/deactivate the function, press
button 7.
AQS function
Using an exterior pollution sensor, this function
automatically activates the recirculation of
interior air when a certain level of pollutants in
the exterior
air is detected.
When the air quality returns to a satisfactory
level, recirculation of interior air is automatically
deactivated.
This function is not designed to detect
unpleasant odours.
Recirculation is automatically activated when the
windscreen wash is used or when reverse gear
is engaged.
The function is inactive if the outside temperature
is below 5°C to prevent the risk of misting on the
windscreen and side windows.
Clean Air function
Using an interior pollution sensor, this function
detects fine particles (e.g. cigarette smoke,
mould, bacteria).
The management of the recirculation of
interior
air makes it possible to return to a purified
passenger compartment in just a few minutes,
thanks to the passage of air through the high-
performance passenger compartment filter.
If the air quality appears to be reduced, contact
a PEUGEOT dealer or a qualified workshop
to change the high-performance passenger
compartment filter.
Air conditioning on/off
The air conditioning system is designed to
operate effectively in all seasons, with the
windows closed:
–
It lowers the temperature in summer
.
–
It increase the effectiveness of the demisting,
in winter
, above 3°C.
►
Press button
4-A/C to switch the air
conditioning on/off.
When the system is switched on, the indicator
lamp in the button comes on or “ A/C” changes
colour (depending on version).
Air conditioning does not operate when the air flow is deactivated.
To obtain cool air more quickly, enable interior
air recirculation for a brief period. Then return
to the intake of exterior air.
Switching off the air conditioning may result in
some discomfort (humidity or misting).
Maximum air conditioning
This function automatically adjusts the
temperature setting to the lowest possible, the
air distribution towards the central and side air
vents, the air flow to maximum and, if necessary,
activates interior air recirculation.
► Press this button to activate/deactivate
the function (confirmed by the
illumination/extinction of the indicator lamp).
Once the function is deactivated, the system
returns to the previous settings.
Switching off the air
conditioning system
► Press button 12-OFF.
Its indicator lamp lights up and all the other
indicator lamps of the air conditioning system
go off.
This action deactivates all of the functions of the
air conditioning system.
The temperature is no longer regulated. A slight
flow of air can still be felt, due to the forward
movement of the vehicle.
Interior air recirculation
The intake of exterior air prevents the formation
of mist on the windscreen and side windows.
Recirculating the interior air isolates the
passenger compartment from outside odours
and fumes and allows the desired passenger
compartment temperature to be achieved more
rapidly.
► Press this button to activate/deactivate
the function (confirmed by the
illumination/extinction of the indicator lamp). CarM an uals 2 .c o m
Page 57 of 260
55
Ease of use and comfort
3This function is activated automatically when the front screenwash is used or
reverse gear is engaged.
Front demisting/defrosting
This mode allows the windscreen and side windows to be demisted or defrosted as quickly
as possible.
► Press this button to activate/deactivate
the mode (confirmed by the illumination/
extinction of the
indicator lamp).
The mode automatically manages the air
conditioning, air flow, air intake and distributes
ventilation optimally to the windscreen and side
windows.
The air flow can be changed manually without
deactivating this mode.
With Stop & Start, when demisting has
been activated, STOP mode is not
available.
In wintry conditions, before moving off, it
is essential to remove any snow or ice
from the windscreen around the camera.
Otherwise, the operation of the equipment
using the camera may be affected.
Rear screen demisting/
defrosting
This demisting/de-icing only works with the engine running.
Depending on version, it also demists/de-ices
the door mirrors.
► Press this button to activate/deactivate
the function (confirmed by the indicator
lamp coming on/switching off).
The function can be activated whatever the outside temperature may be.
The period of operation depends on the outside
temperature.
Demisting/defrosting therefore switches
off automatically to prevent an excessive
consumption of electrical current.
Heated windscreen
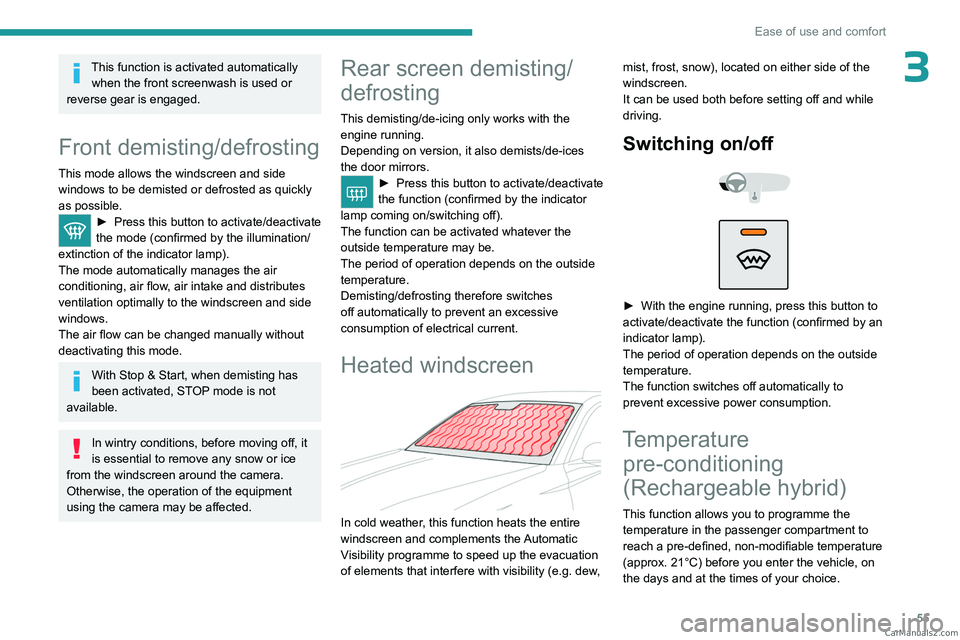
In cold weather, this function heats the entire
windscreen and complements the Automatic
Visibility programme to speed up the evacuation
of elements that interfere with visibility (e.g.
dew, mist, frost, snow), located on either side of the
windscreen.
It can be used both before setting off and while
driving.
Switching on/
off
► With the engine running, press this button to
activate/deactivate the function (confirmed by an
indicator lamp).
The period of operation depends on the outside
temperature.
The function switches off automatically to
prevent excessive power consumption.
Temperature pre-conditioning
(Rechargeable hybrid)
This function allows you to programme the
temperature in the passenger compartment to
reach a pre-defined, non-modifiable temperature
(approx. 21°C) before you enter the vehicle, on
the days and at the times of your choice. CarM an uals 2 .c o m
Page 74 of 260
72
Lighting and visibility
In position 1 or 2, the wiping frequency is
automatically reduced when the speed of
the vehicle drops below 3
mph (5 km/h).
When the speed is above 6
mph (10 km/h)
again, the wiping frequency returns to the
original frequency (fast or normal).
Single wipe
If the wiper control stalk is:
► In the INT or AUTO position, pull the stalk
briefly towards you then release it.
►
In the
0 position, press briefly on the stalk
then release it.
Pressing and holding triggers continuous wiping
at the normal wiping speed.
Windscreen wash
► Pull the wiper control stalk towards you and
hold.
A
final wiping cycle is performed when
screenwashing ends.
The windscreen wash jets are incorporated into the tip of each wiper
arm.
An additional jet is installed below the
midpoint of the arm on the driver's side.
Screenwash fluid is sprayed along the length
of the wiper blade. This improves visibility and
reduces screenwash fluid consumption.
With automatic air conditioning, any
action on the screenwash control results
in temporary closure of the air intake to
protect the passenger compartment from any
odour.
To avoid damaging the wiper blades, do not operate the screenwash if the
screenwash reservoir is empty.
Only operate the screenwash if there is no
risk of the fluid freezing on the windscreen
and hindering visibility. During the winter
period, use "very cold climate" rated products.
Never top up with water.
Rear wiper
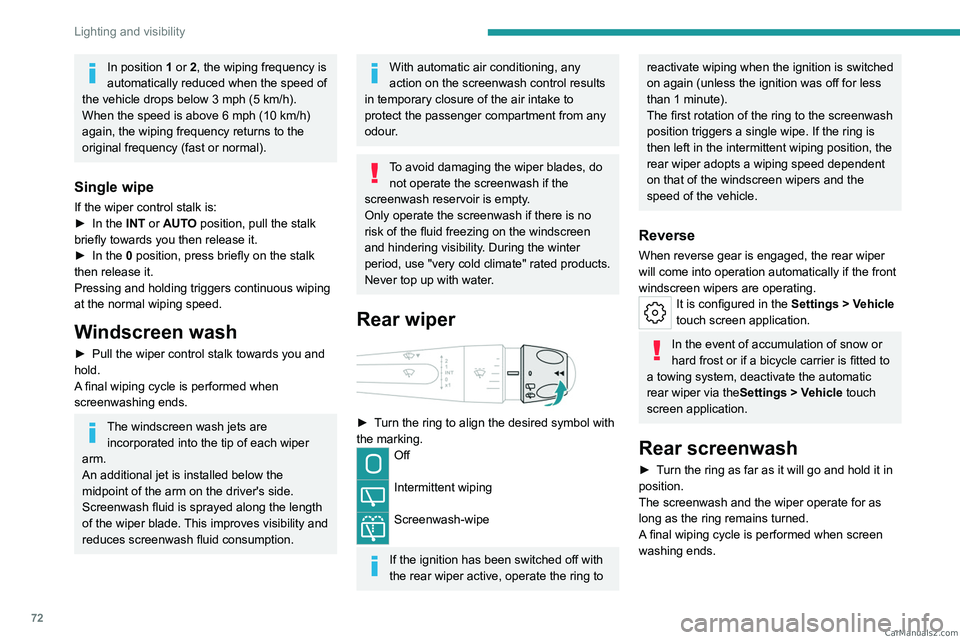
► Turn the ring to align the desired symbol with
the marking.
Off
Intermittent wiping
Screenwash-wipe
If the ignition has been switched off with
the rear wiper active, operate the ring to
reactivate wiping when the ignition is switched
on again (unless the ignition was off for less
than 1 minute).
The first rotation of the ring to the screenwash
position triggers a single wipe. If the ring is
then left in the intermittent wiping position, the
rear wiper adopts a wiping speed dependent
on that of the windscreen wipers and the
speed of the vehicle.
Reverse
When reverse gear is engaged, the rear wiper
will come into operation automatically if the front
windscreen wipers are operating.
It is configured in the Settings > Vehicle
touch screen application.
In the event of accumulation of snow or
hard frost or if a bicycle carrier is fitted to
a towing system, deactivate the automatic
rear wiper via the Settings
> Vehicle touch
screen application.
Rear screenwash
► Turn the ring as far as it will go and hold it in
position.
The screenwash and the wiper operate for as
long as the ring remains turned.
A final wiping cycle is performed when screen
washing ends. CarM an uals 2 .c o m
Page 105 of 260
103
Driving
6Switching of the gearbox to back-up mode
Mode D locks in third gear.
The paddles on the steering wheel do not work
and mode M is no longer accessible.
You may feel a significant jolt on engaging
reverse gear. This will not damage the gearbox.
Selector malfunction
Minor malfunction
This warning lamp comes on, accompanied by the display of a message
and an audible signal.
Drive carefully.
Go to a PEUGEOT dealer or a qualified
workshop.
In some cases, the selector indicator lamps may
no longer come on, but the gearbox state is still
displayed on the instrument panel.
Major malfunction
This warning lamp comes on, accompanied by the display of a
message.
You must stop the vehicle.
Stop as soon as it is safe to do so and
switch off the ignition.
Contact a PEUGEOT dealer or a qualified
workshop.
Driving modes
The driving modes available depend on the engine and equipment of the vehicle.
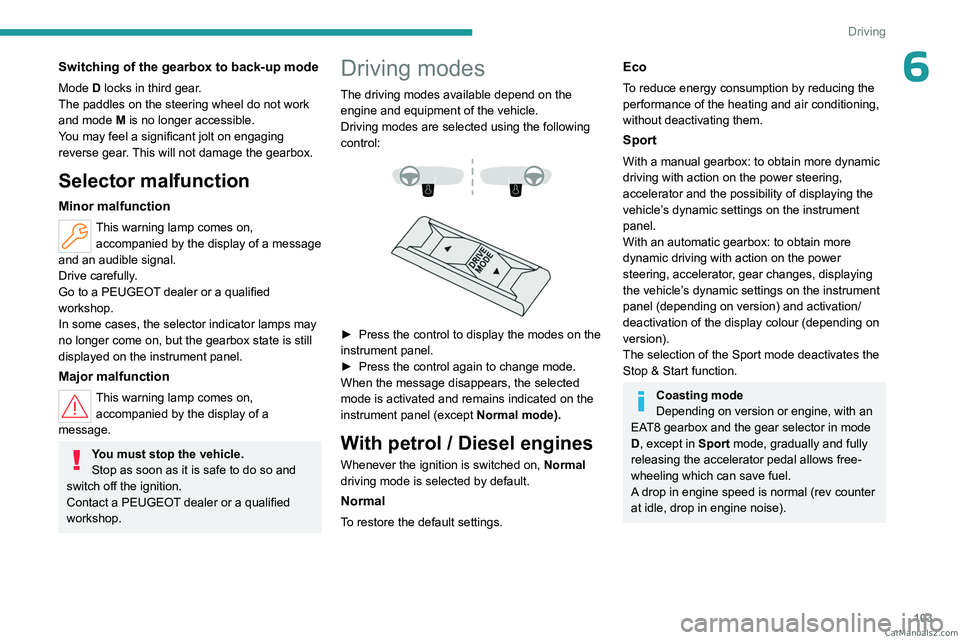
Driving modes are selected using the following
control:
► Press the control to display the modes on the
instrument panel.
►
Press the control again to change mode.
When the message disappears, the selected
mode is activated and remains indicated on the
instrument panel (except Normal
mode).
With petrol / Diesel engines
Whenever the ignition is switched on, Normal
driving mode is selected by default.
Normal
To restore the default settings.
Eco
To reduce energy consumption by reducing the
performance of the heating and air conditioning,
without deactivating them.
Sport
With a manual gearbox: to obtain more dynamic
driving with action on the power steering,
accelerator and the possibility of displaying the
vehicle’s dynamic settings on the instrument
panel.
With an automatic gearbox: to obtain more
dynamic driving with action on the power
steering, accelerator, gear changes, displaying
the vehicle’s dynamic settings on the instrument
panel (depending on version) and activation/
deactivation of the display colour (depending on
version).
The selection of the Sport mode deactivates the
Stop & Start function.
Coasting mode
Depending on version or engine, with an
EAT8 gearbox and the gear selector in mode
D, except in
Sport mode, gradually and fully
releasing the accelerator pedal allows free-
wheeling which can save fuel.
A drop in engine speed is normal (rev counter
at idle, drop in engine noise). CarM an uals 2 .c o m
Page 155 of 260
153
Practical information
7The estimated charging time is indicated on the instrument panel when the vehicle
is connected. It may vary depending on
various factors such as the outside
temperature or the quality of the electricity
supply.
If the outside temperature is below -10°C, it
is recommended to connect the vehicle as
soon as possible as the charging time may
increase significantly. The traction battery
may not charge fully.
Domestic charging cable (mode 2)
It is essential to avoid damaging the
cable and to keep it intact.
In the event of damage, do not use it and
contact a PEUGEOT
dealer or a qualified
workshop to replace it.
Accelerated charging unit (mode 3)
Do not dismantle or modify the
accelerated charging unit - risk of
electrocution and/or fire!
T
o find out how it is used, please refer to the
accelerated charging unit's user instructions.
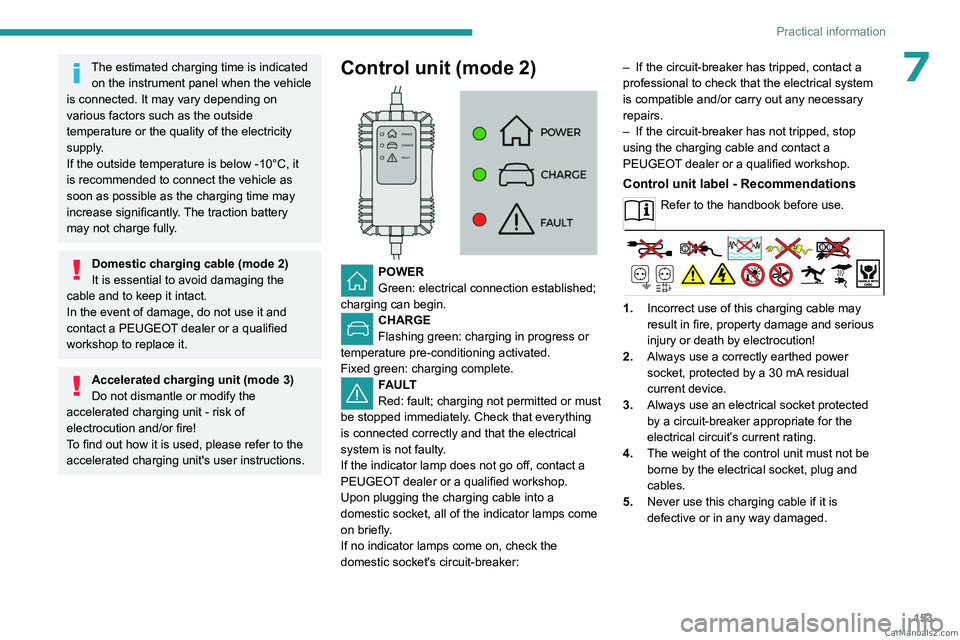
Control unit (mode 2)
POWER
Green: electrical connection established;
charging can begin.
CHARGE
Flashing green: charging in progress or
temperature pre-conditioning activated.
Fixed green: charging complete.
FAULT
Red: fault; charging not permitted or must
be stopped immediately. Check that everything
is connected correctly and that the electrical
system is not faulty.
If the indicator lamp does not go off, contact a
PEUGEOT dealer or a qualified workshop.
Upon plugging the charging cable into a
domestic socket, all of the indicator lamps come
on briefly.
If no indicator lamps come on, check the
domestic socket's circuit-breaker: –
If the circuit-breaker has tripped, contact a
professional to check that the electrical system
is compatible and/or carry out any necessary
repairs.
–
If the circuit-breaker has not tripped, stop
using the charging cable and contact a
PEUGEOT
dealer or a qualified workshop.
Control unit label - Recommendations
Refer to the handbook before use.
1.
Incorrect use of this charging cable may
result in fire, property damage and serious
injury or death by electrocution!
2. Always use a correctly earthed power
socket, protected by a 30
mA residual
current device.
3. Always use an electrical socket protected
by a circuit-breaker appropriate for the
electrical circuit’s current rating.
4. The weight of the control unit must not be
borne by the electrical socket, plug and
cables.
5. Never use this charging cable if it is
defective or in any way damaged. CarM an uals 2 .c o m
Page 156 of 260
154
Practical information
6.Never attempt to repair or open this
charging cable. It contains no repairable
parts - replace the charging cable if it is
damaged.
7. Never immerse this charging cable in water.
8. Never use this charging cable with an
extension cable, a multi-plug socket, a
conversion adaptor or on a damaged
electrical socket.
9. Do not unplug the plug from the wall as a
means of stopping charging. 10.
Immediately stop charging, by locking and
then unlocking the vehicle using the remote
control key, if the charging cable or wall
socket feel burning hot to the touch.
11 . This charging cable includes components
liable to cause electrical arcing or sparks.
Do not expose to flammable vapours.
12. Only use this charging cable with PEUGEOT
vehicles.
13. Never plug the cable into the wall socket (or
unplug it) with wet hands.
14. Do not force the connector if it is locked into
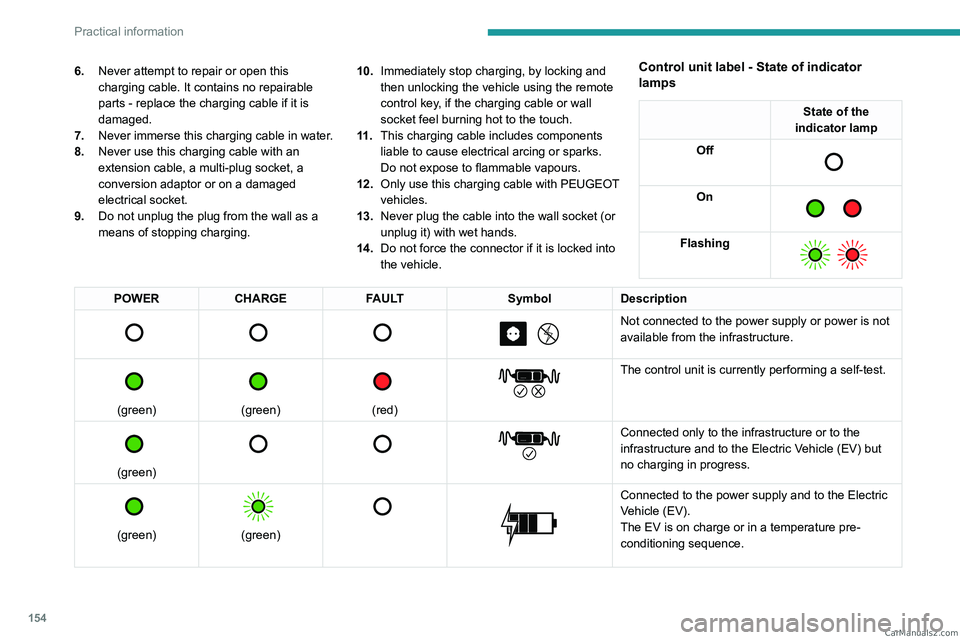
the vehicle.Control unit label - State of indicator
lamps
State of the
indicator lamp
Off
On
Flashing
POWER CHARGE FAULT SymbolDescription
Not connected to the power supply or power is not
available from the infrastructure.
(green)
(green)
(red)
The control unit is currently performing a self-test.
(green)
Connected only to the infrastructure or to the
infrastructure and to the Electric Vehicle (EV) but
no charging in progress.
(green)
(green)
Connected to the power supply and to the Electric
Vehicle (EV).
The EV is on charge or in a temperature pre-
conditioning sequence. CarM an uals 2 .c o m
Page 158 of 260
156
Practical information
Lounge mode
When the vehicle is connected, it is
possible to switch on the ignition and use
certain functions such as the audio and
telematics system and the air conditioning
system for several hours.
Low charging / Driving
Driving when the charge level of the
traction battery is too low can lead to the
vehicle breaking down and can lead to
accidents or serious injuries. ALWAYS make
sure the traction battery has a sufficient
charge level.
Low charging / Parking
If the outside temperature is negative,
it is recommended not to park your vehicle
outside for several hours at a low charging
(less than 20%).
Vehicle in storage for more than
1 month
In the event of a long period of non-use of
the vehicle (beyond 4
weeks) without the
possibility of charging when restarting, the
self-discharge may make it impossible to
restart if the traction battery charge level
is a low or very low, especially at negative
ambient temperatures. ALWAYS make sure
that the traction battery has a charge between
20% and 40% if you do not plan to use your
vehicle for several weeks.
Do not connect the charging cable.
Always park the vehicle in a place with
temperatures between -10°C and 30°C
(parking in a place with extreme temperatures
can damage the traction battery).
Refer to the Accessory battery
(Rechargeable hybrid) section for the
battery disconnection procedure.
Precautions
Rechargeable hybrid vehicles have
been developed in accordance with the
recommendations for maximum electromagnetic
field limits established by the ICNIRP
(International Commission on Non-Ionizing
Radiation Protection - 1998 Guidelines).
Wearers of pacemakers or equivalent
devices should consult a doctor to
enquire about any applicable precautionary
measures, or contact the manufacturer of their
implanted electronic medical device to check that
it is guaranteed to operate in an environment
compliant with the ICNIRP guidelines.
If in doubt , during charging, do not remain
inside or near the vehicle, near the charging
cable or the charging unit, even for a short time.
Before charging
Depending on the context:
►
Have a professional check that the
electrical system to be used complies with
applicable standards and is compatible with
the vehicle.
►
Have a professional electrician install
a dedicated domestic power socket or
accelerated charging unit (W
allbox)
compatible with the vehicle.
Use the charging cable supplied with the
vehicle.
For more information, contact a PEUGEOT
dealer or a qualified workshop.
During charging
As a safety measure, the engine will
not start if the charging cable is plugged into
the connector on the vehicle. A warning is
displayed on the instrument panel.
While charging is in progress, unlocking the
vehicle will cause the charging to stop.
If no action is taken on one of the openings
(door or boot) or on the charging nozzle, the
vehicle will lock again after 30 seconds and
charging will resume automatically.
Never work under the bonnet:
–
Some areas remain very hot, even an hour
after charging ends - risk of burns!
–
The fan may start at any time - risk of cuts
or strangulation!
After charging
Check that the charging flap is closed.
Do not leave the cable connected to the
domestic power socket - risk of short-circuit CarM an uals 2 .c o m