2023 PEUGEOT 3008 Ready
[x] Cancel search: ReadyPage 11 of 292

9
Dashboard instruments
1Driver information
Instrument panel
The instrument panel displays all the information
the driver needs about the status of the vehicle's
various systems.
This information appears in the form of warning
and indicator lamps and messages.
The instrument panel is in the form of a fully
digital screen.
Head-up digital display
This digital instrument panel can be customised.
Depending on the display mode selected, certain
information is hidden or presented differently.
Example with the "DIALS"
display mode:
1.Fuel gauge
2. Analogue speedometer (mph or km/h)
3. Gear shift indicator
Selector position and gear engaged on
automatic gearbox
4. Digital speedometer (mph or km/h)
5. Cruise control or speed limiter settings
Display of speed limit signs
6. Rev counter (x 1,000 rpm) 7.
Engine coolant temperature indicator (°C)
8. Trip distance recorder (miles or km)
9. Total distance recorder (miles or km)
A. Instrument panel ambient lighting on/off
B. Short press: start a manual test
Long press: reset the service indicator or trip
distance recorder (depending on the context)
Head-up digital display
(Rechargeable hybrid)
This digital instrument panel can be customised.
Depending on the display mode selected, certain
information is hidden or presented differently.
Example with the " Energy" display mode:
1.Fuel gauge and remaining range (miles or
km)
2. Digital speedometer (mph or km/h)
READY indicator lamp
3. Status of the gearbox
4. Energy flows
5. Driving mode selected
6. Power indicator
7. Battery charge level and remaining range
(miles or km)
8.Trip distance recorder (miles or km)
9. Total distance recorder (miles or km)
A. Instrument panel ambient lighting on/off
B. Short press: start a manual test
Long press: reset the service indicator or trip
distance recorder (depending on the context)
In all-electric driving mode, the speed is
displayed in blue.
Displays
Most warning and indicator lamps do not have a
fixed position.
The warning and indicator lamps in the second
line are displayed from right to left in order of
priority.
For certain functions that have indicator lamps
for both operation and deactivation, there is only
one dedicated location.
Permanent information
In the standard display, the instrument panel
shows:
–
in fixed locations:
•
Information related to the gearbox and gear
shift indicator
.
•
Fuel gauge.
•
Coolant temperature indicator (Petrol or
Diesel).
•
Charge level and range indicator
(Rechargeable hybrid).
•
Distance recorders. CarM an uals 2 .c o m
Page 18 of 292

16
Dashboard instruments
The engine will not switch off at the next traffic
stop, if the exterior temperature is:
–
below 0°C.
–
above +35°C.
For more information, refer to the
Driving
section.
Flashing then fixed, accompanied by a
message.
The system has a fault.
Carry out (3).
Rear foglampsFixed.
The lamps are on.
Green warning/indicator lamps
Blind spot monitoring
Fixed.
The function has been activated.
Hill Assist Descent ControlFixed.
The function has been activated, but the
conditions for regulation are not met (gradient,
gear engaged).
Flashing.
The function is regulating the speed of
the vehicle.
The vehicle is being braked; the brake lamps
come on during the descent.
Stop & StartFixed.
When the vehicle stops, the Stop & Start
puts the engine into STOP mode.
Flashing temporarily.
STOP mode is momentarily unavailable
or START mode is automatically triggered.
For more information, refer to the Driving
section.
Vehicle ready to drive (Rechargeable
hybrid)
Fixed, accompanied by an audible signal
when it comes on.
The vehicle is ready to drive.
The indicator lamp goes out upon reaching a
speed of approximately 3 mph (5
km/h) and
lights up again when the vehicle stops moving.
The lamp will go out when you turn off the
engine and exit the vehicle.
Lane positioning assistFixed.
The function has been activated.
All conditions have been met: the system is
operating.
For more information, refer to the Driving
section.
Automatic wipingFixed.
Automatic windscreen wiping is activated.
Direction indicatorsFlashing with audible signal.
The direction indicators are on.
SidelampsFixed.
The lamps are on.
Dipped beam headlampsFixed.
The lamps are on.
Automatic headlamp dippingFixed.
The function has been activated
via the touch screen (Driving/Vehicle menu).
The lighting control stalk is in the "AUTO"
position.
For more information, refer to the Lighting and
visibility section.
Blue warning/indicator lamps
Main beam headlamps
Fixed.
The lamps are on.
Black/white warning lamps
eSave function (Rechargeable hybrid)
Fixed, accompanied by the reserved
electric range.
The
eSave function is activated.
Indicators
Service indicator
The servicing information is expressed in terms
of distance (miles or kilometres) and time
(months or days).
The alert is given at whichever of these two
terms is reached first. CarM an uals 2 .c o m
Page 34 of 292
32
Access
harmful to the environment. Take them to an
approved disposal point.
This equipment contains a button type battery.
Do not swallow the battery. Risk of chemical
burns!
Swallowing the battery can cause serious
internal burning in only 2 hours and can be
fatal.
If batteries have been swallowed or inserted
into a part of the body, seek immediate
medical advice.
Keep new and used batteries out of the reach
of children.
If the battery compartment does not close
properly, stop using the product and keep it
out of the reach of children.
Risk of explosion if the battery is
replaced with an incorrect type!
Replace the battery with the same type.
Risk of explosion or leaking of
inflammable liquid or gas!
Do not use in/store in/place in an environment
where the temperature is extremely high or
where the pressure is extremely low due to
very high altitude.
Do not try to burn, crush or cut a used battery.
Reinitialising the remote
control
Following replacement of the battery or in
the event of a fault, it may be necessary to
reinitialise the remote control.
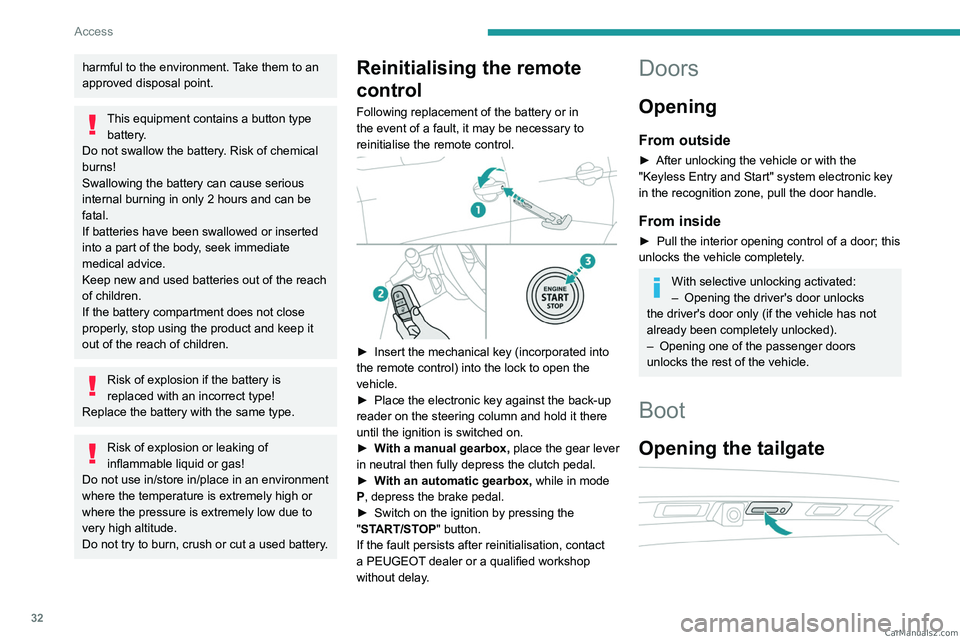
► Insert the mechanical key (incorporated into
the remote control) into the lock to open the
vehicle.
►
Place the electronic key against the back-up
reader on the steering column and hold it there
until the ignition is switched on.
►
W
ith a manual gearbox, place the gear lever
in neutral then fully depress the clutch pedal.
►
W
ith an automatic gearbox, while in mode
P, depress the brake pedal.
►
Switch on the ignition by pressing the
"
START/STOP" button.
If the fault persists after reinitialisation, contact
a PEUGEOT dealer or a qualified workshop
without delay.
Doors
Opening
From outside
► After unlocking the vehicle or with the
"Keyless Entry and Start" system electronic key
in the recognition zone, pull the door handle.
From inside
► Pull the interior opening control of a door; this
unlocks the vehicle completely .
With selective unlocking activated:
– Opening the driver's door unlocks
the driver's door only (if the vehicle has not
already been completely unlocked).
–
Opening one of the passenger doors
unlocks the rest of the vehicle.
Boot
Opening the tailgate
CarM an uals 2 .c o m
Page 67 of 292
65
Ease of use and comfort
3– remove the device and try again in a quarter
of an hour .
If the problem persists, have the system checked
by a PEUGEOT dealer or a qualified workshop.
Front armrest
It includes a refrigerated storage space.
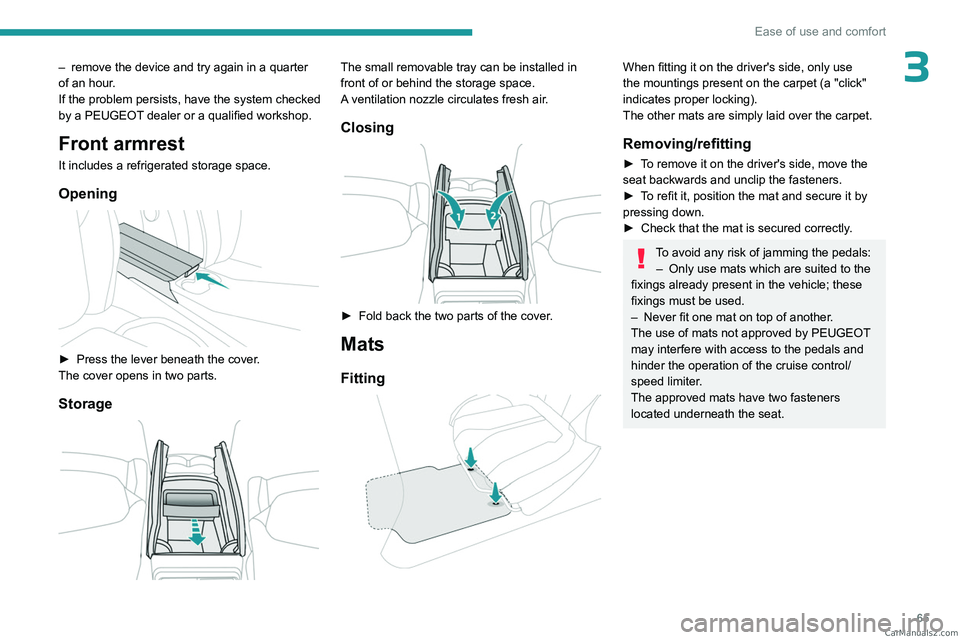
Opening
► Press the lever beneath the cover.
The cover opens in two parts.
Storage
The small removable tray can be installed in
front of or behind the storage space.
A ventilation nozzle circulates fresh air.
Closing
► Fold back the two parts of the cover .
Mats
Fitting
When fitting it on the driver's side, only use
the mountings present on the carpet (a "click"
indicates proper locking).
The other mats are simply laid over the carpet.
Removing/refitting
► To remove it on the driver's side, move the
seat backwards and unclip the fasteners.
►
T
o refit it, position the mat and secure it by
pressing down.
►
Check that the mat is secured correctly
.
To avoid any risk of jamming the pedals:– Only use mats which are suited to the
fixings already present in the vehicle; these
fixings must be used.
–
Never fit one mat on top of another
.
The use of mats not approved by PEUGEOT
may interfere with access to the pedals and
hinder the operation of the cruise control/
speed limiter.
The approved mats have two fasteners
located underneath the seat. CarM an uals 2 .c o m
Page 115 of 292
11 3
Driving
6Starting
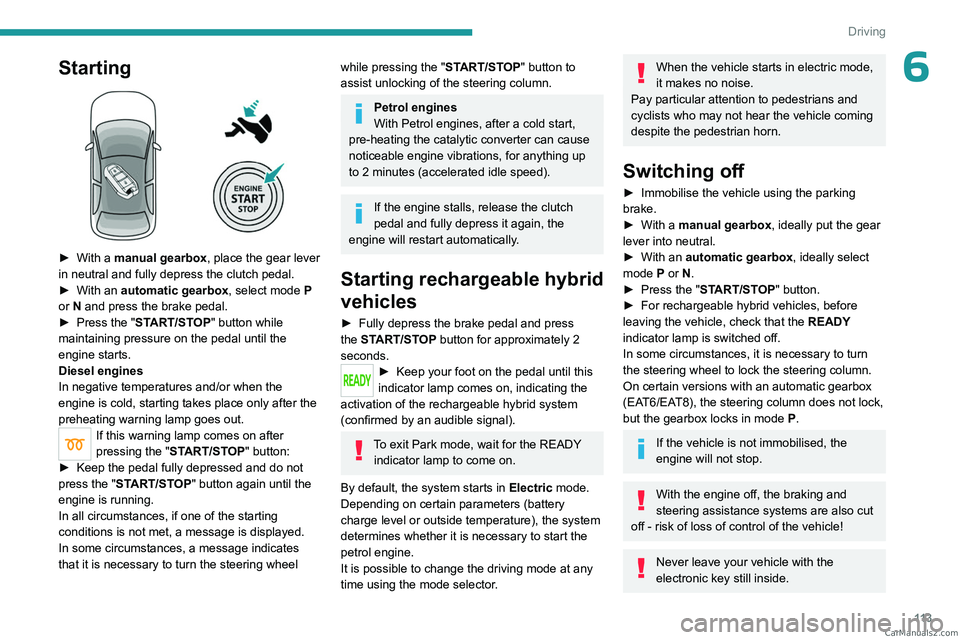
► With a manual gearbox, place the gear lever
in neutral and fully depress the clutch pedal.
►
With an
automatic gearbox, select mode P
or
N and press the brake pedal.
►
Press the "
START/STOP" button while
maintaining pressure on the pedal until the
engine starts.
Diesel engines
In negative temperatures and/or when the
engine is cold, starting takes place only after the
preheating warning lamp goes out.
If this warning lamp comes on after
pressing the " START/STOP" button:
►
Keep the pedal fully depressed and do not
press the "
START/STOP" button again until the
engine is running.
In all circumstances, if one of the starting
conditions is not met, a message is displayed.
In some circumstances, a message indicates
that it is necessary to turn the steering wheel
while pressing the " START/STOP" button to
assist unlocking of the steering column.
Petrol engines
With Petrol engines, after a cold start,
pre-heating the catalytic converter can cause
noticeable engine vibrations, for anything up
to 2 minutes (accelerated idle speed).
If the engine stalls, release the clutch
pedal and fully depress it again, the
engine will restart automatically.
Starting rechargeable hybrid
vehicles
► Fully depress the brake pedal and press
the START/STOP button for approximately 2
seconds.
► Keep you r foot on the pedal until this
indicator lamp comes on, indicating the
activation of the rechargeable hybrid system
(confirmed by an audible signal).
To exit Park mode, wait for the READY indicator lamp to come on.
By default, the system starts in Electric mode.
Depending on certain parameters (battery
charge level or outside temperature), the system
determines whether it is necessary to start the
petrol engine.
It is possible to change the driving mode at any
time using the mode selector.
When the vehicle starts in electric mode,
it makes no noise.
Pay particular attention to pedestrians and
cyclists who may not hear the vehicle coming
despite the pedestrian horn.
Switching off
► Immobilise the vehicle using the parking
brake.
►
With a
manual gearbox, ideally put the gear
lever into neutral.
►
With an
automatic gearbox, ideally select
mode
P or N.
►
Press the "
START/STOP" button.
►
For rechargeable hybrid vehicles, before
leaving the vehicle, check that the READY
indicator lamp is switched off.
In some circumstances, it is necessary to turn
the steering wheel to lock the steering column.
On certain versions with an automatic gearbox
(EAT6/EAT8), the steering column does not lock,
but the gearbox locks in mode P.
If the vehicle is not immobilised, the
engine will not stop.
With the engine off, the braking and
steering assistance systems are also cut
off - risk of loss of control of the vehicle!
Never leave your vehicle with the
electronic key still inside. CarM an uals 2 .c o m
Page 121 of 292
11 9
Driving
6Operation
Only appropriate mode change instructions are
validated.
With the engine running, if it is necessary to
depress the brake pedal to change modes,
an alert message will be displayed on the
instrument panel.
With the engine running and the brakes
released, if R, D or M is selected, the
vehicle moves off, even without pressing the
accelerator pedal.
Never depress the accelerator and brake
pedals at the same time - risk of damage to
the gearbox!
If you open the driver's door while mode
N is engaged, an audible signal will
sound and mode P will be engaged. The
audible signal stops when the driver's door is
closed.
At speeds below 3 mph (5 km/h),
opening the driver ’s door will engage
mode P
- risk of sudden braking!
In the event of battery failure, it is
essential to place the chock(s) supplied
with the tool kit against one of the wheels to
immobilise the vehicle.
Special aspects of automatic mode
The gearbox selects the gear that provides
optimal performance based on ambient
temperature, road profile, vehicle loading and
driving style.
For maximum acceleration, press the accelerator
fully down (kick-down). The gearbox changes
down automatically or holds the selected gear
until the maximum engine speed is reached.
Steering mounted controls allow the driver to
temporarily select a gear, if the vehicle speed
and engine speed conditions permit.
Special aspects of manual mode
The gearbox only changes from one gear to
another if the vehicle speed and engine speed
conditions permit.
Regenerative braking (Brake function)
The regenerative braking function emulates
engine braking, slowing the vehicle with no need
to depress the brake pedal. When the driver
releases the accelerator pedal, the vehicle slows
down more quickly.
The energy recovered when the accelerator
pedal is released is used to partially recharge the
traction battery.
This partial recharging has no effect on the charge level indicator.
The resulting deceleration of the vehicle does not cause the brake lamps to come
on.
►
From
mode D, press button B to activate/
deactivate the function.
D on the instrument panel is replaced with B.
The state of the function is not saved when the
ignition is switched off.
In some situations (e.g. battery full,
extreme temperatures), the amount of
regenerative braking may be temporarily
limited, resulting in less deceleration.
The driver must remain alert to traffic
conditions and must always be ready to use
the brake pedal.
Regenerative braking using the brake
pedal
Energy recovery can also be produced
by depressing the brake pedal in order to
partially recharge the traction battery, without
affecting the charge level indicator.
Starting the vehicle
► Fully depress the brake pedal.
► Start the engine.
►
With your foot on the brake pedal, push once
or twice backwards to select automatic mode D
,
or forwards to shift into reverse gear R.
►
Release the brake pedal. CarM an uals 2 .c o m
Page 125 of 292
123
Driving
6Special aspects of manual mode
The gearbox only changes from one gear to
another if the vehicle speed and engine speed
conditions permit.
Regenerative braking (Brake function)
The regenerative braking function emulates
engine braking, slowing the vehicle with no need
to depress the brake pedal. When the driver
releases the accelerator pedal, the vehicle slows
down more quickly.
The energy recovered when the accelerator
pedal is released is used to partially recharge the
traction battery.
This partial recharging has no effect on
the charge level indicator.
The resulting deceleration of the vehicle does not cause the brake lamps to come
on.
►
From mode
D/B, move the push selector
backwards to activate/deactivate the function.
D on the instrument panel is replaced with B.
The state of the function is not saved when the
ignition is switched off.
In some situations (e.g. battery full,
extreme temperatures), the amount of
regenerative braking may be temporarily
limited, resulting in less deceleration.
The driver must remain alert to traffic
conditions and must always be ready to use
the brake pedal.
Regenerative braking using the brake
pedal
Energy recovery can also be produced
by depressing the brake pedal in order to
partially recharge the traction battery, without
affecting the charge level indicator.
Starting the vehicle
From mode P:
► Fully depress the brake pedal.
►
Start the engine.
►
Maintaining pressure on the brake pedal,
press the
Unlock button.
►
Push once or twice rearwards to select
the automatic mode
D, or forwards to engage
reverse
R.
From neutral
N:
►
Fully depress the brake pedal.
►
Start the engine.
►
Maintaining pressure on the brake pedal,
push rearwards to select the automatic mode
D
,
or forwards, while pressing the Unlock
button to
engage reverse
R
.
Then, from
D or R:
►
Release the brake pedal.
► Accelerate gradually to automatically release
the electric parking brake.
The vehicle moves off immediately
.
Automatic gearbox
Never try to start the engine by pushing
the vehicle.
Switching the vehicle off
Regardless of the current gearbox mode, mode
P is immediately engaged automatically when
the ignition is switched off.
However, in mode N, mode P will be engaged
after a delay of 5 seconds (time to enable free-
wheeling mode).
Check that mode
P has been engaged and
that the electric parking brake was applied
automatically; if not, apply it manually.
The corresponding indicator lamps on the gear selector and the electric parking
brake control must be on, as well as the
indicator
lamps on the instrument panel.
Gearbox malfunction
This warning lamp comes on, accompanied by an audible signal and
the display of a message.
Go to a PEUGEOT dealer or a qualified
workshop.
Do not drive faster than 62
mph (100 km/h),
keeping to the speed limit. CarM an uals 2 .c o m
Page 133 of 292
131
Driving
6snow or dead leaves on the road or in the
event of damaged bumpers and mirrors.
When reverse gear is engaged, an audible
signal (long beep) indicates that the sensors
may be dirty.
A front or rear impact to the vehicle can
upset the sensors’ settings, which is not
always detected by the system: distance
measurements may be distorted.
The sensors do not systematically detect
obstacles that are too low (pavements, studs)
or too thin (trees, posts, wire fences).
Certain obstacles located in the sensors’ blind
spots may not be detected or may no longer
be detected during the manoeuvre.
Certain materials (fabrics) absorb sound
waves: pedestrians may not be detected.
Maintenance
Clean the bumpers and door mirrors and
the field of vision of the cameras regularly.
When washing your vehicle at high pressure,
direct the spray from at least 30
cm away
from the radar, sensors and cameras.
Mats/Pedal trims
The use of mats or pedal trims not
approved by PEUGEOT may interfere with
the operation of the speed limiter or cruise
control.
To avoid any risk of jamming the pedals:
–
Ensure that the mat is secured correctly
.
– Never fit one mat on top of another.
Units of speed
Ensure that the units of speed displayed
on the instrument panel (mph or km/h) are
those for the country you are driving in.
If this is not the case, when the vehicle is
stationary, set the display to the required
units of speed so that it complies with what is
authorised locally.
In case of doubt, contact a PEUGEOT dealer
or a qualified workshop.
Memorising speeds
This function, used only for the speed limiter
and programmable cruise control, lets you
save speed settings that will subsequently be
proposed for the purpose of configuring these
two systems.
You can memorise multiple speed settings for
each of the two systems.
By default, some speed settings are already
memorised.
As a safety measure, the driver must only change speed settings when stationary.
Changing a speed setting
Speed settings can be activated,
deactivated, selected and changed in the
Driving
/ Vehicle touch screen menu.
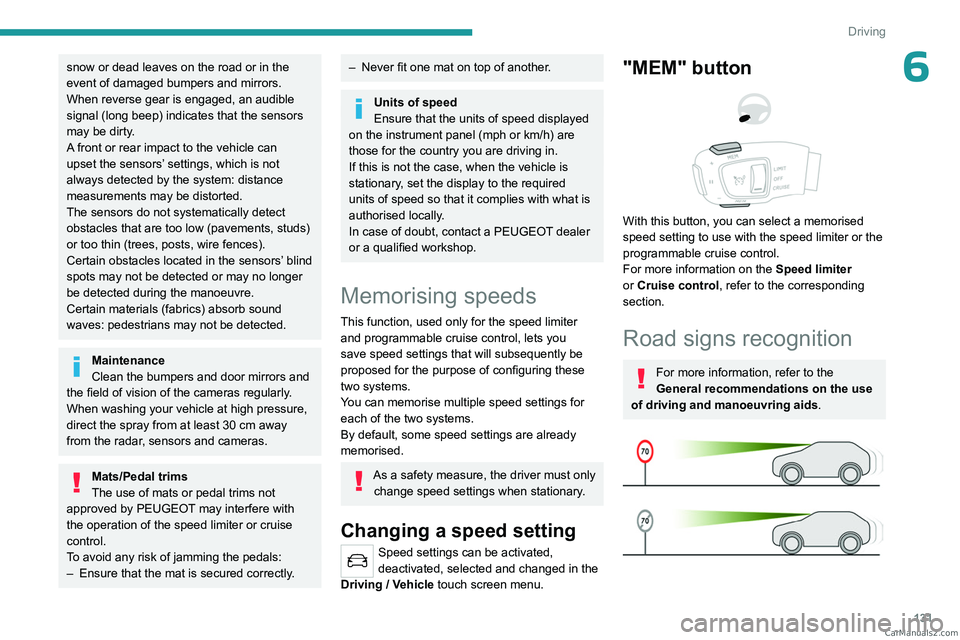
"MEM" button
With this button, you can select a memorised
speed setting to use with the speed limiter or the
programmable cruise control.
For more information on the Speed limiter
or Cruise control, refer to the corresponding
section.
Road signs recognition
For more information, refer to the
General recommendations on the use
of driving and manoeuvring aids .
CarM an uals 2 .c o m