2023 NISSAN TITAN fuel
[x] Cancel search: fuelPage 233 of 644
–Keep the pump nozzle in contact
with the container while you are
filling it.
– Use only approved portable fuel
containers for flammable liquid.
CAUTION
• Do not use E-15 or E-85 fuel in your
vehicle. For additional information,
see “Fuel recommendation” (P. 10-4).
• The Loose Fuel Cap warning mes-
sage will appear if the fuel-filler cap
is not properly tightened. It may take
a few driving trips for the message to
be displayed. Failure to tighten the
fuel-filler cap properly af ter the
Loose Fuel Cap warning message ap-
pears may cause the
Malfunc-
tion Indicator Light (MIL) to
illuminate. •
Failure to tighten the fuel-filler cap
properly may cause the
Mal-
function Indicator Light (MIL) to illu-
minate. If the
light illuminates
because the fuel-filler cap is loose or
missing, tighten or install the cap and
continue to drive the vehicle. The
light should turn off af ter a few
driving trips. If thelight does not
turn off af ter a few driving trips, have
the vehicle inspected. It is recom-
mended that you visit a NISSAN
dealer for this service.
• For additional information, see “Mal-
function Indicator Light (MIL)”
(P. 2-17).
• If fuel is spilled on the vehicle body,
flush it away with water to avoid
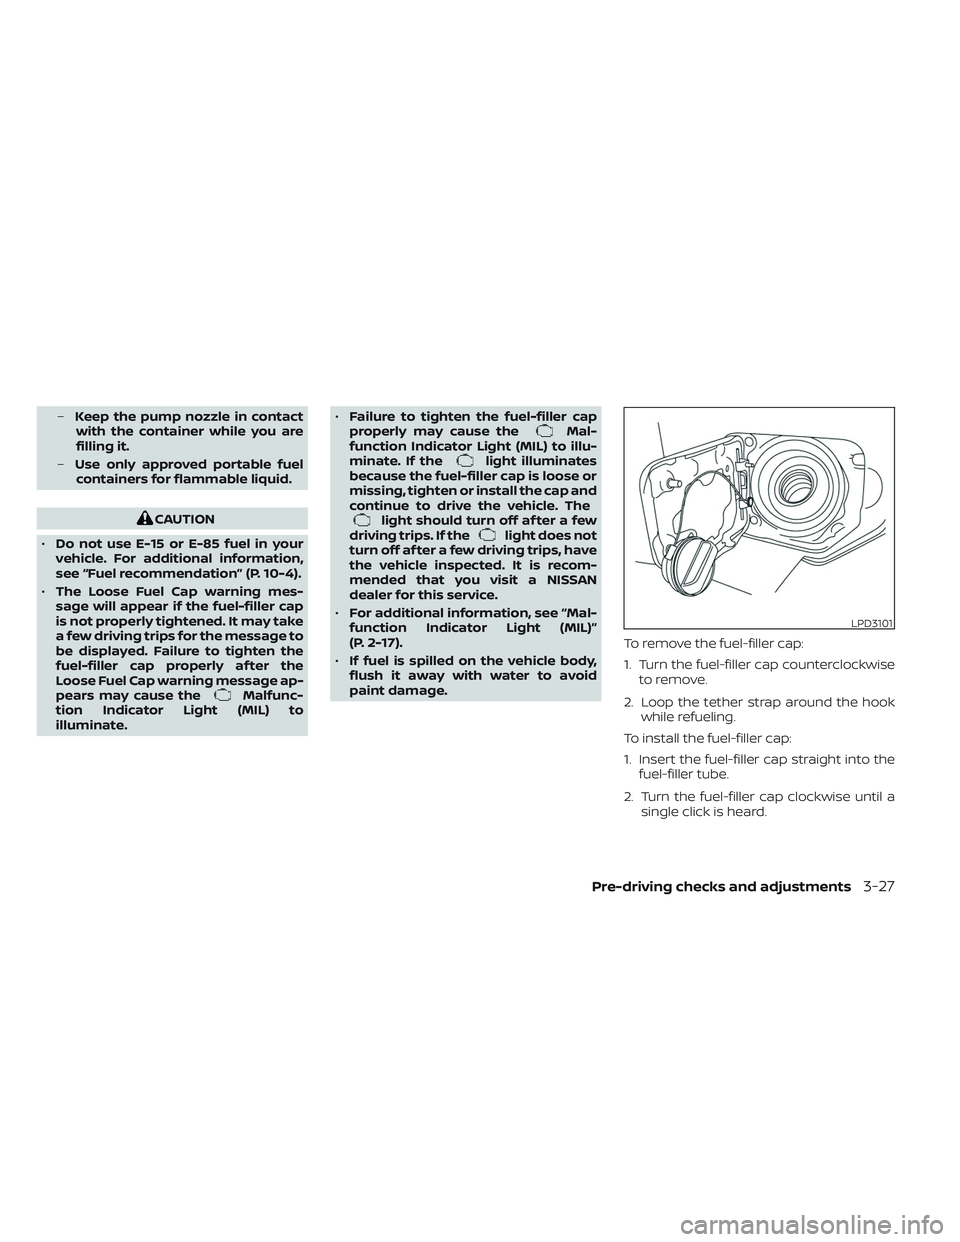
paint damage. To remove the fuel-filler cap:
1. Turn the fuel-filler cap counterclockwise
to remove.
2. Loop the tether strap around the hook while refueling.
To install the fuel-filler cap:
1. Insert the fuel-filler cap straight into the fuel-filler tube.
2. Turn the fuel-filler cap clockwise until a single click is heard.
LPD3101
Pre-driving checks and adjustments3-27
Page 234 of 644
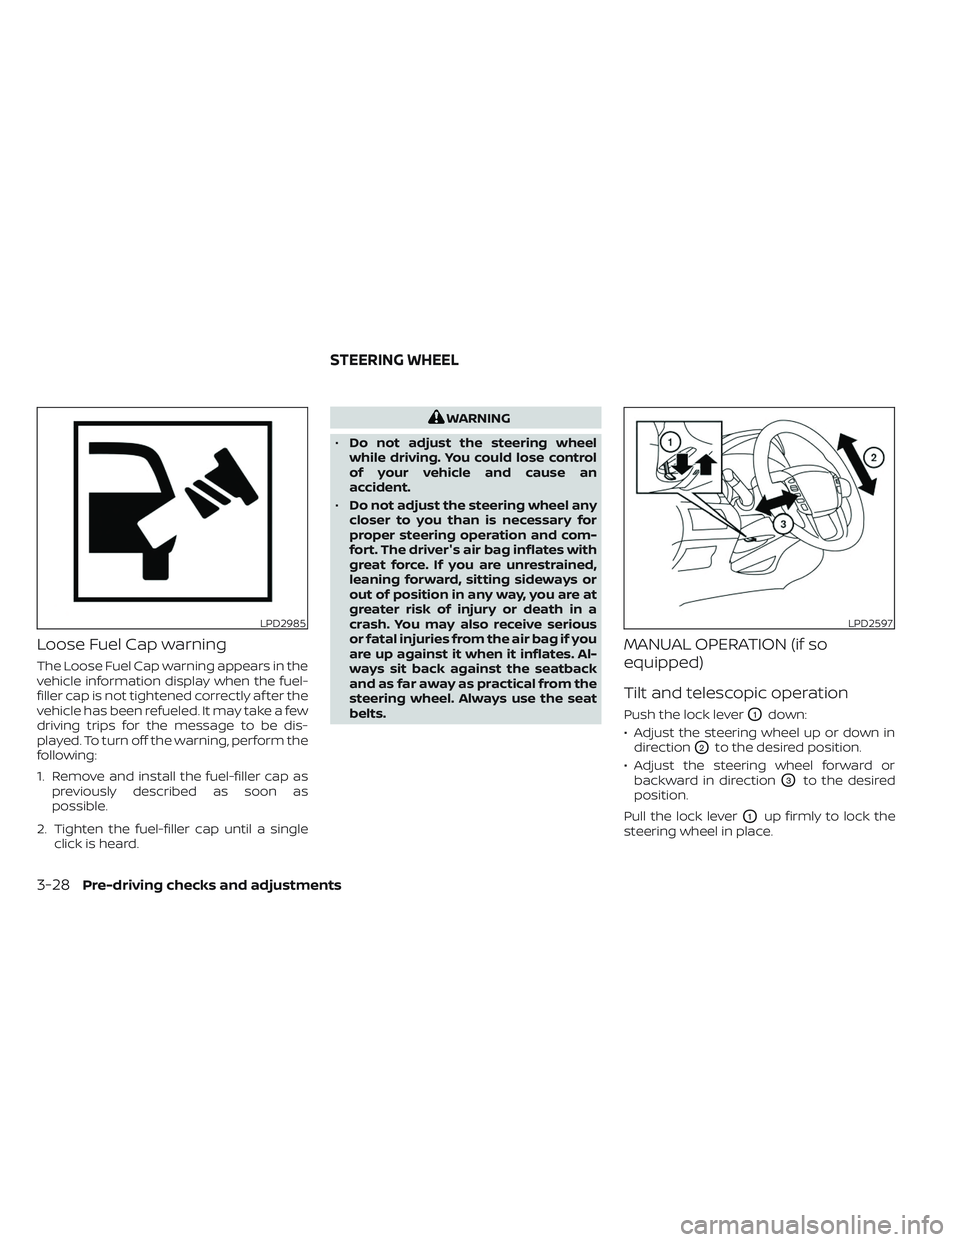
Loose Fuel Cap warning
The Loose Fuel Cap warning appears in the
vehicle information display when the fuel-
filler cap is not tightened correctly af ter the
vehicle has been refueled. It may take a few
driving trips for the message to be dis-
played. To turn off the warning, perform the
following:
1. Remove and install the fuel-filler cap aspreviously described as soon as
possible.
2. Tighten the fuel-filler cap until a single click is heard.
WARNING
• Do not adjust the steering wheel
while driving. You could lose control
of your vehicle and cause an
accident.
• Do not adjust the steering wheel any
closer to you than is necessary for
proper steering operation and com-
fort. The driver's air bag inflates with
great force. If you are unrestrained,
leaning forward, sitting sideways or
out of position in any way, you are at
greater risk of injury or death in a
crash. You may also receive serious
or fatal injuries from the air bag if you
are up against it when it inflates. Al-
ways sit back against the seatback
and as far away as practical from the
steering wheel. Always use the seat
belts.
MANUAL OPERATION (if so
equipped)
Tilt and telescopic operation
Push the lock leverO1down:
• Adjust the steering wheel up or down in direction
O2to the desired position.
• Adjust the steering wheel forward or backward in direction
O3to the desired
position.
Pull the lock lever
O1up firmly to lock the
steering wheel in place.
LPD2985LPD2597
STEERING WHEEL
3-28Pre-driving checks and adjustments
Page 259 of 644
•Underneath the bumper and the cor-
ner areas of the bumper cannot be
viewed on the RearView Monitor be-
cause of its monitoring range limita-
tion. The system will not show small
objects below the bumper, and may
not show objects close to the bum-
per or on the ground.
• Objects viewed in the RearView
Monitor differ from actual distance
because a wide-angle lens is used.
• Objects in the RearView Monitor will
appear visually opposite compared
to when viewed in the rearview and
outside mirrors.
• Use the displayed lines as a refer-
ence. The lines are highly affected by
the number of occupants, fuel level,
vehicle position, road conditions and
road grade.
• Make sure that the tailgate is se-
curely closed when backing up.
• Do not put anything on the rearview
camera. The rearview camera is in-
stalled on the tailgate. •
When washing the vehicle with high
pressure water, be sure not to spray it
around the camera. Otherwise, water
may enter the camera unit causing
water condensation on the lens, a
malfunction, fire or an electric shock.
• Do not strike the camera. It is a preci-
sion instrument. Otherwise, it may
malfunction or cause damage result-
ing in a fire or an electric shock.
The following are operating limitations and
do not represent a system malfunction:
• When the temperature is extremely high or low, the screen may not clearly display
objects.
• When strong light directly shines on the camera, objects may not be displayed
clearly.
• Vertical lines may be seen in objects on the screen. This is due to strong reflected
light from the bumper.
• The screen may flicker under fluorescent light. • The colors of objects on the RearView
Monitor may differ somewhat from the
actual color of objects.
• Objects on the monitor may not be clear in a dark environment.
• There may be a delay when switching between views.
• If dirt, rain or snow accumulate on the camera, RearView Monitor may not dis-
play objects clearly. Clean the camera.
• Do not use wax on the camera lens. Wipe off any wax with a clean cloth dampened
with a diluted mild cleaning agent, then
wipe with a dry cloth.
• Due to a sudden change in humidity, con- densation may form on the camera lens
causing the image to be unclear.
Monitor, climate, audio, phone and voice recognition systems4-9
Page 263 of 644
When the camera is first activated with the
bird’s-eye view in the display, a red icon (if so
equipped) will flash on the screen. This in-
dicates that the sonar system (if so
equipped) is activated. For additional infor-
mation on the front and rear sonar system
(if so equipped), see “Front and rear sonar
system” (P. 5-121).
The screen displayed on the Intelligent
Around View® Monitor will automatically re-
turn to the previous screen 3 minutes af ter
the CAMERA button has been pressed with
the shif t lever in a position other than the R
(Reverse) position.
Available views
WARNING
• The distance guide lines and the ve-
hicle width lines should be used as a
reference only when the vehicle is on
a paved, level surface. The apparent
distance viewed on the monitor may
be different than the actual distance
between the vehicle and displayed
objects. •
Use the displayed lines and the
bird’s-eye view as a reference. The
lines and the bird’s-eye view are
greatly affected by the number of oc-
cupants, cargo, fuel level, vehicle po-
sition, road condition and road
grade.
• If the tires are replaced with different
sized tires, the predicted course lines
and the bird's-eye view may be dis-
played incorrectly.
• When driving the vehicle up a hill, ob-
jects viewed in the monitor are fur-
ther than they appear. When driving
the vehicle down a hill, objects
viewed in the monitor are closer than
they appear.
• Objects in the rear view will appear
visually opposite compared to when
viewed in the monitor and outside
mirrors.
• Use the mirrors or actually look to
properly judge distances to other
objects.
• On a snow-covered or slippery road,
there may be a difference between
the predicted course lines and the
actual course line. •
The vehicle width and predicted
course lines are wider than the actual
width and course.
• The displayed lines will appear
slightly off to the right, because the
rearview camera is not installed in
the rear center of the vehicle.
Monitor, climate, audio, phone and voice recognition systems4-13
Page 337 of 644
Intelligent Driver Alertness (I-DA)
system limitations......................... 5-102
Break-in schedule ............................. 5-103
Fuel efficient driving tips .......................5-104
Increasing fuel economy ......................5-105
Using 4–Wheel Drive (4WD) (if so equipped) ....5-105
Transfer case shif ting procedures ..........5-106
Electronic locking rear differential (E-Lock)
system (if so equipped) ......................... 5-111
Parking/parking on hills .......................5-112
Power steering ................................ 5-113
Brake system ................................. 5-114
Brake precautions .......................... 5-114
Anti-lock Braking System (ABS) .............5-114
Brake Assist ................................ 5-115
Active Brake Limited Slip (ABLS) system .......5-116
Vehicle Dynamic Control (VDC) system .........5-117
Brake force distribution ....................5-118Hill descent control system (if so equipped) . . . 5-119
Hill start assist system
........................5-120
Front and rear sonar system (if so equipped) . . 5-121 System operation .......................... 5-122
How to enable/disable the sonar
system ..................................... 5-124
Sonar limitations ........................... 5-125
System maintenance ......................5-126
Cold weather driving .......................... 5-126
Freeing a frozen door lock ..................5-126
Antifreeze .................................. 5-126
Battery..................................... 5-126
Draining of coolant water ..................5-126
Tire equipment ............................. 5-127
Special winter equipment ..................5-127
Driving on snow or ice ......................5-127
Engine block heater (if so equipped) ........5-128
Page 338 of 644
WARNING
• Do not leave children or adults who
would normally require the assis-
tance of others alone in your vehicle.
Pets should also not be lef t alone.
They could accidentally injure them-
selves or others through inadvertent
operation of the vehicle. Also, on hot,
sunny days, temperatures in a closed
vehicle could quickly become high
enough to cause severe or possibly
fatal injuries to people or animals.
• Properly secure all cargo with ropes
or straps to help prevent it from slid-
ing or shif ting. Do not place cargo
higher than the seatbacks. In a sud-
den stop or collision, unsecured
cargo could cause personal injury.
EXHAUST GAS (carbon monoxide)
WARNING
• Do not breathe exhaust gases; they
contain colorless and odorless car-
bon monoxide. Carbon monoxide is
dangerous. It can cause uncon-
sciousness or death. •
If you suspect that exhaust fumes
are entering the vehicle, drive with all
windows fully open, and have the ve-
hicle inspected immediately.
• Do not run the engine in closed
spaces such as a garage.
• Do not park the vehicle with the en-
gine running for any extended length
of time.
• Keep the rear vent windows, lif t-
gates, doors and trunk lids (if so
equipped) closed while driving, oth-
erwise exhaust gases could be
drawn into the passenger compart-
ment. If you must drive with one of
these open, follow these precau-
tions:
1. Open all the windows.
2. Set the
air recirculation but-
ton to off and the fan control dial
to high to circulate the air.
• If electrical wiring or other cable con-
nections must pass to a trailer
through the seal on the lif tgate or the
body, follow the manufacturer's rec-
ommendation to prevent carbon
monoxide entry into the vehicle. •
The exhaust system and body should
be inspected by a qualified mechanic
whenever:
a. The vehicle is raised for service.
b. You suspect that exhaust fumes are entering into the passenger
compartment.
c. You notice a change in the sound of the exhaust system.
d. You have had an accident involv- ing damage to the exhaust sys-
tem, underbody, or rear of the
vehicle.
NOTE:
If the vehicle engine experiences exces-
sive fuel consumption or produces ex-
cessive smoke it is recommended that
you visit a NISSAN dealer for service.
THREE-WAY CATALYST (if so
equipped)
The three-way catalyst is an emission con-
trol device installed in the exhaust system.
Exhaust gases in the three-way catalyst
are burned at high temperatures to help
reduce pollutants.
PRECAUTIONS WHEN STARTING AND
DRIVING
5-4Starting and driving
Page 339 of 644
WARNING
• The exhaust gas and the exhaust
system are very hot. Keep people,
animals or flammable materials
away from the exhaust system
components.
• Do not stop or park the vehicle over
flammable materials such as dry
grass, waste paper or rags. They may
ignite and cause a fire.
CAUTION
• Do not use leaded gasoline. Deposits
from leaded gasoline will seriously
reduce the three-way catalyst's abil-
ity to help reduce exhaust pollutants.
• Keep your engine tuned up. Malfunc-
tions in the ignition, fuel injection, or
electrical systems can cause overrich
fuel flow into the three-way catalyst,
causing it to overheat. Do not keep
driving if the engine misfires, or if no-
ticeable loss of performance or other
unusual operating conditions are de-
tected. Have the vehicle inspected
promptly. It is recommended that
you visit a NISSAN dealer for this
service. •
Avoid driving with an extremely low
fuel level. Running out of fuel could
cause the engine to misfire, damag-
ing the three-way catalyst.
• Do not race the engine while warm-
ing it up.
• Do not push or tow your vehicle to
start the engine.
TIRE PRESSURE MONITORING
SYSTEM (TPMS)
Each tire, including the spare (if provided),
should be checked monthly when cold and
inflated to the inflation pressure recom-
mended by the vehicle manufacturer on
the vehicle placard or tire inflation pressure
label. (If your vehicle has tires of a different
size than the size indicated on the vehicle
placard or tire inflation pressure label, you
should determine the proper tire inflation
pressure for those tires.)
As an added safety feature, your vehicle
has been equipped with a Tire Pressure
Monitoring System (TPMS) that illuminates
a low tire pressure telltale when one or
more of your tires is significantly under-
inflated. Accordingly, when the low tire
pressure telltale illuminates, you should
stop and check all your tires as soon as
possible, and inflate them to the proper pressure. Driving on a significantly under-
inflated tire causes the tire to overheat and
can lead to tire failure. Under-inflation also
reduces fuel efficiency and tire tread life,
and may affect the vehicle’s handling and
stopping ability.
Please note that the TPMS is not a substi-
tute for proper tire maintenance, and it is
the driver’s responsibility to maintain cor-
rect tire pressure, even if under-inflation
has not reached the level to trigger illumi-
nation of the TPMS low tire pressure telltale.
Your vehicle has also been equipped with a
TPMS malfunction indicator to indicate
when the system is not operating properly.
The TPMS malfunction indicator is com-
bined with the low tire pressure telltale.
When the system detects a malfunction,
the telltale will flash for approximately one
minute and then remain continuously illu-
minated. This sequence will continue upon
subsequent vehicle start-ups as long as
the malfunction exists. When the malfunc-
tion indicator is illuminated, the system
may not be able to detect or signal low tire
pressure as intended. TPMS malfunctions
may occur for a variety of reasons, includ-
ing the installation of replacement or alter-
nate tires or wheels on the vehicle that
Starting and driving5-5
Page 350 of 644
NISSAN VEHICLE IMMOBILIZER
SYSTEM
The NISSAN Vehicle Immobilizer System
will not allow the engine to start without
the use of the registered key.
If the engine fails to start using a registered
key (for example, when interference is
caused by another registered key, an auto-
mated toll road device or automatic pay-
ment device on the key ring), restart the
engine using the following procedures:
1. Leave the ignition switch in the ON posi-tion for approximately 5 seconds.
2. Place the ignition switch in the OFF or LOCK position, and wait approximately
10 seconds.
3. Repeat steps 1 and 2.
4. Restart the engine while holding the de- vice (which may have caused the inter-
ference) separate from the registered
key.
If the no start condition re-occurs, NISSAN
recommends placing the registered key on
a separate key ring to avoid interference
from other devices. • Make sure the area around the vehicle is
clear.
• Check fluid levels such as engine oil, cool- ant, brake fluid and windshield-washer
fluid as frequently as possible, or at least
whenever you refuel.
• Check that all windows and lights are clean.
• Visually inspect tires for their appearance and condition. Also check tires for proper
inflation.
• Check that all doors are closed.
• Position seat and adjust head restraints/headrests.
• Adjust inside and outside mirrors.
• Fasten seat belts and ask all passengers to do likewise.
• Check the operation of warning lights when the ignition switch is placed in the
ON position. For additional information,
see “Warning lights, indicator lights and
audible reminders” (P. 2-13). 1. Apply the parking brake.
2. Move the shif t lever to P (Park) or N (Neu-
tral). P (Park) is recommended.
The starter is designed not to operate
unless the shif t lever is in either P
(Park) or N (Neutral).
3. Push the ignition switch to the ON posi- tion. Depress the brake pedal and push
the ignition switch to start the engine.
To start the engine immediately, push
and release the ignition switch while de-
pressing the brake pedal with the igni-
tion switch in any position.
• If the engine is very hard to start in extremely cold weather or when re-
starting, depress the accelerator
pedal a little (approximately 1/3 to the
floor) and while holding, crank the en-
gine. Release the accelerator pedal
when the engine starts.
• If the engine is very hard to start be- cause it is flooded, depress the accel-
erator pedal all the way to the floor
and hold it. Push the ignition switch to
the ON position to start cranking the
engine. Af ter 5 or 6 seconds, stop
cranking by pushing the ignition
switch to the LOCK position. Af ter
BEFORE STARTING THE ENGINE STARTING THE ENGINE
5-16Starting and driving