2023 NISSAN QASHQAI service indicator
[x] Cancel search: service indicatorPage 285 of 508

exist, turn off the I-LI system. Push the
dynamic driver assistance switch (models
without ProPILOT assist) or the ProPILOT
assist switch (models with ProPILOT as-
sist) again to turn the I-LI system back on.
Temporary disabled status at high tem-
perature:
If the vehicle is parked in direct sunlight
under high temperature conditions (over
approximately 104°F (40°C)) and then the
I-LI system is turned on, the I-LI system
may be deactivated automatically and
the following message will appear on
the vehicle information display: “Unavail-
able: High Cabin Temperature.” When the
interior temperature is reduced, the sys-
tem will resume operating automatically.
SYSTEM MALFUNCTION
If the I-LI system malfunctions, it will
cancel automatically. The I-LI indicator
(orange) will illuminate and the “Malfunc-
tion” warning message will appear in the
display.
If the I-LI indicator (orange) illuminates in
the display, pull off the road to a safe
location. Turn the engine off and restart
the engine. If the I-LI indicator (orange)
continues to illuminate, have the I-LI
system checked. It is recommended that
you visit a NISSAN dealer for this service.
WAC0198X
SYSTEM MAINTENANCE
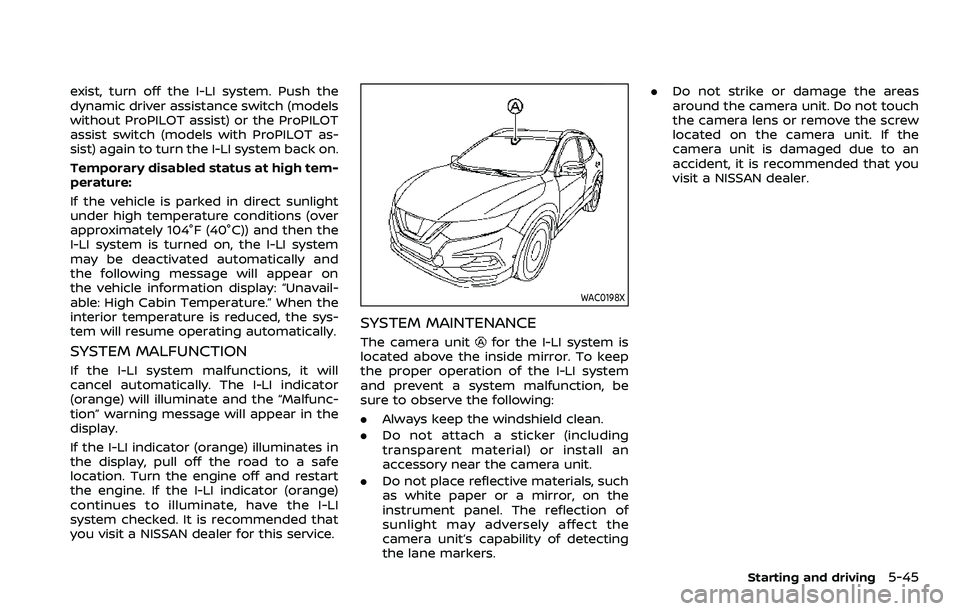
The camera unitfor the I-LI system is
located above the inside mirror. To keep
the proper operation of the I-LI system
and prevent a system malfunction, be
sure to observe the following:
. Always keep the windshield clean.
. Do not attach a sticker (including
transparent material) or install an
accessory near the camera unit.
. Do not place reflective materials, such
as white paper or a mirror, on the
instrument panel. The reflection of
sunlight may adversely affect the
camera unit’s capability of detecting
the lane markers. .
Do not strike or damage the areas
around the camera unit. Do not touch
the camera lens or remove the screw
located on the camera unit. If the
camera unit is damaged due to an
accident, it is recommended that you
visit a NISSAN dealer.
Starting and driving5-45
Page 303 of 508

PRECAUTIONS ON CRUISE CON-
TROL
.If the cruise control system malfunc-
tions, it will cancel automatically. The
CRUISE indicator in the vehicle infor-
mation display will then blink to warn
the driver.
. If the CRUISE indicator blinks, turn the
Cruise ON/OFF switch off and have
the system checked. It is recom-
mended that you visit a NISSAN dealer
for this service.
. The CRUISE indicator may blink when
the Cruise ON/OFF switch is turned
ON while pushing the RES/+, SET/-, or
CANCEL switch. To properly set the
cruise control system, perform the
following procedures.
CRUISE CONTROL OPERATIONS
The cruise control allows driving at
speeds above 25 MPH (40 km/h) without
keeping your foot on the accelerator
pedal.
The cruise control will automatically be
canceled if the vehicle slows down more
than approximately 8 MPH (13 km/h)
below the set speed.
Moving the shift lever to the N (Neutral)
position will cancel the cruise control.
Turning on cruise control
Push the Cruise ON/OFF switch. The
CRUISE indicator in the vehicle informa-
tion display will appear.
Setting cruising speed
1. Accelerate to the desired speed.
2. Push the SET/- switch and release it.
3. Take your foot off the accelerator
pedal.
The vehicle will maintain the set speed.
Passing another vehicle:
Depress the accelerator pedal to accel-
erate. After releasing the accelerator
pedal, the vehicle will return to the pre-
viously set speed.
The vehicle may not maintain the set
speed when going up or down steep hills.
In such cases, drive without the cruise
control.
Resetting to slower speed:
Use any one of the following methods to
reset to a slower speed.
. Lightly tap the foot brake pedal. When
the vehicle reaches the desired speed,
push and release the SET/- switch.
. Push and hold the SET/- switch. When
the vehicle reaches the desired speed,
release the SET- switch. .
Quickly push and release the SET/-
switch. This will reduce the vehicle
speed by about 1 MPH (1.6 km/h).
Resetting to faster speed:
Use any one of the following methods to
reset to a faster speed.
. Depress the accelerator pedal. When
the vehicle reaches the desired speed,
push and release the SET/- switch.
. Push and hold the RES/+switch. When
the vehicle reaches the desired speed,
release the RES/+ switch.
. Quickly push and release the RES/+
switch. This will increase the vehicle
speed by about 1 MPH (1.6 km/h).
Resuming at preset speed:
Push and release the RES/+ switch.
The vehicle will resume the last set
cruising speed when the vehicle speed is
over 25 MPH (40 km/h).
Cancelling cruising speed
Use any one of the following methods to
cancel the set speed.
. Push the CANCEL switch.
. Tap the foot brake pedal.
. Push the Cruise ON/OFF switch. The
CRUISE indicator will turn off.
Starting and driving5-63
Page 366 of 508

5-126Starting and driving
AWD modeWheels driven AWD LOCK indicator light Use conditions
AUTO Distribution of torque to
the front and rear wheels
changes automatically,
depending on road condi-
tions encountered [ratio;
100 : 0
/?50 : 50]. This
results in improved driving
stability.*1 -
For driving on paved
or slippery roads
LOCK All-Wheel Drive (AWD) *2*3*
For driving on rough
roads
*1: When the rotation difference between the front and rear wheels is large, the AWD
mode may change from AUTO to LOCK
for a while, however, this is not a mal-
function.
*2: The LOCK mode will change to the AUTO mode automatically when the vehicle has
been driven at a high speed. The AWD
LOCK indicator light turns off.
*3: The LOCK mode will automatically be cancelled when the ignition switch is
placed in the OFF position.
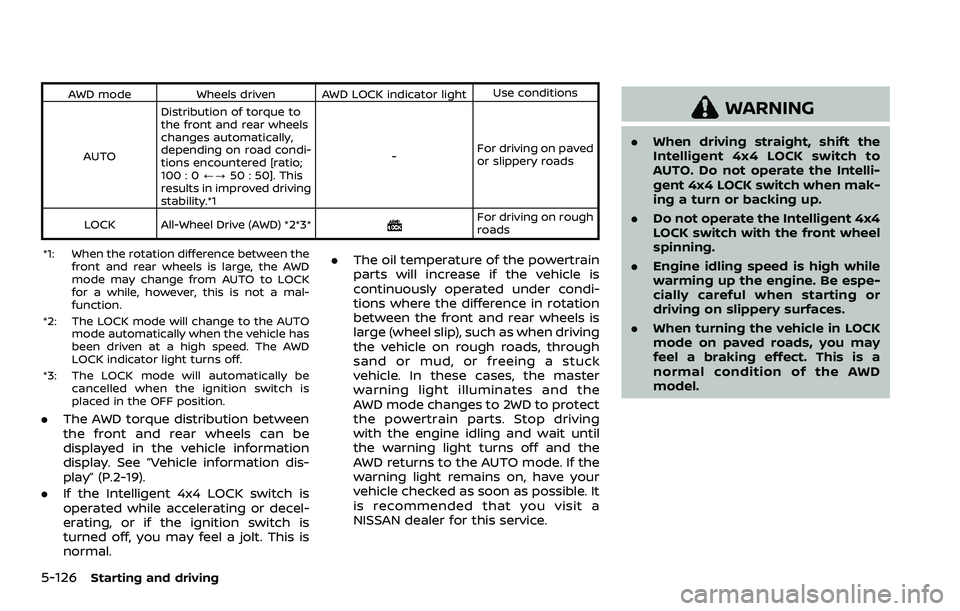
.The AWD torque distribution between
the front and rear wheels can be
displayed in the vehicle information
display. See “Vehicle information dis-
play” (P.2-19).
. If the Intelligent 4x4 LOCK switch is
operated while accelerating or decel-
erating, or if the ignition switch is
turned off, you may feel a jolt. This is
normal. .
The oil temperature of the powertrain
parts will increase if the vehicle is
continuously operated under condi-
tions where the difference in rotation
between the front and rear wheels is
large (wheel slip), such as when driving
the vehicle on rough roads, through
sand or mud, or freeing a stuck
vehicle. In these cases, the master
warning light illuminates and the
AWD mode changes to 2WD to protect
the powertrain parts. Stop driving
with the engine idling and wait until
the warning light turns off and the
AWD returns to the AUTO mode. If the
warning light remains on, have your
vehicle checked as soon as possible. It
is recommended that you visit a
NISSAN dealer for this service.
WARNING
.When driving straight, shift the
Intelligent 4x4 LOCK switch to
AUTO. Do not operate the Intelli-
gent 4x4 LOCK switch when mak-
ing a turn or backing up.
. Do not operate the Intelligent 4x4
LOCK switch with the front wheel
spinning.
. Engine idling speed is high while
warming up the engine. Be espe-
cially careful when starting or
driving on slippery surfaces.
. When turning the vehicle in LOCK
mode on paved roads, you may
feel a braking effect. This is a
normal condition of the AWD
model.
Page 371 of 508

tion. If the computer senses a malfunc-
tion, it switches the ABS off and illumi-
nates the ABS warning light on the
instrument panel. The brake system then
operates normally, but without anti-lock
assistance.
If the ABS warning light illuminates during
the self-test or while driving, have the
vehicle checked. It is recommended you
visit a NISSAN dealer for this service.
Normal operation
The ABS operates at speeds above 3 to 6
MPH (5 to 10 km/h). The speed varies
according to road conditions.
When the ABS senses that one or more
wheels are close to locking up, the
actuator rapidly applies and releases
hydraulic pressure. This action is similar
to pumping the brakes very quickly. You
may feel a pulsation in the brake pedal
and hear a noise from under the hood or
feel a vibration from the actuator when it
is operating. This is normal and indicates
that the ABS is operating properly. How-
ever, the pulsation may indicate that road
conditions are hazardous and extra care
is required while driving.The Vehicle Dynamic Control (VDC) sys-
tem uses various sensors to monitor
driver inputs and vehicle motion. Under
certain driving conditions, the VDC sys-
tem helps to perform the following func-
tions.
.
Controls brake pressure to reduce
wheel slip on one slipping drive wheel
so power is transferred to a non
slipping drive wheel on the same axle.
. Controls brake pressure and engine
output to reduce drive wheel slip
based on vehicle speed (traction con-
trol function).
. Controls brake pressure at individual
wheels and engine output to help the
driver maintain control of the vehicle
in the following conditions:
— understeer (vehicle tends to not
follow the steered path despite
increased steering input)
— oversteer (vehicle tends to spin due to certain road or driving condi-
tions).
The VDC system can help the driver to
maintain control of the vehicle, but it
cannot prevent loss of vehicle control in
all driving situations.
When the VDC system operates, the VDC
warning light
in the instrument panel
flashes so note the following: .
The road may be slippery or the
system may determine some action
is required to help keep the vehicle on
the steered path.
. You may feel a pulsation in the brake
pedal and hear a noise or vibration
from under the hood. This is normal
and indicates that the VDC system is
working properly.
. Adjust your speed and driving to the
road conditions.
If a malfunction occurs in the system, the
VDC warning light
illuminates in the
instrument panel. The VDC system auto-
matically turns off.
The VDC OFF switch is used to turn off the
VDC system. The VDC off indicator
illuminates to indicate the VDC system is
off. When the VDC switch is used to turn
off the system, the VDC system still
operates to prevent one drive wheel from
slipping by transferring power to a non
slipping drive wheel. The VDC warning
light
flashes if this occurs. All other
VDC functions are off, and the VDC
warning light
will not flash. The VDC
system is automatically reset to on when
the ignition switch is placed in the off
position then back to the on position.
See “Vehicle Dynamic Control (VDC) warn-
ing light” (P.2-17) and “Vehicle Dynamic
Control (VDC) off indicator light” (P.2-17).
Starting and driving5-131
VEHICLE DYNAMIC CONTROL (VDC) SYSTEM
Page 373 of 508

The chassis control is an electric control
module that includes the following func-
tions:
.Intelligent Trace Control
. Intelligent Engine Brake
. Active Ride Control
INTELLIGENT TRACE CONTROL
This system senses driving based on the
driver’s steering and acceleration/braking
patterns, and controls brake pressure at
individual wheels to aid tracing at corners
and help smooth vehicle response.
Intelligent Trace Control can be set to ON
(enabled) or OFF (disabled) through the
Vehicle Information Display “Settings”
page. See “Vehicle information display”
(P.2-19) for more information.
When the Vehicle Dynamic Control (VDC)
OFF switch is used to turn off the VDC
system, the Intelligent Trace Control is
also turned off.
JVS0403X
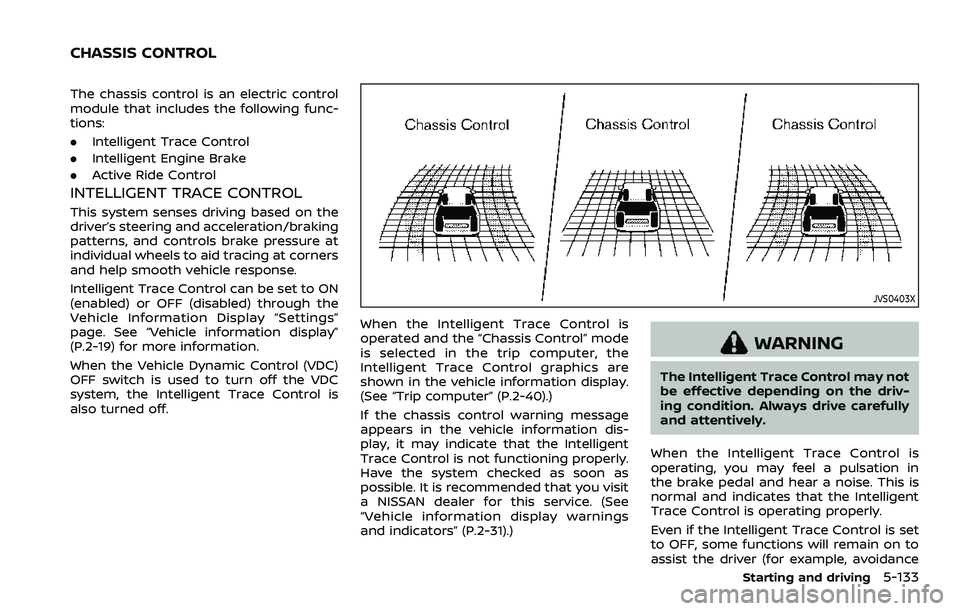
When the Intelligent Trace Control is
operated and the “Chassis Control” mode
is selected in the trip computer, the
Intelligent Trace Control graphics are
shown in the vehicle information display.
(See “Trip computer” (P.2-40).)
If the chassis control warning message
appears in the vehicle information dis-
play, it may indicate that the Intelligent
Trace Control is not functioning properly.
Have the system checked as soon as
possible. It is recommended that you visit
a NISSAN dealer for this service. (See
“Vehicle information display warnings
and indicators” (P.2-31).)
WARNING
The Intelligent Trace Control may not
be effective depending on the driv-
ing condition. Always drive carefully
and attentively.
When the Intelligent Trace Control is
operating, you may feel a pulsation in
the brake pedal and hear a noise. This is
normal and indicates that the Intelligent
Trace Control is operating properly.
Even if the Intelligent Trace Control is set
to OFF, some functions will remain on to
assist the driver (for example, avoidance
Starting and driving5-133
CHASSIS CONTROL
Page 385 of 508

To shut off the engine in an emergency
situation while driving, perform the fol-
lowing procedure:
.Rapidly push the push-button ignition
switch 3 consecutive times in less
than 1.5 seconds, or
. Push and hold the push-button igni-
tion switch for more than 2 seconds.TIRE PRESSURE MONITORING SYS-
TEM (TPMS)
This vehicle is equipped with the Tire
Pressure Monitoring System (TPMS). It
monitors tire pressure of all tires except
the spare (if so equipped). When the low
tire pressure warning light is lit, and the
“Tire Pressure Low - Add Air” warning
message is displayed in the vehicle in-
formation display, one or more of your
tires is significantly under-inflated. If the
vehicle is being driven with low tire
pressure, the TPMS will activate and warn
you of it by the low tire pressure warning
light. This system will activate only when
the vehicle is driven at speeds above 16
MPH (25 km/h). For more details, see
“Warning lights, indicator lights and audi-
ble reminders” (P.2-10) and “Tire Pressure
Monitoring System (TPMS)” (P.5-5).
WARNING
.If the low tire pressure warning
light illuminates while driving,
avoid sudden steering maneu-
vers or abrupt braking, reduce
vehicle speed, pull off the road
to a safe location and stop the
vehicle as soon as possible. Driv-
ing with under-inflated tires may
permanently damage the tires and increase the likelihood of tire
failure. Serious vehicle damage
could occur and may lead to an
accident and could result in ser-
ious personal injury. Check the
tire pressure for all four tires.
Adjust the tire pressure to the
recommended COLD tire pressure
shown on the Tire and Loading
Information label to turn the low
tire pressure warning light OFF. If
the light still illuminates while
driving after adjusting the tire
pressure, a tire may be flat. If
you have a flat tire, replace it with
a spare tire (if so equipped) or
repair it using the emergency tire
puncture repair kit (if so
equipped) as soon as possible.
. Since the spare tire (if so
equipped) is not equipped with
the TPMS, when a spare tire is
mounted or a wheel is replaced,
the TPMS will not function and
the low tire pressure warning
light will flash for approximately
1 minute. The light will remain on
after 1 minute. Have your tires
replaced and/or TPMS system
reset as soon as possible. It is
recommended you visit a NISSAN
dealer for these services.
In case of emergency6-3
EMERGENCY ENGINE SHUT OFF (models
with push-button ignition switch)FLAT TIRE
Page 424 of 508

8-12Do-it-yourself
DI0137MA
Check the fluid level in each cell. It should
be between the UPPER LEVELand
LOWER LEVELlines.
If it is necessary to add fluid, add only
distilled water to bring the level to the
indicator in each filler opening. Do not
overfill.
SDI1480C
1. Remove the cell plugs.
2. Add distilled water up to the UPPER LEVEL
line.
If the side of the battery is not clear,
check the distilled water level by
looking directly above the cell; the
condition
indicates OK and the
conditionneeds more to be added.
3. Tighten cell plugs
.
Vehicles operated in high temperatures
or under severe conditions require fre-
quent checks of the battery fluid level.
JUMP STARTING
If jump starting is necessary, see “Jump
starting” (P.6-14). If the engine does not
start by jump starting, the battery may
have to be replaced. It is recommended
you visit a NISSAN dealer for this service.
Page 450 of 508

8-38Do-it-yourself
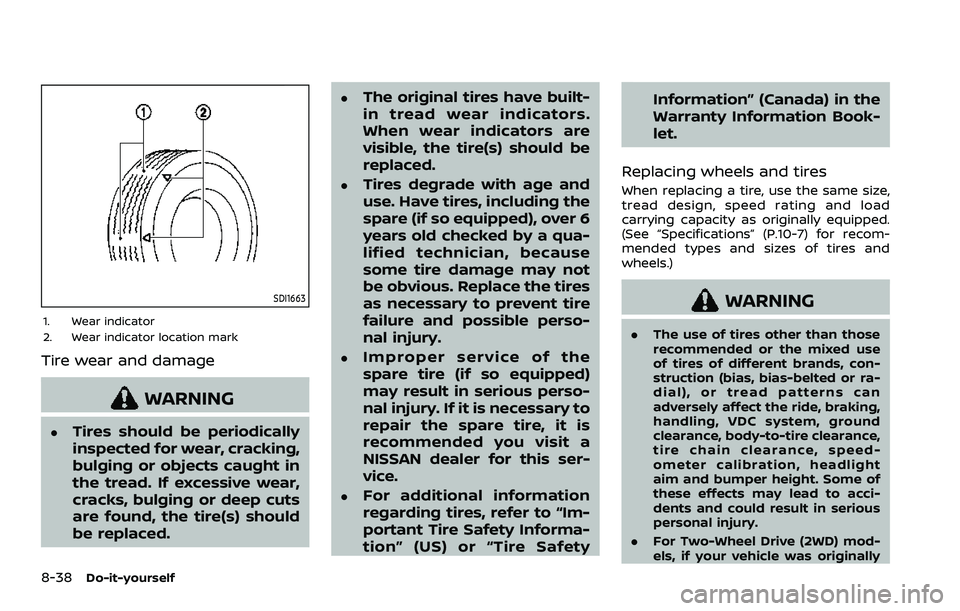
SDI1663
1. Wear indicator
2. Wear indicator location mark
Tire wear and damage
WARNING
.Tires should be periodically
inspected for wear, cracking,
bulging or objects caught in
the tread. If excessive wear,
cracks, bulging or deep cuts
are found, the tire(s) should
be replaced.
.The original tires have built-
in tread wear indicators.
When wear indicators are
visible, the tire(s) should be
replaced.
.Tires degrade with age and
use. Have tires, including the
spare (if so equipped), over 6
years old checked by a qua-
lified technician, because
some tire damage may not
be obvious. Replace the tires
as necessary to prevent tire
failure and possible perso-
nal injury.
.Improper service of the
spare tire (if so equipped)
may result in serious perso-
nal injury. If it is necessary to
repair the spare tire, it is
recommended you visit a
NISSAN dealer for this ser-
vice.
.For additional information
regarding tires, refer to “Im-
portant Tire Safety Informa-
tion” (US) or “Tire SafetyInformation” (Canada) in the
Warranty Information Book-
let.
Replacing wheels and tires
When replacing a tire, use the same size,
tread design, speed rating and load
carrying capacity as originally equipped.
(See “Specifications” (P.10-7) for recom-
mended types and sizes of tires and
wheels.)
WARNING
. The use of tires other than those
recommended or the mixed use
of tires of different brands, con-
struction (bias, bias-belted or ra-
dial), or tread patterns can
adversely affect the ride, braking,
handling, VDC system, ground
clearance, body-to-tire clearance,
tire chain clearance, speed-
ometer calibration, headlight
aim and bumper height. Some of
these effects may lead to acci-
dents and could result in serious
personal injury.
. For Two-Wheel Drive (2WD) mod-
els, if your vehicle was originally