2023 NISSAN QASHQAI reverse
[x] Cancel search: reversePage 261 of 508

.Do not downshift abruptly on
slippery roads. This may cause a
loss of control.
CAUTION
.To avoid possible damage to your
vehicle; when stopping the vehi-
cle on an uphill grade, do not hold
the vehicle by depressing the
accelerator pedal. The foot brake
should be used for this purpose.
. Except in an emergency, do not
shift to the N (Neutral) position
while driving. Coasting with the
transmission in the N (Neutral)
position may cause serious da-
mage to the transmission.
JVS1025X
To move the shift lever,
: Push the buttonwhile depressing
the brake pedal.
: Push the button.
:Just move the shift lever.
Shifting
After starting the engine, fully depress the
brake pedal, push the shift lever button
and move the shift lever from the P (Park)
position to any of the desired shift posi-
tions.
WARNING
Apply the parking brake if the shift
lever is in any position while the
engine is not running. Failure to do
so could cause the vehicle to move
unexpectedly or roll away and result
in serious personal injury or property
damage.
CAUTION
Use the P (Park) or R (Reverse) posi-
tion only when the vehicle is com-
pletely stopped.
If the ignition switch is placed in the OFF
or ACC position for any reason while the
shift lever is in any positions other than
the P (Park), the ignition switch cannot be
placed in the LOCK position.
If the ignition switch cannot be placed in
the LOCK position, perform the following
steps:
1. Apply the parking brake when the vehicle is stopped.
2. Place the ignition switch in the ON position while depressing the foot
Starting and driving5-21
Page 262 of 508

5-22Starting and driving
brake pedal.
3. Move the shift lever to the P (Park) position.
4. Place the ignition switch in the LOCK position.
CAUTION
To prevent transmission damage,
move the shift lever to the P (Park)
or R (Reverse) position only when the
vehicle is completely stopped.
P (Park):
Use this position when the vehicle is
parked or when starting the engine. Make
sure the vehicle is completely stopped.
The brake pedal must be depressed and
the shift lever button pushed in to move
the shift lever from N (Neutral) or any
drive position to P (Park). Apply the
parking brake. When parking on a hill,
apply the parking brake first, then move
the shift lever to the P (Park) position.
R (Reverse):
Use this position to back up. Make sure
the vehicle is completely stopped before
selecting the R (Reverse) position. The
brake pedal must be depressed and the
shift lever button pushed in to move the shift lever from P (Park), N (Neutral) or
any driving position to R (Reverse).
N (Neutral):
Neither forward nor reverse gear is en-
gaged. The engine can be started in this
position. You may shift to N (Neutral) and
restart a stalled engine while the vehicle
is moving.
D (Drive):
Use this position for all normal forward
driving.
Manual shift mode
When the shift lever is shifted from the D
(Drive) position to the manual shift gate,
the transmission enters the manual shift
mode. Shift ranges can be selected
manually by moving the shift lever up or
down.
In the manual shift mode, the shift range
is displayed on the position indicator in
the meter.
Shift ranges up or down one by one as
follows:
M1
?
M2 ?
M3 ?
M4 ?
M5 ?
M6 ?
M7 ?
M8
// / / / / /
.
When shifting up, move the shift lever
to the + (up) side. The transmission
shifts to a higher range.
. When shifting down, move the shift
lever to the − (down) side. The trans-
mission shifts to a lower range.
. Moving the shift lever to the same side
twice will shift the ranges in succes-
sion. However, if this motion is rapidly
done, the second shifting may not be
completed properly.
. When canceling the manual shift
mode, return the shift lever to the D
(Drive) position. The transmission re-
turns to the normal driving mode.
M8 (8th):
Use this position for all normal forward
driving.
However, you need to shift down the
gears manually when accelerating or
passing another vehicle.
M7 (7th), M6 (6th) and M5 (5th):
Use these positions when driving up long
slopes, or for engine braking when driving
down long slopes.
M4 (4th), M3 (3rd) and M2 (2nd) :
Use these positions for hill climbing or
engine braking on downhill grades.
Page 265 of 508

4. Insert the mechanical key and pushdown the shift lock release.
5. Push the shift lever button and move the shift lever to the N (Neutral)
position while holding down the shift
lock release.
Place the ignition switch in the ON posi-
tion. The vehicle may be moved to the
desired location.
Replace the removed shift lock release
cover after the operation.
If the shift lever cannot be moved out of
the P (Park) position, have the CVT system
checked as soon as possible. It is recom-
mended you visit a NISSAN dealer for this
service.
WARNING
If the shift lever cannot be moved
from the P (Park) position while the
engine is running and the brake
pedal is depressed, the stop lights
may not work. Malfunctioning stop
lights could cause an accident injur-
ing yourself and others.
MANUAL TRANSMISSION (MT)
WARNING
. Do not downshift abruptly on
slippery roads. This may cause a
loss of control.
. Do not over-rev the engine when
shifting to a lower gear. This may
cause a loss of control or engine
damage.
. When the high fluid temperature
protection mode or fail-safe op-
eration occurs, vehicle speed may
be gradually reduced. The re-
duced speed may be lower than
other traffic, which could increase
the chance of a collision. Be
especially careful when driving. If
necessary, pull to the side of the
road at a safe place and allow the
transmission to return to normal
operation, or have it repaired if
necessary.
CAUTION
.Do not rest your foot on the
clutch pedal while driving. This may damage the clutch.
. Fully depress the clutch pedal
before shifting to help prevent
transmission damage.
. Stop your vehicle completely be-
fore shifting into R (Reverse).
. When the vehicle is stopped for a
period of time, for example at a
stop light, shift to N (Neutral) and
release the clutch pedal with the
foot brake applied.
Starting and driving5-25
Page 266 of 508
5-26Starting and driving
SSD0552
Shifting
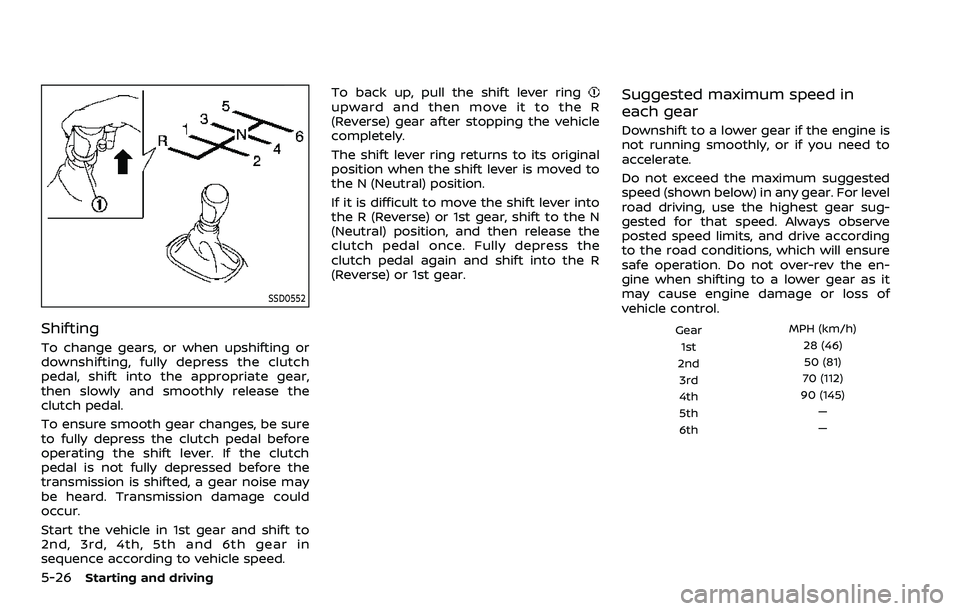
To change gears, or when upshifting or
downshifting, fully depress the clutch
pedal, shift into the appropriate gear,
then slowly and smoothly release the
clutch pedal.
To ensure smooth gear changes, be sure
to fully depress the clutch pedal before
operating the shift lever. If the clutch
pedal is not fully depressed before the
transmission is shifted, a gear noise may
be heard. Transmission damage could
occur.
Start the vehicle in 1st gear and shift to
2nd, 3rd, 4th, 5th and 6th gear in
sequence according to vehicle speed.To back up, pull the shift lever ring
upward and then move it to the R
(Reverse) gear after stopping the vehicle
completely.
The shift lever ring returns to its original
position when the shift lever is moved to
the N (Neutral) position.
If it is difficult to move the shift lever into
the R (Reverse) or 1st gear, shift to the N
(Neutral) position, and then release the
clutch pedal once. Fully depress the
clutch pedal again and shift into the R
(Reverse) or 1st gear.Suggested maximum speed in
each gear
Downshift to a lower gear if the engine is
not running smoothly, or if you need to
accelerate.
Do not exceed the maximum suggested
speed (shown below) in any gear. For level
road driving, use the highest gear sug-
gested for that speed. Always observe
posted speed limits, and drive according
to the road conditions, which will ensure
safe operation. Do not over-rev the en-
gine when shifting to a lower gear as it
may cause engine damage or loss of
vehicle control.
Gear
MPH (km/h)
1st 28 (46)
2nd 50 (81)
3rd 70 (112)
4th 90 (145)
5th —
6th —
Page 268 of 508
5-28Starting and driving
automatic brake hold function.
The electronic parking brake is automati-
cally released as soon as the vehicle
starts while the accelerator pedal is
depressed.
WARNING
.The electronic parking brake will
not be automatically applied
when the engine is stopped with-
out using the ignition switch (for
example, by engine stalling).
Without the vehicle stationary,
the electronic parking brake will
not be automatically applied
even if the engine is turned off
with the ignition switch.
. Before leaving the vehicle, move
the shift lever to the 1 (1st) or R
(Reverse) position and check that
the electronic parking brake in-
dicator light is illuminated to
confirm that the electronic park-
ing brake is applied. The electro-
nic parking brake indicator light
will remain on for a period of time
after the driver’s door is locked.
CAUTION
When parking in an area where the
outside temperature is below 32°F
(0°C), do not apply the parking brake
to prevent it from freezing.
For safe parking, place the shift lever
in the 1 (1st) or R (Reverse) position
and securely block the wheels.
NOTE:
. To keep the electronic parking brake
released after the engine is turned
off, place the ignition switch in the
OFF position, depress the brake
pedal and push down the parking
brake switch before opening the
driver’s door.
. If a malfunction occurs in the elec-
tronic parking brake system (for
example, due to battery discharge),
it is recommended to contact a
NISSAN dealer.
. If the shift lever is moved to the P
(Park) position when the brake force
is maintained by the automatic
brake hold function, the electronic
parking brake will apply automati-
cally. .
If the driver’s seat belt is unfastened
when the brake force is maintained
by the automatic brake hold func-
tion, the electronic parking brake
will apply automatically.
. If the ignition switch is placed in the
OFF position when the brake force is
maintained by the automatic brake
hold function, the electronic parking
brake will apply automatically.
Manual operation
The electronic parking brake will not be
automatically applied if the engine is
stopped without using the ignition switch
(for example, by engine stalling). In such a
case, you have to apply the parking brake
manually.
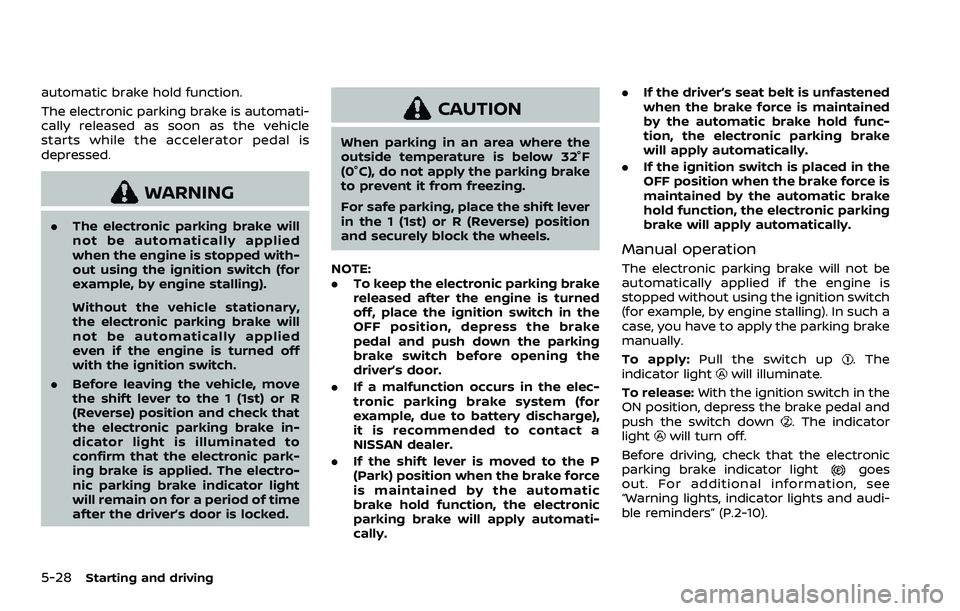
To apply: Pull the switch up
. The
indicator lightwill illuminate.
To release: With the ignition switch in the
ON position, depress the brake pedal and
push the switch down
. The indicator
lightwill turn off.
Before driving, check that the electronic
parking brake indicator light
goes
out. For additional information, see
“Warning lights, indicator lights and audi-
ble reminders” (P.2-10).
Page 273 of 508
system.
. The ECO mode system will turn off
automatically if a malfunction occurs
in the system.
. Turn off the ECO mode system when
acceleration is required such as when:
— driving with a heavy load of pas-
sengers or cargo in the vehicle
— driving on a steep uphill slope
WAF0142X
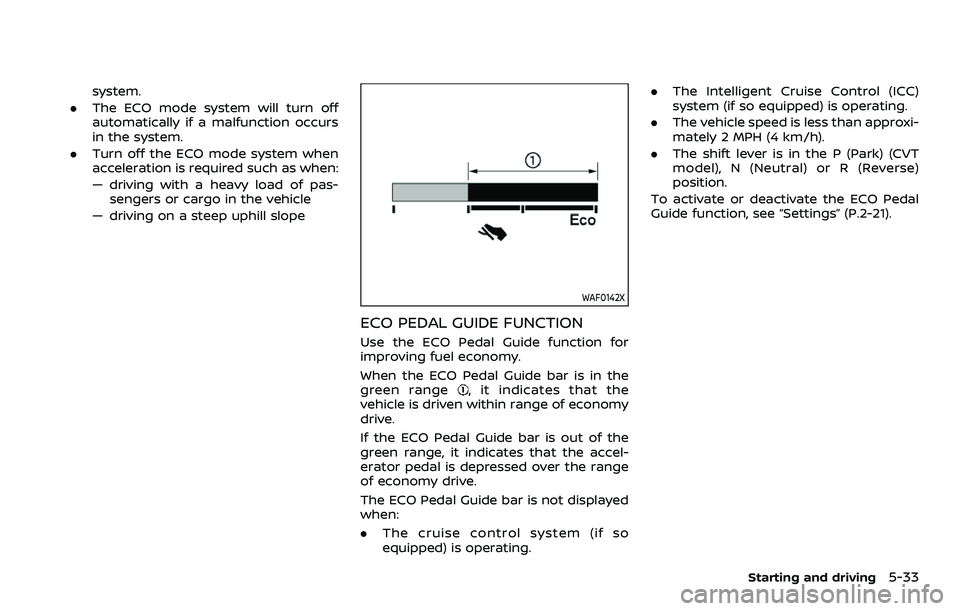
ECO PEDAL GUIDE FUNCTION
Use the ECO Pedal Guide function for
improving fuel economy.
When the ECO Pedal Guide bar is in the
green range
, it indicates that the
vehicle is driven within range of economy
drive.
If the ECO Pedal Guide bar is out of the
green range, it indicates that the accel-
erator pedal is depressed over the range
of economy drive.
The ECO Pedal Guide bar is not displayed
when:
. The cruise control system (if so
equipped) is operating. .
The Intelligent Cruise Control (ICC)
system (if so equipped) is operating.
. The vehicle speed is less than approxi-
mately 2 MPH (4 km/h).
. The shift lever is in the P (Park) (CVT
model), N (Neutral) or R (Reverse)
position.
To activate or deactivate the ECO Pedal
Guide function, see “Settings” (P.2-21).
Starting and driving5-33
Page 274 of 508
5-34Starting and driving
WAF0143X
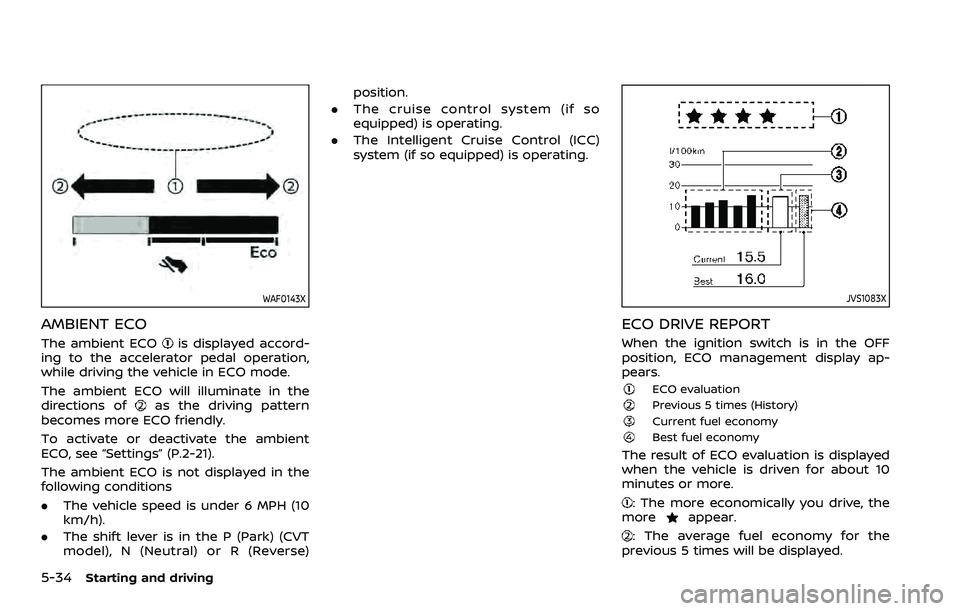
AMBIENT ECO
The ambient ECOis displayed accord-
ing to the accelerator pedal operation,
while driving the vehicle in ECO mode.
The ambient ECO will illuminate in the
directions of
as the driving pattern
becomes more ECO friendly.
To activate or deactivate the ambient
ECO, see “Settings” (P.2-21).
The ambient ECO is not displayed in the
following conditions
. The vehicle speed is under 6 MPH (10
km/h).
. The shift lever is in the P (Park) (CVT
model), N (Neutral) or R (Reverse) position.
. The cruise control system (if so
equipped) is operating.
. The Intelligent Cruise Control (ICC)
system (if so equipped) is operating.
JVS1083X
ECO DRIVE REPORT
When the ignition switch is in the OFF
position, ECO management display ap-
pears.
ECO evaluationPrevious 5 times (History)Current fuel economyBest fuel economy
The result of ECO evaluation is displayed
when the vehicle is driven for about 10
minutes or more.
: The more economically you drive, the
moreappear.
: The average fuel economy for the
previous 5 times will be displayed.
Page 294 of 508

5-54Starting and driving
interference that may cause undesired
operation of the device.
Frequency bands: 24.05 – 24.25 Ghz
The field strength of SRR3-B is below
250 millivolts/m measured at 3 metres
with an average detector.
This device contains licence-exempt
transmitter(s)/receiver(s) that comply
with Innovation, Science and Economic
Development Canada’s licence-exempt
RSS(s). Operation is subject to the fol-
lowing two conditions:
1. This device may not cause interfer-
ence.
2. This device must accept any inter-
ference, including interference that may
cause undesired operation of the de-
vice.
Radiofrequency radiation exposure in-
formation:
This equipment complies with radiation
exposure limits set forth for an uncon-
trolled environment. This equipment
should be installed and operated with
minimum distance of 20 cm between
the radiator and your body.
WARNING
Failure to follow the warnings and
instructions for proper use of the
RCTA system could result in serious
injury or death.
.The RCTA system is not a replace-
ment for proper driving proce-
dures and is not designed to
prevent contact with vehicles or
objects. When backing out of a
parking space, always use the
side and rear mirrors and turn
and look in the direction your
vehicle will move. Never rely so-
lely on the RCTA system.
The RCTA system will assist you when
backing out from a parking space. When
the vehicle is in reverse, the system is
designed to detect other vehicles ap-
proaching from the right or left of the
vehicle. If the system detects cross traffic,
it will alert you.
REAR CROSS TRAFFIC ALERT (RCTA)