2023 NISSAN QASHQAI window
[x] Cancel search: windowPage 84 of 508

Power outlet ........................................................................\
.......... 2-65USB (Universal Serial Bus)
charging connector .......................................................... 2-66
Emergency Call (SOS) button (if
so equipped) ........................................................................\
.......... 2-67 Emergency support .......................................................... 2-67
Storage ........................................................................\
...................... 2-69 Cup holders ........................................................................\
..... 2-69
Soft bottle holders ............................................................. 2-70
Flexible luggage boards (if so equipped) ......... 2-70
Glove box ........................................................................\
........... 2-71
Console box ........................................................................\
..... 2-71
Sunglasses holder .............................................................. 2-72
Card holder (driver’s side) ............................................ 2-72
Luggage hooks ..................................................................... 2-73
Parcel shelf (if so equipped) ....................................... 2-73
Roof rack (if so equipped) .................................................. 2-75
Windows ........................................................................\
.................... 2-76
Power windows .................................................................... 2-76
Moonroof (if so equipped) .................................................. 2-78 Power moonroof ................................................................. 2-78 Interior lights ........................................................................\
...... 2-80
Interior light switch ........................................................ 2-81
Console light (if so equipped) ................................. 2-81
Map lights ........................................................................\
....... 2-81
Room light ........................................................................\
.... 2-82
Vanity mirror light (if so equipped) .................... 2-82
Cargo light ........................................................................\
..... 2-83
HomeLink® Universal Transceiver (if
so equipped) ........................................................................\
......... 2-83 Programming HomeLink® ......................................... 2-84
Programming HomeLink® for Canadian
customers and gate openers ................................. 2-85
Operating the HomeLink®
Universal Transceiver .................................................... 2-85
Programming troubleshooting ............................. 2-86
Clearing the programmed information .......... 2-86
Reprogramming a single
HomeLink® button ........................................................... 2-86
If your vehicle is stolen ................................................ 2-86
Page 114 of 508

2-32Instruments and controls
9. Low fuel level warning
This warning appears when the fuel level
in the fuel tank is getting low. Refuel as
soon as it is convenient, preferably before
the fuel gauge reaches 0 (Empty). There
will be a small reserve of fuel in the tank
when the fuel gauge needle reaches 0
(Empty).
10. Low Washer Fluid warning (if so
equipped)
This warning appears when the window
washer fluid is at a low level. Add window
washer fluid as necessary. For additional
information, refer to “Window washer
fluid” (P.8-10).
11. Door/liftgate open warning
This warning appears if any of the doors
and/or the liftgate are open or not closed
securely. The vehicle icon indicates which
door or the liftgate is open on the display.
12. Rear seat belt warning
This rear seat belt warning appears after
the ignition switch is placed in the ON
position. If any of the rear passenger’s
seat belts is not fastened, the seat icon
illuminates in red to show which seat belt
is not fastened. The seat icon illuminates
in red until the corresponding rear pas-
senger’s seat belt is fastened. The warn-ing will automatically turn off after
approximately 35 seconds. When the
vehicle speed exceeds 10 MPH (15 km/h),
if a rear passenger’s seat belt is unfas-
tened, a buzzer will sound and the seat
icon illuminates in red. The seat icon
illuminates in red until the corresponding
rear passenger’s seat belt is fastened. The
warning will automatically turn off after
approximately 35 seconds. For precau-
tions on seat belt usage, see “Seat belts”
(P.1-12).
13. Key System Error: See Owner’s
Manual warning (if so equipped)
This warning appears if there is a mal-
function in the Intelligent Key system.
If this warning appears while the engine is
stopped, the engine cannot be started. If
this warning appears while the engine is
running, the vehicle can be driven. How-
ever, it is recommended that you visit a
NISSAN dealer for repair as soon as
possible.
14. Loose Fuel Cap warning
This warning appears when the fuel-filler
cap is not tightened correctly after the
vehicle has been refueled. For additional
information, refer to “Fuel-filler cap” (P.3-
28).
15. Tire Pressure Low — Add Air
warning
This warning appears when the low tire
pressure warning light in the meter
illuminates and low tire pressure is de-
tected. The warning appears each time
the ignition switch is placed in the ON
position as long as the low tire pressure
warning light remains illuminated. If this
warning appears, stop the vehicle and
adjust the pressure to the recommended
COLD tire pressure shown on the Tire and
Loading Information label. (See “Low tire
pressure warning light” (P.2-14) and “Tire
Pressure Monitoring System (TPMS)” (P.5-
5).)
16. Low Oil Pressure Stop Vehicle
warning
This warning appears if low engine oil
pressure is detected. If the warning ap-
pears during normal driving, pull off the
road in a safe area and stop the engine
immediately. It is recommended that you
call a NISSAN dealer.
The low oil pressure warning is not
designed to indicate a low oil level. Use
the dipstick to check the oil level. (See
“Engine oil” (P.8-6).)
Page 128 of 508
2-46Instruments and controls
cannot prevent it, nor can it prevent the
theft of interior or exterior vehicle com-
ponents in all situations. Always secure
your vehicle even if parking for a brief
period. Never leave your keys in the
vehicle, and always lock it when unat-
tended. Be aware of your surroundings,
and park in secure, well-lit areas when-
ever possible.
Many devices offering additional protec-
tion, such as component locks, identifica-
tion markers, and tracking systems, are
available at auto supply stores and speci-
alty shops. Your NISSAN dealer may also
offer such equipment. Check with your
insurance company to see if you may be
eligible for discounts for various theft
protection features.
SIC2045
How to arm the vehicle security
system
1. Close all windows.The system can be
armed even if the windows are open.
2. Remove the keys from the vehicle.
3. Close all doors, hood (if so equipped) and liftgate. Lock all doors. The doors
can be locked with the key fob (if so
equipped), Intelligent Key (if so
equipped), the request switch (if so
equipped), or power door lock switch.
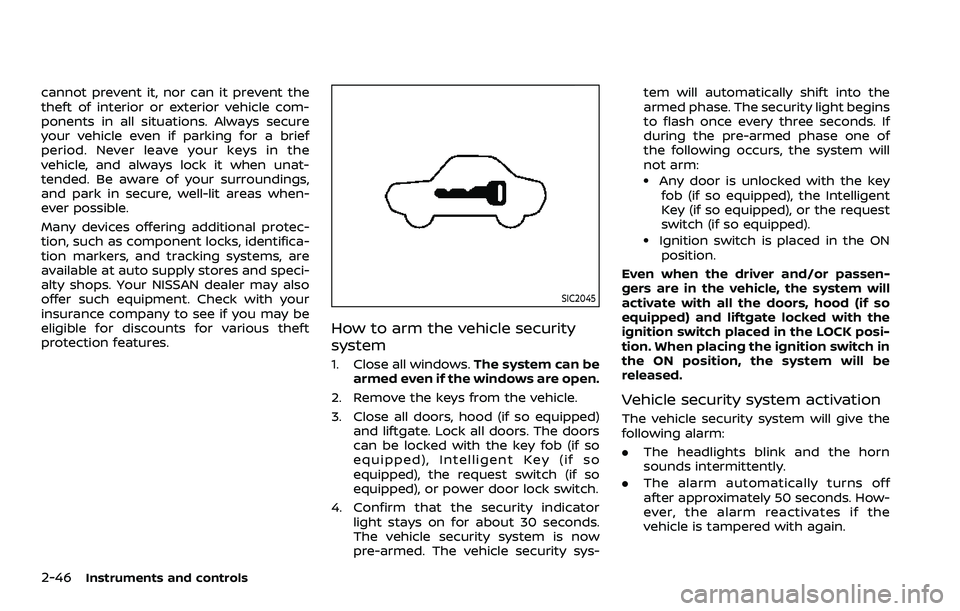
4. Confirm that the security indicator light stays on for about 30 seconds.
The vehicle security system is now
pre-armed. The vehicle security sys- tem will automatically shift into the
armed phase. The security light begins
to flash once every three seconds. If
during the pre-armed phase one of
the following occurs, the system will
not arm:
.Any door is unlocked with the key
fob (if so equipped), the Intelligent
Key (if so equipped), or the request
switch (if so equipped).
.Ignition switch is placed in the ON
position.
Even when the driver and/or passen-
gers are in the vehicle, the system will
activate with all the doors, hood (if so
equipped) and liftgate locked with the
ignition switch placed in the LOCK posi-
tion. When placing the ignition switch in
the ON position, the system will be
released.
Vehicle security system activation
The vehicle security system will give the
following alarm:
. The headlights blink and the horn
sounds intermittently.
. The alarm automatically turns off
after approximately 50 seconds. How-
ever, the alarm reactivates if the
vehicle is tampered with again.
Page 130 of 508
2-48Instruments and controls
SIC2045
Security indicator light
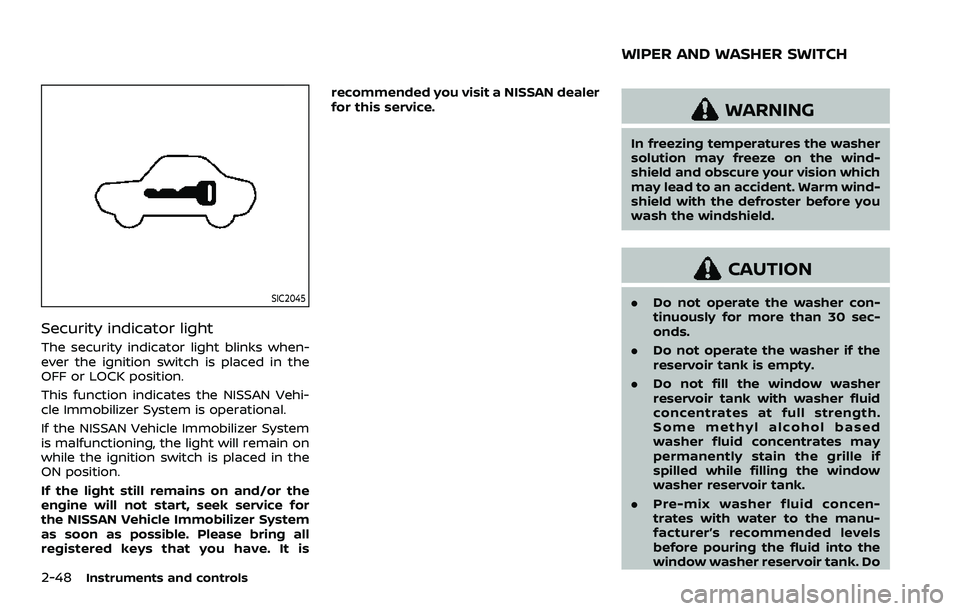
The security indicator light blinks when-
ever the ignition switch is placed in the
OFF or LOCK position.
This function indicates the NISSAN Vehi-
cle Immobilizer System is operational.
If the NISSAN Vehicle Immobilizer System
is malfunctioning, the light will remain on
while the ignition switch is placed in the
ON position.
If the light still remains on and/or the
engine will not start, seek service for
the NISSAN Vehicle Immobilizer System
as soon as possible. Please bring all
registered keys that you have. It isrecommended you visit a NISSAN dealer
for this service.
WARNING
In freezing temperatures the washer
solution may freeze on the wind-
shield and obscure your vision which
may lead to an accident. Warm wind-
shield with the defroster before you
wash the windshield.
CAUTION
.
Do not operate the washer con-
tinuously for more than 30 sec-
onds.
. Do not operate the washer if the
reservoir tank is empty.
. Do not fill the window washer
reservoir tank with washer fluid
concentrates at full strength.
Some methyl alcohol based
washer fluid concentrates may
permanently stain the grille if
spilled while filling the window
washer reservoir tank.
. Pre-mix washer fluid concen-
trates with water to the manu-
facturer’s recommended levels
before pouring the fluid into the
window washer reservoir tank. Do
WIPER AND WASHER SWITCH
Page 131 of 508
not use the window washer re-
servoir tank to mix the washer
fluid concentrate and water.
If the windshield wiper operation is
interrupted by snow or ice, the wiper
may stop moving to protect its motor. If
this occurs, turn the wiper switch to the
OFF position and remove the snow or
ice that is on and around the wiper
arms. In approximately 1 minute, turn
the switch on again to operate the
wiper.
JVI0863X
WINDSHIELD WIPER AND WASHER
OPERATION
The windshield wiper and washer oper-
ates when the ignition switch is in the ON
position.
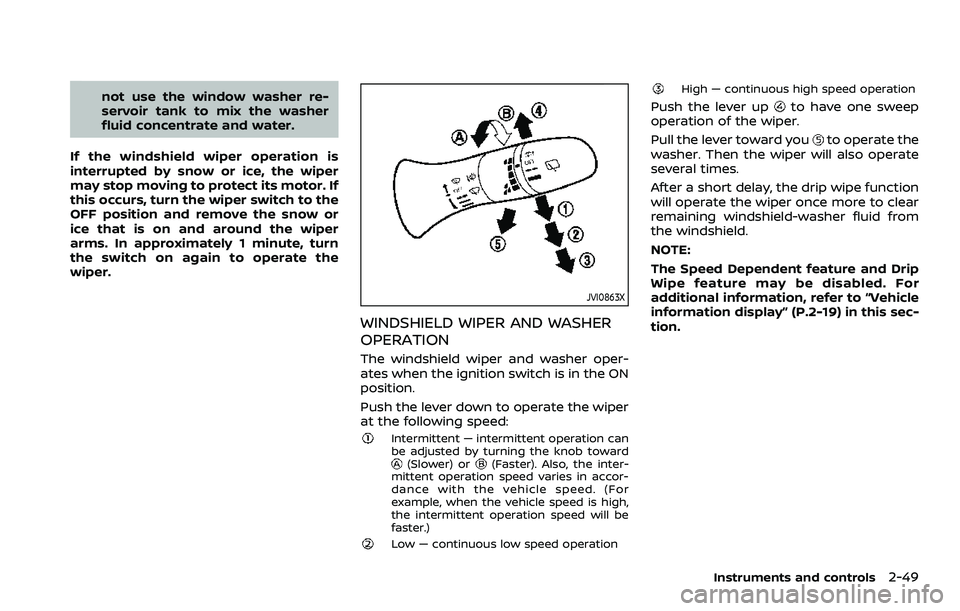
Push the lever down to operate the wiper
at the following speed:
Intermittent — intermittent operation can
be adjusted by turning the knob toward
(Slower) or(Faster). Also, the inter-
mittent operation speed varies in accor-
dance with the vehicle speed. (For
example, when the vehicle speed is high,
the intermittent operation speed will be
faster.)
Low — continuous low speed operation
High — continuous high speed operation
Push the lever upto have one sweep
operation of the wiper.
Pull the lever toward you
to operate the
washer. Then the wiper will also operate
several times.
After a short delay, the drip wipe function
will operate the wiper once more to clear
remaining windshield-washer fluid from
the windshield.
NOTE:
The Speed Dependent feature and Drip
Wipe feature may be disabled. For
additional information, refer to “Vehicle
information display” (P.2-19) in this sec-
tion.
Instruments and controls2-49
Page 132 of 508
2-50Instruments and controls
WARNING
In freezing temperatures the washer
solution may freeze on the rear
window glass and obscure your vi-
sion. Warm the rear window with the
defroster before you wash the rear
window.
CAUTION
.Do not operate the washer con-
tinuously for more than 30 sec-
onds.
. Do not operate the washer if the
reservoir tank is empty.
. Do not fill the window washer
reservoir tank with washer fluid
concentrates at full strength.
Some methyl alcohol based
washer fluid concentrates may
permanently stain the grille if
spilled while filling the window
washer reservoir tank.
. Pre-mix washer fluid concen-
trates with water to the manu-
facturer’s recommended levels
before pouring the fluid into the
window washer reservoir tank. Do not use the window washer re-
servoir tank to mix the washer
fluid concentrate and water.
If the rear window wiper operation is
interrupted by snow or ice, the wiper
may stop moving to protect its motor. If
this occurs, turn the wiper switch to the
OFF position and remove the snow or
ice that is on and around the wiper
arms. In approximately 1 minute, turn
the switch on again to operate the
wiper.JVI0867X
The rear window wiper and washer
operate when the ignition switch is in
the ON position.
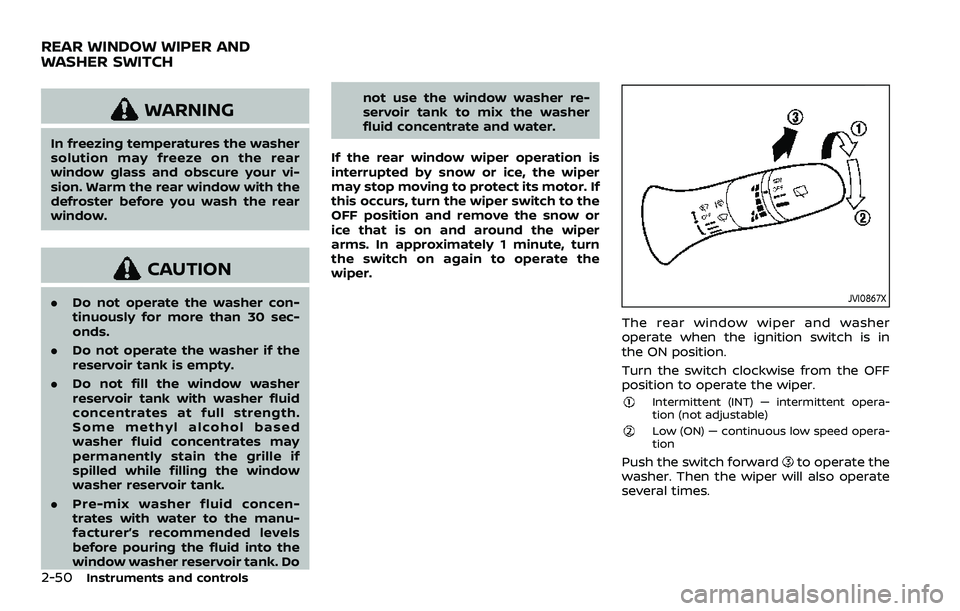
Turn the switch clockwise from the OFF
position to operate the wiper.
Intermittent (INT) — intermittent opera-
tion (not adjustable)
Low (ON) — continuous low speed opera-
tion
Push the switch forwardto operate the
washer. Then the wiper will also operate
several times.
REAR WINDOW WIPER AND
WASHER SWITCH
Page 133 of 508
Reverse Link feature:
When the windshield wiper switch is on,
moving the shift lever to the R (Reverse)
position will operate the rear window
wiper.
NOTE:
The Reverse Link feature may be dis-
abled. For additional information, refer
to “Vehicle information display” (P.2-19).
Wiper drip wipe system:
The wiper will also operate once about 3
seconds after the washer and wiper are
operated. This operation is to wipe
washer fluid that has dripped on the
windshield.
JVI0852XType A
JVI0853X
Type B
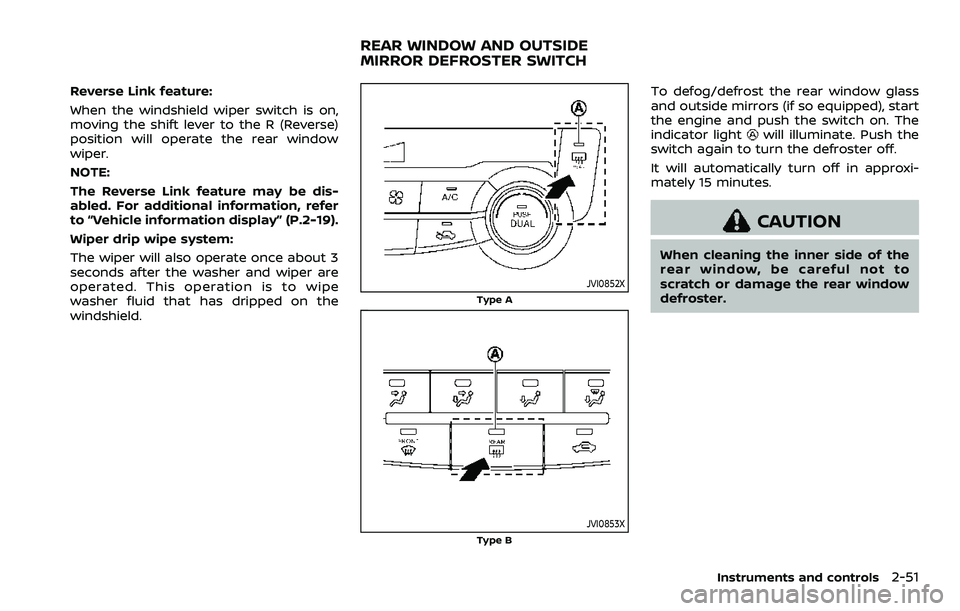
To defog/defrost the rear window glass
and outside mirrors (if so equipped), start
the engine and push the switch on. The
indicator light
will illuminate. Push the
switch again to turn the defroster off.
It will automatically turn off in approxi-
mately 15 minutes.
CAUTION
When cleaning the inner side of the
rear window, be careful not to
scratch or damage the rear window
defroster.
Instruments and controls2-51
REAR WINDOW AND OUTSIDE
MIRROR DEFROSTER SWITCH
Page 147 of 508
system.
. The ECO mode system will turn off
automatically if a malfunction occurs
in the system.
. Turn off the ECO mode system when
acceleration is required such as when:
— driving with a heavy load of pas-
sengers or cargo in the vehicle
— driving on a steep uphill slope
WAC0077X
Instrument Panel
WAC0233XCenter Console Box
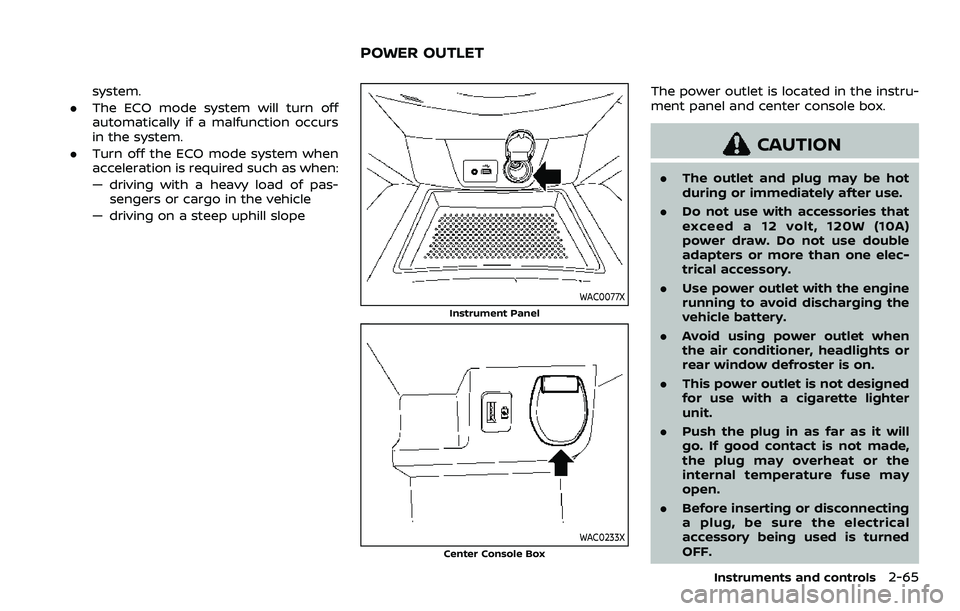
The power outlet is located in the instru-
ment panel and center console box.
CAUTION
. The outlet and plug may be hot
during or immediately after use.
. Do not use with accessories that
exceed a 12 volt, 120W (10A)
power draw. Do not use double
adapters or more than one elec-
trical accessory.
. Use power outlet with the engine
running to avoid discharging the
vehicle battery.
. Avoid using power outlet when
the air conditioner, headlights or
rear window defroster is on.
. This power outlet is not designed
for use with a cigarette lighter
unit.
. Push the plug in as far as it will
go. If good contact is not made,
the plug may overheat or the
internal temperature fuse may
open.
. Before inserting or disconnecting
a plug, be sure the electrical
accessory being used is turned
OFF.
Instruments and controls2-65
POWER OUTLET