2023 NISSAN PATHFINDER reset
[x] Cancel search: resetPage 149 of 665

Press brake to operate
switch
This indicator appears if the automatic
brake hold switch is pushed without de-
pressing the brake pedal while the auto-
matic brake hold function is activated. De-
press the brake pedal and push the switch
to deactivate the automatic brake hold
function.
For additional information, see “Automatic
brake hold” (P. 5-28).
Push brake and start
switch to drive
This indicator appears when the shif t posi-
tion is in the P (Park) position.
This indicator also appears when the ve-
hicle has been started using the Remote
Engine Start (if so equipped) function.
This indicator means that the engine will
start by pushing the ignition switch with
the brake pedal depressed. You can start
the engine from any position of the ignition
switch.
Rear seat belt warning
• This warning includes display of the seatbelts for rear positions only. Rear seat
belts that are unfastened will appear red.
• If any rear seat belts are unfastened when the ignition switch is pushed to the
ON position, this warning will display for
about one minute, or until dismissed.
• When a rear seat belt is changed from fastened to unfastened, this warning will
display for over one minute, or until dis-
missed, and the seat belt warning light
will turn on.
• If the vehicle is driven above 9 mph (15 km/h) during or af ter the status change,
this warning will display, the seat belt
warning light will blink, and the chime will
sound for over one minute. During this
time, the warning and chime cannot be
dismissed unless the rear seat belt is fas-
tened again. Once the seat belt warning
light and chime have turned off, the dis-
play will remain until dismissed.
NOTE:
•While it appears, this message will also
display the status of all doors and rear
hatch.
• Opening and closing a rear door while
stopped will reset this warning, similar
to pushing the ignition switch to ON
again.
Reminder: Turn OFF
headlights
This warning appears when the headlights
are lef t in the ON position when exiting the
vehicle. Place the headlight switch in the
OFF or AUTO position. For additional infor-
mation, see “Headlight and turn signal
switch” (P. 2-82).
Shipping Mode On Push Storage Fuse
This warning may appear if the extended
storage switch is not pushed in. When this
warning appears, push in the extended
storage switch to turn off the warning. For
additional information, see “Extended stor-
age switch” (P. 2-106).
2-42Instruments and controls
Page 158 of 665

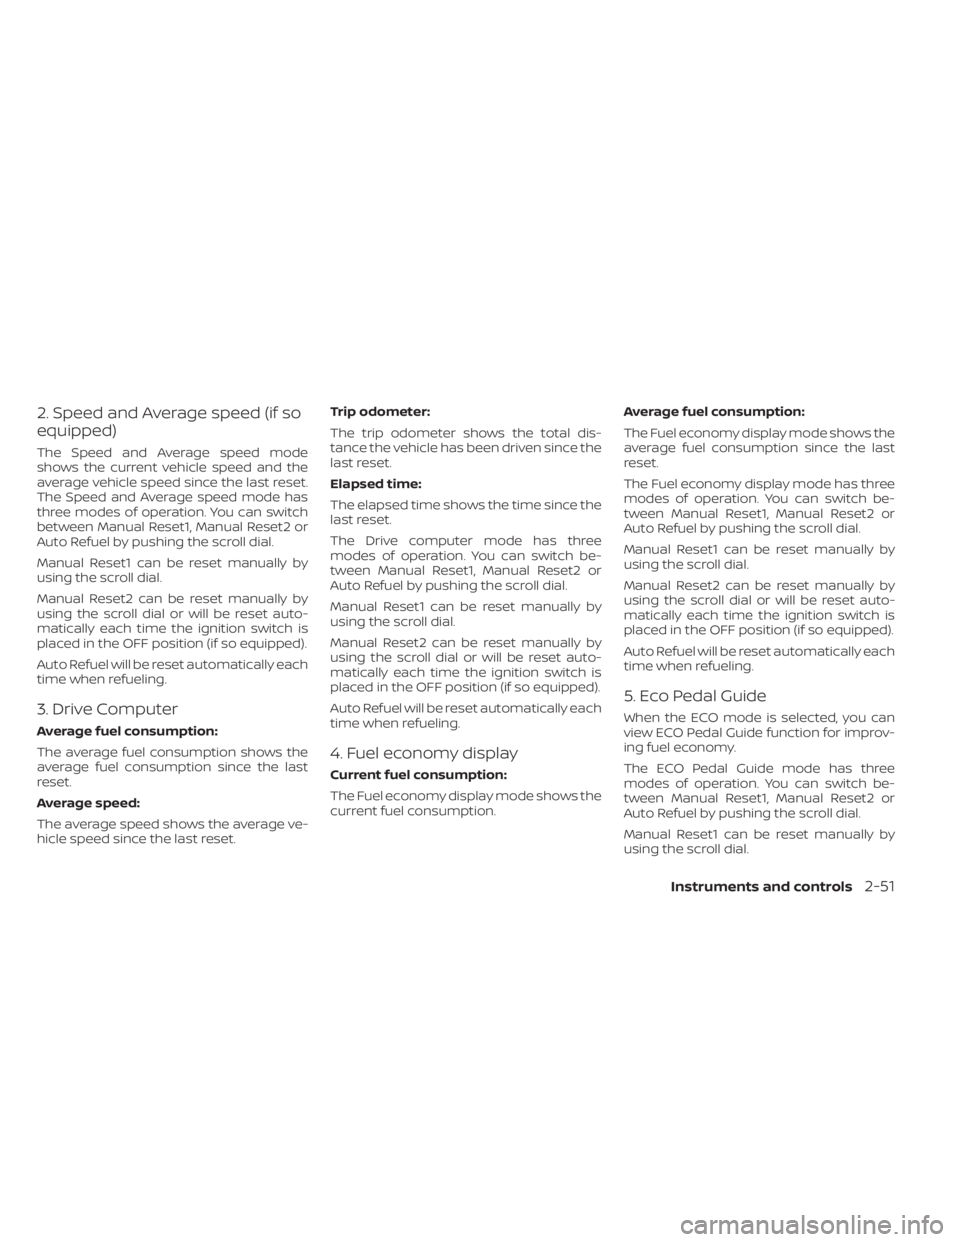
2. Speed and Average speed (if so
equipped)
The Speed and Average speed mode
shows the current vehicle speed and the
average vehicle speed since the last reset.
The Speed and Average speed mode has
three modes of operation. You can switch
between Manual Reset1, Manual Reset2 or
Auto Refuel by pushing the scroll dial.
Manual Reset1 can be reset manually by
using the scroll dial.
Manual Reset2 can be reset manually by
using the scroll dial or will be reset auto-
matically each time the ignition switch is
placed in the OFF position (if so equipped).
Auto Refuel will be reset automatically each
time when refueling.
3. Drive Computer
Average fuel consumption:
The average fuel consumption shows the
average fuel consumption since the last
reset.
Average speed:
The average speed shows the average ve-
hicle speed since the last reset.Trip odometer:
The trip odometer shows the total dis-
tance the vehicle has been driven since the
last reset.
Elapsed time:
The elapsed time shows the time since the
last reset.
The Drive computer mode has three
modes of operation. You can switch be-
tween Manual Reset1, Manual Reset2 or
Auto Refuel by pushing the scroll dial.
Manual Reset1 can be reset manually by
using the scroll dial.
Manual Reset2 can be reset manually by
using the scroll dial or will be reset auto-
matically each time the ignition switch is
placed in the OFF position (if so equipped).
Auto Refuel will be reset automatically each
time when refueling.
4. Fuel economy display
Current fuel consumption:
The Fuel economy display mode shows the
current fuel consumption.
Average fuel consumption:
The Fuel economy display mode shows the
average fuel consumption since the last
reset.
The Fuel economy display mode has three
modes of operation. You can switch be-
tween Manual Reset1, Manual Reset2 or
Auto Refuel by pushing the scroll dial.
Manual Reset1 can be reset manually by
using the scroll dial.
Manual Reset2 can be reset manually by
using the scroll dial or will be reset auto-
matically each time the ignition switch is
placed in the OFF position (if so equipped).
Auto Refuel will be reset automatically each
time when refueling.
5. Eco Pedal Guide
When the ECO mode is selected, you can
view ECO Pedal Guide function for improv-
ing fuel economy.
The ECO Pedal Guide mode has three
modes of operation. You can switch be-
tween Manual Reset1, Manual Reset2 or
Auto Refuel by pushing the scroll dial.
Manual Reset1 can be reset manually by
using the scroll dial.
Instruments and controls2-51
Page 159 of 665

Manual Reset2 can be reset manually by
using the scroll dial or will be reset auto-
matically each time the ignition switch is
placed in the OFF position (if so equipped).
Auto Refuel will be reset automatically each
time when refueling.
For additional information, see “ECO Mode”
(P. 5-34).
6. Tire Pressures
The tire pressure mode shows the pres-
sure of all four tires while the vehicle is
driven.
With the “Tire Pres ECO advice” function ON,
when the tire pressure is getting low,
“Check Tire Pressures for Best Fuel
Economy” or “Add air for Best Fuel
Economy” appears. For additional informa-
tion, see “ECO Mode Setting” (P. 5-34) or “Tire
Pres ECO advice” (P. 5-34).
When the “Tire Pressure Low — Add Air”
warning appears, the display can be
switched to the tire pressure mode by
pushing the scroll dial to reveal additional
details on the displayed warning.
7. Intelligent 4x4 torque
distribution display (if so
equipped)
When the Intelligent 4x4 torque distribution
display is selected, you can view the distri-
bution ratio of the transmission torque to
the front and rear wheels during driving.
8. Compass (if so equipped)
This display indicates the direction the ve-
hicle is heading.
9. Navigation (if so equipped)
When the route guidance is set in the navi-
gation system, this item shows the naviga-
tion route information.
10. Audio
The audio mode shows the status of audio
information.
11. Driver Assistance
The Driver Assistance mode shows the op-
erating condition for the following systems:
•Forward–– Automatic Emergency Braking (AEB)with Pedestrian Detection system –
– Intelligent Forward Collision Warning
(I-FCW)
• Lane: –– Lane Departure Warning (LDW)
–– Intelligent Lane Intervention (I-LI)
• Blind Spot: –– Blind Spot Warning (BSW)
–– Intelligent Blind Spot Intervention (I-
BSI) (if so equipped)
For additional information, see “Intelligent
Blind Spot Intervention (I-BSI)” (P. 5-65),
“Blind Spot Warning (BSW)” (P. 5-52), “Lane
Departure Warning (LDW)” (P. 5-38), “Auto-
matic Emergency Braking (AEB) with Pe-
destrian Detection” (P. 5-137), “Intelligent
Forward Collision Warning (I-FCW)” (P. 5-149)
or “Intelligent Lane Intervention (I-LI)”
(P. 5-45).
12. ProPILOT Assist (if so equipped)
The ProPILOT Assist mode shows operat-
ing conditions for the following systems:
• Intelligent Cruise Control (ICC)
• Steering Assist
The display will also be shown when the
ProPILOT Assist is turned on. For additional
information, see “ProPILOT Assist” (P. 5-88).
2-52Instruments and controls
Page 161 of 665

For models with the full-screen display, the
meter screen view can be changed to ex-
pand the vehicle information display.
To change the meter screen view:
1. Push the shortcut menu button
OAon
the lef t side of the steering wheel. “Short-
cut Menu” appears on the vehicle infor-
mation display.
2. Select “Change Meter View” by rotating the scroll dial
OBand pushing it to
change the view.
OIL CONTROL SYSTEM (if so
equipped)
The oil control system can be accessed in
the Maintenance portion of the vehicle in-
formation display settings.
Engine oil information informs the distance
to oil change. Never exceed one year or
10,000 miles (16,000 km) between oil
change intervals for the 3.5L 6 cylinder
(VQ35DD engine model).
Display when
ignition is ON Display timing Action Re-
quired
Engine Oil Ser-
vice due in xxx
miles Remaining oil
life is less than
940 miles (1500
km). Plan to have
your vehicle
serviced.
Engine Oil Ser-
vice due Remaining oil
lifeis0miles(0
km). Have your ve-
hicle serviced
within two
weeks or less
than 500 miles
(800 km).
The oil change interval cannot be adjusted
manually.
The distance to oil change interval is calcu-
lated depending on the driving conditions
and set automatically by the oil control sys-
tem. A reminder will be displayed when ap-
proaching the end of the service interval.
When the Factory Reset option is selected
in the vehicle information display, the oil
control system will also be reset to initial
value. Please change the engine oil when
Factory Reset is selected.
CAUTION
If the oil replacement indicator is dis-
played, change the engine oil within
two weeks or less than 500 miles (800
km).
Operating the vehicle with deteriorated
oil can damage the engine.
To reset oil control system:
1. Place the ignition switch in the ON position.
2. Push the
andbuttons located
on the steering wheel until “Settings” dis-
plays in the vehicle information display.
Use the scroll dial to select “Mainte-
nance”. Then, press the scroll dial.
3. Select the “Service” and press the scroll dial.
4. Press the scroll dial according to the re- set instructions displayed at the bottom
of the “Service” maintenance screen.
For additional information, see “Mainte-
nance” (P. 2-62).
2-54Instruments and controls
Page 162 of 665

SETTINGS
The setting mode allows you to change the
information displayed in the vehicle infor-
mation display:
• VDC Setting
• Driver Assistance
• Personal Display
• Head—Up Display (if so equipped)• ECO Mode Setting
• TPMS Setting
• Clock
• Vehicle Settings
• Maintenance
• Customize Display
• Unit/Language
• Factory Reset
VDC Setting
The VDC Setting menu allows the user to enable or disable the Vehicle Dynamic Control (VDC) system.
Some menu items shown below may not be equipped on your vehicle.
Menu item
Explanation
System Allows the user to turn the VDC system on or off. For additional information, see “Vehicle Dynamic Control
(VDC) system” (P. 5-177).
Instruments and controls2-55
Page 165 of 665

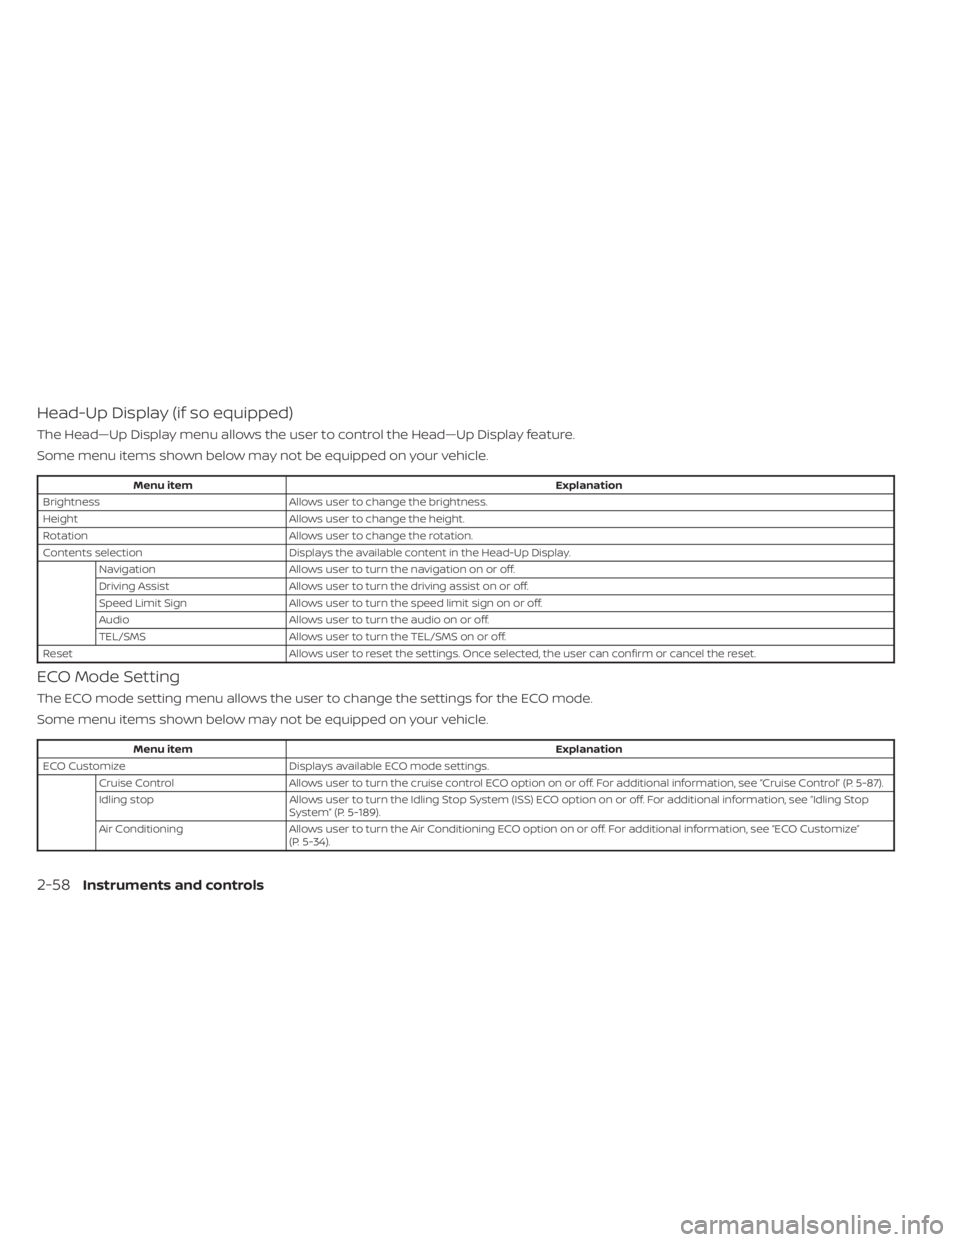
Head-Up Display (if so equipped)
The Head—Up Display menu allows the user to control the Head—Up Display feature.
Some menu items shown below may not be equipped on your vehicle.
Menu itemExplanation
Brightness Allows user to change the brightness.
Height Allows user to change the height.
Rotation Allows user to change the rotation.
Contents selection Displays the available content in the Head-Up Display.
Navigation Allows user to turn the navigation on or off.
Driving Assist Allows user to turn the driving assist on or off.
Speed Limit Sign Allows user to turn the speed limit sign on or off.
Audio Allows user to turn the audio on or off.
TEL/SMS Allows user to turn the TEL/SMS on or off.
Reset Allows user to reset the settings. Once selected, the user can confirm or cancel the reset.
ECO Mode Setting
The ECO mode setting menu allows the user to change the settings for the ECO mode.
Some menu items shown below may not be equipped on your vehicle.
Menu item Explanation
ECO Customize Displays available ECO mode settings.
Cruise Control Allows user to turn the cruise control ECO option on or off. For additional information, see “Cruise Control” (P. 5-87).
Idling stop Allows user to turn the Idling Stop System (ISS) ECO option on or off. For additional information, see “Idling Stop
System” (P. 5-189).
Air Conditioning Allows user to turn the Air Conditioning ECO option on or off. For additional information, see “ECO Customize”
(P. 5-34).
2-58Instruments and controls
Page 169 of 665

Maintenance
The maintenance menu allows the user to set reminders for various vehicle maintenance items.
Some menu items shown below may not be equipped on your vehicle.
WARNING
The tire replacement indicator is not a substitute for regular tire checks, including tire pressure checks. For additional informa-
tion, see “Changing wheels and tires” (P. 8-39). Many factors including tire inflation, alignment, driving habits and road conditions
affect tire wear and when tires should be replaced. Setting the tire replacement indicator for a certain driving distance does not
mean your tires will last that long. Use the tire replacement indicator as a guide only and always perform regular tire checks.
Failure to perform regular tire checks, including tire pressure checks could result in tire failure. Serious vehicle damage could
occur and may lead to a collision, which could result in serious personal injury or death.
Menu item Explanation
Service Allows user to reset the service interval. This should only be done af ter completing an oil and filter change main-
tenance. For additional information, see “Oil Control System” (P. 2-54).
Air Filter Allows user to set a reminder at a desired interval to perform an air filter change, or reset the reminder af ter com-
pleting the maintenance.
Tire Allows user to set a reminder at a desired interval to perform a tire rotation/replacement, or reset the reminder
af ter completing the tire service.
Other Allows user to set a reminder at a desired interval to perform additional maintenance items (other than oil, air fil-
ter, or tire), or reset the reminder af ter completing the maintenance.
2-62Instruments and controls
Page 171 of 665

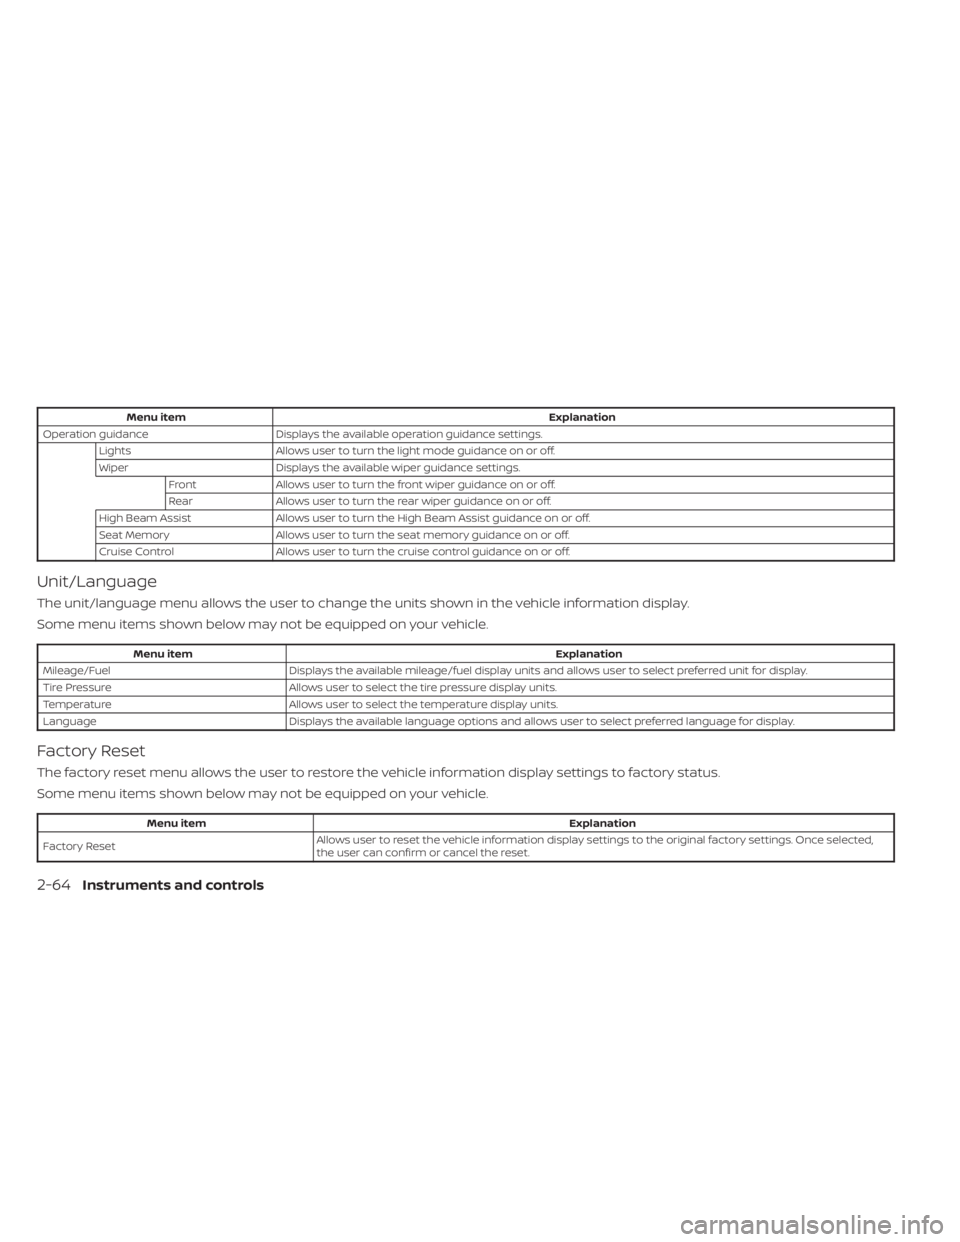
Menu itemExplanation
Operation guidance Displays the available operation guidance settings.
Lights Allows user to turn the light mode guidance on or off.
Wiper Displays the available wiper guidance settings.
Front Allows user to turn the front wiper guidance on or off.
Rear Allows user to turn the rear wiper guidance on or off.
High Beam Assist Allows user to turn the High Beam Assist guidance on or off.
Seat Memory Allows user to turn the seat memory guidance on or off.
Cruise Control Allows user to turn the cruise control guidance on or off.
Unit/Language
The unit/language menu allows the user to change the units shown in the vehicle information display.
Some menu items shown below may not be equipped on your vehicle.
Menu item Explanation
Mileage/Fuel Displays the available mileage/fuel display units and allows user to select preferred unit for display.
Tire Pressure Allows user to select the tire pressure display units.
Temperature Allows user to select the temperature display units.
Language Displays the available language options and allows user to select preferred language for display.
Factory Reset
The factory reset menu allows the user to restore the vehicle information display settings to factory status.
Some menu items shown below may not be equipped on your vehicle.
Menu item Explanation
Factory Reset Allows user to reset the vehicle information display setti
ngs to the original factory settings. Once selected,
the user can confirm or cancel the reset.
2-64Instruments and controls