Page 18 of 558
1.6L 4 cylinder (HR16DE engine model)
1. Engine coolant reservoir (P. 8-4)2. Windshield-washer fluid reservoir
(P. 8-10)
3. Engine oil filler cap (P. 8-5) 4. Engine oil dipstick (P. 8-5)
5. Brake fluid reservoir (P. 8-9)
6. Fuse box (P. 8-18)
7. Battery (P. 8-11)
8. Fuse box (P. 8-18)
9. Air cleaner (P. 8-15)
10. Engine drive belt location (P. 8-13)
NOTE:
Your vehicle may not be equipped with
an engine cover.
LDI3471
ENGINE COMPARTMENT CHECK
LOCATIONS
0-8Illustrated table of contents
Page 123 of 558

This indicator means that the engine will
start by pushing the ignition switch with
the brake pedal depressed. You can start
the engine from any position of the ignition
switch.
Rear seat belt reminder
This warning appears for 65 seconds af ter
the ignition is placed in the ON position and
the engine is started.
This warning message shows the status
of the three rear seat belts. When one of
the rear seat belts are buckled, the corre-
sponding rear seat belt indicator will ap-
pear white. When one of the rear seat belts
are unbuckled, the corresponding rear seat
belt indicator will appear red.
Af ter a change in buckle status, a chime will
sound and the warning will appear for an-
other 65 seconds.
Release Parking Brake
This warning appears in the message area
of the vehicle information display when
the parking brake is set and the vehicle is
driven.
Reminder: Turn OFF
Headlights
This warning appears when the headlights
are lef t in the ON position when exiting the
vehicle. Place the headlight switch in the
OFF (if so equipped) or AUTO position. For
additional information, see “Headlight and
turn signal switch” (P. 2-44).
Shif t to Park
This warning appears when the ignition
switch is in the OFF position and the shif t
lever is not in the P (Park) position. Also, a
chime sounds when the ignition switch is
in the OFF position.
If this warning appears, move the shif t lever
to the P (Park) position and start the engine.
Shipping Mode On Push Storage Fuse
This warning may appear if the extended
storage switch is not pushed in. When this
warning appears, push in the extended
storage switch to turn off the warning. For
additional information, see “Extended stor-
age switch” (P. 2-60).
Steep slope Apply foot
brake
This warning appears if the “Caution Steep
slope” warning has appeared over about 3
minutes. Then the parking brake will auto-
matically be applied and the brake force of
the automatic brake hold will be released,
and the vehicle may move or roll away un-
expectedly. Apply the foot brake to stop the
vehicle from moving.
For additional information, see “Automatic
brake hold” (P. 5-25).
Steering lock release
malfunction indicator
This indicator appears when the steering
lock cannot be released.
If this indicator appears, push the ignition
switch while lightly turning the steering
wheel right and lef t.
Tire
This indicator appears when the customer
set distance is reached for replacing tires.
You can set or reset the distance for replac-
ing tires.
Instruments and controls2-35
Page 148 of 558
•Push the plug in as far as it will go. If
good contact is not made, the plug
may overheat or the internal tem-
perature fuse may open.
• When not in use, be sure to close the
cap. Do not allow water or any other
liquid to contact the outlet.
The extended storage switch is used when
the vehicle is in transit from the factory. It is
located in the fuse panel
OAwhich is on the
driver’s side lef t kick panel, near the floor, on
the inside of the panel. If any electrical
equipment does not operate, ensure the
extended storage switch is pushed fully in
place, as shown.
LIC3581LIC3266
Pulled position
EXTENDED STORAGE SWITCH
2-60Instruments and controls
Page 451 of 558

8 Do-it-yourself
Maintenance precautions.......................8-2
Engine compartment check locations ...........8-3
Engine cooling system ..........................8-4
Checking engine coolant level ................8-5
Changing engine coolant ....................8-5
Engine oil .......................................8-5
Checking engine oil level .....................8-5
Changing engine oil and oil filter ..............8-6
Continuously Variable Transmission (CVT)
fluid .............................................8-9
Brake fluid .......................................8-9
Windshield-washer fluid ........................8-10
Windshield-washer fluid reservoir ...........8-10
Battery.......................................... 8-11
Jump starting ............................... 8-12
Variable voltage control system ................8-13
Drive belt ....................................... 8-13
Spark plugs .................................... 8-14
Replacing spark plugs ....................... 8-14
Air cleaner ..................................... 8-15
In-cabin microfilter .......................... 8-15Windshield wiper blades
........................8-16
Cleaning .................................... 8-16
Replacing ................................... 8-16
Brakes ......................................... 8-17
Fuses .......................................... 8-18
Engine compartment .......................8-18
Passenger compartment ...................8-20
Passenger compartment
(with electronic parking brake) ..............8-21
Battery replacement ........................... 8-22
NISSAN Intelligent Key® ......................8-23
Lights .......................................... 8-24
Headlights .................................. 8-24
Fog lights (if so equipped) ...................8-25
Exterior and interior lights ...................8-26
Wheels and tires ............................... 8-28
Tire pressure ................................ 8-28
Tire labeling ................................. 8-32
Types of tires ................................ 8-35
Tir
e chains .................................. 8-36
Changing wheels and tires ..................8-37
Page 453 of 558
1.6L 4 cylinder (HR16DE engine model)
1. Engine coolant reservoir
2. Windshield-washer fluid reservoir
3. Engine oil filler cap4. Engine oil dipstick
5. Brake fluid reservoir
6. Fuse box
7. Battery8. Fuse box
9. Air cleaner
10. Engine drive belt location
NOTE:
Your vehicle may not be equipped with
an engine cover.
LDI3471
ENGINE COMPARTMENT CHECK
LOCATIONS
Do-it-yourself8-3
Page 468 of 558

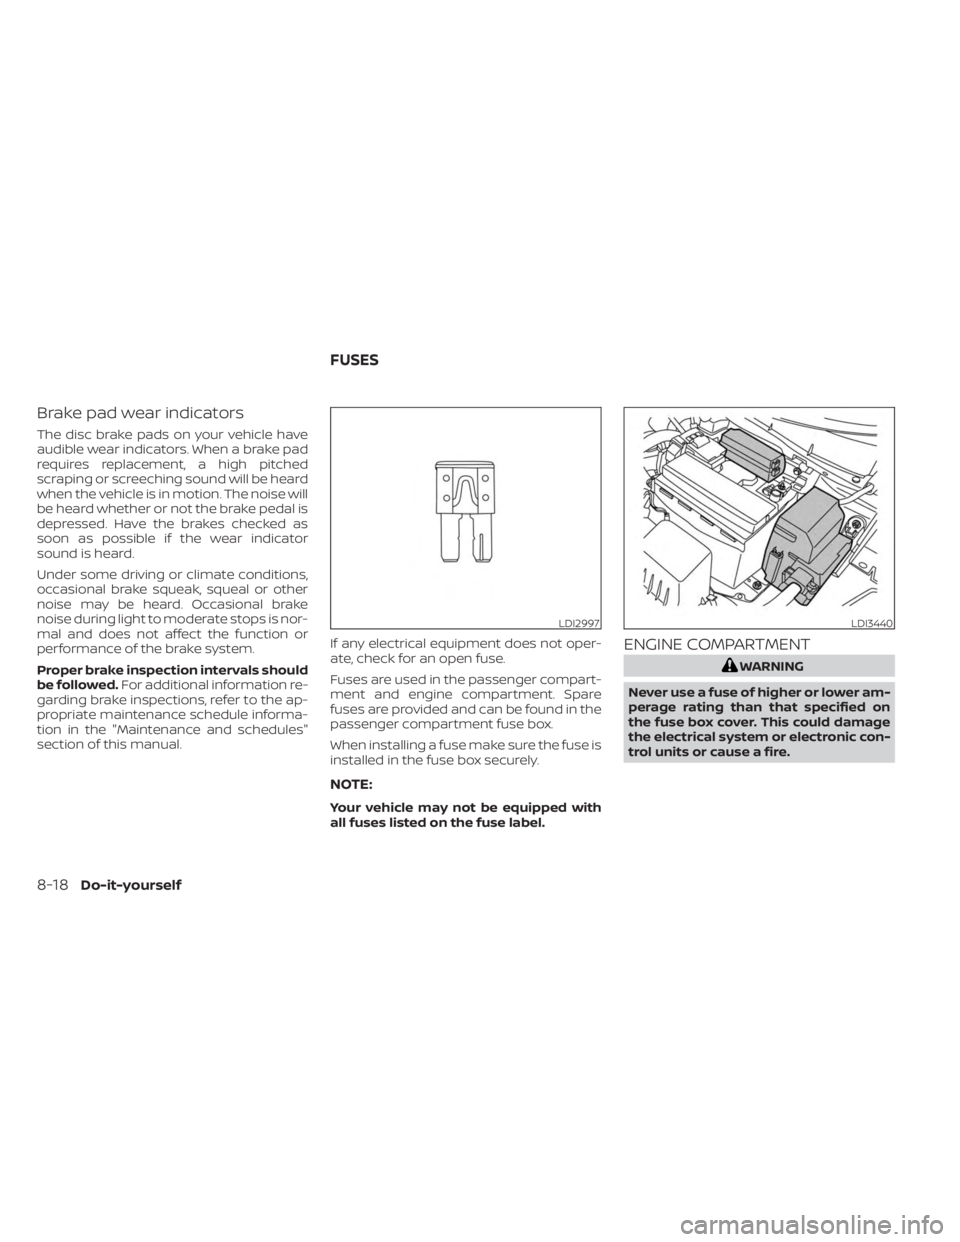
Brake pad wear indicators
The disc brake pads on your vehicle have
audible wear indicators. When a brake pad
requires replacement, a high pitched
scraping or screeching sound will be heard
when the vehicle is in motion. The noise will
be heard whether or not the brake pedal is
depressed. Have the brakes checked as
soon as possible if the wear indicator
sound is heard.
Under some driving or climate conditions,
occasional brake squeak, squeal or other
noise may be heard. Occasional brake
noise during light to moderate stops is nor-
mal and does not affect the function or
performance of the brake system.
Proper brake inspection intervals should
be followed.For additional information re-
garding brake inspections, refer to the ap-
propriate maintenance schedule informa-
tion in the "Maintenance and schedules"
section of this manual. If any electrical equipment does not oper-
ate, check for an open fuse.
Fuses are used in the passenger compart-
ment and engine compartment. Spare
fuses are provided and can be found in the
passenger compartment fuse box.
When installing a fuse make sure the fuse is
installed in the fuse box securely.
NOTE:
Your vehicle may not be equipped with
all fuses listed on the fuse label.
ENGINE COMPARTMENT
WARNING
Never use a fuse of higher or lower am-
perage rating than that specified on
the fuse box cover. This could damage
the electrical system or electronic con-
trol units or cause a fire.
LDI2997LDI3440
FUSES
8-18Do-it-yourself
Page 469 of 558
If any electrical equipment does not come
on, check for an open fuse.
1. Be sure the ignition switch and the head-light switch are OFF.
2. Open the engine hood.
3. Remove the fuse box cover by pushing the tab and lif ting the cover up.
4. Remove the fuse with the fuse puller. The fuse puller is located in the center
of the fuse block in the passenger
compartment.
5. If the fuse is open
OA, replace it with a
new fuse
OB.
6. If a new fuse also opens, have the elec- trical system checked and repaired. It is
recommended that you visit a NISSAN
dealer for this service.
Fusible links
If any electrical equipment does not oper-
ate and the fuses are in good condition,
check the fusible links in the holder. If any of
the fusible links are melted, replace only
with Genuine NISSAN parts.
For checking and replacing the fusible links,
it is recommended that you visit a NISSAN
dealer for this service.
LDI3232
Do-it-yourself8-19
Page 470 of 558

PASSENGER COMPARTMENT
WARNING
Never use a fuse of a higher or lower
amperage rating than that specified on
the fuse box cover. This could damage
the electrical system or electronic con-
trol units or cause a fire.
If any electrical equipment does not oper-
ate, check for an open fuse.
NOTE:
The fuse box is located on the lef t wall of
the driver's side foot well, below the fuel
door and hood release levers.
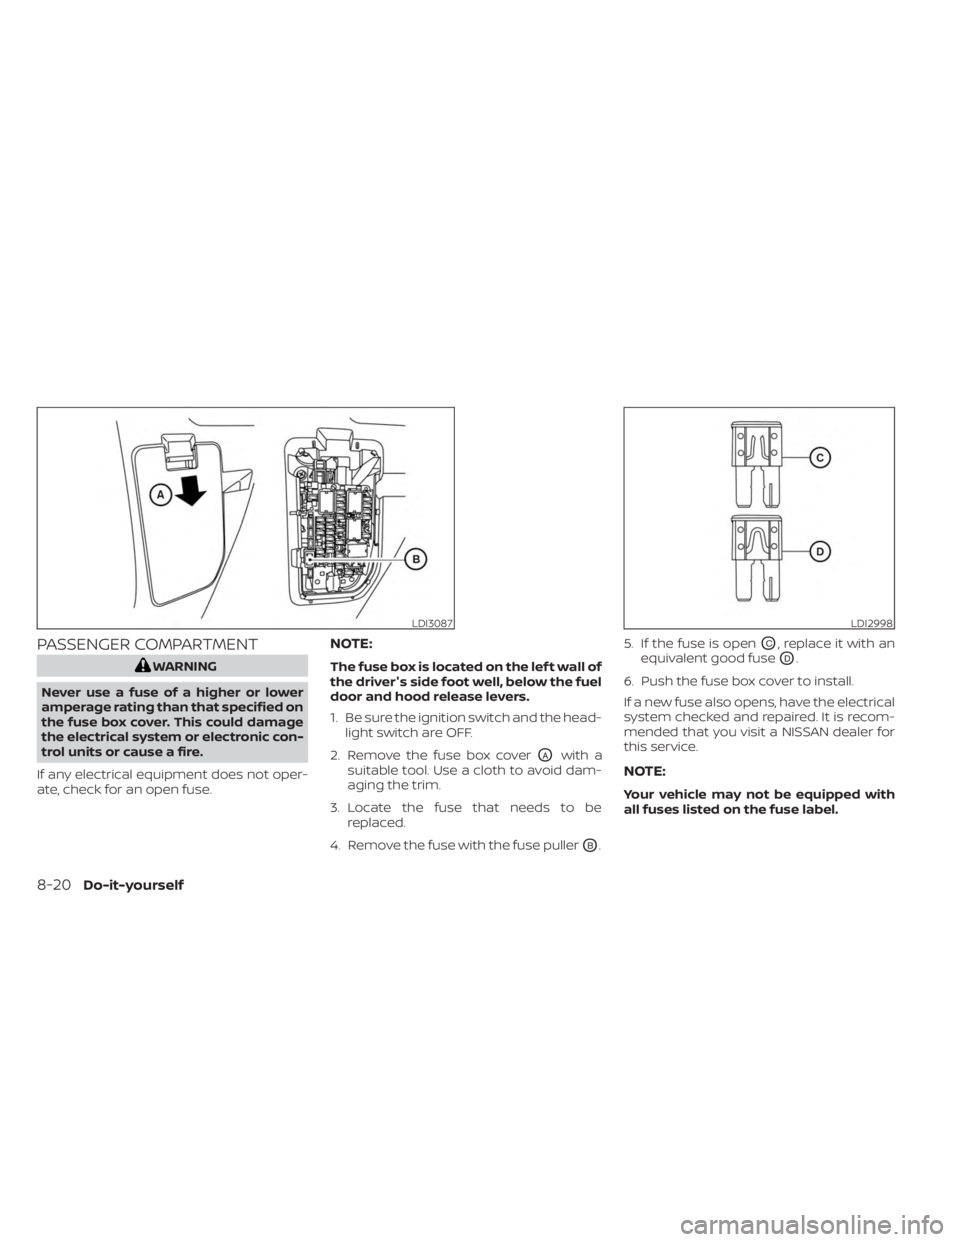
1. Be sure the ignition switch and the head- light switch are OFF.
2. Remove the fuse box cover
OAwith a
suitable tool. Use a cloth to avoid dam-
aging the trim.
3. Locate the fuse that needs to be replaced.
4. Remove the fuse with the fuse puller
OB. 5. If the fuse is open
OC, replace it with an
equivalent good fuse
OD.
6. Push the fuse box cover to install.
If a new fuse also opens, have the electrical
system checked and repaired. It is recom-
mended that you visit a NISSAN dealer for
this service.
NOTE:
Your vehicle may not be equipped with
all fuses listed on the fuse label.
LDI3087LDI2998
8-20Do-it-yourself