2023 NISSAN KICKS change time
[x] Cancel search: change timePage 6 of 558
MODIFICATION OF YOUR VEHICLE
This vehicle should not be modified.
Modification could affect its perfor-
mance, safety, emissions or durability
and may even violate governmental
regulations. In addition, damage or per-
formance problems resulting from
modifications may not be covered un-
der NISSAN warranties.
WARNING
Installing an af termarket On-Board Di-
agnostic (OBD) plug-in device that uses
the port during normal driving, for ex-
ample remote insurance company
monitoring, remote vehicle diagnos-
tics, telematics or engine reprogram-
ming, may cause interference or dam-
age to vehicle systems. We do not
recommend or endorse the use of any
af termarket OBD plug-in devices, un-
less specifically approved by NISSAN.
The vehicle warranty may not cover
damage caused by any af termarket
plug-in device. This manual includes information for all
features and equipment available on this
model. Features and equipment in your ve-
hicle may vary depending on model, trim
level, options selected, order, date of pro-
duction, region or availability. Therefore,
you may find information about features or
equipment that are not included or in-
stalled on your vehicle.
All information, specifications and illustra-
tions in this manual are those in effect at
the time of printing. NISSAN reserves the
right to change specifications, perfor-
mance, design or component suppliers
without notice and without obligation.
From time to time, NISSAN may update or
revise this manual to provide Owners with
the most accurate information currently
available. Please carefully read and retain
with this manual all revision updates sent
to you by NISSAN to ensure you have ac-
cess to accurate and up-to-date informa-
tion regarding your vehicle. Current ver-
sions of vehicle Owner's Manuals and any
updates can also be found in the Owner
section of the NISSAN website at
https://
owners.nissanusa.com/nowners/
navigation/manualsGuide . If you have
questions concerning any information in
your Owner's Manual, contact NISSAN Con-
sumer Affairs. For contact information, re- fer to the NISSAN CUSTOMER CARE PRO-
GRAM page in this Owner’s Manual.
IMPORTANT INFORMATION ABOUT
THIS MANUAL
You will see various symbols in this manual.
They are used in the following ways:
WARNING
This is used to indicate the presence of
a hazard that could cause death or se-
rious personal injury. To avoid or re-
duce the risk, the procedures must be
followed precisely.
CAUTION
This is used to indicate the presence of
a hazard that could cause minor or
moderate personal injury or damage
to your vehicle. To avoid or reduce the
risk, the procedures must be followed
carefully.
WHEN READING THE MANUAL
Page 96 of 558
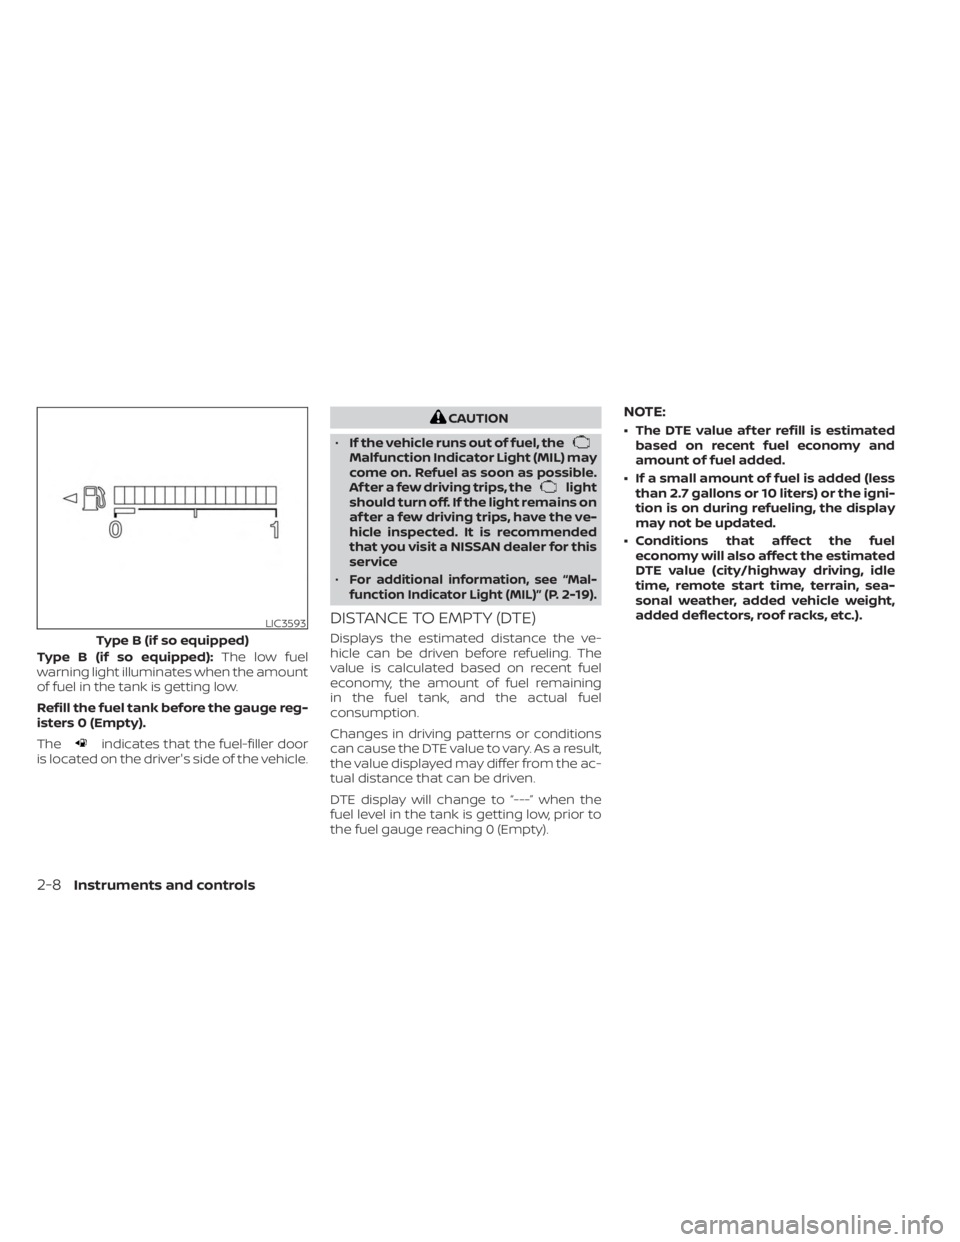
Type B (if so equipped):The low fuel
warning light illuminates when the amount
of fuel in the tank is getting low.
Refill the fuel tank before the gauge reg-
isters 0 (Empty).
The
indicates that the fuel-filler door
is located on the driver's side of the vehicle.
CAUTION
• If the vehicle runs out of fuel, the
Malfunction Indicator Light (MIL) may
come on. Refuel as soon as possible.
Af ter a few driving trips, the
light
should turn off. If the light remains on
af ter a few driving trips, have the ve-
hicle inspected. It is recommended
that you visit a NISSAN dealer for this
service
•
For additional information, see “Mal-
function Indicator Light (MIL)” (P. 2-19).
DISTANCE TO EMPTY (DTE)
Displays the estimated distance the ve-
hicle can be driven before refueling. The
value is calculated based on recent fuel
economy, the amount of fuel remaining
in the fuel tank, and the actual fuel
consumption.
Changes in driving patterns or conditions
can cause the DTE value to vary. As a result,
the value displayed may differ from the ac-
tual distance that can be driven.
DTE display will change to “---” when the
fuel level in the tank is getting low, prior to
the fuel gauge reaching 0 (Empty).
NOTE:
• The DTE value af ter refill is estimated based on recent fuel economy and
amount of fuel added.
• If a small amount of fuel is added (less than 2.7 gallons or 10 liters) or the igni-
tion is on during refueling, the display
may not be updated.
• Conditions that affect the fuel economy will also affect the estimated
DTE value (city/highway driving, idle
time, remote start time, terrain, sea-
sonal weather, added vehicle weight,
added deflectors, roof racks, etc.).
LIC3593
Type B (if so equipped)
2-8Instruments and controls
Page 97 of 558
TRIP COMPUTER (if so equipped)
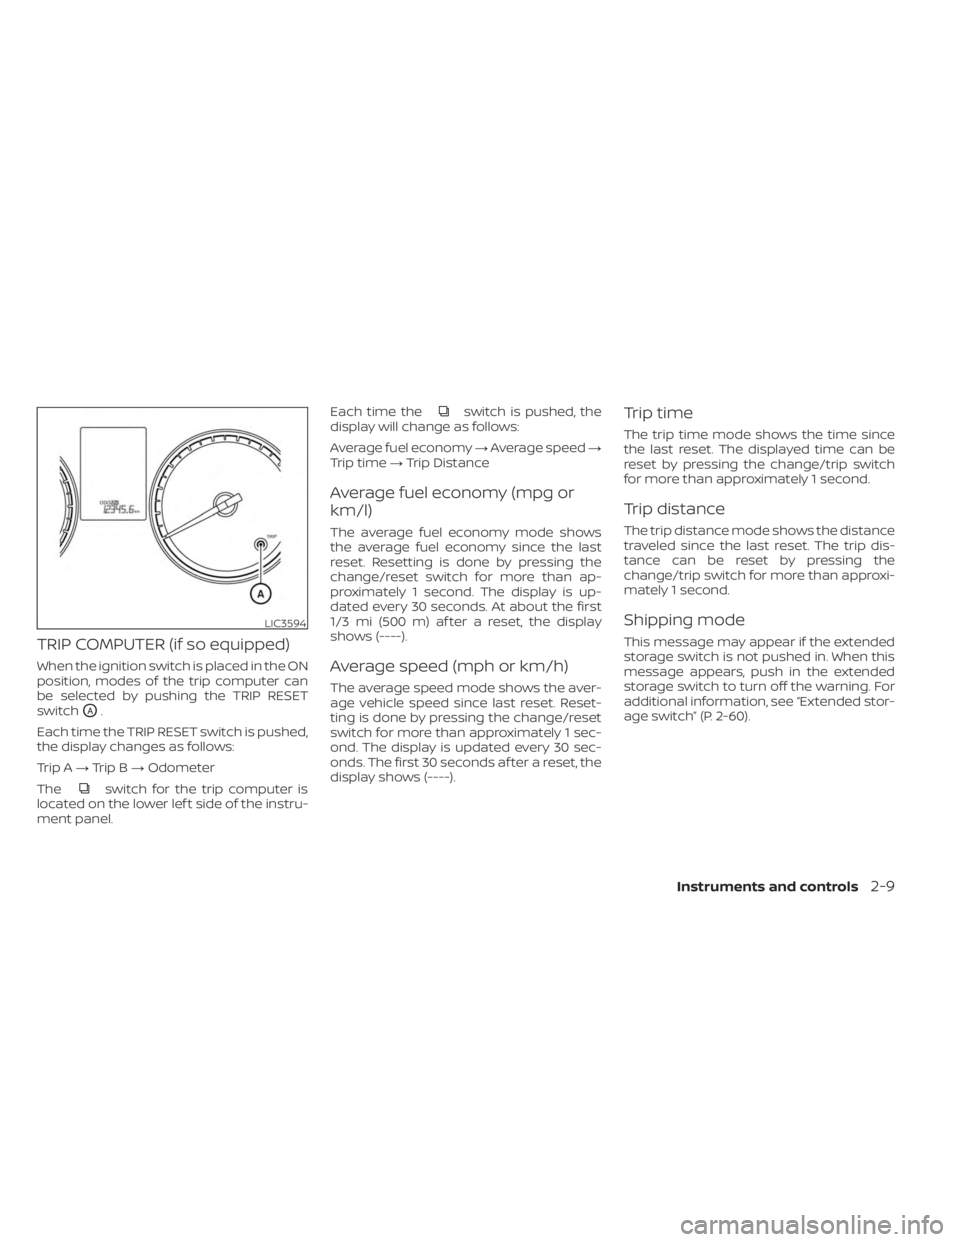
When the ignition switch is placed in the ON
position, modes of the trip computer can
be selected by pushing the TRIP RESET
switch
OA.
Each time the TRIP RESET switch is pushed,
the display changes as follows:
Trip A →Trip B →Odometer
The
switch for the trip computer is
located on the lower lef t side of the instru-
ment panel. Each time the
switch is pushed, the
display will change as follows:
Average fuel economy →Average speed →
Trip time →Trip Distance
Average fuel economy (mpg or
km/l)
The average fuel economy mode shows
the average fuel economy since the last
reset. Resetting is done by pressing the
change/reset switch for more than ap-
proximately 1 second. The display is up-
dated every 30 seconds. At about the first
1/3 mi (500 m) af ter a reset, the display
shows (----).
Average speed (mph or km/h)
The average speed mode shows the aver-
age vehicle speed since last reset. Reset-
ting is done by pressing the change/reset
switch for more than approximately 1 sec-
ond. The display is updated every 30 sec-
onds. The first 30 seconds af ter a reset, the
display shows (----).
Trip time
The trip time mode shows the time since
the last reset. The displayed time can be
reset by pressing the change/trip switch
for more than approximately 1 second.
Trip distance
The trip distance mode shows the distance
traveled since the last reset. The trip dis-
tance can be reset by pressing the
change/trip switch for more than approxi-
mately 1 second.
Shipping mode
This message may appear if the extended
storage switch is not pushed in. When this
message appears, push in the extended
storage switch to turn off the warning. For
additional information, see “Extended stor-
age switch” (P. 2-60).
LIC3594
Instruments and controls2-9
Page 116 of 558
Vehicle Settings
The vehicle settings allow the user to change the settings for lights, wipers, locking, keys, and other vehicle settings.
Some menu items shown below may not be equipped on your vehicle.
Menu itemExplanation
Rear Door Alert Displays the available Rear Door Alert options. For additional information, see “Rear Door Alert” (P. 2-58).
Horn & Alert When selected, the alert is displayed and the horn sounds.
Alert Only When selected, only the alert is displayed.
OFF When selected, no alert or horn will be active.
Lighting Displays the available lighting settings.
Welcome Headlight Displays the available welcome headlight options.
Welcome & Farewell Allows user to set the headlights to turn on when they approach and leave the vehicle.
Welcome Allows user to set the headlights to turn on when they approach the vehicle.
Farewell Allows user to set the headlights to turn on when they leave the vehicle.
OFF Allows user to set the headlights to turn off when not driving.
Auto Room Lamp Allows user to turn the auto room lamp on or off.
Light Sensitivity Allows user to change when the lights illuminate based on the brightness outside the vehicle.
Auto Light Allows user to turn the auto light feature on or off.
Light Off Delay Allows user to change the duration of time, from 0 to 180 seconds, that the automatic headlights stay on
af ter the vehicle is shut off.
Turn Indicator Displays the available turn indicator settings.
3 Flash Pass Allows user to turn the 3 flash pass feature on or off. For additional information, see “Headlight and turn sig-
nal switch” (P. 2-44).
Locking Displays the available locking settings.
Ext. Door Switch Allows user to turn the exterior door switch on or off. When turned on, the request switch on the door is acti-
vated.
2-28Instruments and controls
Page 119 of 558
Clock
Some menu items shown below may not be equipped on your vehicle.
Menu itemExplanation
Clock Allows user to adjust the clock settings and time within the vehicle information display. Adjustments that can
be made include manually setting the time and 12H/24H format.
If these options do not appear, the clock must be set within the center display. For additional information,
refer to the separate NissanConnect® Owner’s Manual (if so equipped).
Unit/Language
The unit/language menu allows the user to change the units shown in the vehicle information display.
Some menu items shown below may not be equipped on your vehicle.
Menu item Explanation
Mileage/Fuel Displays the available mileage/fuel display units and allows user to select preferred unit for display.
Tire Pressures Allows user to select the tire pressure display units.
Temperature Allows user to select the temperature display units.
Language Displays the available language options and allows user to select preferred language for display.
Factory Reset
The factory reset menu allows the user to restore the vehicle information display settings to factory status.
Some menu items shown below may not be equipped on your vehicle.
Menu item Explanation
Factory Reset Allows user to reset the vehicle information display setti
ngs to the original factory settings. Once selected,
the user can confirm or cancel the reset.
Instruments and controls2-31
Page 121 of 558
WARNING
Selecting “Dismiss Message” during a
stop within a trip temporarily dis-
misses the message for that stop with-
out turning the system off. Alerts can
be provided for other stops during the
trip. Selecting “Disable Alert” turns off
the Rear Door Alert system for the re-
mainder of a trip and no audible alert
will be provided.
NOTE:
This system is disabled until a driver en-
ables it using the vehicle information
display. For additional information, see
“How to use the vehicle information dis-
play ” (P. 2-24).
For additional information, see “Rear Door
Alert” (P. 2-58).
Check Back Seat For All Articles
When the system is enabled, this message
appears when the vehicle comes to a com-
plete stop, the vehicle is transitioned from
the D (Drive) position to P (Park) position,
and the driver exits the vehicle. This mes-
sage alerts the driver, af ter a period of time,
to check for items in the rear seat af ter the
audible alert has been provided.
NOTE:
This system is disabled until a driver en-
ables it using the vehicle information
display. For additional information, see
“How to use the vehicle information dis-
play ” (P. 2-24).
For additional information, see “Rear Door
Alert” (P. 2-58).
Door/lif tgate Open
This warning appears when a door or the
lif tgate has been opened.
Headlight System Error: See Owner’s
Manual
This warning appears when there is an er-
ror with the system. For additional informa-
tion, see “Headlight and turn signal switch”
(P. 2-44).
High Coolant Temp: See
Owner’s Manual
This warning appears when the tempera-
ture of the engine coolant is too high. Stop
the vehicle in a safe location as soon as
possible. Avoid quick starting or abrupt ac-
celeration. When the warning turns off, the
vehicle can be driven. If the warning appears again soon af ter it
turns off, have the vehicle checked. It is rec-
ommended that you visit a NISSAN dealer
for this service.
Illumination indicator
This indicator shows the illumination ad-
justment of the instrument panel. For addi-
tional information, see “Instrument bright-
ness control” (P. 2-50).
Low Fuel
This warning appears when the fuel level in
the fuel tank is getting low. Refuel as soon
as it is convenient, preferably before the
fuel gauge reaches 0 (Empty).
There will be
a small reserve of fuel in the tank when
the fuel gauge needle reaches 0 (Empty).
Low Outside Temperature
This warning appears if the outside tem-
perature is below 37°F (3°C). The tempera-
ture can be changed to display in Celsius or
Fahrenheit. For additional information, see
“Settings” (P. 2-25).
Instruments and controls2-33
Page 135 of 558
High Beam Assist (if so equipped)
The High Beam Assist system will operate
when the vehicle is driven at speeds of ap-
proximately 25 mph (40 km/h) and above. If
an oncoming vehicle or leading vehicle ap-
pears in front of your vehicle when the
headlight high beam is on, the headlight
will be switched to the low beam
automatically.
WARNING
• The High Beam Assist system is a
convenience but it is not a substitute
for safe driving operation. The driver
should remain alert at all times, en-
sure safe driving practices and
switch the high beams and low beam
manually when necessary.
• The high beam or low beam may not
switch automatically under the fol-
lowing conditions. Switch the high
beam and low beam manually.
– During bad weather (rain, fog,
snow, wind, etc.).
– When a light source similar to a
headlight or tail light is in the vi-
cinity of the vehicle. –
When the headlights of the on-
coming vehicle or the leading ve-
hicle are turned off, when the color
of the light is affected due to for-
eign materials on the lights, or
when the light beam is out of
position.
– When there is a sudden, continu-
ous change in brightness.
– When driving on a road that
passes over rolling hills, or a road
that has level differences.
– When driving on a road with many
curves.
– When a sign or mirror-like surface
is reflecting intense light towards
the front of the vehicle.
– When the container, etc. being
towed by a leading vehicle is re-
flecting intense light.
– When a headlight on your vehicle
is damaged or dirty.
– When the vehicle is leaning at an
angle due to a punctured tire, be-
ing towed, etc. •
The timing of switching the low
beam and high beam may change
under the following situations.
– The brightness of the headlights
of the oncoming vehicle or leading
vehicle.
– The movement and direction of
the oncoming vehicle and the
leading vehicle.
– When only one light on the on-
coming vehicle or the leading ve-
hicle is illuminated.
– When the oncoming vehicle or the
leading vehicle is a two-wheeled
vehicle.
– Road conditions (incline, curve,
the road surface, etc.).
– The number of passengers and
the amount of luggage.
Instruments and controls2-47
Page 139 of 558
Move the lever up or down until the turn
signal begins to flash, but the lever does
not latch, and release the lever. The turn
signal will automatically flash three times.
Choose the appropriate method to signal
a lane change based on road and traffic
conditions.
NOTE:
The 3 flash pass feature may be disabled.
For additional information, see “Vehicle
information display ” (P. 2-24).
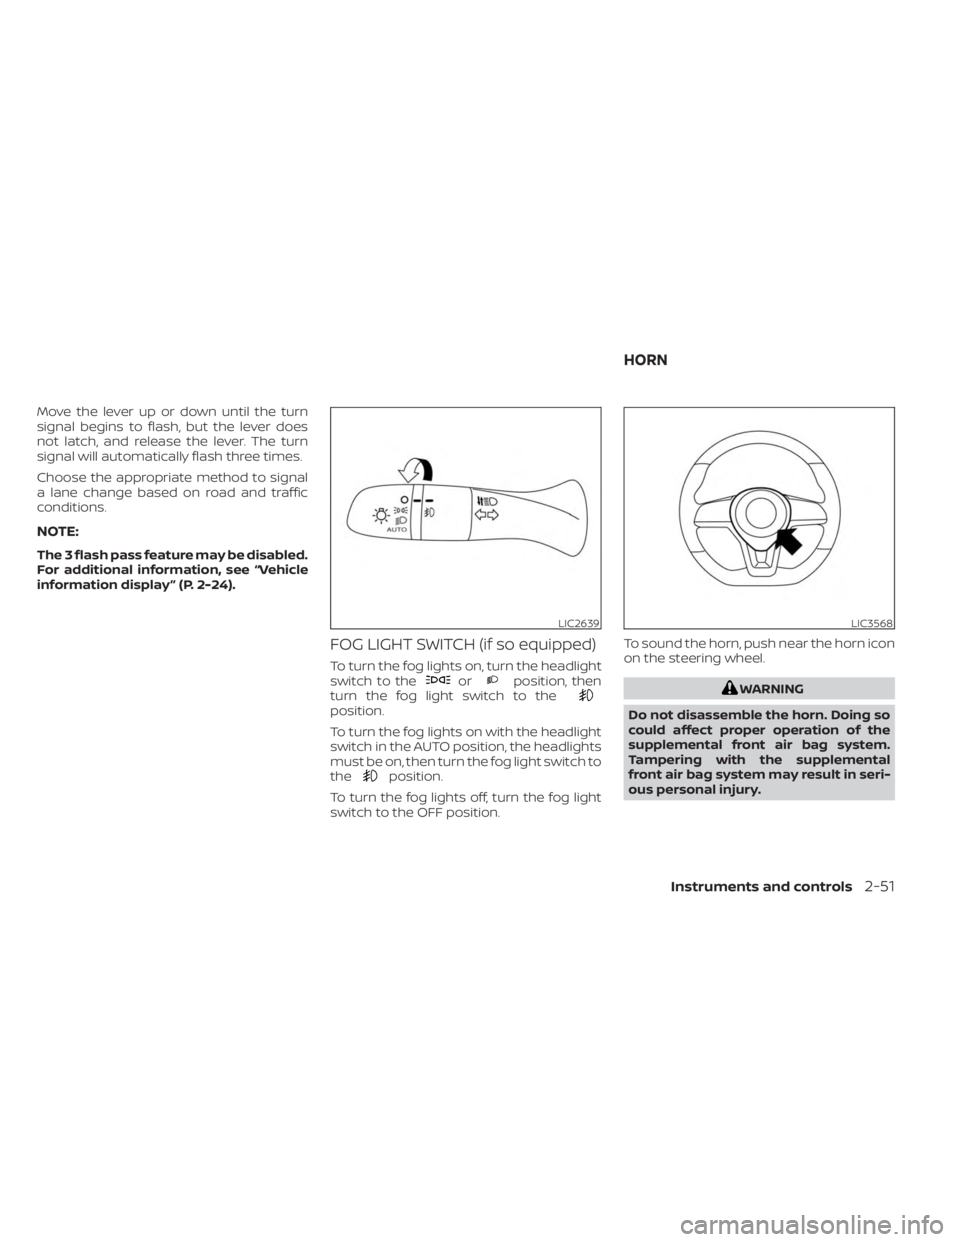
FOG LIGHT SWITCH (if so equipped)
To turn the fog lights on, turn the headlight
switch to theorposition, then
turn the fog light switch to the
position.
To turn the fog lights on with the headlight
switch in the AUTO position, the headlights
must be on, then turn the fog light switch to
the
position.
To turn the fog lights off, turn the fog light
switch to the OFF position. To sound the horn, push near the horn icon
on the steering wheel.
WARNING
Do not disassemble the horn. Doing so
could affect proper operation of the
supplemental front air bag system.
Tampering with the supplemental
front air bag system may result in seri-
ous personal injury.
LIC2639LIC3568
HORN
Instruments and controls2-51