2023 NISSAN KICKS service
[x] Cancel search: servicePage 129 of 558
If the light still remains on and/or the
engine will not start, seek service for the
NATS as soon as possible. Please bring all
registered keys that you have. It is rec-
ommended that you visit a NISSAN
dealer for this service.
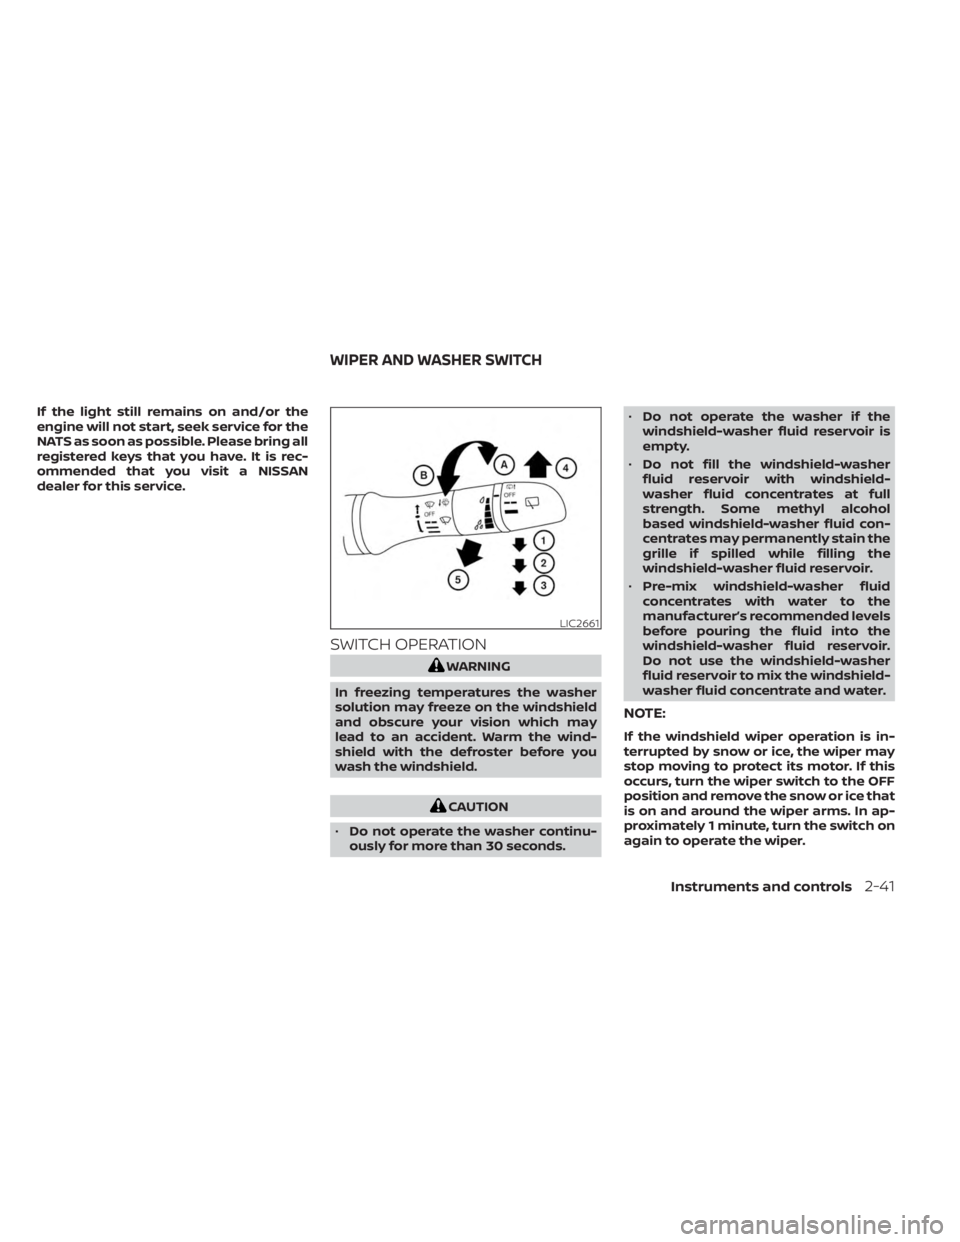
SWITCH OPERATION
WARNING
In freezing temperatures the washer
solution may freeze on the windshield
and obscure your vision which may
lead to an accident. Warm the wind-
shield with the defroster before you
wash the windshield.
CAUTION
• Do not operate the washer continu-
ously for more than 30 seconds. •
Do not operate the washer if the
windshield-washer fluid reservoir is
empty.
• Do not fill the windshield-washer
fluid reservoir with windshield-
washer fluid concentrates at full
strength. Some methyl alcohol
based windshield-washer fluid con-
centrates may permanently stain the
grille if spilled while filling the
windshield-washer fluid reservoir.
• Pre-mix windshield-washer fluid
concentrates with water to the
manufacturer’s recommended levels
before pouring the fluid into the
windshield-washer fluid reservoir.
Do not use the windshield-washer
fluid reservoir to mix the windshield-
washer fluid concentrate and water.
NOTE:
If the windshield wiper operation is in-
terrupted by snow or ice, the wiper may
stop moving to protect its motor. If this
occurs, turn the wiper switch to the OFF
position and remove the snow or ice that
is on and around the wiper arms. In ap-
proximately 1 minute, turn the switch on
again to operate the wiper.
LIC2661
WIPER AND WASHER SWITCH
Instruments and controls2-41
Page 136 of 558
High Beam Assist operation
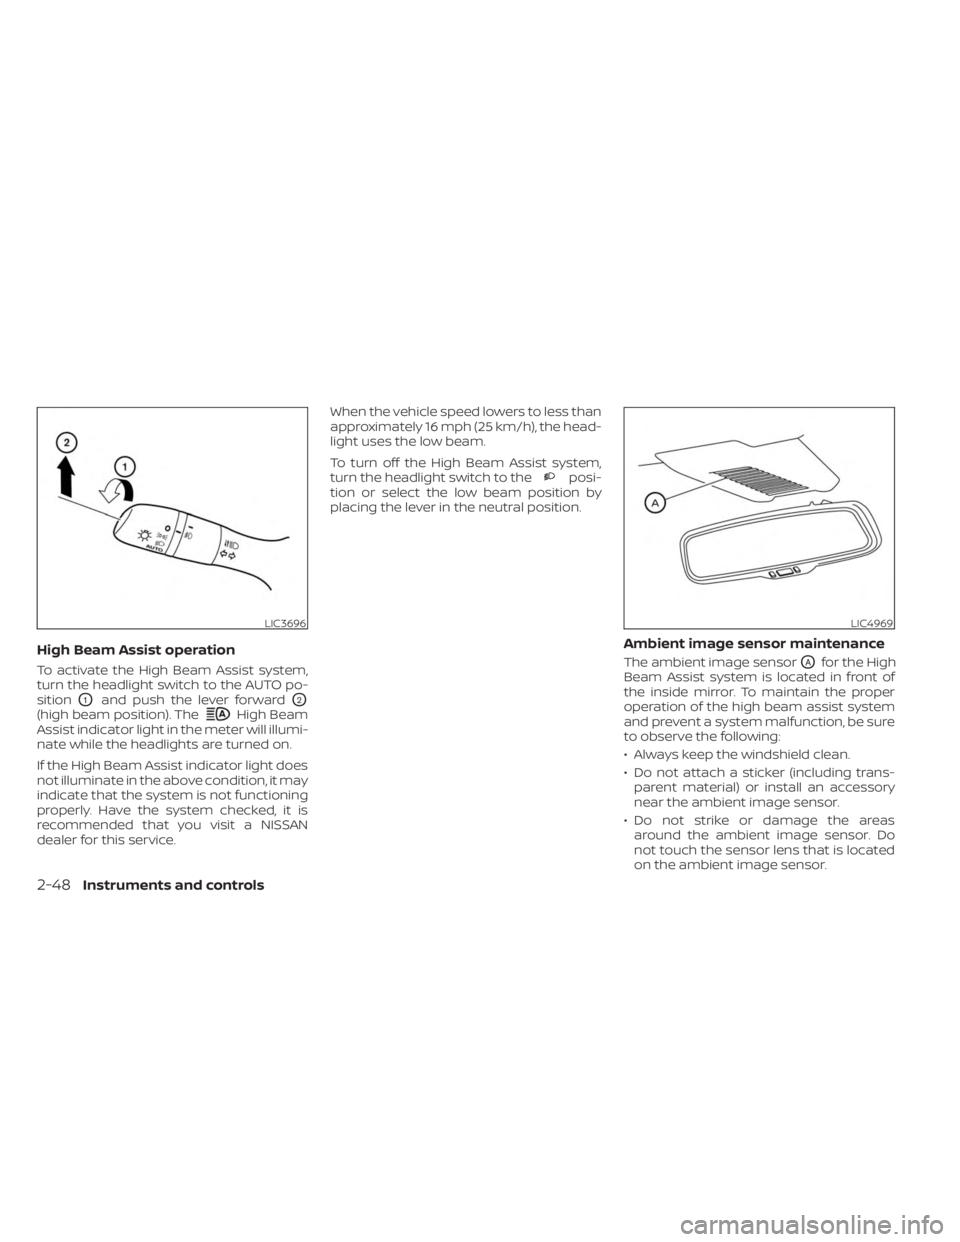
To activate the High Beam Assist system,
turn the headlight switch to the AUTO po-
sition
O1and push the lever forwardO2
(high beam position). TheHigh Beam
Assist indicator light in the meter will illumi-
nate while the headlights are turned on.
If the High Beam Assist indicator light does
not illuminate in the above condition, it may
indicate that the system is not functioning
properly. Have the system checked, it is
recommended that you visit a NISSAN
dealer for this service. When the vehicle speed lowers to less than
approximately 16 mph (25 km/h), the head-
light uses the low beam.
To turn off the High Beam Assist system,
turn the headlight switch to the
posi-
tion or select the low beam position by
placing the lever in the neutral position.
Ambient image sensor maintenance
The ambient image sensorOAfor the High
Beam Assist system is located in front of
the inside mirror. To maintain the proper
operation of the high beam assist system
and prevent a system malfunction, be sure
to observe the following:
• Always keep the windshield clean.
• Do not attach a sticker (including trans- parent material) or install an accessory
near the ambient image sensor.
• Do not strike or damage the areas around the ambient image sensor. Do
not touch the sensor lens that is located
on the ambient image sensor.
LIC3696LIC4969
2-48Instruments and controls
Page 140 of 558
WARNING
Do not use or allow occupants to use
the seat heater if you or the occupants
cannot monitor elevated seat tem-
peratures or have an inability to feel
pain in body parts that contact the
seat. Use of the seat heater by such
people could result in serious injury.
CAUTION
• The battery could run down if the
seat heater is operated while the en-
gine is not running.
• Do not use the seat heater for ex-
tended periods or when no one is us-
ing the seat.
•
Do not put anything on the seat which
insulates heat, such as a blanket,
cushion, seat cover, etc. Otherwise, the
seat may become overheated.
• Do not place anything hard or heavy
on the seat or pierce it with a pin or
similar object. This may result in
damage to the heater.
• Any liquid spilled on the heated seat
should be removed immediately with
a dry cloth.
• When cleaning the seat, never use
gasoline, benzine, thinner, or any
similar materials.
• If any malfunctions are found or the
heated seat does not operate, turn
the switch off and have the system
checked. It is recommended that you
visit a NISSAN dealer for this service. The front seats are warmed by built-in
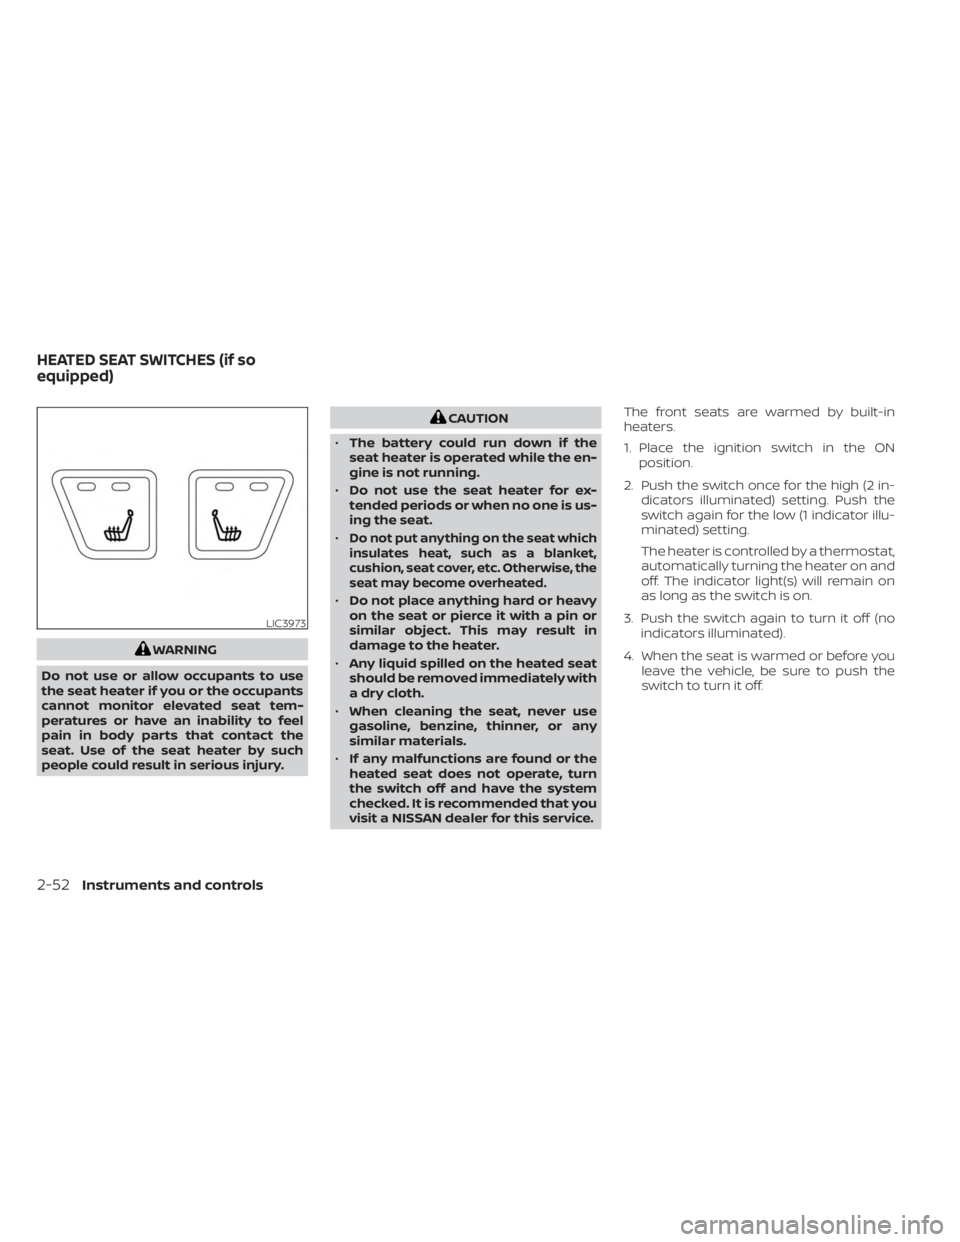
heaters.
1. Place the ignition switch in the ON
position.
2. Push the switch once for the high (2 in- dicators illuminated) setting. Push the
switch again for the low (1 indicator illu-
minated) setting.
The heater is controlled by a thermostat,
automatically turning the heater on and
off. The indicator light(s) will remain on
as long as the switch is on.
3. Push the switch again to turn it off (no indicators illuminated).
4. When the seat is warmed or before you leave the vehicle, be sure to push the
switch to turn it off.
LIC3973
HEATED SEAT SWITCHES (if so
equipped)
2-52Instruments and controls
Page 156 of 558
•Heavy loading of the crossbars has
the potential to affect the vehicle
stability and handling during sudden
or unusual handling maneuvers.
• Properly secure all cargo with ropes
or straps to help prevent it from slid-
ing or shif ting. In a sudden stop or
collision, unsecured cargo could
cause personal injury.
• Drive extra carefully when the vehicle
is loaded at or near the cargo carry-
ing capacity, especially if the signifi-
cant portion of that load is carried on
the crossbars.
CAUTION
• Use care when placing or removing
items from the roof rack. If you can-
not comfortably lif t the items onto
the roof rack from the ground, use a
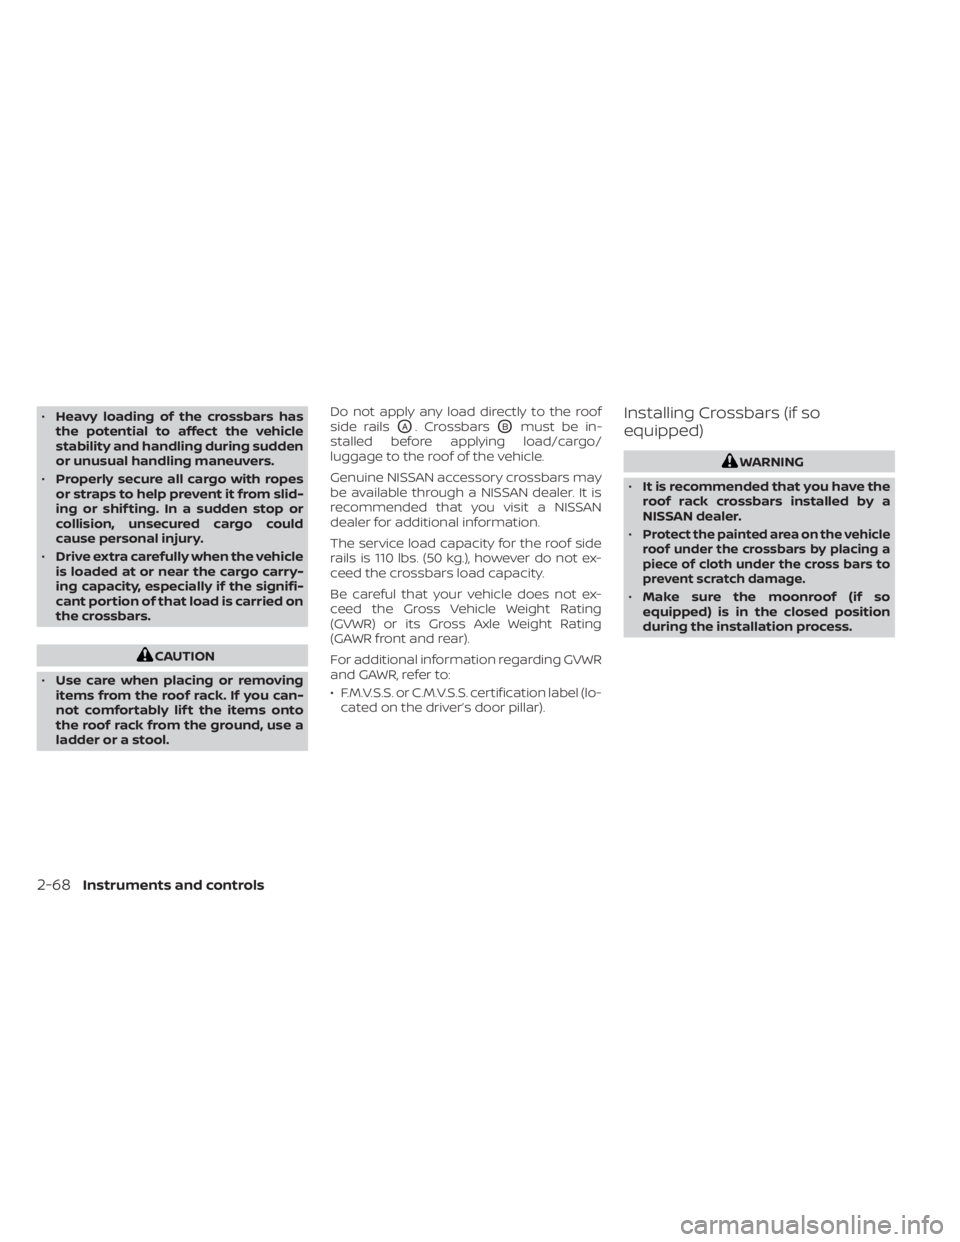
ladder or a stool. Do not apply any load directly to the roof
side rails
OA. CrossbarsOBmust be in-
stalled before applying load/cargo/
luggage to the roof of the vehicle.
Genuine NISSAN accessory crossbars may
be available through a NISSAN dealer. It is
recommended that you visit a NISSAN
dealer for additional information.
The service load capacity for the roof side
rails is 110 lbs. (50 kg.), however do not ex-
ceed the crossbars load capacity.
Be careful that your vehicle does not ex-
ceed the Gross Vehicle Weight Rating
(GVWR) or its Gross Axle Weight Rating
(GAWR front and rear).
For additional information regarding GVWR
and GAWR, refer to:
• F.M.V.S.S. or C.M.V.S.S. certification label (lo- cated on the driver’s door pillar).Installing Crossbars (if so
equipped)
WARNING
• It is recommended that you have the
roof rack crossbars installed by a
NISSAN dealer.
•
Protect the painted area on the vehicle
roof under the crossbars by placing a
piece of cloth under the cross bars to
prevent scratch damage.
• Make sure the moonroof (if so
equipped) is in the closed position
during the installation process.
2-68Instruments and controls
Page 161 of 558
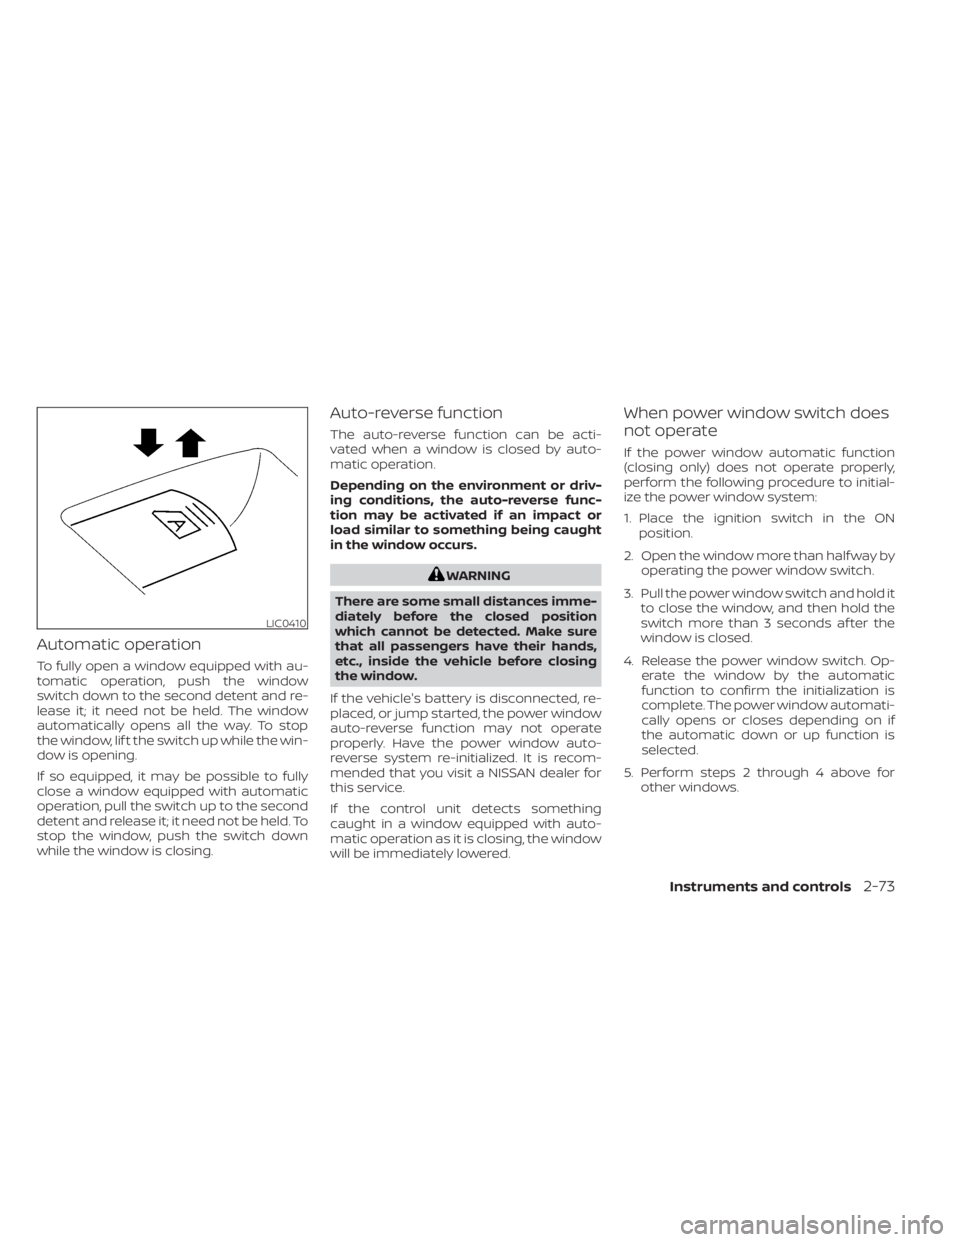
Automatic operation
To fully open a window equipped with au-
tomatic operation, push the window
switch down to the second detent and re-
lease it; it need not be held. The window
automatically opens all the way. To stop
the window, lif t the switch up while the win-
dow is opening.
If so equipped, it may be possible to fully
close a window equipped with automatic
operation, pull the switch up to the second
detent and release it; it need not be held. To
stop the window, push the switch down
while the window is closing.
Auto-reverse function
The auto-reverse function can be acti-
vated when a window is closed by auto-
matic operation.
Depending on the environment or driv-
ing conditions, the auto-reverse func-
tion may be activated if an impact or
load similar to something being caught
in the window occurs.
WARNING
There are some small distances imme-
diately before the closed position
which cannot be detected. Make sure
that all passengers have their hands,
etc., inside the vehicle before closing
the window.
If the vehicle's battery is disconnected, re-
placed, or jump started, the power window
auto-reverse function may not operate
properly. Have the power window auto-
reverse system re-initialized. It is recom-
mended that you visit a NISSAN dealer for
this service.
If the control unit detects something
caught in a window equipped with auto-
matic operation as it is closing, the window
will be immediately lowered.
When power window switch does
not operate
If the power window automatic function
(closing only) does not operate properly,
perform the following procedure to initial-
ize the power window system:
1. Place the ignition switch in the ON position.
2. Open the window more than half way by operating the power window switch.
3. Pull the power window switch and hold it to close the window, and then hold the
switch more than 3 seconds af ter the
window is closed.
4. Release the power window switch. Op- erate the window by the automatic
function to confirm the initialization is
complete. The power window automati-
cally opens or closes depending on if
the automatic down or up function is
selected.
5. Perform steps 2 through 4 above for other windows.
LIC0410
Instruments and controls2-73
Page 162 of 558
If the power window function does not op-
erate properly af ter performing the above
procedure have the system checked and
repaired. It is recommended that you visit a
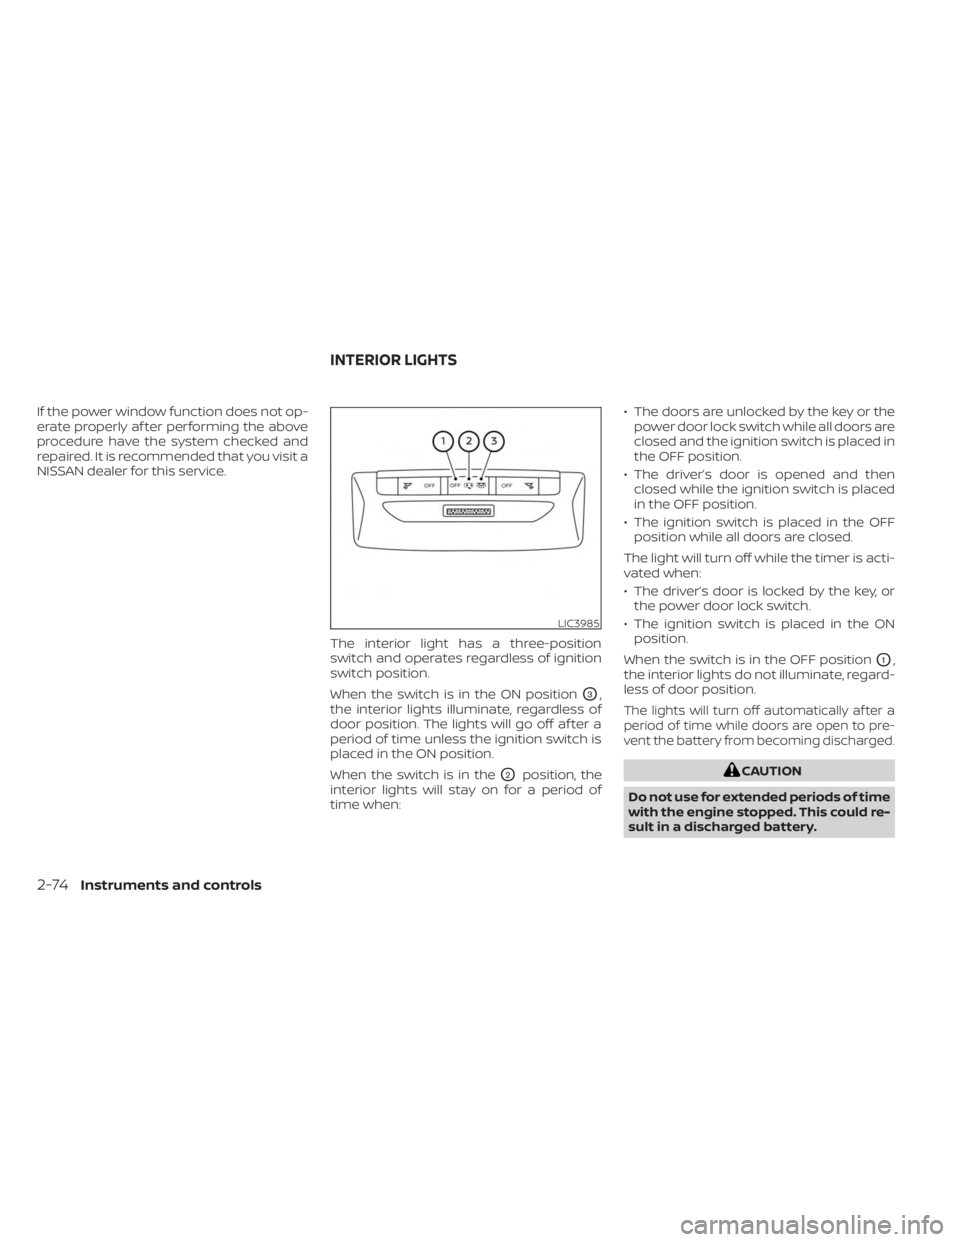
NISSAN dealer for this service.The interior light has a three-position
switch and operates regardless of ignition
switch position.
When the switch is in the ON position
O3,
the interior lights illuminate, regardless of
door position. The lights will go off af ter a
period of time unless the ignition switch is
placed in the ON position.
When the switch is in the
O2position, the
interior lights will stay on for a period of
time when: • The doors are unlocked by the key or the
power door lock switch while all doors are
closed and the ignition switch is placed in
the OFF position.
• The driver’s door is opened and then closed while the ignition switch is placed
in the OFF position.
• The ignition switch is placed in the OFF position while all doors are closed.
The light will turn off while the timer is acti-
vated when:
• The driver’s door is locked by the key, or the power door lock switch.
• The ignition switch is placed in the ON position.
When the switch is in the OFF position
O1,
the interior lights do not illuminate, regard-
less of door position.
The lights will turn off automatically af ter a
period of time while doors are open to pre-
vent the battery from becoming discharged.
CAUTION
Do not use for extended periods of time
with the engine stopped. This could re-
sult in a discharged battery.
LIC3985
INTERIOR LIGHTS
2-74Instruments and controls
Page 190 of 558
•The Loose Fuel Cap warning mes-
sage (if so equipped) will appear if
the fuel-filler cap is not properly
tightened. It may take a few driving
trips for the message to be dis-
played. Failure to tighten the fuel-
filler cap properly af ter the Loose
Fuel Cap warning message (if so
equipped) appears may cause the
Malfunction Indicator Light (MIL)
to illuminate.
• Failure to tighten the fuel-filler cap
properly may cause the
Mal-
function Indicator Light (MIL) to illu-
minate. If the
light illuminates
because the fuel-filler cap is loose or
missing, tighten or install the cap and
continue to drive the vehicle. The
light should turn off af ter a few
driving trips. If thelight does not
turn off af ter a few driving trips, have
the vehicle inspected. It is recom-
mended that you visit a NISSAN
dealer for this service.
•
For additional information, see “Mal-
function Indicator Light (MIL)” (P. 2-19).
• If fuel is spilled on the vehicle body,
flush it away with water to avoid
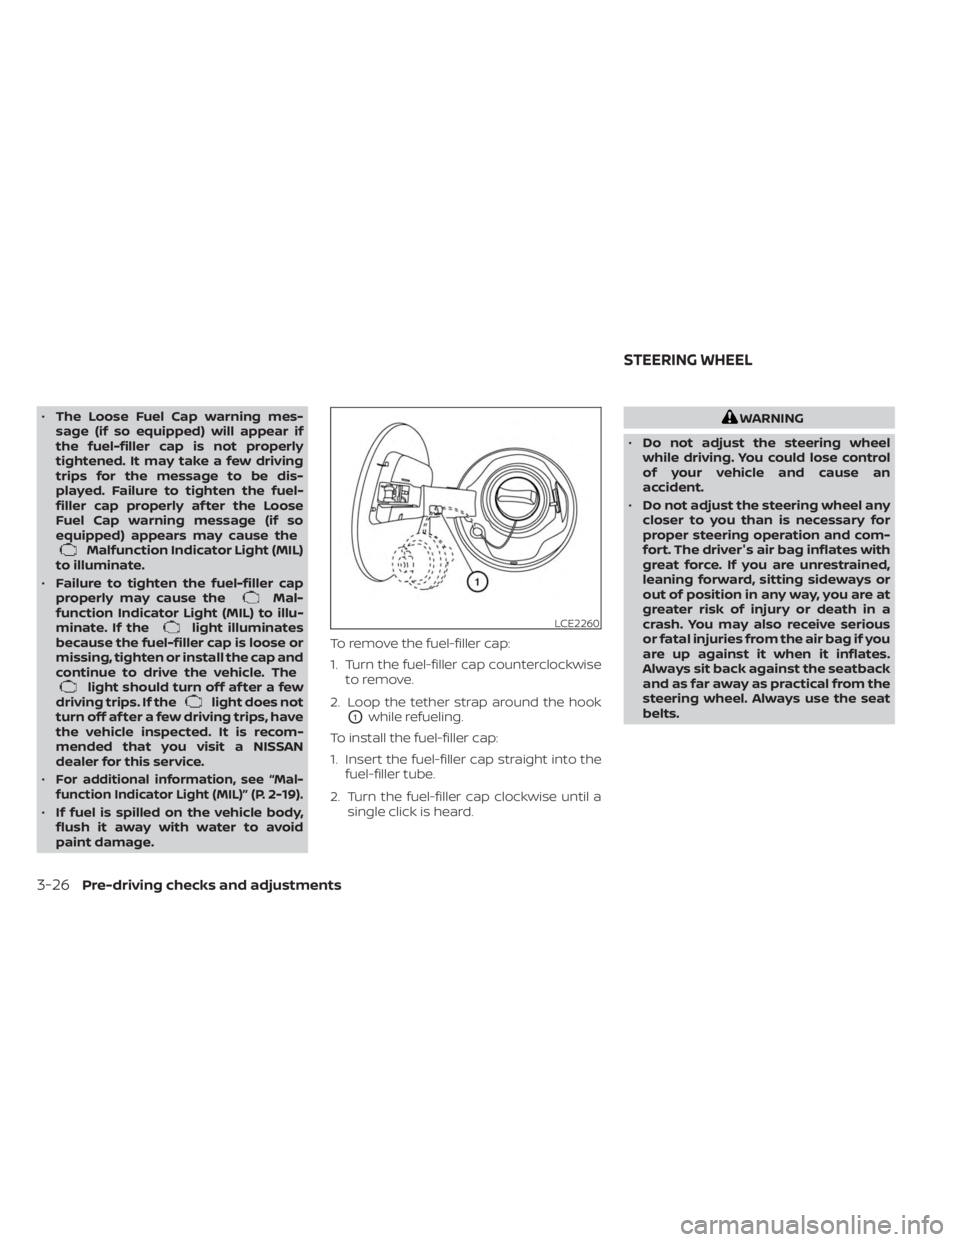
paint damage. To remove the fuel-filler cap:
1. Turn the fuel-filler cap counterclockwise
to remove.
2. Loop the tether strap around the hook
O1while refueling.
To install the fuel-filler cap:
1. Insert the fuel-filler cap straight into the fuel-filler tube.
2. Turn the fuel-filler cap clockwise until a single click is heard.
WARNING
• Do not adjust the steering wheel
while driving. You could lose control
of your vehicle and cause an
accident.
• Do not adjust the steering wheel any
closer to you than is necessary for
proper steering operation and com-
fort. The driver's air bag inflates with
great force. If you are unrestrained,
leaning forward, sitting sideways or
out of position in any way, you are at
greater risk of injury or death in a
crash. You may also receive serious
or fatal injuries from the air bag if you
are up against it when it inflates.
Always sit back against the seatback
and as far away as practical from the
steering wheel. Always use the seat
belts.
LCE2260
STEERING WHEEL
3-26Pre-driving checks and adjustments
Page 198 of 558
Refer to the digital NissanConnect® Own-
er’s manual using the QR code on this
page, or your printed NissanConnect®
Owner’s manual (if so equipped). This
manual includes the following information:
• NissanConnect® Services (if so equipped)
• Audio system
• Apple CarPlay®
• Android Auto™
• Bluetooth® Hands-Free Phone system
• Viewing information
• Other settings• Voice Recognition
• General system information
WARNING
• Positioning of the heating or air con-
ditioning controls and display con-
trols should not be done while driv-
ing in order that full attention may be
given to the driving operation.
• Do not disassemble or modif y this
system. If you do, it may result in ac-
cidents, fire, or electrical shock.
• Do not use this system if you notice
any abnormality, such as a frozen
screen or lack of sound. Continued
use of the system may result in acci-
dent, fire or electric shock.
• In case you notice any foreign object
in the system hardware, spill liquid
on it, or notice smoke or smell com-
ing from it, stop using the system
immediately. Ignoring such condi-
tions may lead to accidents, fire or
electrical shock. It is recommended
that you visit a NISSAN dealer for
servicing.
LHA5695
NISSANCONNECT® OWNER’S
MANUAL (if so equipped)
4-2Monitor, climate, audio, phone and voice recognition systems