2023 NISSAN ARMADA warning light
[x] Cancel search: warning lightPage 144 of 604
2-50Instruments and controls
High beam assist
The high beam assist system will operate
when the vehicle is driven at approxi-
mately 25 MPH (40 km/h) and above.
If an oncoming vehicle or leading vehicle
appears in front of your vehicle when the
headlight high beam is on, the headlight
will be switched to the low beam auto-
matically.
Precautions on high beam assist:
WARNING
.The high beam assist system is a
convenience but it is not a sub-
stitute for safe driving operation.
The driver should remain alert at
all times, ensure safe driving
practices and switch the high
beam and low beam manually
when necessary.
. The high beam or low beam may
not switch automatically under
the following conditions. Switch
the high beam and low beam
manually.
— During bad weather (rain, fog,
snow, wind, etc.). — When a light source similar to
a headlight or tail light is in
the vicinity of the vehicle.
— When the headlights of the oncoming vehicle or the lead-
ing vehicle are turned off,
when the color of the light is
affected due to foreign mate-
rials on the lights, or when the
light beam is out of position.
— When there is a sudden, con- tinuous change in brightness.
— When driving on a road that passes over rolling hills, or a
road that has level differ-
ences.
— When driving on a road with many curves.
— When a sign or mirror-like surface is reflecting intense
light towards the front of the
vehicle.
— When the container, etc. being towed by a leading vehicle is
reflecting intense light.
— When a headlight on your vehicle is damaged or dirty.
— When the vehicle is leaning at an angle due to a punctured tire, being towed, etc.
. The timing of switching the low
beam and high beam may
change under the following situa-
tions.
— The brightness of the head-
lights of the oncoming vehicle
or leading vehicle.
— The movement and direction of the oncoming vehicle and
the leading vehicle.
— When only one light on the oncoming vehicle or the lead-
ing vehicle is illuminated.
— When the oncoming vehicle or the leading vehicle is a two-
wheeled vehicle.
— Road conditions (incline, curve, the road surface, etc.).
— The number of passengers and the amount of luggage.
Page 146 of 604

2-52Instruments and controls
If the ambient image sensor is damaged
due to an accident, contact a NISSAN
dealer.
Battery saver system
A chime will sound when the driver side
door is opened with the headlight switch
in the
orposition and the ignition
switch in the OFF or LOCK position.
When the headlight switch is in the
orposition while the ignition switch is in
the ON position, the lights will automati-
cally turn off after a period of time when
the ignition switch has been pushed to
the OFF position.
When the headlight switch remains in the
orposition after the lights auto-
matically turn off, the lights will turn on
when the ignition switch is pushed to the
ON position.
CAUTION
. When you turn on the headlight
switch again after the lights auto-
matically turn off, the lights will
not turn off automatically. Be
sure to turn the headlight switch
to the OFF (if so equipped) or the
AUTO position when you leave
the vehicle for extended periods of time, otherwise the battery will
be discharged.
. Never leave the headlight switch
on when the engine is not run-
ning for extended periods of time
even if the headlights turn off
automatically.
Daytime Running Light (DRL) sys-
tem
The LED Daytime Running Lights (DRL)
automatically illuminate when the engine
is started and the parking brake is
released. The LED DRL operate with the
headlight switch in the OFF (if so
equipped),
, or AUTO (when the head-
lights are off) position. When you turn the
headlight switch to the
position for
full illumination, the LED lights switch
from LED DRL to the park function.
Type A (if so equipped): If the parking
brake is applied before the engine is
started, the LED DRL do not illuminate.
The LED DRL illuminate when the parking
brake is released. This feature will work in
the
, AUTO or OFF position. The LED
DRL will remain on until the ignition
switch is placed in the OFF position.
Type B (if so equipped): If the parking
brake is applied before the engine is
started, the LED DRL do not illuminate. The LED DRL illuminate when the parking
brake is released. This feature will work in
the AUTO or
position. The LED DRL
will remain on until the ignition switch is
placed in the OFF position.
WARNING
When the LED DRL system is active
with the headlight switch in the OFF
position (if so equipped), tail lights
on your vehicle are not on. It is
necessary at dusk to turn on your
headlights. Failure to do so could
cause an accident injuring yourself
and others.
Page 149 of 604
indicator light will turn off.
NOTE:
If the surface temperature of the steer-
ing wheel is above 68°F (20°C) when the
switch is turned on, the system will not
heat the steering wheel. This is not a
malfunction.
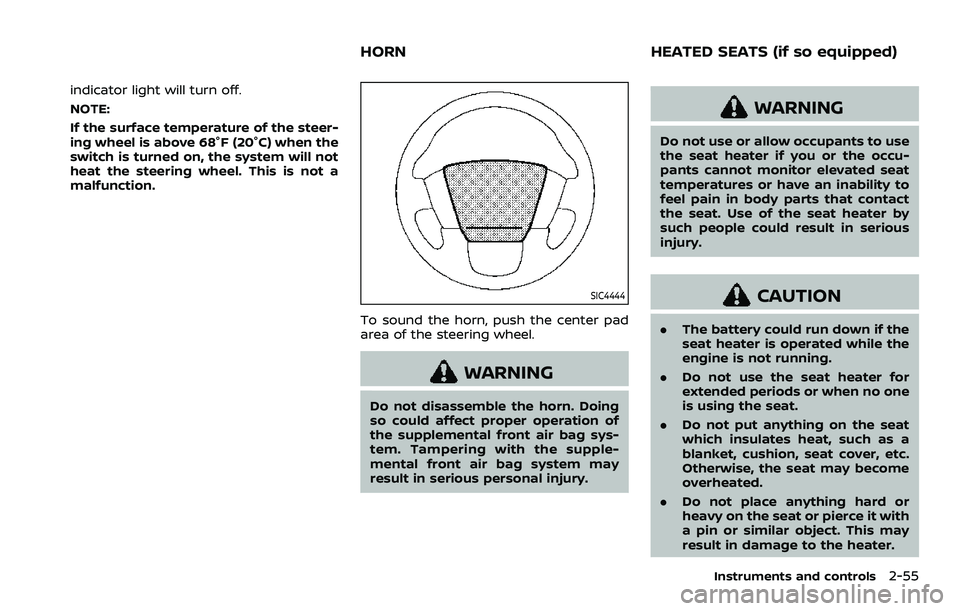
SIC4444
To sound the horn, push the center pad
area of the steering wheel.
WARNING
Do not disassemble the horn. Doing
so could affect proper operation of
the supplemental front air bag sys-
tem. Tampering with the supple-
mental front air bag system may
result in serious personal injury.
WARNING
Do not use or allow occupants to use
the seat heater if you or the occu-
pants cannot monitor elevated seat
temperatures or have an inability to
feel pain in body parts that contact
the seat. Use of the seat heater by
such people could result in serious
injury.
CAUTION
.The battery could run down if the
seat heater is operated while the
engine is not running.
. Do not use the seat heater for
extended periods or when no one
is using the seat.
. Do not put anything on the seat
which insulates heat, such as a
blanket, cushion, seat cover, etc.
Otherwise, the seat may become
overheated.
. Do not place anything hard or
heavy on the seat or pierce it with
a pin or similar object. This may
result in damage to the heater.
Instruments and controls2-55
HORN HEATED SEATS (if so equipped)
Page 152 of 604
2-58Instruments and controls
4. When the vehicle’s interior is warmedor cooled, or before you leave the
vehicle, be sure to turn off the climate
controlled seats. To turn off the cli-
mate controlled seats, push the
switch until the indicator light turns
off.
To check the air filters for the climate
controlled seat, it is recommended
you visit a NISSAN dealer.
WARNING
Do not use or allow occupants to use
the climate controlled seats if you or
the occupants cannot monitor seat
temperatures or have an inability to
feel pain in those body parts in
contact with the seat. Use of the
climate controlled seats by such
people could result in serious injury.
CAUTION
.The battery could run down if the
climate controlled seat is oper-
ated while the engine is not run-
ning. .
Do not use the climate controlled
seat for extended periods or
when no one is using the seat.
. Do not put anything on the seat
which insulates heat, such as a
blanket, cushion, seat cover, etc.
Otherwise, the seat may become
overheated.
. Do not place anything hard or
heavy on the seat or pierce it with
a pin or similar object. This may
result in damage to the climate
controlled seat.
. Any liquid spilled on the seat
should be removed immediately
with a dry cloth.
. The climate controlled seat has
an air filter. Do not operate cli-
mate controlled seat without an
air filter. This may result in da-
mage to the system.
. When cleaning the seat, never use
gasoline, thinner, or any similar
materials.
. If any malfunctions are found or
the climate controlled seat does
not operate, turn the switch off
and have the system checked. It
is recommended you visit a
NISSAN dealer for this service.
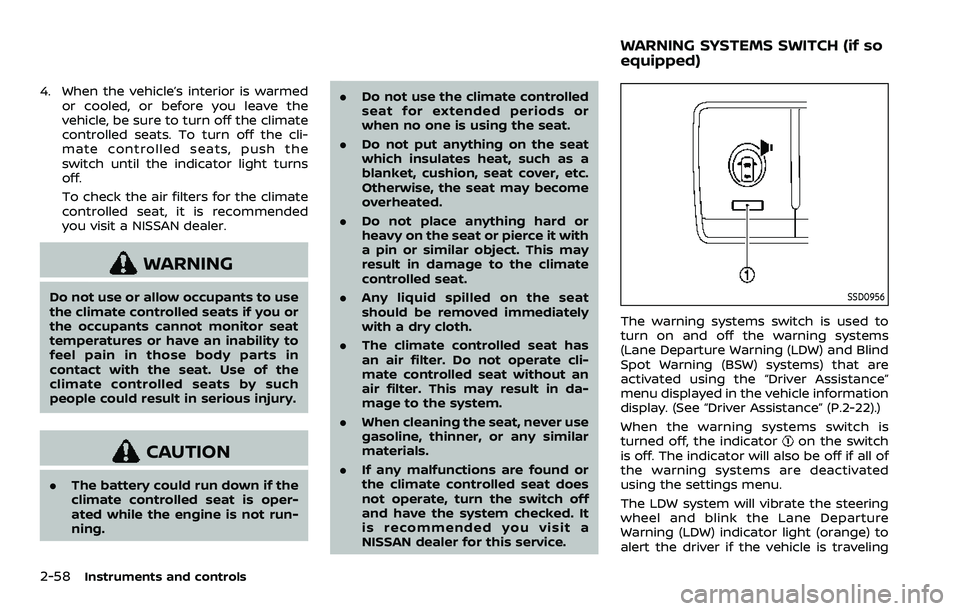
SSD0956
The warning systems switch is used to
turn on and off the warning systems
(Lane Departure Warning (LDW) and Blind
Spot Warning (BSW) systems) that are
activated using the “Driver Assistance”
menu displayed in the vehicle information
display. (See “Driver Assistance” (P.2-22).)
When the warning systems switch is
turned off, the indicator
on the switch
is off. The indicator will also be off if all of
the warning systems are deactivated
using the settings menu.
The LDW system will vibrate the steering
wheel and blink the Lane Departure
Warning (LDW) indicator light (orange) to
alert the driver if the vehicle is traveling
WARNING SYSTEMS SWITCH (if so
equipped)
Page 153 of 604

close to either the left or the right of a
traveling lane with detectable lane mar-
kers. (See “Lane Departure Warning (LDW)”
(P.5-26).)
The BSW system will turn on the side
indicator lights, on the outside mirrors, if
the radar sensors detect a vehicle in the
detection zone. If the turn signal is
activated in the direction of the detected
vehicle, a chime sounds twice and the
side indicator light will flash. (See “Blind
Spot Warning (BSW)” (P.5-38).)
SIC4454
For driving or starting the vehicle on
snowy roads or slippery areas, push on
the SNOW mode switch. The SNOW mode
indicator will illuminate. When the SNOW
mode is activated, engine output is con-
trolled to avoid wheel spin.
Push off the SNOW mode for normal
driving.
NOTE:
When the SNOW mode is activated, the
I-LI, I-BSI, and ICC systems will be turned
off automatically.
SIC4474
TOW MODE should be used when pulling
a heavy trailer or hauling a heavy load.
Driving the vehicle in TOW MODE with no
trailer/load or light trailer/light load will
not cause any damage. However, fuel
economy may be reduced, and the trans-
mission/engine driving characteristics
may feel unusual.
Push the TOW MODE switch to activate
TOW MODE. The indicator light on the
TOW MODE switch illuminates when TOW
MODE is selected. Push the TOW MODE
switch again to turn TOW MODE OFF.
TOW MODE is automatically canceled
when the ignition switch is placed in the
OFF position.
Instruments and controls2-59
SNOW MODE SWITCHTOW MODE SWITCH
Page 159 of 604
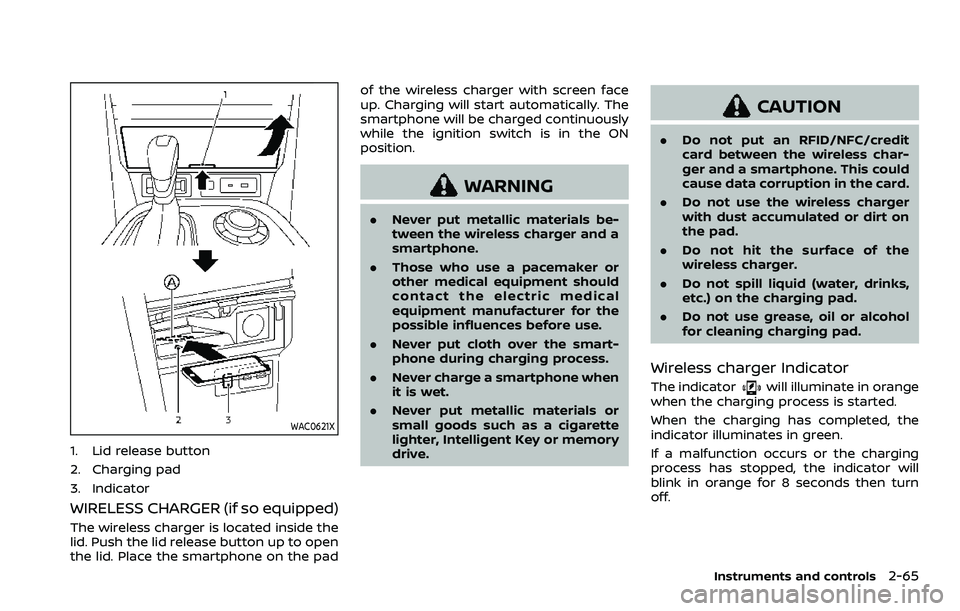
WAC0621X
1. Lid release button
2. Charging pad
3. Indicator
WIRELESS CHARGER (if so equipped)
The wireless charger is located inside the
lid. Push the lid release button up to open
the lid. Place the smartphone on the padof the wireless charger with screen face
up. Charging will start automatically. The
smartphone will be charged continuously
while the ignition switch is in the ON
position.
WARNING
.
Never put metallic materials be-
tween the wireless charger and a
smartphone.
. Those who use a pacemaker or
other medical equipment should
contact the electric medical
equipment manufacturer for the
possible influences before use.
. Never put cloth over the smart-
phone during charging process.
. Never charge a smartphone when
it is wet.
. Never put metallic materials or
small goods such as a cigarette
lighter, Intelligent Key or memory
drive.
CAUTION
.Do not put an RFID/NFC/credit
card between the wireless char-
ger and a smartphone. This could
cause data corruption in the card.
. Do not use the wireless charger
with dust accumulated or dirt on
the pad.
. Do not hit the surface of the
wireless charger.
. Do not spill liquid (water, drinks,
etc.) on the charging pad.
. Do not use grease, oil or alcohol
for cleaning charging pad.
Wireless charger Indicator
The indicatorwill illuminate in orange
when the charging process is started.
When the charging has completed, the
indicator illuminates in green.
If a malfunction occurs or the charging
process has stopped, the indicator will
blink in orange for 8 seconds then turn
off.
Instruments and controls2-65
Page 165 of 604
JVI0619X
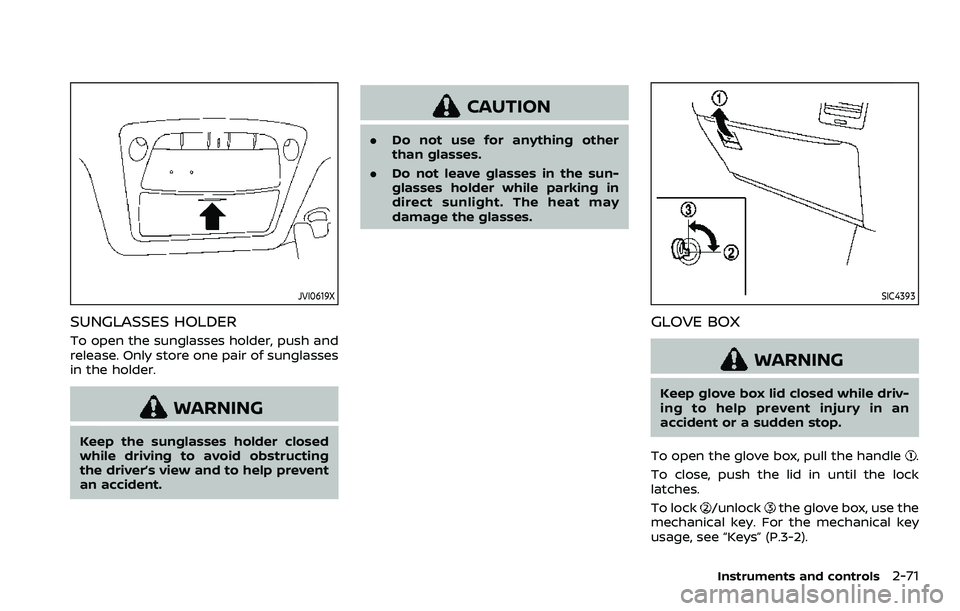
SUNGLASSES HOLDER
To open the sunglasses holder, push and
release. Only store one pair of sunglasses
in the holder.
WARNING
Keep the sunglasses holder closed
while driving to avoid obstructing
the driver’s view and to help prevent
an accident.
CAUTION
.Do not use for anything other
than glasses.
. Do not leave glasses in the sun-
glasses holder while parking in
direct sunlight. The heat may
damage the glasses.
SIC4393
GLOVE BOX
WARNING
Keep glove box lid closed while driv-
ing to help prevent injury in an
accident or a sudden stop.
To open the glove box, pull the handle
.
To close, push the lid in until the lock
latches.
To lock
/unlockthe glove box, use the
mechanical key. For the mechanical key
usage, see “Keys” (P.3-2).
Instruments and controls2-71
Page 169 of 604
(GAWR front and rear). The GVWR and
GAWR are located on the F.M.V.S.S. or C.V.
M.S.S. certification label (located on the
driver’s door pillar). For additional infor-
mation regarding GVWR and GAWR, refer
to “Vehicle loading information” (P.10-15).
WARNING
.Always install the cross bars onto
the roof side rails before loading
cargo of any kind. Loading cargo
directly onto the roof side rails or
the vehicle’s roof may cause ve-
hicle damage.
. Drive extra carefully when the
vehicle is loaded at or near the
cargo carrying capacity, espe-
cially if the significant portion of
that load is carried on the roof
rack.
. Heavy loading of the roof rack
has the potential to affect the
vehicle stability and handling
during sudden or unusual hand-
ling maneuvers.
. Roof rack load should be evenly
distributed.
. Do not exceed maximum roof
rack load weight capacity. .
Properly secure all cargo with
ropes or straps to help prevent it
from sliding or shifting. In a sud-
den stop or collision, unsecured
cargo could cause personal in-
jury.
The sound with a feeling of oppression
may occur with the rear windows open
and front windows close. To reduce the
sound, slightly open either a front window
or the moonroof (if so equipped).
POWER WINDOWS
WARNING
The driver is always responsible for
all the power window operation in-
cluding passenger’s operation. Be
sure to observe the following warn-
ings for safety.
.Never allow anyone to extend any
portion of their body or objects
out of the opening while the
vehicle is in motion. Otherwise
they may be seriously damaged
by coming into contact with ob-
jects outside the vehicle or when
abruptly braking.
. Make sure that all passengers
have their hands, etc. inside the
vehicle before operating the
power windows. Do not intention-
ally activate the auto-reverse
function. If their hands or faces
are caught in the windows, it
could cause serious injury.
Instruments and controls2-75
WINDOWS