2023 NISSAN ARMADA warning lights
[x] Cancel search: warning lightsPage 412 of 604

5-100Starting and driving
serious injury or death.
.The AEB with pedestrian detec-
tion system cannot detect all
vehicles or pedestrians under all
conditions.
. The AEB with pedestrian detec-
tion system does not detect the
following:
— Pedestrians that are small (for
example, children), in a sitting
position, operating toys/ska-
teboards, on scooters or in
wheelchairs, or not in an up-
right standing or walking po-
sition.
— Animals of any size.
— Obstacles (for example, cargo or debris) on the roadway or
roadside.
— Oncoming or crossing vehi- cles.
— Vehicles where the tires are difficult to see or the shape of
the rear of the vehicle is un-
clear or obstructed.
— Parked vehicles.
. The AEB with pedestrian detec-
tion system has some perfor-
mance limitations. — If a stationary vehicle is in the
vehicle’s path, the system will
not function when the vehicle
approaches the stationary ve-
hicle at speeds over approxi-
mately 50 MPH (80 km/h).
— Pedestrian detection will not function when the vehicle is
driven at speeds over ap-
proximately 37 MPH (60
km/h) or below approxi-
mately 6 MPH (10 km/h).
. For pedestrians, the AEB with
pedestrian detection system will
not issue the first warning.
. The AEB with pedestrian detec-
tion system may not function
properly or detect a vehicle or
pedestrian ahead in the following
conditions:
— In poor visibility conditions
(such as rain, snow, fog, dust
storms, sand storms, smoke,
and road spray from other
vehicles).
— If dirt, ice, snow, fog or other material is covering the radar
sensor area or camera area of
the windshield. — If strong light (for example,
sunlight or high beams) en-
ters the front camera or a
sudden change in brightness
occurs (for example, entering
a tunnel or driving in light-
ning).
— In dark or dimly lit conditions, such as at night or in tunnels,
including cases where your
vehicle’s headlights are off or
dim, or the tail lights of the
vehicle ahead are off.
— When the direction of the camera is misaligned.
— When driving on a steep downhill slope, on roads with
sharp curves, and/or bumpy
or dirt roads.
— If there is interference by other radar sources.
— When your vehicle’s position or movement is changed
quickly or significantly (for
example, lane change, turning
vehicle, abrupt steering, sud-
den acceleration or decelera-
tion).
Page 430 of 604

5-118Starting and driving
RAB SYSTEM OPERATION
When the shift lever is in the R (Reverse)
position and the vehicle speed is less than
approximately 9 MPH (15 km/h), the RAB
system operates.
If a risk of a collision with an obstacle is
detected when your vehicle is backing up,
the RAB system warning indicator will
flash in the vehicle information display, a
red frame will appear in the touch screen
display (models with the Intelligent
Around View® Monitor system), and the
system will chime three times. The system
will then automatically apply the brakes.
After the automatic brake application, the
driver must depress the brake pedal to
maintain brake pressure.
NOTE:
.The stop lights of the vehicle come
on when braking is performed by
the RAB system.
. When the brakes operate, a noise
may be heard. This is not a malfunc-
tion.
. When the “P” key is touched, the
indicator light on the key will turn off
and the the Rear Automatic Braking
(RAB) system will turn off tempora-
rily. The Moving Object Detection
(MOD) (if so equipped), the Intelligent
Back-up Intervention (I-BI) (if so
equipped) and the sonar systems will also be turned off at the same
time.
. When the sonar and MOD systems is
turned off on the settings menu in
the touch screen display, the “P” key
will disappear.
To enable or disable the RAB system,
use the vehicle information display. See
“Turning the RAB system ON/OFF” (P.5-
119).
Page 444 of 604

5-132Starting and driving
WARNING
.Never rely solely on the hill start
assist system to prevent the ve-
hicle from moving backward on a
hill. Always drive carefully and
attentively. Depress the brake
pedal when the vehicle is stopped
on a steep hill. Be especially care-
ful when stopped on a hill on
frozen or muddy roads. Failure
to prevent the vehicle from rolling
backwards may result in a loss of
control of the vehicle and possi-
ble serious injury or death.
. The hill start assist system is not
designed to hold the vehicle at a
standstill on a hill. Depress the
brake pedal when the vehicle is
stopped on a steep hill. Failure to
do so may cause the vehicle to
roll backwards and may result in
a collision or serious personal
injury.
. The hill start assist system may
not prevent the vehicle from roll-
ing backwards on a hill under all
load or road conditions. Always
be prepared to depress the brake
pedal to prevent the vehicle from
rolling backwards. Failure to do so may result in a collision or
serious personal injury.
The hill start assist system automatically
keeps the brakes applied to help prevent
the vehicle from rolling backwards in the
time it takes the driver to release the
brake pedal and apply the accelerator
when the vehicle is stopped on a hill.
The hill start assist system will operate
automatically under the following condi-
tions:
. The transmission is shifted to a for-
ward or reverse gear.
. The vehicle is stopped completely on a
hill by applying the brake.
The maximum holding time is 2 seconds.
After 2 seconds the vehicle will begin to
roll back and the hill start assist system
will stop operating completely.
The hill start assist system will not
operate when the transmission is shifted
to the N (Neutral) or P (Park) position or
on a flat and level road.
When the Vehicle Dynamic Control (VDC)
warning light illuminates in the meter, the
hill start assist system will not operate.
(See “Warning lights, indicator lights and
audible reminders” (P.2-11).)
HILL START ASSIST SYSTEM
Page 462 of 604

6-2In case of emergency
SIC2574
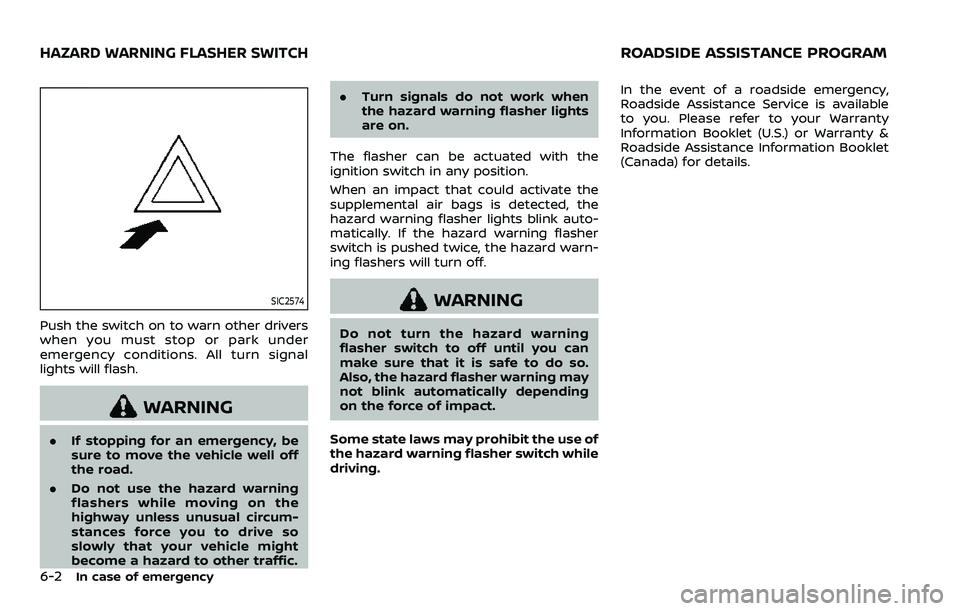
Push the switch on to warn other drivers
when you must stop or park under
emergency conditions. All turn signal
lights will flash.
WARNING
.If stopping for an emergency, be
sure to move the vehicle well off
the road.
. Do not use the hazard warning
flashers while moving on the
highway unless unusual circum-
stances force you to drive so
slowly that your vehicle might
become a hazard to other traffic. .
Turn signals do not work when
the hazard warning flasher lights
are on.
The flasher can be actuated with the
ignition switch in any position.
When an impact that could activate the
supplemental air bags is detected, the
hazard warning flasher lights blink auto-
matically. If the hazard warning flasher
switch is pushed twice, the hazard warn-
ing flashers will turn off.
WARNING
Do not turn the hazard warning
flasher switch to off until you can
make sure that it is safe to do so.
Also, the hazard flasher warning may
not blink automatically depending
on the force of impact.
Some state laws may prohibit the use of
the hazard warning flasher switch while
driving. In the event of a roadside emergency,
Roadside Assistance Service is available
to you. Please refer to your Warranty
Information Booklet (U.S.) or Warranty &
Roadside Assistance Information Booklet
(Canada) for details.
HAZARD WARNING FLASHER SWITCHROADSIDE ASSISTANCE PROGRAM
Page 493 of 604

8 Do-it-yourself
Maintenance precautions ...................................................... 8-2
Engine compartment check locations ........................ 8-3VK56VD engine ....................................................................... 8-3
Engine cooling system ............................................................. 8-4 Checking engine coolant level .................................... 8-5
Changing engine coolant ................................................ 8-5
Engine oil ........................................................................\
..................... 8-6 Checking engine oil level ................................................. 8-6
Changing engine oil and filter ..................................... 8-6
Automatic Transmission Fluid (ATF) ............................. 8-8
Power steering fluid ................................................................... 8-8
Brake fluid ........................................................................\
.................. 8-9
Window washer fluid .............................................................. 8-10
Battery ........................................................................\
........................ 8-11 Jump starting ........................................................................\
. 8-13
Variable voltage control system ................................... 8-13
Drive belts ........................................................................\
................ 8-13
Spark plugs ........................................................................\
............. 8-14 Replacing spark plugs ..................................................... 8-14
Air cleaner ........................................................................\
............... 8-15 Windshield wiper blades ..................................................... 8-16
Cleaning ........................................................................\
........... 8-16
Replacing ........................................................................\
........ 8-16
Rear window wiper blades ............................................... 8-17
Brakes ........................................................................\
........................ 8-17 Self-adjusting brakes ..................................................... 8-17
Brake pad wear warning ............................................ 8-17
Brake booster ...................................................................... 8-17
Fuses ........................................................................\
........................... 8-18 Engine compartment .................................................... 8-18
Passenger compartment ........................................... 8-20
Intelligent Key battery replacement .......................... 8-21
Lights ........................................................................\
.......................... 8-24
Headlights ........................................................................\
...... 8-25
Exterior and interior lights ........................................ 8-26
Wheels and tires ........................................................................\
8-28
Tire pressure ........................................................................\
8-28
Tire labeling ........................................................................\
.. 8-32
Types of tires ....................................................................... 8-34
Tire chains ........................................................................\
...... 8-35
Changing wheels and tires ...................................... 8-36
Page 510 of 604

8-18Do-it-yourself
each depression as the hydraulic
pressure decreases.
If the brakes do not operate properly,
have the brakes checked. It is recom-
mended that you visit a NISSAN dealer for
repair.
SDI2518
SDI2532
ENGINE COMPARTMENT
WARNING
Never use a fuse of a higher or lower
amperage rating than that specified
on the fuse box cover. This could
damage the electrical system or
electronic control units or cause a
fire.
If any electrical equipment does not
operate, check for an open fuse.
1. Be sure the ignition switch is pushed to the OFF or LOCK position and the
headlights are off.
2. Open the engine hood and remove the cover on the battery.
3. Remove the fuse/fusible link holder cover
,or.
4. Remove the fuse with the fuse puller.
FUSES
Page 512 of 604

8-20Do-it-yourself
JVM0200X
PASSENGER COMPARTMENT
WARNING
Never use a fuse of a higher or lower
amperage rating than that specified
on the fuse box cover. This could
damage the electrical system or
electronic control units or cause a
fire.
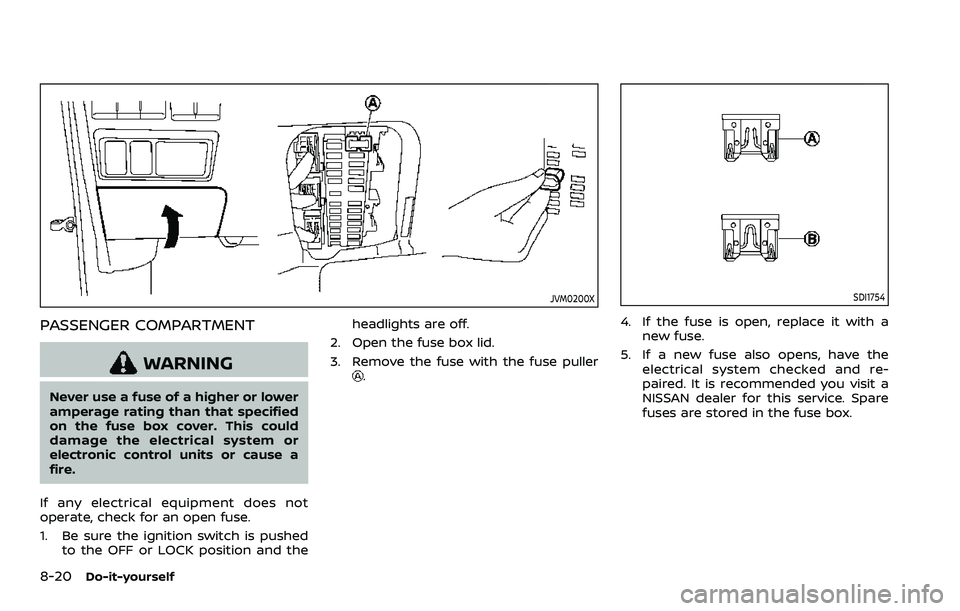
If any electrical equipment does not
operate, check for an open fuse.
1. Be sure the ignition switch is pushed to the OFF or LOCK position and the headlights are off.
2. Open the fuse box lid.
3. Remove the fuse with the fuse puller
.
SDI1754
4. If the fuse is open, replace it with a new fuse.
5. If a new fuse also opens, have the electrical system checked and re-
paired. It is recommended you visit a
NISSAN dealer for this service. Spare
fuses are stored in the fuse box.
Page 513 of 604

SDI2704
Extended storage fuse switch (if so
equipped)
To reduce battery drain, the extended
storage fuse switch comes from the
factory switched off. Prior to delivery of
your vehicle, the switch is pushed in
(switched on) and should always remain
on.
If the extended storage fuse switch is not
pushed in (switched on), the “Shipping
Mode On, Push Storage Fuse” warning
may appear on the vehicle information
display (if so equipped). See “Vehicle
information display” (P.2-20).
If any electrical equipment does not
operate, remove the extended storagefuse switch and check for an open fuse.
NOTE:
If the extended storage fuse switch
malfunctions or if the fuse is open, it is
not necessary to replace the switch. In
this case, remove the extended storage
fuse switch and replace it with a new
fuse of the same rating.
How to remove the extended storage
fuse switch:
1. To remove the extended storage fuse
switch, be sure the ignition switch is in
the OFF or LOCK position.
2. Be sure the headlights are off. (See “Headlight switch” (P.2-47), “Intelligent
Auto Headlight system (Type A)” (P.2-
47), or “Autolight system (Type B)” (P.2-
48).)
3. Remove the fuse box cover.
4. Pinch the locking tabs
found on
each side of the storage fuse switch.
5. Pull the storage fuse switch straight out from the fuse box
.
CAUTION
Be careful not to allow children to
swallow the battery and removed
parts.
Do-it-yourself8-21
INTELLIGENT KEY BATTERY REPLACEMENT