2023 LINCOLN NAUTILUS tow
[x] Cancel search: towPage 367 of 606

REMOVING A HEADLAMP ASSEMBLY
1.Open the hood. See Opening andClosing the Hood (page 341).
2.Remove the screws.
3.Pull the headlamp toward the front of thevehicle to disengage it from the lowerfixing point.
4.Lift the headlamp up and remove it.
5.Disconnect the electrical connector.
CHANGING A FRONT TURN SIGNALLAMP BULB
Front turn signal lamp bulb.A
1.Remove the headlamp assembly. SeeRemoving a Headlamp Assembly (page363).
2.Turn the bulb holder (A) counterclockwiseand remove it.
3.Remove the bulb by pulling it straight out.
363
2023 Nautilus (CD9) Canada/United States of America, enUSA, Edition date: 202207, DOMMaintenance E194758 5E133750 E387424
Page 371 of 606

CLEANING CHROME, ALUMINIUM ORSTAINLESS STEEL
We recommend that you only use a carshampoo, a soft cloth and water on bumpersand other chrome, aluminium or stainlesssteel parts.
Note:For additional information andassistance, we recommend that you contactan authorized dealer.
Note:Rinse the area well after cleaning.
Note:Do not use abrasive materials, forexample steel wool or plastic pads, as theycan scratch these surfaces.
Note:Do not use chrome cleaner, metalcleaner or polish on wheels or wheel covers.
CLEANING WHEELS
Only use a recommended wheel and tirecleaner to clean the wheels weekly. Foradditional information and assistance, werecommend that you contact an authorizeddealer.
1.Use a sponge to remove heavy depositsof dirt and brake dust.
2.Rinse well after cleaning.
Note:Do not apply a cleaning chemical towarm or hot wheel rims and covers.
If you intend on parking your vehicle for anextended period after cleaning the wheelswith a wheel cleaner, drive your vehicle fora few minutes before parking your vehicle.This reduces the risk of corrosion of thebrake discs, brake pads and linings.
Do not clean the wheels when they are hot.
Note: Some car washes could damagewheel rims and covers.
Note: Using non-recommended cleaners,harsh cleaning products, chrome wheelcleaners or abrasive materials coulddamage wheel rims and covers.
CLEANING THE ENGINECOMPARTMENT
Use a vacuum cleaner to remove debris fromthe screen area below windshield.
Note:If you are not familiar with the partsaround the engine do not wash the enginecompartment. Avoid frequent enginewashes.
When washing the engine compartment:
•Never wash or rinse the engine while itis hot or running.
•Never wash or rinse any ignition coil,spark plug wire or spark plug well.
•Cover the battery, power distribution box,and air filter assembly to prevent waterdamage.
Note:If your vehicle has an engine coverremove the cover before application ofshampoo and degreaser.
•Spray an approved engine shampoo anddegreaser on all parts that requirecleaning and rinse with water.
CLEANING STRIPES OR GRAPHICS
It is recommended to wash your vehicle byhand however, pressure washing may beused under the following conditions:
367
2023 Nautilus (CD9) Canada/United States of America, enUSA, Edition date: 202207, DOMVehicle Care
Page 392 of 606

If you feel a sudden vibration or ridedisturbance while driving, or you suspectyour tire or vehicle has been damaged,immediately reduce your speed. Drivewith caution until you can safely pull offthe road. Stop and inspect the tires fordamage. If a tire is under-inflated ordamaged, deflate it, remove the wheeland replace it with your spare tire andwheel. If you cannot detect a cause,have the vehicle towed to the nearestrepair facility or tire dealer to have thevehicle inspected.
Tire and Wheel Alignment
A bad jolt from hitting a curb or potholecan cause the front end of your vehicleto become misaligned or cause damageto your tires. If your vehicle seems topull to one side when you are driving,the wheels could be out of alignment.Have an authorized dealer check thewheel alignment periodically.
Wheel misalignment in the front or therear can cause uneven and rapidtreadwear of your tires and should becorrected by an authorized dealer.
INSPECTING THE WHEEL VALVE
STEMS
Check the valve stems for holes, cracks,or cuts that could permit air leakage.
TIRE ROTATION
WARNING: If the tire label showsdifferent tire pressures for the front andrear tires and the vehicle has a tirepressure monitoring system, then you needto update the settings for the systemsensors. Always perform the system resetprocedure after tire rotation. If you do notreset the system, it may not provide a lowtire pressure warning when necessary.
Rotating your tires at the recommendedinterval will help your tires wear more evenly,providing better tire performance and longertire life.
Note:If your tires show any uneven wearhave the alignment checked by anauthorized dealer before rotating tires.
Note:If you have a dissimilar spare wheeland tire assembly, it is intended fortemporary use only and should not be usedin a tire rotation.
Note:After having your tires rotated, inflationpressure must be checked and adjusted tothe vehicle requirements.
Tire Rotation Diagram
Follow the diagram indicating the correct tirelocations for rotating the tires.
388
2023 Nautilus (CD9) Canada/United States of America, enUSA, Edition date: 202207, DOMTire CareE142547
Page 393 of 606

WHAT IS THE TIRE SEALANT AND
INFLATOR KIT
Lincoln Tire Inflator and Sealant Kit VideoLink
The kit consists of an air compressor toreinflate the tire and a canister of sealingcompound that seals most punctures. Thiskit provides a temporary tire repair allowingyou to drive your vehicle up to 120 mi(200 km) at a maximum speed of 50 mph(80 km/h) to reach a tire service location.
Note:The temporary mobility kit containsenough sealant compound in the canisterfor one tire repair only. See an authorizeddealer for replacement sealant canisters.
TIRE SEALANT AND INFLATOR KIT
PRECAUTIONS
WARNING: Failure to follow theseguidelines could result in an increased riskof loss of vehicle control, injury or death.
WARNING: Do not run the enginewhen operating the air compressor unlessthe vehicle is outdoors or in awell-ventilated area.
Note:Do not use the kit if a tire has becomeseverely damaged. Only punctures locatedwithin the tire tread can be sealed with thekit.
Do not attempt to repair punctures largerthan 0.24 in (6 mm) or damage to the tire'ssidewall. The tire may not completely seal.
•Drive carefully and avoid abrupt steeringmaneuvers.
•Periodically monitor tire inflation pressurein the affected tire; if the tire is losingpressure, have the vehicle towed.
•Read the information in the Tips for Useof the Kit section to make sure safeoperation of the kit and your vehicle.
After sealant use, the tire pressuremonitoring system sensor and valve stem onthe wheel must be replaced by an authorizeddealer.
LOCATING THE TIRE SEALANT
AND INFLATOR KIT
The kit is located under the load floor in therear of the vehicle.
389
2023 Nautilus (CD9) Canada/United States of America, enUSA, Edition date: 202207, DOMTire Sealant and Inflator Kit (If Equipped)
Page 399 of 606

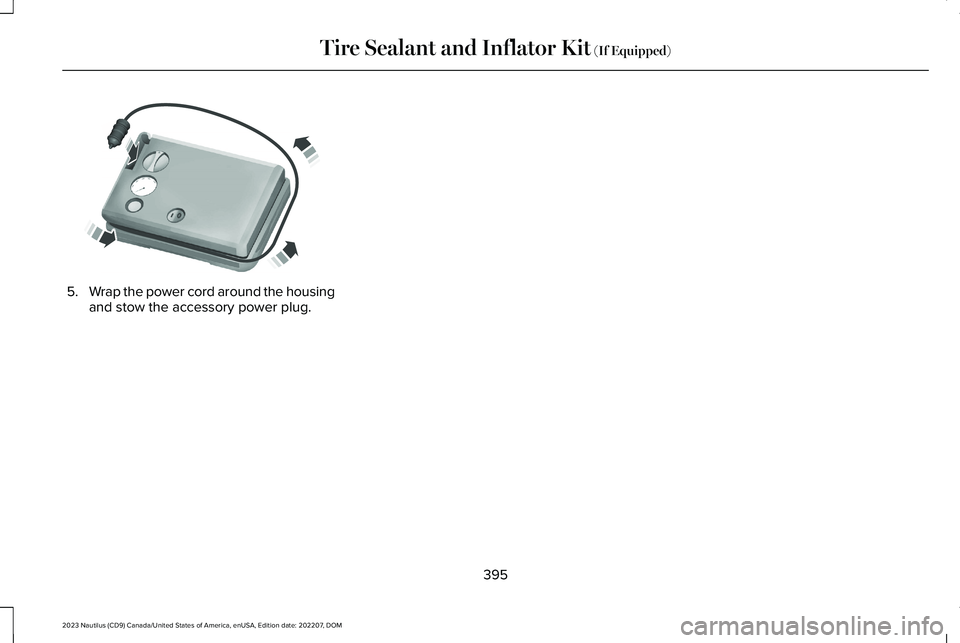
5.Wrap the power cord around the housingand stow the accessory power plug.
395
2023 Nautilus (CD9) Canada/United States of America, enUSA, Edition date: 202207, DOMTire Sealant and Inflator Kit (If Equipped) E175990
Page 406 of 606

•Exceed 50 mph (80 km/h).
•Load the vehicle beyond maximumvehicle load rating listed on the SafetyCompliance Label.
•Tow a trailer.
•Use snow chains on the end of thevehicle with the dissimilar spare tire.
•Use more than one dissimilar spare tireat a time.
•Use commercial car washing equipment.
•Try to repair the dissimilar spare tire.
Use of one of the dissimilar spare tires listedabove at any one wheel location can lead toimpairment of the following:
•Handling, stability and brakingperformance.
•Comfort and noise.
•Ground clearance and parking at curbs.
•Winter weather driving capability.
•Wet weather driving capability.
•All-wheel driving capability, if applicable.
3. Full-size dissimilar spare without labelon wheel
When driving with the full-size dissimilarspare wheel and tire assembly, do not:
•Exceed 70 mph (113 km/h).
•Use more than one dissimilar sparewheel and tire assembly at a time.
•Use commercial car washing equipment.
•Use snow chains on the end of thevehicle with the dissimilar spare wheeland tire assembly.
The usage of a full-size dissimilar sparewheel and tire assembly can lead toimpairment of the following:
•Handling, stability and brakingperformance.
•Comfort and noise.
•Ground clearance and parking at curbs.
•Winter weather driving capability.
•Wet weather driving capability.
•All-wheel driving capability.
When driving with the full-size dissimilarspare wheel and tire assembly additionalcaution should be given to:
•Towing a trailer.
•Driving vehicles equipped with a camperbody.
•Driving vehicles with a load on the cargorack.
Drive cautiously when using a full-sizedissimilar spare wheel and tire assembly andseek service as soon as possible.
Tire Change Procedure
WARNING: The jack supplied withthis vehicle is only intended for changinga flat tire in an emergency. Do not attemptto do any other work on your vehicle whenit is supported by the jack, as your vehiclecould slip off the jack. Failure to follow thisinstruction could result in personal injuryor death.
402
2023 Nautilus (CD9) Canada/United States of America, enUSA, Edition date: 202207, DOMChanging a Road Wheel (If Equipped)
Page 410 of 606

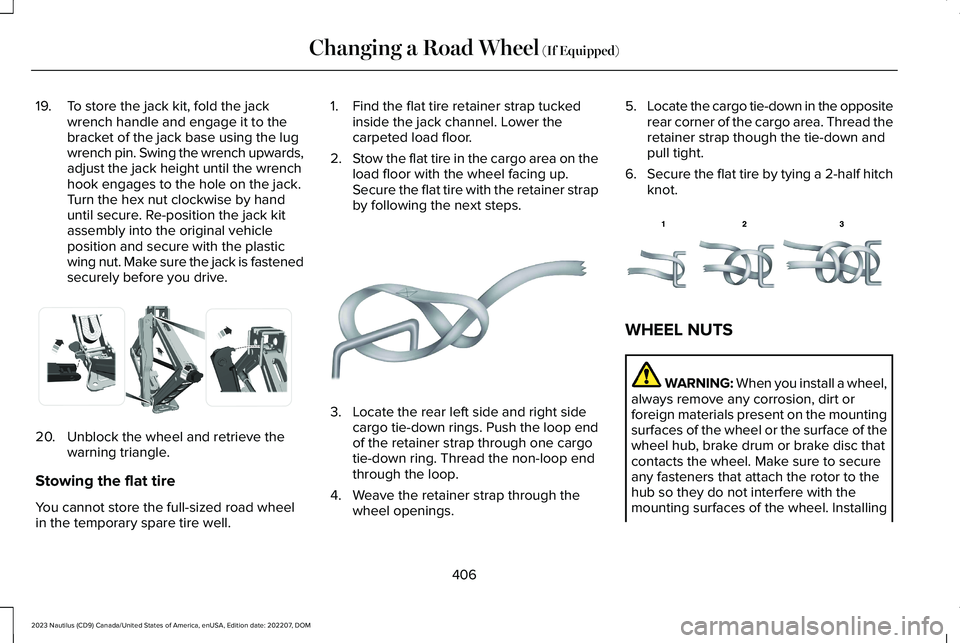
19.To store the jack kit, fold the jackwrench handle and engage it to thebracket of the jack base using the lugwrench pin. Swing the wrench upwards,adjust the jack height until the wrenchhook engages to the hole on the jack.Turn the hex nut clockwise by handuntil secure. Re-position the jack kitassembly into the original vehicleposition and secure with the plasticwing nut. Make sure the jack is fastenedsecurely before you drive.
20.Unblock the wheel and retrieve thewarning triangle.
Stowing the flat tire
You cannot store the full-sized road wheelin the temporary spare tire well.
1.Find the flat tire retainer strap tuckedinside the jack channel. Lower thecarpeted load floor.
2.Stow the flat tire in the cargo area on theload floor with the wheel facing up.Secure the flat tire with the retainer strapby following the next steps.
3.Locate the rear left side and right sidecargo tie-down rings. Push the loop endof the retainer strap through one cargotie-down ring. Thread the non-loop endthrough the loop.
4.Weave the retainer strap through thewheel openings.
5.Locate the cargo tie-down in the oppositerear corner of the cargo area. Thread theretainer strap though the tie-down andpull tight.
6.Secure the flat tire by tying a 2-half hitchknot.
WHEEL NUTS
WARNING: When you install a wheel,always remove any corrosion, dirt orforeign materials present on the mountingsurfaces of the wheel or the surface of thewheel hub, brake drum or brake disc thatcontacts the wheel. Make sure to secureany fasteners that attach the rotor to thehub so they do not interfere with themounting surfaces of the wheel. Installing
406
2023 Nautilus (CD9) Canada/United States of America, enUSA, Edition date: 202207, DOMChanging a Road Wheel (If Equipped)E294121 E142906 E143746
Page 439 of 606

3.Press Tone Settings.
4.Press the arrows or slider bar to adjustthe settings.
Speed Compensated Volume
1.Press Settings on the touchscreen.
2.Press Sound Settings.
3.Press Speed Compensated Volume.
4.Press a setting.
Occupancy Mode (If Equipped)
1.Press Settings on the touchscreen.
2.Press Sound Settings.
3.Press Occupancy Mode.
4.Press a setting.
Sound Mode (If Equipped)
1.Press Settings on the touchscreen.
2.Press Sound Settings.
3.Press Sound Mode.
4.Press a setting.
SETTING THE CLOCK AND DATE
1.Press Settings on the touchscreen.
2.Press Clock Settings.
3.Set the time.
Note:The AM and PM options are notavailable if 24-hour mode is on.
Switching Automatic Time Updates Onand Off
1.Press Settings on the touchscreen.
2.Press Clock Settings.
3.Switch Auto Time Update on or off.
AM/FM RADIO
AM/FM RADIO LIMITATIONS
The further you travel from an AM or FMstation, the weaker the signal and the weakerthe reception.
Hills, mountains, tall buildings, bridges,tunnels, freeway overpasses, parkinggarages, dense tree foliage andthunderstorms can interfere with thereception.
When you pass a ground-based broadcastrepeating tower, a stronger signal mayovertake a weaker one and result in theaudio system muting.
435
2023 Nautilus (CD9) Canada/United States of America, enUSA, Edition date: 202207, DOMAudio System