Page 73 of 344

GETTING TO KNOW YOUR VEHICLE71
(Continued)
To fully raise the load floor, pull upward on the floor
handle, pull the floor outward, then position the
floor upright with the bottom fitting on top of the
floor positioning brackets. Push the top of the floor
down firmly to secure it in this position.
Fully Raised Load Floor Position
To provide additional storage area, each rear seat
can be folded flat. This allows for extended cargo
space and still maintains some rear seating room
Ú page 28.
Cargo Tie-Down Hooks And Loops
The tie-downs located on the cargo area floor
should be used to secure loads safely when the
vehicle is moving.
Cargo tie-down loops are located on the trim
panels.
Rear Storage Bins
The rear storage bins are located in the rear of the
vehicle on the sides of the load floor.
Rear Storage Bin
WARNING!
Cargo tie-downs are not safe anchors for a
child seat tether strap. In a sudden stop or
accident, a tie-down could pull loose and allow
the child seat to come loose. A child could be
badly injured. Use only the anchors provided
for child seat tethers.
To help protect against personal injury,
passengers should not be seated in the rear
cargo area. The rear cargo space is intended
for load carrying purposes only, not for
passengers, who should sit in seats and use
seat belts.
The weight and position of cargo and
passengers can change the vehicle center of
gravity and vehicle handling. To avoid loss of
control resulting in personal injury, follow these
guidelines for loading your vehicle:
Do not carry loads that exceed the load limits
described on the label attached to the left
door or left door center pillar.
Always place cargo evenly on the cargo floor.
Put heavier objects as low and as far forward
as possible.
Place as much cargo as possible in front of the
rear axle. Too much weight or improperly
placed weight over or behind the rear axle can
cause the vehicle to sway.
Do not pile luggage or cargo higher than the
top of the seatback. This could impair visibility
or become a dangerous projectile in a sudden
stop or accident.
WARNING!
2
22_MP_OM_EN_USC_t.book Page 71
Page 74 of 344

72GETTING TO KNOW YOUR VEHICLE
(Continued)
ROOF LUGGAGE RACK — IF EQUIPPED
The load carried on the roof, when equipped with a
luggage rack, must not exceed 150 lb (68 kg), and
it should be uniformly distributed over the cargo
area.
Crossbars should always be used whenever cargo
is placed on the roof rack. Check the straps
frequently to be sure that the load remains
securely attached.
NOTE:Crossbars can be purchased at your authorized
dealer through Mopar® parts.
External racks do not increase the total load
carrying capacity of the vehicle. Be sure that the
total occupant and luggage load inside the vehicle,
plus the load on the luggage rack, do not exceed
the maximum vehicle load capacity.
WARNING!
Cargo must be securely tied down before driving
your vehicle. Improperly secured loads can fly off
the vehicle, particularly at high speeds, resulting
in personal injury or property damage. Follow
the roof rack cautions when carrying cargo on
your roof rack.
CAUTION!
To avoid damage to the roof rack and vehicle,
do not exceed the maximum roof rack load
capacity. Always distribute heavy loads as
evenly as possible and secure the load appro-
priately.
Long loads, which extend over the windshield,
should be secured to both the front and rear of
the vehicle.
Place a blanket or other protection between
the surface of the roof and the load.
Travel at reduced speeds and turn corners
carefully when carrying large or heavy loads
on the roof rack. Wind forces, due to natural
causes or nearby truck traffic, can add sudden
upward lift. It is recommended to not carry
large flat loads, such as wood panels or surf -
boards, which may result in damage to the
cargo or your vehicle.
Load should always be secured to crossbars
first, with tie down loops used as additional
securing points if needed. Tie loops are
intended as supplementary tie down points
only. Do not use ratcheting mechanisms with
the tie loops. Check the straps frequently to be
sure that the load remains securely attached.
CAUTION!
22_MP_OM_EN_USC_t.book Page 72
Page 75 of 344
73
GETTING TO KNOW YOUR INSTRUMENT PANEL
BASE / MIDLINE INSTRUMENT CLUSTER
3
22_MP_OM_EN_USC_t.book Page 73
Page 76 of 344
74GETTING TO KNOW YOUR INSTRUMENT PANEL
22_MP_OM_EN_USC_t.book Page 74
Page 77 of 344

GETTING TO KNOW YOUR INSTRUMENT PANEL75
BASE / MIDLINE INSTRUMENT CLUSTER
D
ESCRIPTIONS
1. Tachometer
Indicates the engine speed in revolutions
per minute (RPM x 1000).
2. Instrument Cluster Display
The instrument cluster display features a
driver interactive display Ú page 77.
3. Speedometer
Indicates vehicle speed.
4. Temperature Gauge
The temperature gauge shows engine
coolant temperature. Any reading within the
normal range indicates that the engine
cooling system is operating satisfactorily.
The gauge pointer will likely indicate a
higher temperature when driving in hot
weather or up mountain grades. It should
not be allowed to exceed the upper limits of
the normal operating range. 5. Fuel Gauge
The gauge shows the level of fuel in the fuel
tank when the ignition switch is in the ON/
RUN position.
The fuel pump symbol points to
the side of the vehicle where the
fuel door is located.
NOTE:The hard telltales will illuminate for a bulb check
when the ignition is first cycled.
WARNING!
A hot engine cooling system is dangerous. You or
others could be badly burned by steam or boiling
coolant. It is recommended to call an authorized
dealer for service if your vehicle overheats
Ú page 279.
CAUTION!
Driving with a hot engine cooling system could
damage your vehicle. If the temperature gauge
reads “H”, pull over and stop the vehicle. Idle the
vehicle with the air conditioner turned off until
the pointer drops back into the normal range. If
the pointer remains on the “H”, turn the engine
off immediately and call an authorized dealer
for service.
3
22_MP_OM_EN_USC_t.book Page 75
Page 78 of 344
76GETTING TO KNOW YOUR INSTRUMENT PANEL
PREMIUM INSTRUMENT CLUSTER
22_MP_OM_EN_USC_t.book Page 76
Page 79 of 344

GETTING TO KNOW YOUR INSTRUMENT PANEL77
PREMIUM INSTRUMENT CLUSTER
D
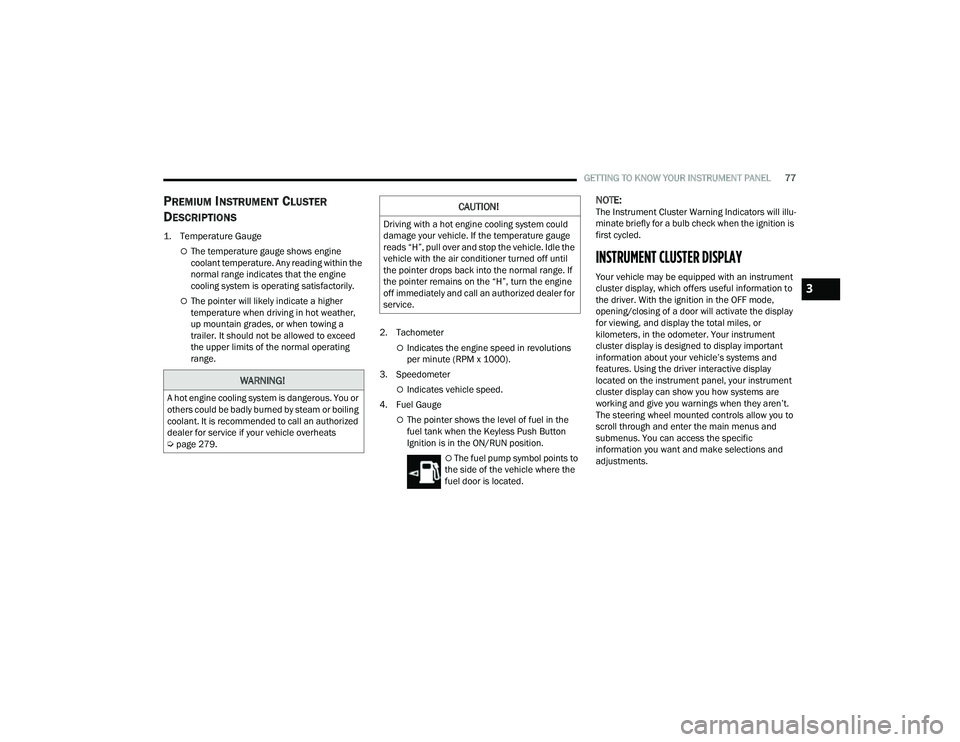
ESCRIPTIONS
1. Temperature Gauge
The temperature gauge shows engine
coolant temperature. Any reading within the
normal range indicates that the engine
cooling system is operating satisfactorily.
The pointer will likely indicate a higher
temperature when driving in hot weather,
up mountain grades, or when towing a
trailer. It should not be allowed to exceed
the upper limits of the normal operating
range. 2. Tachometer
Indicates the engine speed in revolutions
per minute (RPM x 1000).
3. Speedometer
Indicates vehicle speed.
4. Fuel Gauge
The pointer shows the level of fuel in the
fuel tank when the Keyless Push Button
Ignition is in the ON/RUN position.
The fuel pump symbol points to
the side of the vehicle where the
fuel door is located.
NOTE:The Instrument Cluster Warning Indicators will illu -
minate briefly for a bulb check when the ignition is
first cycled.
INSTRUMENT CLUSTER DISPLAY
Your vehicle may be equipped with an instrument
cluster display, which offers useful information to
the driver. With the ignition in the OFF mode,
opening/closing of a door will activate the display
for viewing, and display the total miles, or
kilometers, in the odometer. Your instrument
cluster display is designed to display important
information about your vehicle’s systems and
features. Using the driver interactive display
located on the instrument panel, your instrument
cluster display can show you how systems are
working and give you warnings when they aren’t.
The steering wheel mounted controls allow you to
scroll through and enter the main menus and
submenus. You can access the specific
information you want and make selections and
adjustments.
WARNING!
A hot engine cooling system is dangerous. You or
others could be badly burned by steam or boiling
coolant. It is recommended to call an authorized
dealer for service if your vehicle overheats
Ú page 279.
CAUTION!
Driving with a hot engine cooling system could
damage your vehicle. If the temperature gauge
reads “H”, pull over and stop the vehicle. Idle the
vehicle with the air conditioner turned off until
the pointer drops back into the normal range. If
the pointer remains on the “H”, turn the engine
off immediately and call an authorized dealer for
service.
3
22_MP_OM_EN_USC_t.book Page 77
Page 80 of 344

78GETTING TO KNOW YOUR INSTRUMENT PANEL
INSTRUMENT CLUSTER DISPLAY
L
OCATION AND CONTROLS
The instrument cluster display features a driver
interactive display that is located in the instrument
cluster.
NOTE:Depending on your vehicle trim, your instrument
cluster display may vary.
Instrument Cluster Display Location and Controls
The systems allow the driver to select information
by pushing the following buttons mounted on the
steering wheel:
Premium Instrument Cluster Display Control Buttons
Up Arrow Button
Push and release the up arrow button to
scroll upward through the main menu and
submenus.
OK Button
Push the OK button to access/select the infor -
mation screens or submenu screens of a main
menu item. Push and hold the OK button for one
second to reset displayed/selected features
that can be reset.
Menu Button — If Equipped
Push the Menu button to access/select the
information screens or submenu screens of
the Home Screen display. Push and hold the
OK button to enter edit mode.
Left Arrow Button
Push and release the left arrow button to
access the information screens or submenu
screens of a main menu item.
Down Arrow Button
Push and release the down arrow button to
scroll downward through the main menu and
submenus.
Right Arrow Button
Push and release the right arrow button to
access the information screens or submenu
screens of a main menu item.
1 – Instrument Cluster Display Screen
2 – Instrument Cluster Display Controls
1 — Up Arrow Button
2 — OK Button
3 — Menu Button
4 — Left Arrow Button
5 — Down Arrow Button
6 — Right Arrow Button
22_MP_OM_EN_USC_t.book Page 78