2023 HYUNDAI TUCSON flat
[x] Cancel search: flatPage 113 of 638
04
4-15
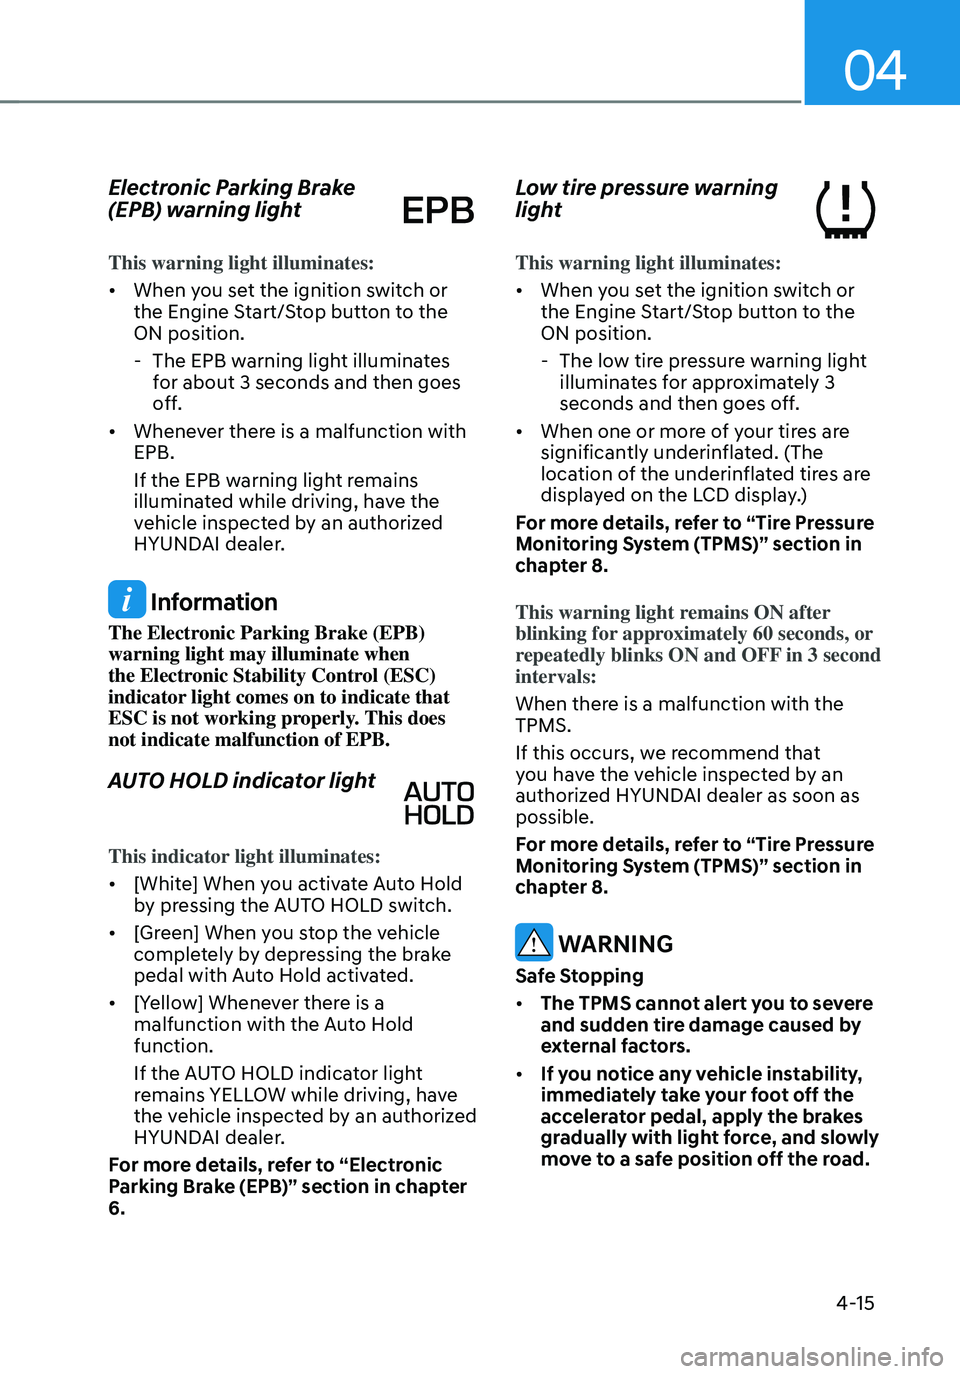
Electronic Parking Brake
(EPB) warning light
This warning light illuminates:
• When you set the ignition switch or
the Engine Start/Stop button to the
ON position.
-The EPB warning light illuminates
for about 3 seconds and then goes
off.
• Whenever there is a malfunction with
EPB.
If the EPB warning light remains
illuminated while driving, have the
vehicle inspected by an authorized
HYUNDAI dealer.
Information
The Electronic Parking Brake (EPB)
warning light may illuminate when
the Electronic Stability Control (ESC)
indicator light comes on to indicate that
ESC is not working properly. This does
not indicate malfunction of EPB.
AUTO HOLD indicator light
This indicator light illuminates:
• [White] When you activate Auto Hold
by pressing the AUTO HOLD switch.
• [Green] When you stop the vehicle
completely by depressing the brake
pedal with Auto Hold activated.
• [Yellow] Whenever there is a
malfunction with the Auto Hold
function.
If the AUTO HOLD indicator light
remains YELLOW while driving, have
the vehicle inspected by an authorized
HYUNDAI dealer.
For more details, refer to “Electronic
Parking Brake (EPB)” section in chapter
6.
Low tire pressure warning
light
This warning light illuminates:
• When you set the ignition switch or
the Engine Start/Stop button to the
ON position.
- The low tire pressure warning light
illuminates for approximately 3
seconds and then goes off.
• When one or more of your tires are
significantly underinflated. (The
location of the underinflated tires are
displayed on the LCD display.)
For more details, refer to “Tire Pressure
Monitoring System (TPMS)” section in
chapter 8.
This warning light remains ON after
blinking for approximately 60 seconds, or
repeatedly blinks ON and OFF in 3 second
intervals:
When there is a malfunction with the
TPMS.
If this occurs, we recommend that
you have the vehicle inspected by an
authorized HYUNDAI dealer as soon as
possible.
For more details, refer to “Tire Pressure
Monitoring System (TPMS)” section in
chapter 8.
WARNING
Safe Stopping
• The TPMS cannot alert you to severe
and sudden tire damage caused by
external factors.
• If you notice any vehicle instability,
immediately take your foot off the
accelerator pedal, apply the brakes
gradually with light force, and slowly
move to a safe position off the road.
Page 175 of 638
05
5-31
Operating door locks from
outside the vehicle
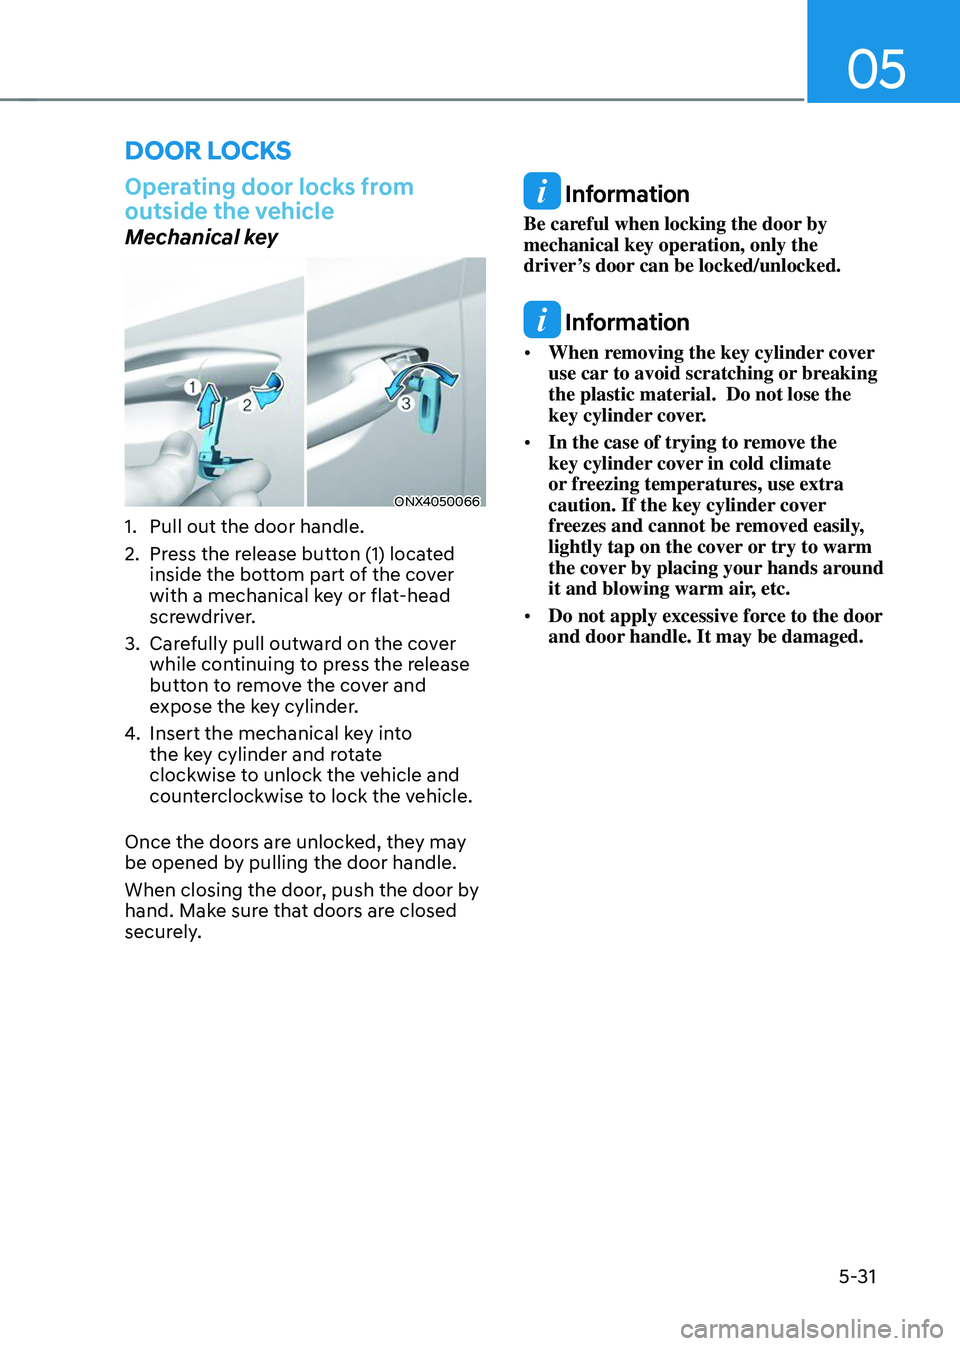
Mechanical key
ONX4050066
1. Pull out the door handle.
2. Press the release button (1) located
inside the bottom part of the cover
with a mechanical key or flat-head
screwdriver.
3. Carefully pull outward on the cover
while continuing to press the release
button to remove the cover and
expose the key cylinder.
4. Insert the mechanical key into
the key cylinder and rotate
clockwise to unlock the vehicle and
counterclockwise to lock the vehicle.
Once the doors are unlocked, they may
be opened by pulling the door handle.
When closing the door, push the door by
hand. Make sure that doors are closed
securely.
Information
Be careful when locking the door by
mechanical key operation, only the
driver’s door can be locked/unlocked.
Information
• When removing the key cylinder cover
use car to avoid scratching or breaking
the plastic material. Do not lose the
key cylinder cover.
• In the case of trying to remove the
key cylinder cover in cold climate
or freezing temperatures, use extra
caution. If the key cylinder cover
freezes and cannot be removed easily,
lightly tap on the cover or try to warm
the cover by placing your hands around
it and blowing warm air, etc.
• Do not apply excessive force to the door
and door handle. It may be damaged.
DOOR LOCKS
Page 179 of 638
05
5-35
CAUTION
Opening a door when something is
approaching may cause damage or
injury. Be careful when opening doors
and watch for vehicles, motorcycles,
bicycles or pedestrians approaching the
vehicle in the path of the door.
WARNING
If you stay in the vehicle for a long time
while the weather is very hot or cold,
there are risks of injuries or danger to
life. Do not lock the vehicle from the
outside when someone is in the vehicle.
Auto door lock/unlock features
Impact sensing door unlock system
All doors will be automatically unlocked
when an impact causes the air bags to
deploy.
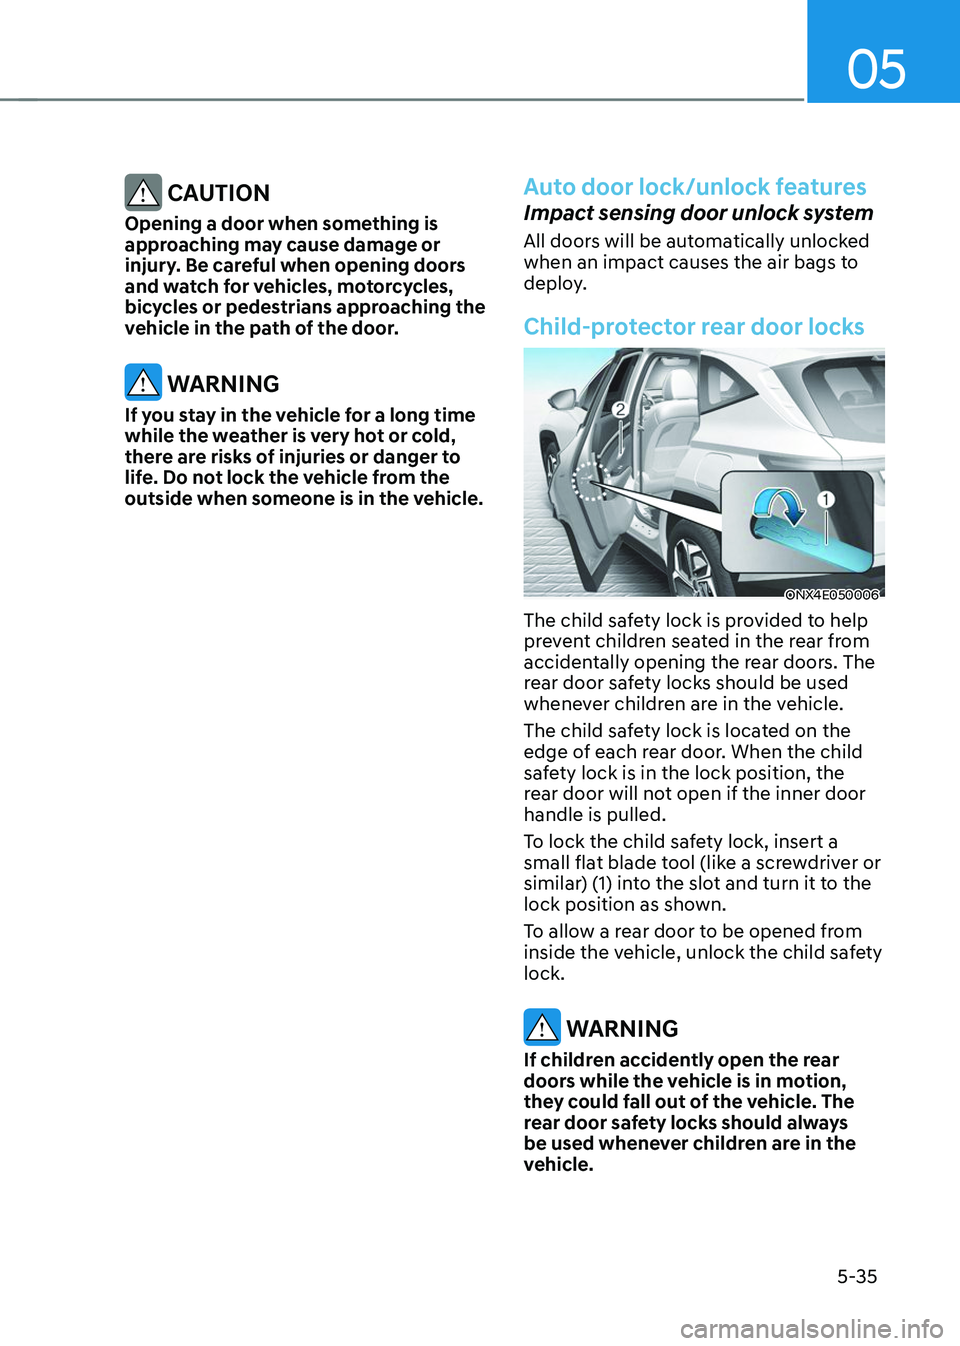
Child-protector rear door locks
ONX4E050006
The child safety lock is provided to help
prevent children seated in the rear from
accidentally opening the rear doors. The
rear door safety locks should be used
whenever children are in the vehicle.
The child safety lock is located on the
edge of each rear door. When the child
safety lock is in the lock position, the
rear door will not open if the inner door
handle is pulled.
To lock the child safety lock, insert a
small flat blade tool (like a screwdriver or
similar) (1) into the slot and turn it to the
lock position as shown.
To allow a rear door to be opened from
inside the vehicle, unlock the child safety
lock.
WARNING
If children accidently open the rear
doors while the vehicle is in motion,
they could fall out of the vehicle. The
rear door safety locks should always
be used whenever children are in the
vehicle.
Page 229 of 638
05
5-85
Limitations of the system
High Beam Assist may not work properly
in the following situations:
• Light from a vehicle is not detected
because of lamp damage, or because
it is hidden from sight, etc.
• Headlamp of a vehicle is covered with
dust, snow or water.
• A vehicle’s headlamps are off but the
fog lamps are on and etc.
• There is a lamp that has a similar
shape as a vehicle’s lamp.
• Headlamps have been damaged or
not repaired properly.
• Headlamps are not aimed properly.
• Driving on a narrow curved road,
rough road, uphill or downhill.
• Vehicle in front is partially visible on a
crossroad or curved road.
• There is a traffic light, reflecting sign,
flashing sign or mirror ahead.
• There is a temporary reflector or flash
ahead (construction area).
• The road conditions are bad such as
being wet, iced or covered with snow.
• A vehicle suddenly appears from a
curve.
• The vehicle is tilted from a flat tire or
is being towed.
• Light from a vehicle is not detected
because of exhaust fume, smoke, fog,
snow, etc.
For more details on the limitations
of the front view camera, refer to
“Forward Collision-Avoidance Assist
(FCA)” section in chapter 7. WARNING
• At times, High Beam Assist may not
work properly. It is the responsibility
of the driver for safe driving
practices and always check the road
conditions for your safety.
• When High Beam Assist does
not operate normally, change
the headlamp position manually
between high beam and low beam.
Page 275 of 638

05
5-131
Coat hook
OTM048095
These hooks are not designed to hold
large or heavy items.
WARNING
OTM048096
Do not hang other objects such
as hangers or hard objects except
clothes. Also, do not put heavy, sharp
or breakable objects in the clothes
pockets. In an accident or when the
curtain air bag is inflated, it may cause
vehicle damage or personal injury.
Floor mat anchor(s)
ALWAYS use the Floor Mat Anchors to
attach the front floor mats to the vehicle.
The anchors on the front floor carpet
keep the floor mats from sliding forward.
WARNING
Do not overlay additional mats or liners
over the floor mats. If using All Weather
mats, remove the carpeted floor mats
before installing them. Only use floor
mats designed to connect to the
anchors.
WARNING
The following must be observed when
installing ANY floor mat to the vehicle.
• Ensure to remove a protective
film attached on the carpet
before attaching a floor mat on
the front floor carpet. Otherwise,
the floor mat may move freely on
the protective film and it could
result in unintentional braking or
accelerating.
• Ensure that the floor mats are
securely attached to the vehicle’s
floor mat anchor(s) before driving
the vehicle.
• Do not use ANY floor mat that cannot
be firmly attached to the vehicle’s
floor mat anchors.
• Do not stack floor mats on top of one
another (e.g. all-weather rubber mat
on top of a carpeted floor mat). Only
a single floor mat should be installed
in each position.
IMPORTANT - Your vehicle was
manufactured with driver’s side floor
mat anchors that are designed to
securely hold the floor mat in place.
To avoid any interference with pedal
operation, HYUNDAI recommends that
the HYUNDAI floor mat designed for use
in your vehicle be installed.
Page 279 of 638
05
5-135
EXTERIOR FEATURES
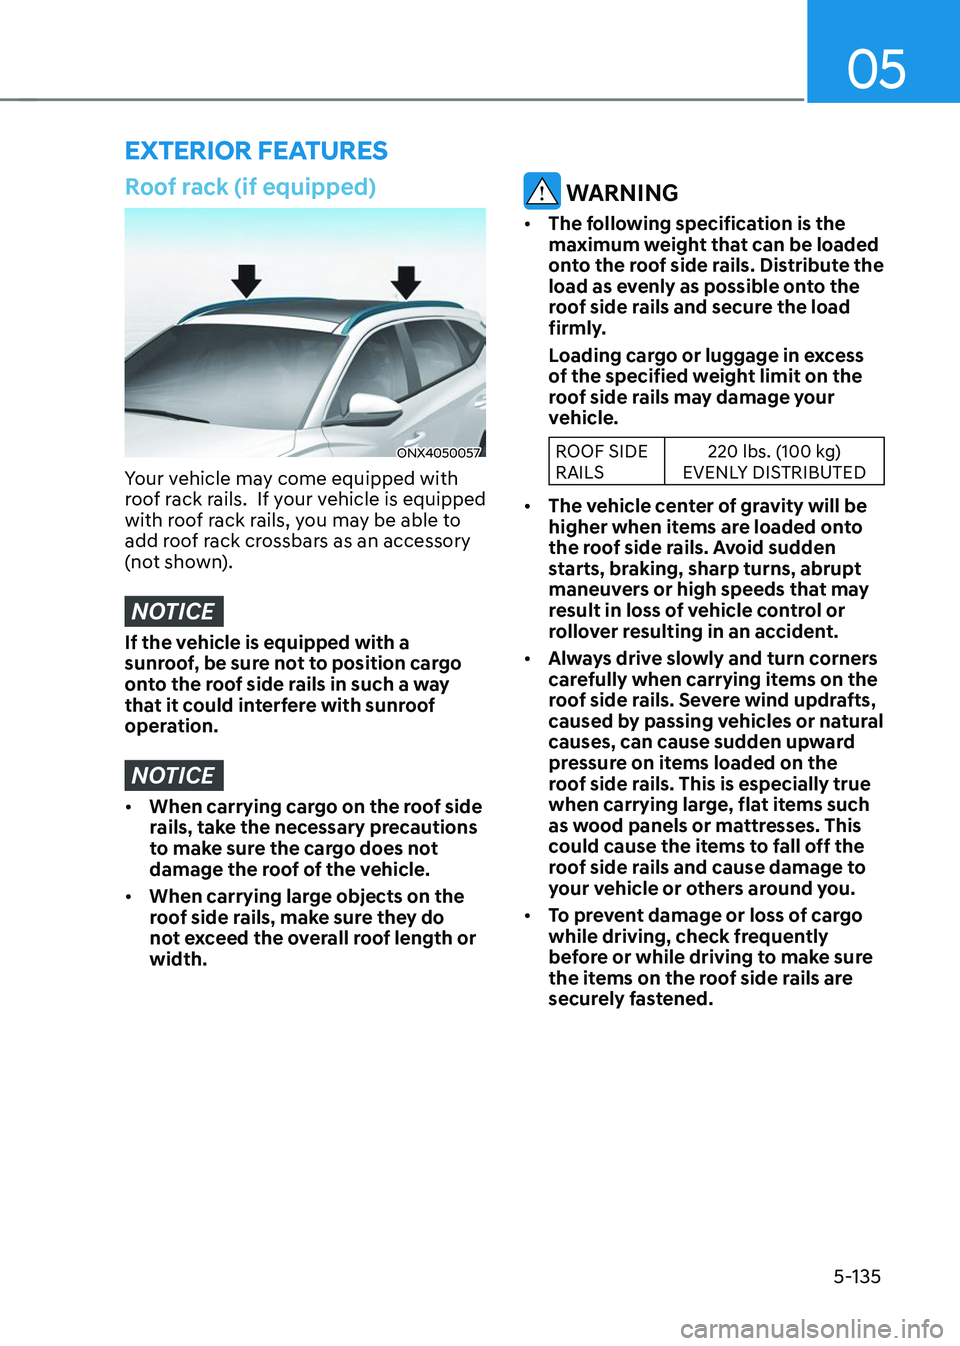
Roof rack (if equipped)
ONX4050057
Your vehicle may come equipped with
roof rack rails. If your vehicle is equipped
with roof rack rails, you may be able to
add roof rack crossbars as an accessory
(not shown).
NOTICE
If the vehicle is equipped with a
sunroof, be sure not to position cargo
onto the roof side rails in such a way
that it could interfere with sunroof
operation.
NOTICE
• When carrying cargo on the roof side
rails, take the necessary precautions
to make sure the cargo does not
damage the roof of the vehicle.
• When carrying large objects on the
roof side rails, make sure they do
not exceed the overall roof length or
width.
WARNING
• The following specification is the
maximum weight that can be loaded
onto the roof side rails. Distribute the
load as evenly as possible onto the
roof side rails and secure the load
firmly.
Loading cargo or luggage in excess
of the specified weight limit on the
roof side rails may damage your
vehicle.
ROOF SIDE
RAILS 220 lbs. (100 kg)
EVENLY DISTRIBUTED
• The vehicle center of gravity will be
higher when items are loaded onto
the roof side rails. Avoid sudden
starts, braking, sharp turns, abrupt
maneuvers or high speeds that may
result in loss of vehicle control or
rollover resulting in an accident.
• Always drive slowly and turn corners
carefully when carrying items on the
roof side rails. Severe wind updrafts,
caused by passing vehicles or natural
causes, can cause sudden upward
pressure on items loaded on the
roof side rails. This is especially true
when carrying large, flat items such
as wood panels or mattresses. This
could cause the items to fall off the
roof side rails and cause damage to
your vehicle or others around you.
• To prevent damage or loss of cargo
while driving, check frequently
before or while driving to make sure
the items on the roof side rails are
securely fastened.
Page 304 of 638
06
6-19
Information
• Only the eight forward gears can be
selected. To reverse or park the vehicle,
move the shift lever to the R (Reverse)
or P (Park) position as required.
• Downshifts are made automatically
when the vehicle slows down. When the
vehicle stops, 1st gear is automatically
selected.
• When the engine RPM approaches the
red zone the transmission will upshift
automatically.
•
If the driver presses the lever to + (Up) or - (Down) position, the transmission may not make the requested gear
change if the next gear is outside of
the allowable engine RPM range.
The driver must execute upshifts in
accordance with road conditions,
taking care to keep the engine RPMs
below the red zone.
• When driving on a slippery road, push
the shift lever forward into the + (Up) position. This causes the transmission
to shift into the 2nd gear which is better
for smooth driving on a slippery road.
Push the shift lever to the - (Down) side to shift back to the 1st gear.
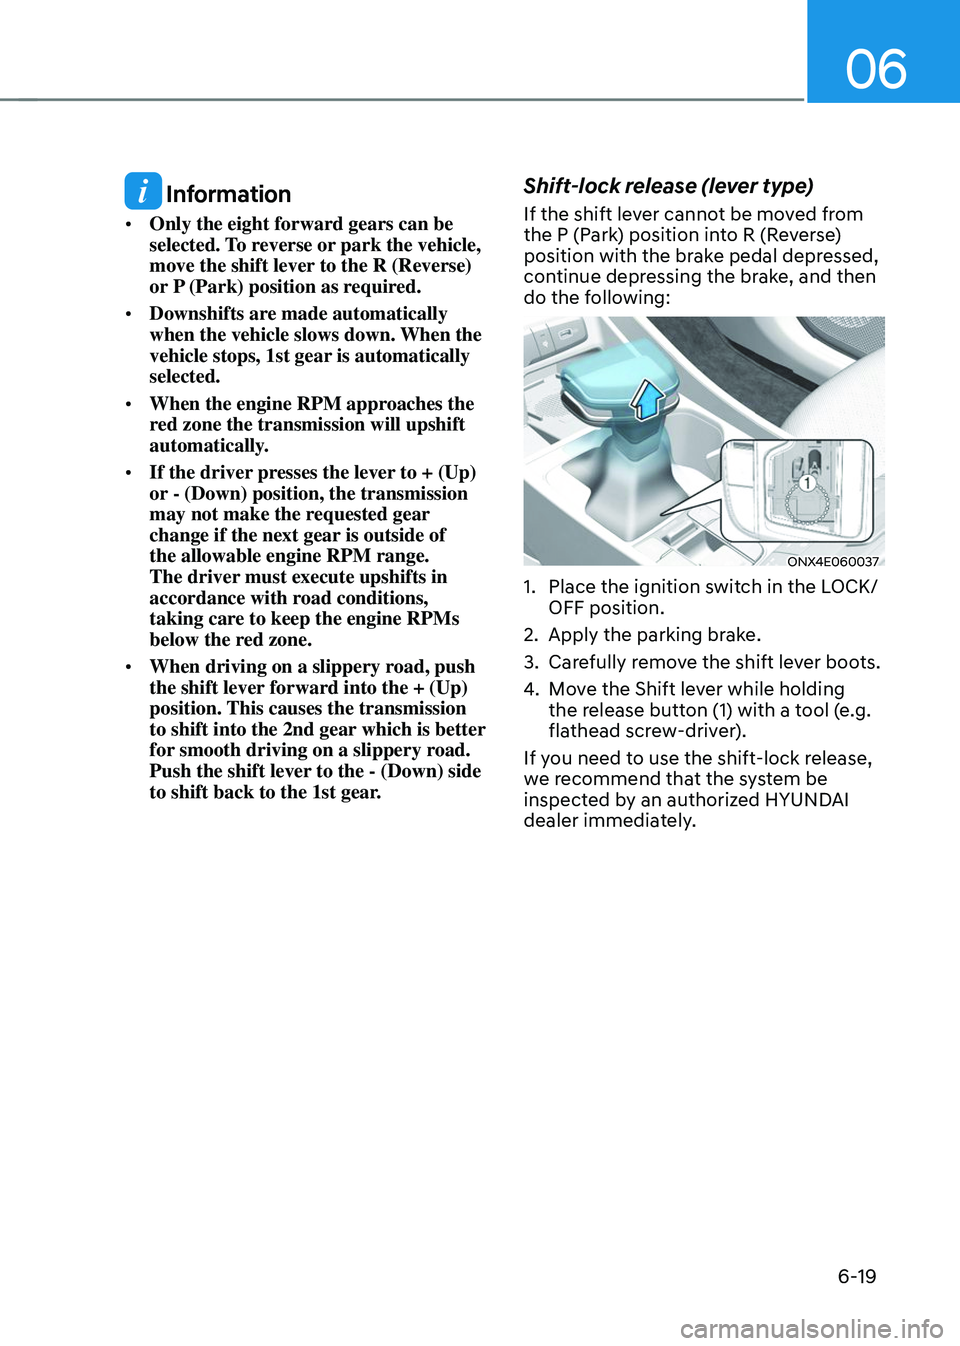
Shift-lock release (lever type)
If the shift lever cannot be moved from
the P (Park) position into R (Reverse)
position with the brake pedal depressed,
continue depressing the brake, and then
do the following:
ONX4E060037
1. Place the ignition switch in the LOCK/
OFF position.
2. Apply the parking brake.
3. Carefully remove the shift lever boots.
4. Move the Shift lever while holding
the release button (1) with a tool (e.g.
flathead screw-driver).
If you need to use the shift-lock release,
we recommend that the system be
inspected by an authorized HYUNDAI
dealer immediately.
Page 315 of 638
Driving your vehicle
6-30
Parking brake warning light
Check the Parking Brake
warning light by pressing the
Engine Stop/Start button to the
ON position.
This light will be illuminated when the
parking brake is applied with the Engine
Stop/Start button in the START or ON
position.
Before driving, be sure the parking
brake is released and the Parking Brake
warning light is OFF.
If the Parking Brake warning light
remains on after the parking brake is
released while the engine is running,
there may be a malfunction in the
brake system. Immediate attention is
necessary.
If at all possible, cease driving the vehicle
immediately. If that is not possible,
use extreme caution while operating
the vehicle and only continue to drive
the vehicle until you can reach a safe
location.
Electronic Parking Brake (EPB)
Malfunction
If the Electronic Parking Brake (EPB) does
not release normally, DO NOT DRIVE THE
VEHICLE. Have your vehicle inspected at
an authorized HYUNDAI dealer.
It is recommended to have your vehicle
towed on a flatbed tow truck if the EPB
malfunction occurs.
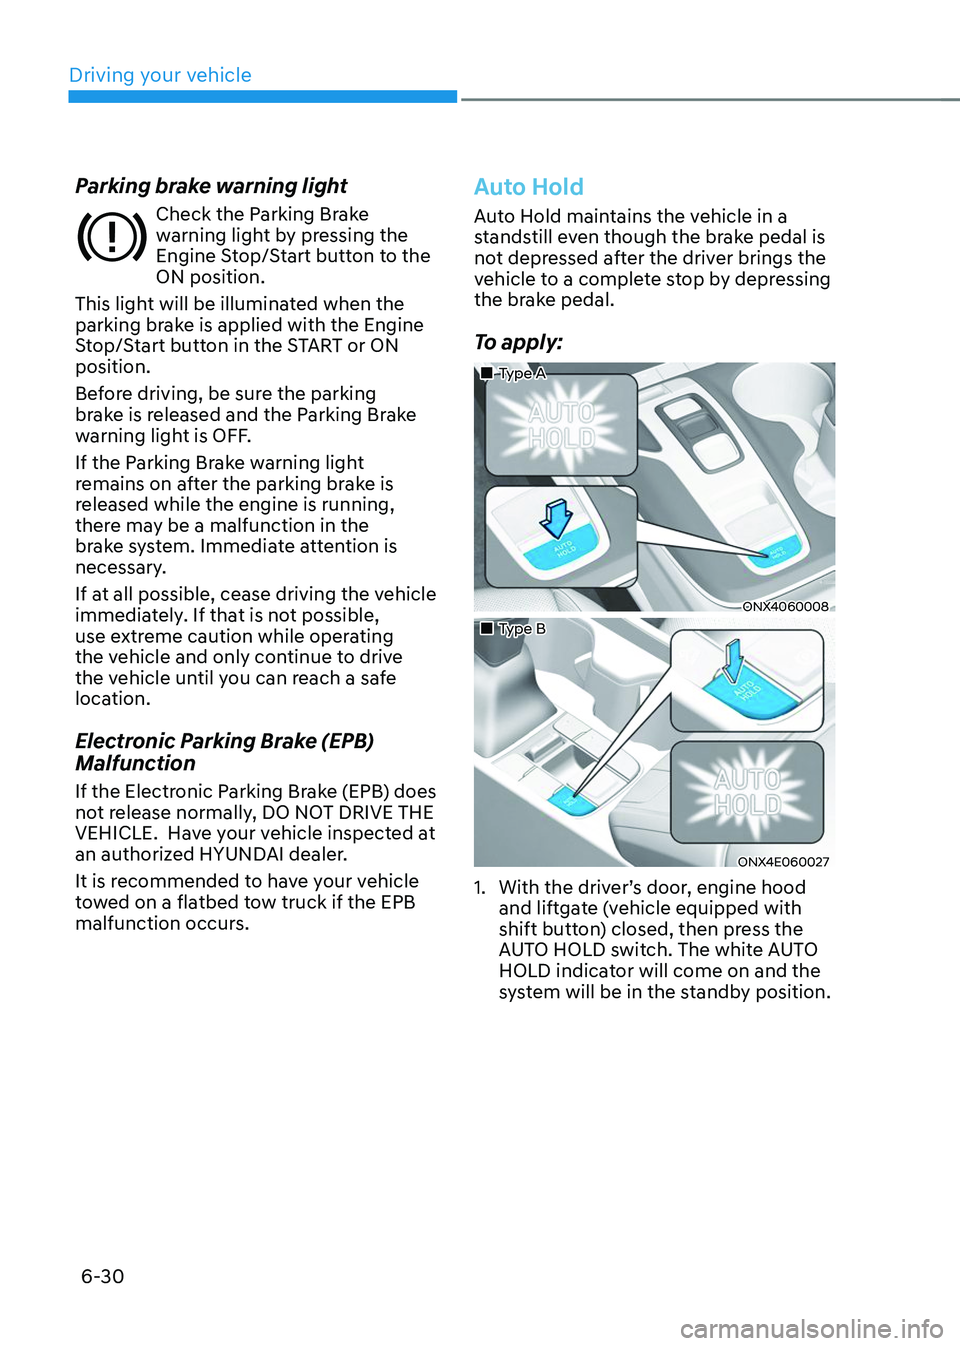
Auto Hold
Auto Hold maintains the vehicle in a
standstill even though the brake pedal is
not depressed after the driver brings the
vehicle to a complete stop by depressing
the brake pedal.
To apply:
„„Type A
ONX4060008
„„Type B
ONX4E060027
1. With the driver’s door, engine hood
and liftgate (vehicle equipped with
shift button) closed, then press the
AUTO HOLD switch. The white AUTO
HOLD indicator will come on and the
system will be in the standby position.