2023 HYUNDAI SONATA lights
[x] Cancel search: lightsPage 164 of 555
Convenience Features
5-18
Information
If a power door lock ever fails to function
while you are in the vehicle try one or
more of the following techniques to exit: • Operate the door unlock feature
repeatedly (both electronic and manual) while simultaneously pulling
on the door handle.
• Operate the other door locks and
handles, front and rear.
• Lower a front window and use the
mechanical key to unlock the door from outside. With the central door lock switch„„Driver’s door
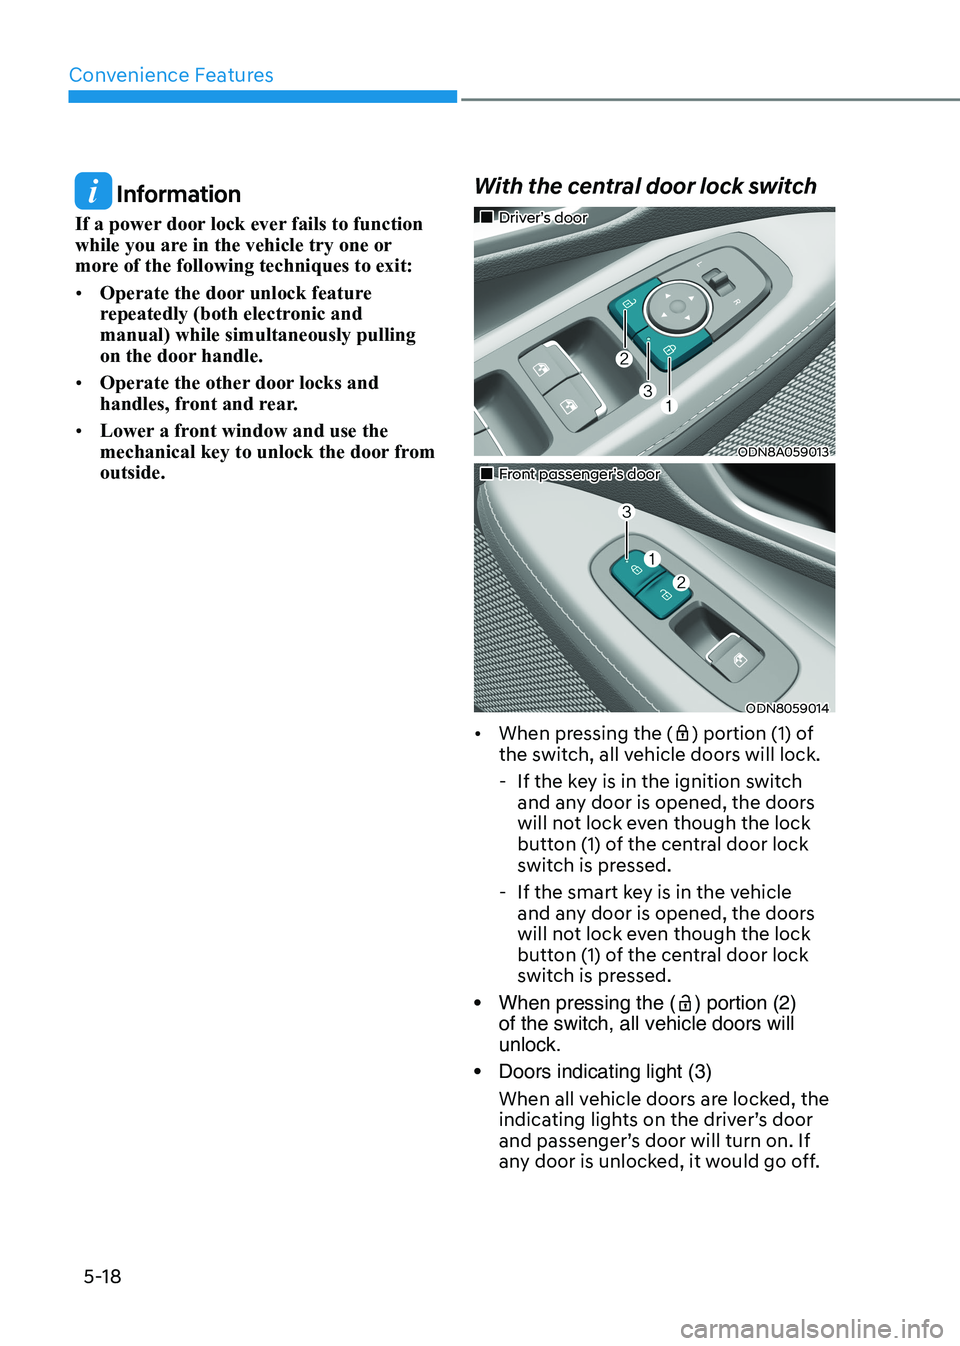
ODN8A059013
„„Front passenger’s door
ODN8059014
• When pressing the (
) portion (1) of
the switch, all vehicle doors will lock.
- If the key is in the ignition switch and any door is opened, the doors
will not lock even though the lock
button (1) of the central door lock
switch is pressed.
- If the smart key is in the vehicle and any door is opened, the doors
will not lock even though the lock
button (1) of the central door lock
switch is pressed.
• When pressing the (
) portion (2)
of the switch, all vehicle doors will unlock.
• Doors indicating light (3)
When all vehicle doors are locked, the
indicating lights on the driver’s door
and passenger’s door will turn on. If
any door is unlocked, it would go off.
Page 169 of 555
05
5-23
This system helps to protect your vehicle
and valuables. The horn will sound and
the hazard warning lights will blink
continuously if any of the following occur:
- A door is opened without using the remote key or smart key.
- The trunk is opened without using the remote key or smart key.
- The engine hood is opened.
The alarm continues for 30 seconds, then
the system resets. To turn off the alarm,
unlock the doors with the remote key or
smart key.
The Theft Alarm System automatically
sets 30 seconds after you lock the doors
and the trunk. For the system to activate,
you must lock the doors and the trunk
from outside the vehicle with the remote
key or smart key or by pressing the
button on the outside of the door handle
with the smart key in your possession.
The hazard warning lights will blink and
the chime will sound once to indicate the
system is armed.
Once the security system is set, opening
any door, the trunk, or the hood without
using the remote key or smart key will
cause the alarm to activate.
The Theft Alarm System will not set if the
hood, the trunk, or any door is not fully
closed. If the system will not set, check
the hood, the trunk, or the doors are fully closed.
Do not attempt to alter this system or
add other devices to it.
Information
• Do not lock the doors until all passengers have left the vehicle. If the
remaining passenger leaves the vehicle when the system is armed, the alarm will be activated.
• If the vehicle is not disarmed with the
remote key or smart key, open the doors by using the mechanical key and place the ignition switch in the
ON position (for remote key) or start
the engine (for smart key) by directly
pressing the ignition switch with the
smart key.
• If the system is disarmed by unlocking
the vehicle, but neither a door or the trunk is opened within 30 seconds, the
doors will relock and the system will
rearm automatically.
ThefT-AlArm SySTem
Page 173 of 555
05
5-27
Electric Power Steering (EPS)
The system assists you with steering the
vehicle. If the vehicle is turned off or
if the power steering system becomes
inoperative, you may still steer the
vehicle, but it will require increased
steering effort.
Also, the steering effort becomes heavier
as the vehicle’s speed increases and
becomes lighter as the vehicle’s speed
decreases for better control of the
steering wheel.
Should you notice any change in the
effort required to steer during normal
vehicle operation, have the system
checked by an authorized HYUNDAI
dealer.
CAUTION
• If the Electric Power Steering System
does not operate normally, the
warning light (
) will illuminate
on the instrument cluster. You may
steer the vehicle, but it will require
increased steering efforts. Take your
vehicle to an authorized HYUNDAI
dealer and have the system checked as soon as possible.
• When an abnormality is detected
in the electric power steering
system, to prevent a an accident, the
steering assist function may become
inoperative. At this time, the warning
light turns on or blinks on the cluster.
The steering wheel may become
difficult to control or operate. Have
your vehicle checked immediately,
after moving the vehicle to a safe
area.
Information
The following symptoms may occur during normal vehicle operation: • The steering effort may be high
immediately after placing the ignition switch in the ON position. This happens as the system performs
the EPS system diagnostics. When the
diagnostics are completed, the steering
wheel effort will return to its normal condition.
• When the battery voltage is low, you
might have to put more steering effort.
However, it is a temporary condition so
that it will return to normal condition
after charging the battery.
• A click noise may be heard from the
EPS relay after the ignition switch is in
the ON or LOCK/OFF position.
• Motor noise may be heard when the
vehicle is at a stop or at a low driving speed.
• When you operate the steering wheel
in low temperatures, abnormal noise
may occur. If the temperature rises, the
noise will disappear. This is a normal condition.
• When an error is detected from the EPS, the steering effort assist function
may become inoperative in order to
prevent fatal accidents. Instrument
cluster warning lights may be on or the steering effort may be high. If these
symptoms occur, drive the vehicle to
a safe area as soon as it is safe to do so. Have the system checked by an
authorized HYUNDAI dealer as soon as possible.
steering Wheel
Page 174 of 555
Convenience Features
5-28
Tilt Steering / Telescope Steering
When adjusting the steering wheel to a
comfortable position, adjust the steering
wheel so that it points toward your chest,
not toward your face. Make sure you can
see the instrument cluster warning lights
and gauges. After locking the lever, push
the steering wheel both up and down to
be certain it is locked in position. Always
adjust the position of the steering wheel
before driving.
WARNING
NEVER adjust the steering wheel while
driving. This may cause loss of vehicle
control resulting in an accident.
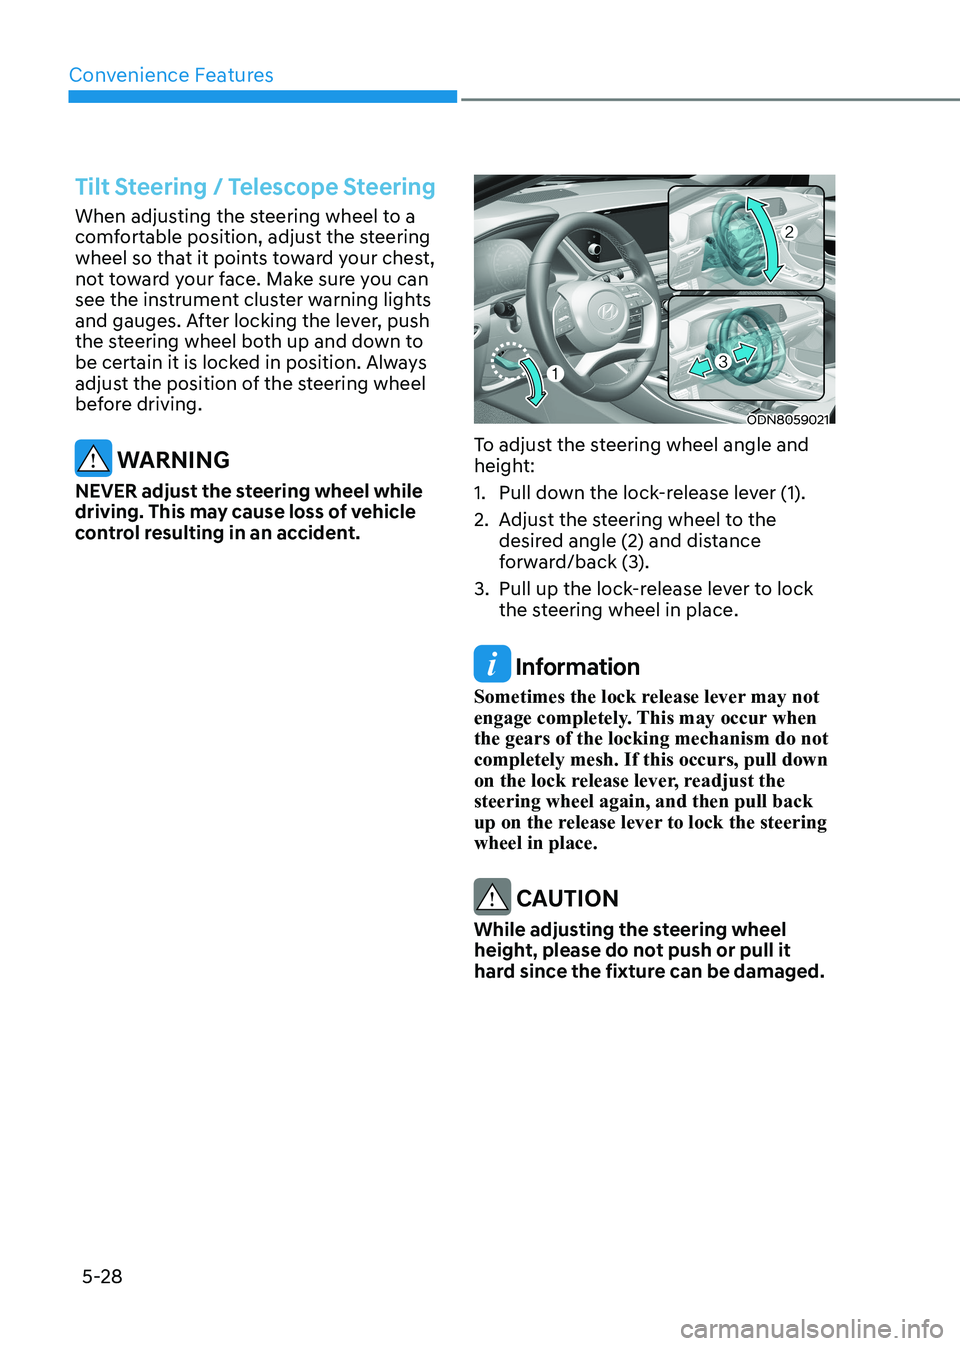
ODN8059021
To adjust the steering wheel angle and
height:
1. Pull down the lock-release lever (1).
2. Adjust the steering wheel to the desired angle (2) and distance
forward/back (3).
3. Pull up the lock-release lever to lock the steering wheel in place.
Information
Sometimes the lock release lever may not
engage completely. This may occur when the gears of the locking mechanism do not completely mesh. If this occurs, pull down
on the lock release lever, readjust the steering wheel again, and then pull back
up on the release lever to lock the steering wheel in place.
CAUTION
While adjusting the steering wheel
height, please do not push or pull it
hard since the fixture can be damaged.
Page 200 of 555
Convenience Features
5-54
ODN8A059047
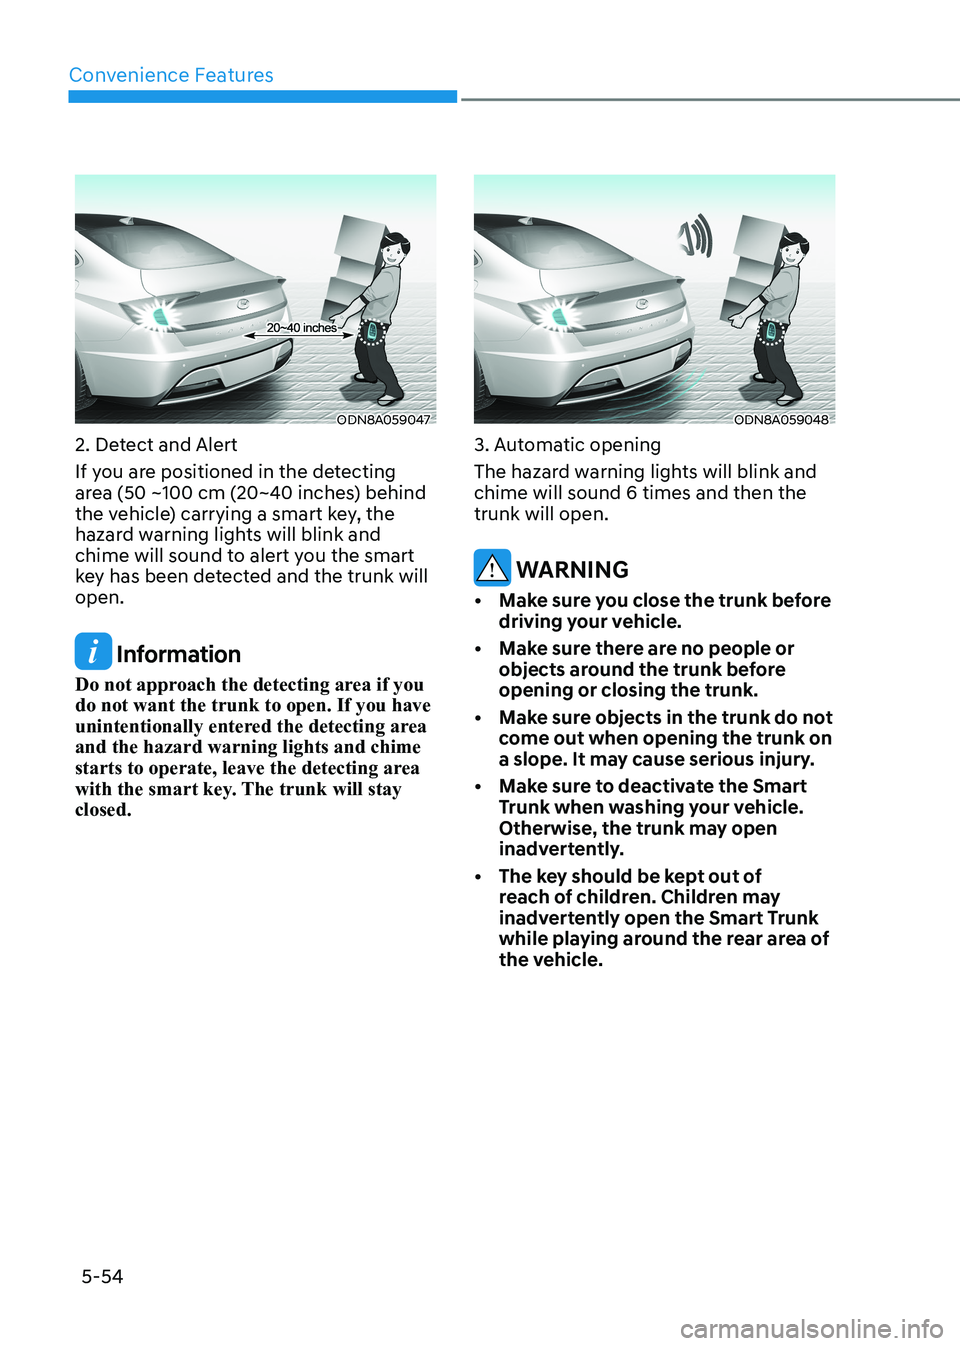
2. Detect and Alert
If you are positioned in the detecting
area (50 ~100 cm (20~40 inches) behind
the vehicle) carrying a smart key, the
hazard warning lights will blink and
chime will sound to alert you the smart
key has been detected and the trunk will open.
Information
Do not approach the detecting area if you do not want the trunk to open. If you have
unintentionally entered the detecting area and the hazard warning lights and chime
starts to operate, leave the detecting area
with the smart key. The trunk will stay closed.
ODN8A059048
3. Automatic opening
The hazard warning lights will blink and chime will sound 6 times and then the trunk will open.
WARNING
• Make sure you close the trunk before driving your vehicle.
• Make sure there are no people or objects around the trunk before opening or closing the trunk.
• Make sure objects in the trunk do not come out when opening the trunk on
a slope. It may cause serious injury.
• Make sure to deactivate the Smart Trunk when washing your vehicle.
Otherwise, the trunk may open
inadvertently.
• The key should be kept out of reach of children. Children may
inadvertently open the Smart Trunk
while playing around the rear area of
the vehicle.
Page 207 of 555
05
5-61
lighting
Exterior Lights
Lighting control
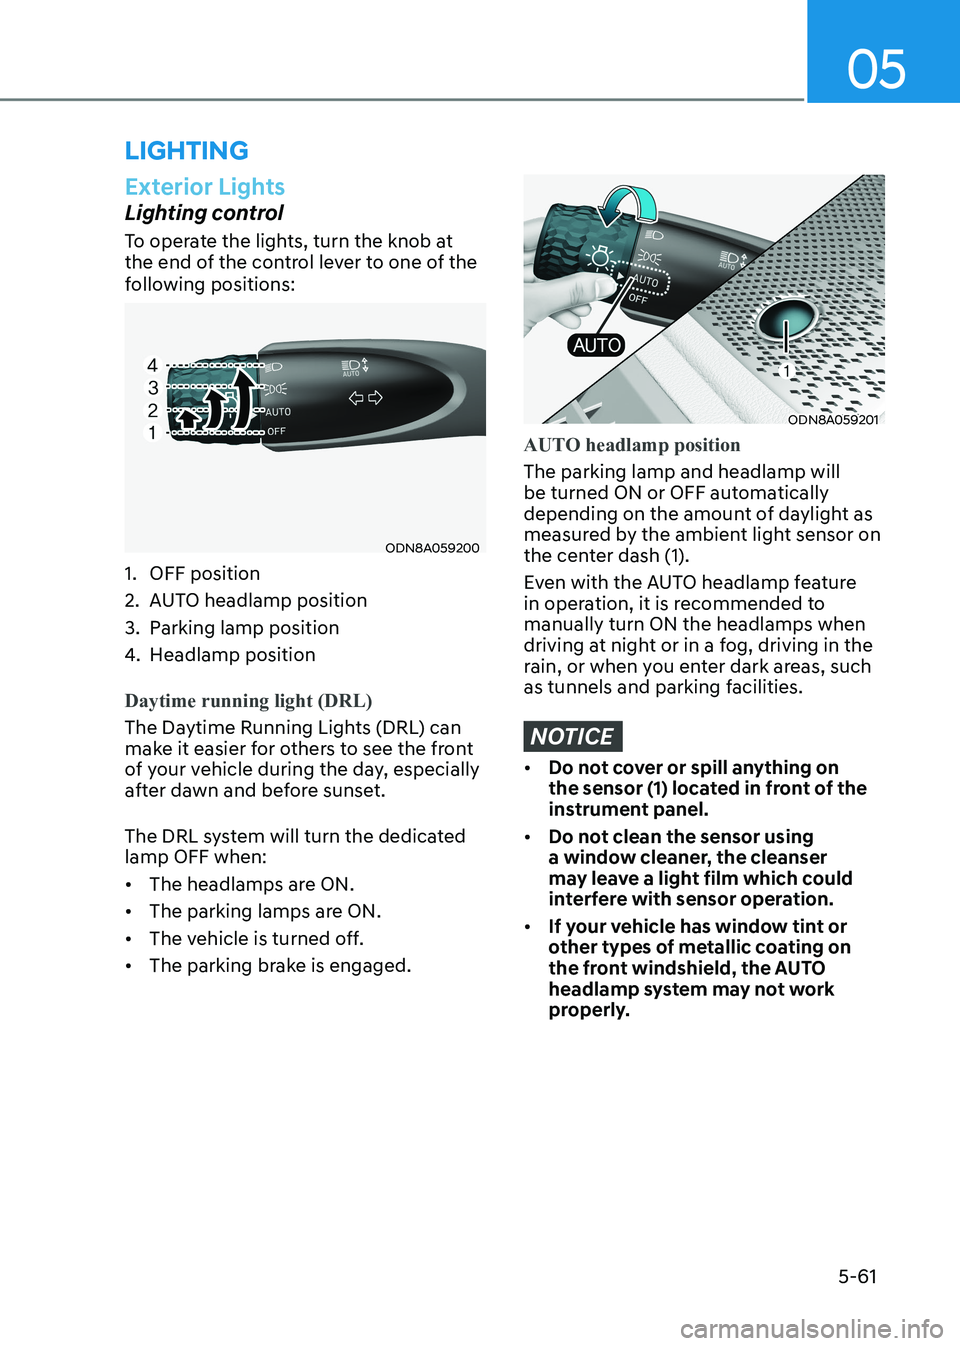
To operate the lights, turn the knob at
the end of the control lever to one of the
following positions:
ODN8A059200
1. OFF position
2. AUTO headlamp position
3. Parking lamp position
4. Headlamp position
Daytime running light (DRL)
The Daytime Running Lights (DRL) can
make it easier for others to see the front
of your vehicle during the day, especially
after dawn and before sunset.
The DRL system will turn the dedicated lamp OFF when: • The headlamps are ON.
• The parking lamps are ON.
• The vehicle is turned off.
• The parking brake is engaged.
ODN8A059201
AUTO headlamp position
The parking lamp and headlamp will
be turned ON or OFF automatically
depending on the amount of daylight as
measured by the ambient light sensor on
the center dash (1).
Even with the AUTO headlamp feature
in operation, it is recommended to manually turn ON the headlamps when
driving at night or in a fog, driving in the
rain, or when you enter dark areas, such
as tunnels and parking facilities.
NOTICE
• Do not cover or spill anything on
the sensor (1) located in front of the
instrument panel.
• Do not clean the sensor using
a window cleaner, the cleanser
may leave a light film which could
interfere with sensor operation.
• If your vehicle has window tint or
other types of metallic coating on
the front windshield, the AUTO
headlamp system may not work
properly.
Page 209 of 555
05
5-63
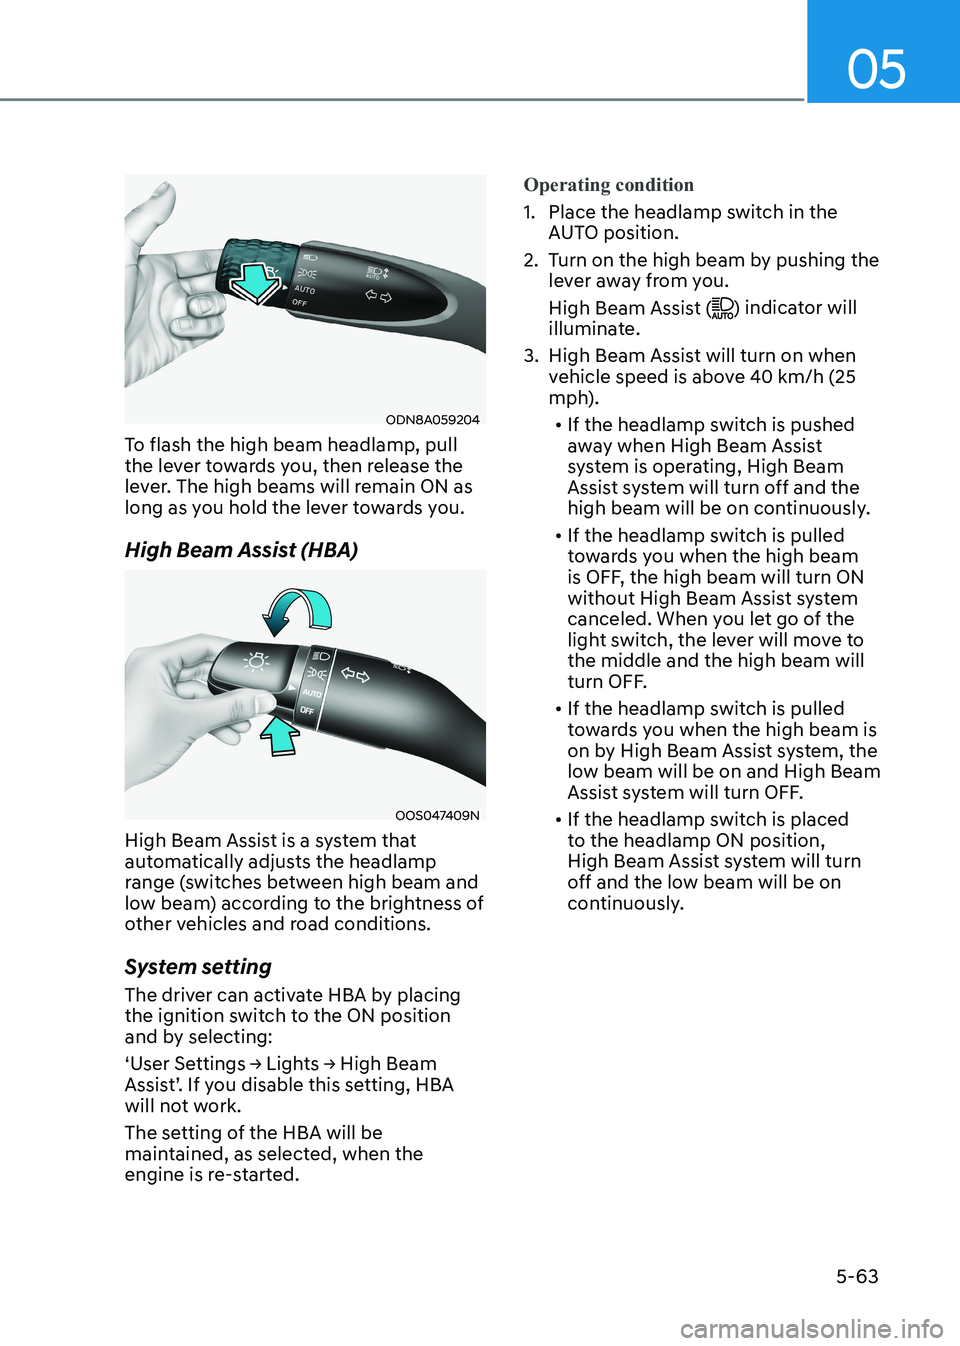
ODN8A059204
To flash the high beam headlamp, pull
the lever towards you, then release the
lever. The high beams will remain ON as
long as you hold the lever towards you.
High Beam Assist (HBA)
OOS047409N
High Beam Assist is a system that
automatically adjusts the headlamp
range (switches between high beam and
low beam) according to the brightness of
other vehicles and road conditions.
System setting
The driver can activate HBA by placing
the ignition switch to the ON position
and by selecting:
‘User Settings → Lights → High Beam
Assist’. If you disable this setting, HBA
will not work.
The setting of the HBA will be
maintained, as selected, when the
engine is re-started.
Operating condition
1. Place the headlamp switch in the AUTO position.
2. Turn on the high beam by pushing the lever away from you.
High Beam Assist (
) indicator will
illuminate.
3. High Beam Assist will turn on when vehicle speed is above 40 km/h (25
mph).
• If the headlamp switch is pushed
away when High Beam Assist
system is operating, High Beam
Assist system will turn off and the
high beam will be on continuously.
• If the headlamp switch is pulled
towards you when the high beam
is OFF, the high beam will turn ON
without High Beam Assist system
canceled. When you let go of the
light switch, the lever will move to the middle and the high beam will
turn OFF.
• If the headlamp switch is pulled
towards you when the high beam is
on by High Beam Assist system, the
low beam will be on and High Beam
Assist system will turn OFF.
• If the headlamp switch is placed
to the headlamp ON position,
High Beam Assist system will turn
off and the low beam will be on
continuously.
Page 210 of 555
Convenience Features
5-64
When High Beam Assist system is
operating, the high beam switches to low
beam if any of the following conditions occur:
- When the headlamp of an on-coming vehicle is detected.
- When the tail lamp of a vehicle in front
is detected.
- When the headlamp or tail lamp of a motorcycle or a bicycle is detected.
- When the surrounding ambient light is bright enough that high beams are not
required.
- When streetlights or other lights are detected.
- When the headlamp switch is not in the AUTO position.
- When High Beam Assist system is off.
- When vehicle speed is below 24 km/h (15 mph).
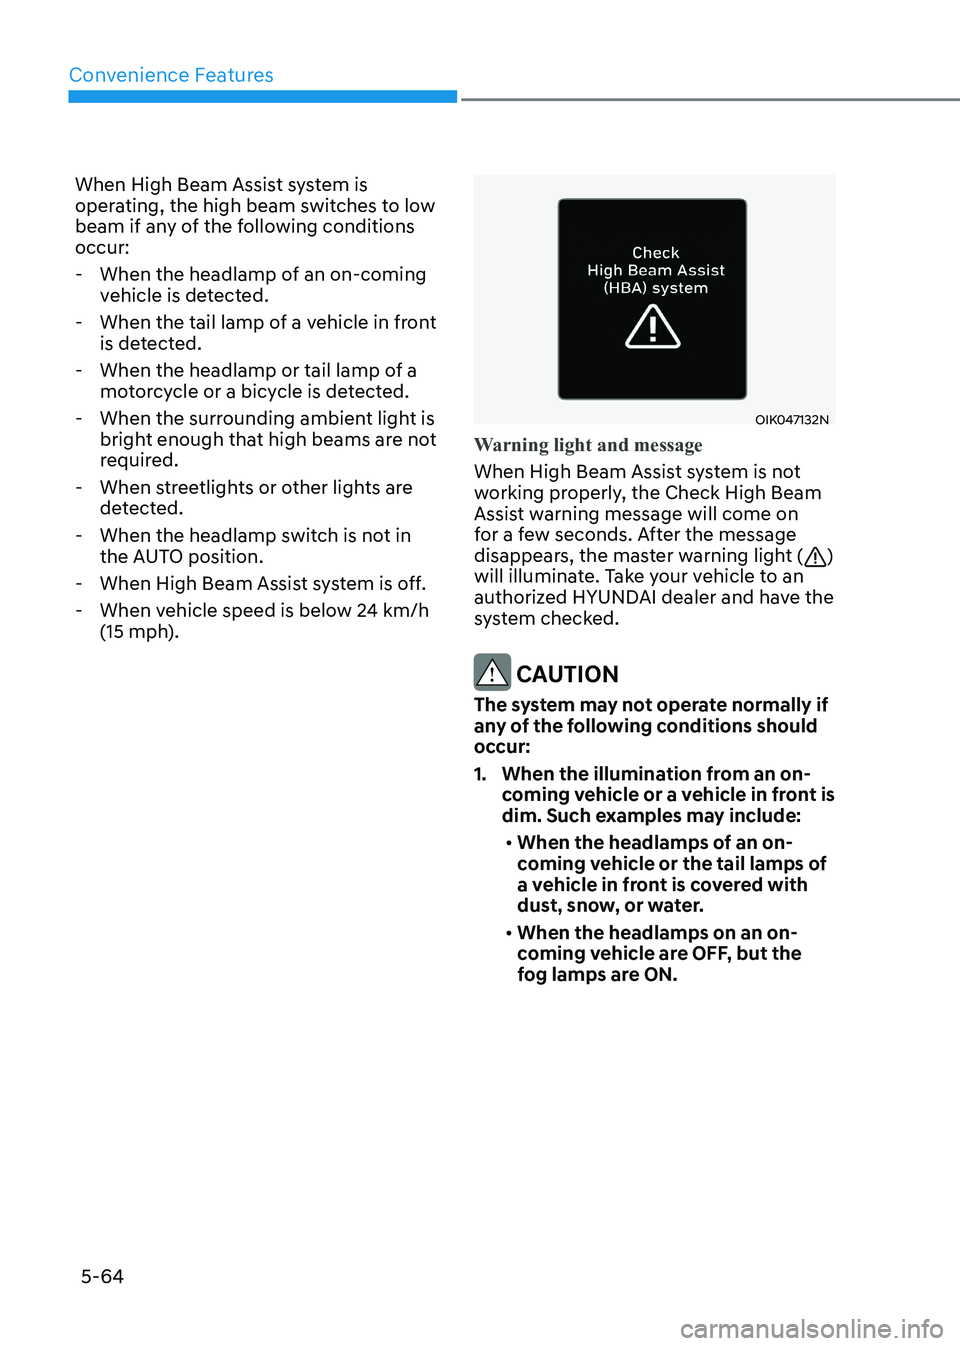
OIK047132N
Warning light and message
When High Beam Assist system is not
working properly, the Check High Beam
Assist warning message will come on
for a few seconds. After the message
disappears, the master warning light (
)
will illuminate. Take your vehicle to an
authorized HYUNDAI dealer and have the
system checked.
CAUTION
The system may not operate normally if
any of the following conditions should
occur:
1. When the illumination from an on- coming vehicle or a vehicle in front is
dim. Such examples may include:
• When the headlamps of an on-
coming vehicle or the tail lamps of
a vehicle in front is covered with
dust, snow, or water.
• When the headlamps on an on-
coming vehicle are OFF, but the
fog lamps are ON.