2023 HYUNDAI SANTA CRUZ lock wheels
[x] Cancel search: lock wheelsPage 299 of 598
06
6-25
Transmission ranges
The indicator in the instrument cluster
displays the shift lever position when the
ignition switch is in the ON position.
P (Park)
Always come to a complete stop before
shifting into P (Park).
To shift from P (Park), you must depress
firmly on the brake pedal and make sure
your foot is off the accelerator pedal.
If you have done all of the above and
still cannot shift the lever out of P
(Park), see “Shift-Lock Release” in this
chapter.
The shift lever must be in P (Park) before
turning the engine off.
WARNING
• Shifting into P (Park) while the
vehicle is in motion may cause you to
lose control of the vehicle.
• After the vehicle has stopped, always
make sure the shift lever is in P
(Park), apply the parking brake, and
turn the engine off.
• When parking on an incline, place
the shift lever in P (Park) and apply
the parking brake to prevent the
vehicle from rolling downhill.
• For safety, always engage the
parking brake with the shift lever in
the P (Park) position except for the
case of emergency parking.
R (Reverse)
Use this position to drive the vehicle
backward.
NOTICE
Always come to a complete stop before
shifting into or out of R (Reverse); you
may damage the transmission if you
shift into R (Reverse) while the vehicle is
in motion.
N (Neutral)
The wheels and transmission are not
engaged.
Use N (Neutral) if you need to restart a
stalled engine, or if it is necessary to stop
with the engine ON. Shift into P (Park)
if you need to leave your vehicle for any
reason.
Always depress the brake pedal when
you are shifting from N (Neutral) to
another gear.
WARNING
Do not shift into gear unless your foot is
firmly on the brake pedal. Shifting into
gear when the engine is running at high
speed can cause the vehicle to move
very rapidly. You could lose control of
the vehicle and hit people or objects.
Page 312 of 598
Driving Your Vehicle
6-38
Anti-lock Brake System (ABS)
WARNING
Anti-Lock Braking System (ABS) or
Electronic Stability Control (ESC)
system will not prevent accidents
due to improper or dangerous driving
maneuvers. Even though vehicle
control is improved during emergency
braking, always maintain a safe
distance between you and objects
ahead of you. Vehicle speeds should
always be reduced during extreme
road conditions. The braking distance
for vehicles equipped with ABS or ESC
may be longer than for those without
these systems in the following road
conditions.
Drive your vehicle at reduced speeds
during the following conditions:
• Rough, gravel or snow-covered
roads.
• On roads where the road surface is
pitted or has different surface height.
• Tire chains are installed on your
vehicle.
The safety features of ABS or ESC
equipped vehicle should not be tested
by high speed driving or cornering. This
could endanger the safety of yourself or
others.
ABS is an electronic braking system that
helps prevent a braking skid. ABS allows
the driver to steer and brake at the same
time.
Using ABS
To obtain the maximum benefit from
your ABS in an emergency situation,
do not attempt to modulate your brake
pressure and do not try to pump your
brakes. Depress your brake pedal as hard
as possible.
When you apply your brakes under
conditions which may lock the wheels,
you may hear sounds from the brakes,
or feel a corresponding sensation in the
brake pedal. This is normal and it means
your ABS is active.
ABS does not reduce the time or distance
it takes to stop the vehicle.
Always maintain a safe distance from the
vehicle in front of you.
ABS will not prevent a skid that results
from sudden changes in direction, such
as trying to take a corner too fast or
making a sudden lane change. Always
drive at a safe speed for the road and
weather conditions.
ABS cannot prevent a loss of stability.
Always steer moderately when braking
hard. Severe or sharp steering wheel
movement can still cause your vehicle to
veer into oncoming traffic or off the road.
On loose or uneven road surfaces,
operation of the anti-lock brake system
may result in a longer stopping distance
than for vehicles equipped with a
conventional brake system.
The ABS (
) warning light will stay on
for several seconds after the ignition
switch is in the ON position.
During that time, ABS will go through
self-diagnosis and the light will go off if
everything is normal. If the light stays on,
you may have a problem with your ABS.
Contact an authorized HYUNDAI dealer
as soon as possible.
Page 314 of 598
Driving Your Vehicle
6-40
ESC operation
ESC ON condition
When the ignition switch is in the
ON position, the ESC and the ESC
OFF indicator lights illuminate for
approximately three seconds. After both
lights go off, the ESC is enabled.
When operating
When ESC is in operation, the
ESC indicator light blinks:
• When you apply your brakes under
conditions which may lock the wheels,
you may hear sounds from the brakes,
or feel a corresponding sensation in
the brake pedal. This is normal and it
means your ESC is active.
• When ESC activates, the engine may
not respond to the accelerator as it
does under routine conditions.
• If Cruise Control or Smart Cruise
Control was in use when ESC
activates, Cruise Control or Smart
Cruise Control automatically
disengages. Cruise Control or Smart
Cruise Control can be reengaged
when the road conditions allow. See
"Cruise Control (CC)" or "Smart
Cruise Control (SCC)" section in
chapter 7 (if equipped).
• When moving out of the mud or
driving on a slippery road, the engine
RPM (revolutions per minute) may
not increase even if you press the
accelerator pedal deeply. This is to
maintain the stability and traction of
the vehicle and does not indicate a
problem.
ESC OFF condition
To cancel ESC operation:
• State 1
Press the ESC OFF button briefly. The
ESC OFF indicator light and/or message
'Traction Control disabled' will illuminate.
In this state, the traction control function
of ESC (engine management) is disabled,
but the brake control function of ESC
(braking management) still operates.
• State 2
Press and hold the ESC OFF button
continuously for more than 3 seconds.
The ESC OFF indicator light and/or
message 'Traction & Stability Control
disabled' illuminates and a warning
chime sounds. In this state, both the
traction control function of ESC (engine
management) and the brake control
function of ESC (braking management)
are disabled.
If the ignition switch is placed to the
LOCK/OFF position when ESC is off, ESC
remains off. Upon restarting the engine,
the ESC will automatically turn on again.
Page 326 of 598
Driving Your Vehicle
6-52
AWD Operation
Four Wheel Drive (AWD) mode selection
Transfer
modeSelection
buttonIndicator light Description
AWD AUTO
(AWD
LOCK is
deactivated)
(not
illuminated)• AWD Auto is used when driving on
roads in normal conditions, roads in
urban areas, and on highways.
• All wheels provide traction when the
vehicle travels at a constant speed.
But the AWD computer will vary front
and rear wheel traction depending
on road driving conditions, which will
be automatically controlled by the
computing system.
•
When the cluster's AWD Auto display
mode is selected, the cluster displays
the status of how four wheels’ traction
forces are distributed.
AWD LOCK
(illuminated)• The main goal of AWD Lock mode is to
allow a driver to maximize the vehicle’s
traction under extreme driving
conditions such as unpaved off-road,
sandy roads, and muddy roads.
• AWD Lock mode is in operation only
when a vehicle travels at 37 mph (60
km/h) or less. When traveling at 37
mph (60 km/h) or faster, the mode will
switch to AWD Auto.
• When AWD Lock mode illuminates, the
cluster does not display the front/rear
wheel traction force distribution status.
• Press the AWD Lock mode switch
again to switch back to AWD Auto.
Page 327 of 598
06
6-53
WARNING
If AWD warning light () stays on
the instrument cluster, your vehicle
may have a malfunction with the
AWD system. When the AWD warning
light (
) illuminates have the vehicle
checked by an authorized HYUNDAI
dealer as soon as possible.
NOTICE
• Maintain AWD Auto mode when
driving on roads in normal
conditions.
• When driving under normal road
conditions (especially when
cornering) in AWD Lock mode, a
driver may find minor mechanical
vibration or noise, which is extremely
normal phenomenon, not a
malfunction. When AWD Lock mode
is released, such noise or vibration
will be immediately gone.
CAUTION
When driving on normal roads,
deactivate the AWD LOCK mode by
pushing the AWD LOCK button (AWD
LOCK indicator light goes off). Driving
on normal roads with the AWD LOCK
mode, especially, when cornering
may cause mechanical noise or
vibration. The noise and vibration will
disappear when the AWD LOCK mode
is deactivated. Prolong driving with the
noise and vibration may damage some
parts of the power train.
NOTICE
When the AWD LOCK mode is
deactivated, a sensation may be felt as
the driving power is delivered entirely
to the front wheels.
For safe AWD operation
Before driving
• Make sure all passengers are wearing
seat belts.
• Sit upright and closer to the steering
wheel than usual. Adjust the steering
wheel to a position comfortable for
you to drive.
Driving on snow-covered or icy roads
• Start off slowly by applying the
accelerator pedal gently.
• Use snow tires or tire chains.
• Keep sufficient distance between your
vehicle and the vehicle in front of you.
• Use engine braking during
deceleration.
• Avoid speeding, rapid acceleration,
sudden brake applications, and sharp
turns to prevent skids.
Driving in sand or mud
• Maintain slow and constant speed.
• Use tire chains driving in mud if
necessary.
• Keep sufficient distance between your
vehicle and the vehicle in front of you.
• Reduce vehicle speed and always
check the road condition.
• Avoid speeding, rapid acceleration,
sudden brake applications, and sharp
turns to prevent getting stuck.
CAUTION
When the vehicle is stuck in snow, sand
or mud, place a non-slip material under
the drive wheels to provide traction
OR Slowly spin the wheels in forward
and reverse directions which causes
a rocking motion that may free the
vehicle. However, avoid running the
engine continuously at high RPM. Doing
so may damage the AWD system.
Page 335 of 598
06
6-61
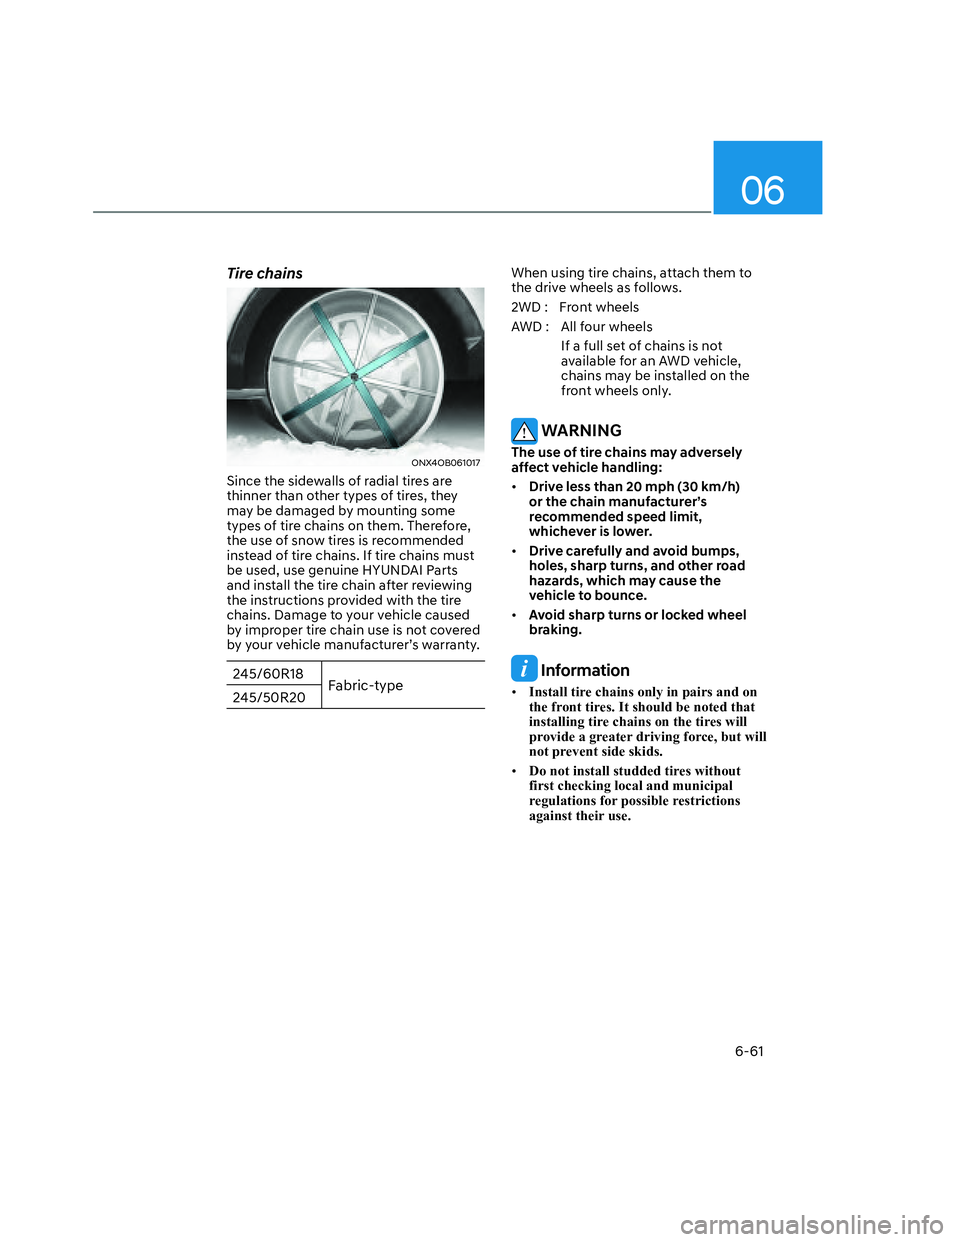
Tire chains
ONX4OB061017 ONX4OB061017
Since the sidewalls of radial tires are
thinner than other types of tires, they
may be damaged by mounting some
types of tire chains on them. Therefore,
the use of snow tires is recommended
instead of tire chains. If tire chains must
be used, use genuine HYUNDAI Parts
and install the tire chain after reviewing
the instructions provided with the tire
chains. Damage to your vehicle caused
by improper tire chain use is not covered
by your vehicle manufacturer’s warranty.
245/60R18
Fabric-type
245/50R20
When using tire chains, attach them to
the drive wheels as follows.
2WD : Front wheels
AWD : All four wheels
If a full set of chains is not
available for an AWD vehicle,
chains may be installed on the
front wheels only.
WARNING
The use of tire chains may adversely
affect vehicle handling:
• Drive less than 20 mph (30 km/h)
or the chain manufacturer’s
recommended speed limit,
whichever is lower.
• Drive carefully and avoid bumps,
holes, sharp turns, and other road
hazards, which may cause the
vehicle to bounce.
• Avoid sharp turns or locked wheel
braking.
Information
• Install tire chains only in pairs and on
the front tires. It should be noted that
installing tire chains on the tires will
provide a greater driving force, but will
not prevent side skids.
• Do not install studded tires without
first checking local and municipal
regulations for possible restrictions
against their use.
Page 337 of 598

06
6-63
Check spark plugs and ignition system
Inspect the spark plugs, as specified in
chapter 8. If necessary, replace them.
Also check all ignition wirings and
components for any cracks, wear-out,
and damage.
To prevent locks from freezing
To prevent the locks from being frozen,
spray approved de-icing fluid or glycerin
into key holes. When a lock opening is
already covered with ice, spray approved
de-icing fluid over the ice to remove it.
When an internal part of a lock freezes,
try to thaw it with a heated key. Carefully
use the heated key to avoid an injury.
Use approved window washer anti-
freeze solution in system
To prevent the window washer from
being frozen, add authorized window
washer anti-freeze solution, as specified
on the window washer container.
Window washer anti-freeze solution is
available from an authorized HYUNDAI
dealer, and most vehicle accessory
outlets. Do not use engine coolant or
other types of anti-freeze solution, to
prevent any damage to the vehicle paint.Do not let your parking brake freeze
Under some conditions your parking
brake can freeze in the engaged position.
This is most likely to happen when there
is an accumulation of snow or ice around
or near the rear brakes or if the brakes
are wet. When there is the risk that your
parking brake may freeze, temporarily
apply it with the gear in P (Park). Also,
block the rear wheels in advance, so the
vehicle may not roll. Then, release the
parking brake.
Do not let ice and snow accumulate
underneath
Under some conditions, snow and ice
can build up under the fenders and
interfere with the steering. When driving
in such conditions during the severe
winter, you should check underneath
the vehicle on a regular basis, to ensure
that the front wheels and the steering
components is unblocked.
Carry emergency equipment
In accordance with weather conditions,
you should carry appropriate emergency
equipment, while driving. Some of the
items you may want to carry include tire
chains, tow straps or chains, flashlight,
emergency flares, sand, shovel, jumper
cables, window scraper, gloves, ground
cloth, coveralls, blanket, etc.
Do not place objects or materials in the
engine compartment
Putting objects or materials in the engine
compartment may cause an engine
failure or combustion, because they may
block the engine cooling. Such damage
will not be covered by the manufacturer’s
warranty.
Page 502 of 598
Emergency Situations
8-18
ONX4OB081012ONX4OB081012
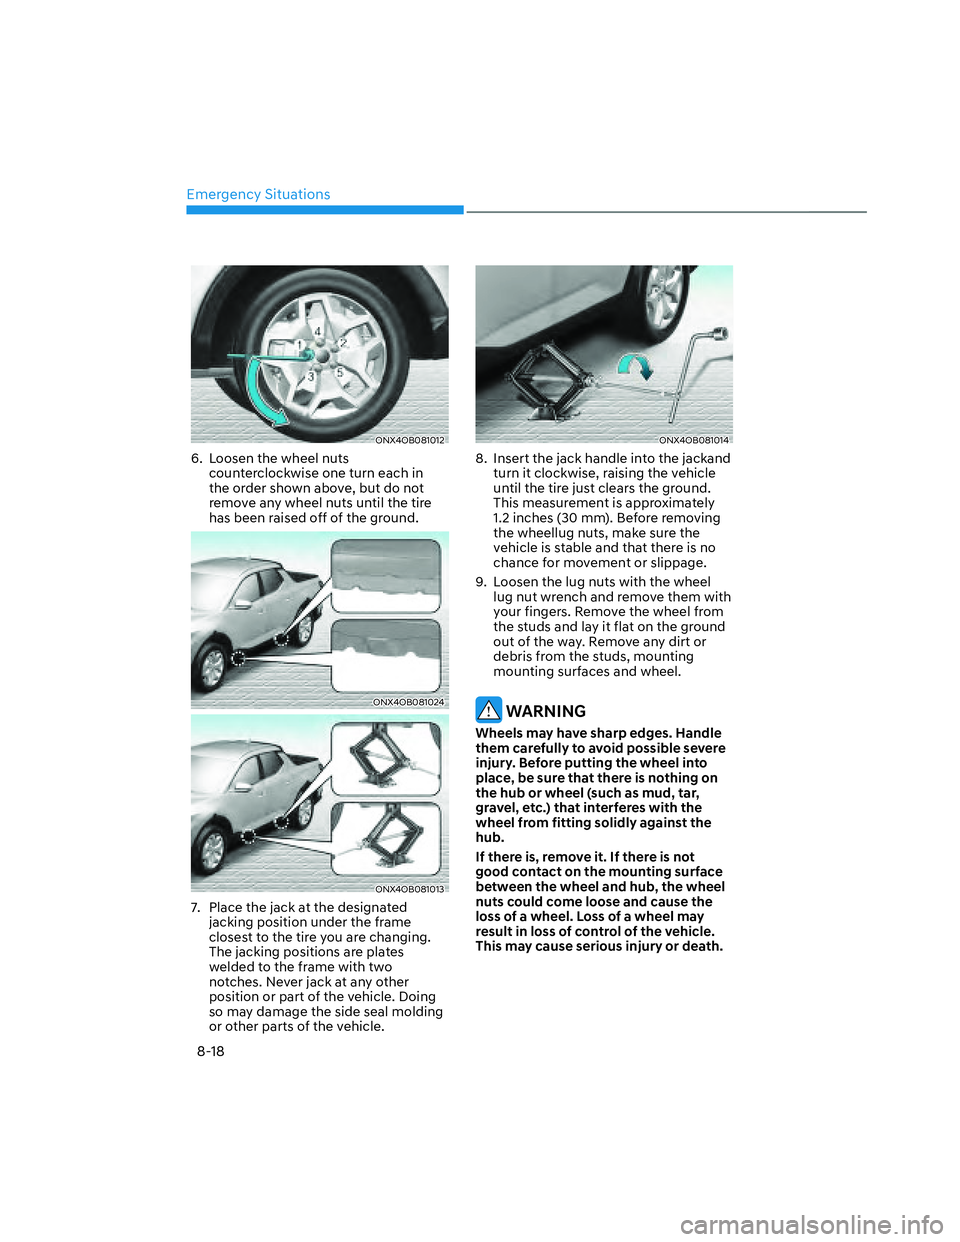
6. Loosen the wheel nuts
counterclockwise one turn each in
the order shown above, but do not
remove any wheel nuts until the tire
has been raised off of the ground.
ONX4OB081024ONX4OB081024
ONX4OB081013ONX4OB081013
7. Place the jack at the designated
jacking position under the frame
closest to the tire you are changing.
The jacking positions are plates
welded to the frame with two
notches. Never jack at any other
position or part of the vehicle. Doing
so may damage the side seal molding
or other parts of the vehicle.
ONX4OB081014ONX4OB081014
8. Insert the jack handle into the jackand
turn it clockwise, raising the vehicle
until the tire just clears the ground.
This measurement is approximately
1.2 inches (30 mm). Before removing
the wheellug nuts, make sure the
vehicle is stable and that there is no
chance for movement or slippage.
9. Loosen the lug nuts with the wheel
lug nut wrench and remove them with
your fingers. Remove the wheel from
the studs and lay it flat on the ground
out of the way. Remove any dirt or
debris from the studs, mounting
mounting surfaces and wheel.
WARNING
Wheels may have sharp edges. Handle
them carefully to avoid possible severe
injury. Before putting the wheel into
place, be sure that there is nothing on
the hub or wheel (such as mud, tar,
gravel, etc.) that interferes with the
wheel from fitting solidly against the
hub.
If there is, remove it. If there is not
good contact on the mounting surface
between the wheel and hub, the wheel
nuts could come loose and cause the
loss of a wheel. Loss of a wheel may
result in loss of control of the vehicle.
This may cause serious injury or death.