Page 223 of 548
05
5-39
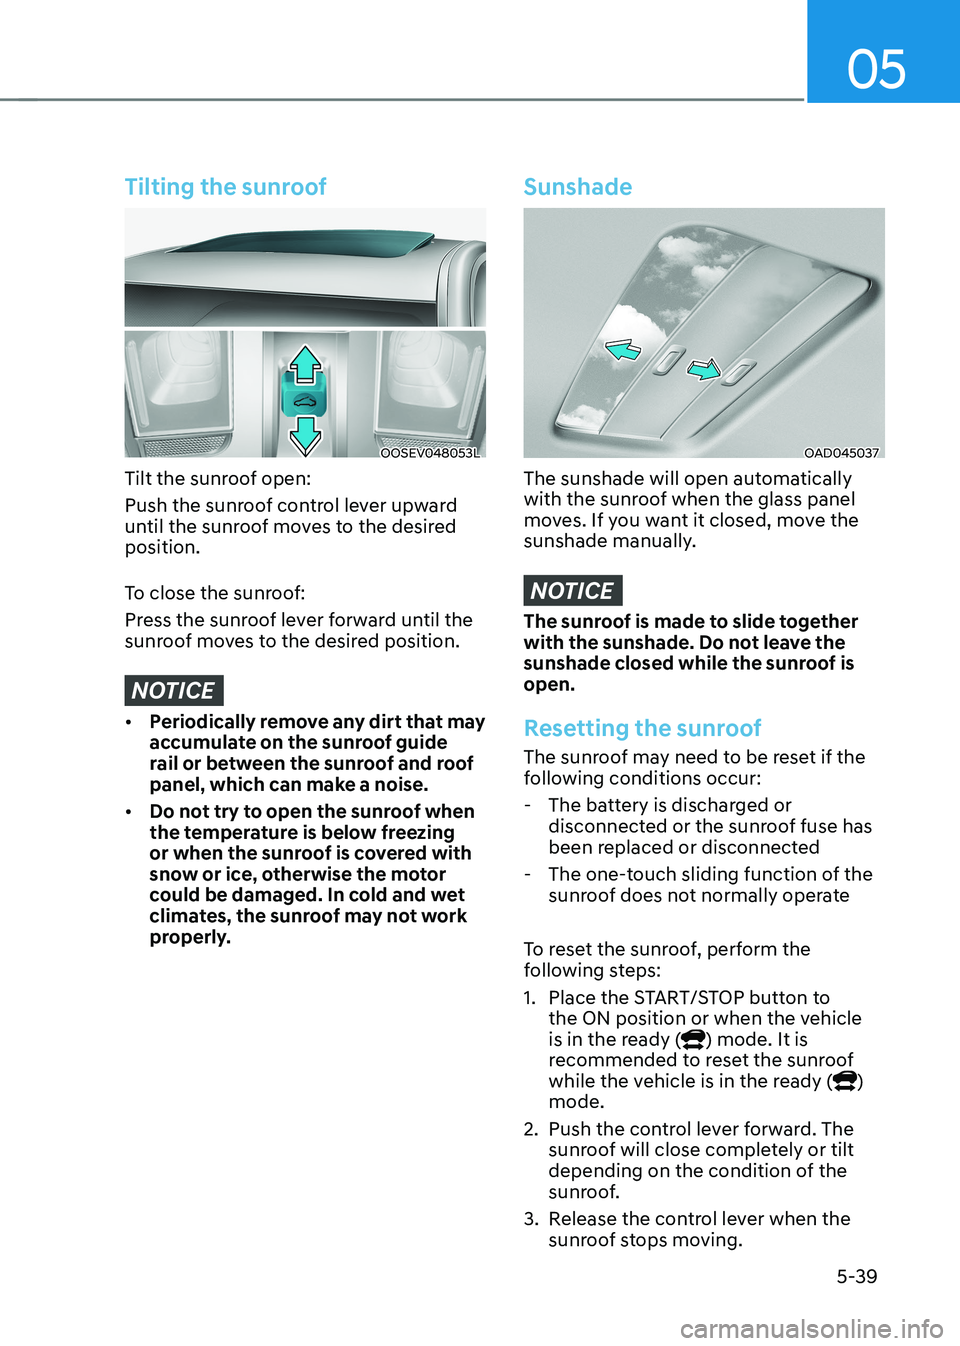
Tilting the sunroof
OOSEV048053L
Tilt the sunroof open:
Push the sunroof control lever upward
until the sunroof moves to the desired position.
To close the sunroof:
Press the sunroof lever forward until the
sunroof moves to the desired position.
NOTICE
• Periodically remove any dirt that may
accumulate on the sunroof guide
rail or between the sunroof and roof
panel, which can make a noise.
• Do not try to open the sunroof when
the temperature is below freezing
or when the sunroof is covered with
snow or ice, otherwise the motor
could be damaged. In cold and wet
climates, the sunroof may not work
properly.
Sunshade
OAD045037
The sunshade will open automatically
with the sunroof when the glass panel
moves. If you want it closed, move the
sunshade manually.
NOTICE
The sunroof is made to slide together
with the sunshade. Do not leave the
sunshade closed while the sunroof is open.
Resetting the sunroof
The sunroof may need to be reset if the
following conditions occur:
- The battery is discharged or disconnected or the sunroof fuse has
been replaced or disconnected
- The one-touch sliding function of the sunroof does not normally operate
To reset the sunroof, perform the
following steps:
1. Place the START/STOP button to the ON position or when the vehicle
is in the ready (
) mode. It is
recommended to reset the sunroof
while the vehicle is in the ready (
)
mode.
2. Push the control lever forward. The sunroof will close completely or tilt
depending on the condition of the
sunroof.
3. Release the control lever when the sunroof stops moving.
Page 224 of 548
Convenient features
5-40
4.
Push the control lever forward for about 10 seconds.
- When the sunroof is in the closed position :
- The glass will tilt and slightly move up and down.
- When the sunroof is in the tilt position:
The glass will slightly move up and
down.
Do not release the lever until the
operation is completed.
If you release the lever during operation,
try again from step 2.
5. Within 3 seconds, push the control lever forward until the sunroof
operates as follows:
Tilt down → Slide Open → Slide Close.
Do not release the lever until the
operation is completed.
If you release the lever during operation,
try again from step 2.
6. Release the sunroof control lever after all operation has completed (The
sunroof system has been reset).
Information
• If the sunroof does not reset when
the vehicle battery is disconnected or
discharged, or related fuse is blown, the
sunroof may not operate normally.
• For more detailed information, we
recommend that you contact an
authorized HYUNDAI dealer.
Sunroof open warning (if equipped)
• If the driver turns off the vehicle
when the sunroof is not fully closed,
the warning chime will sound for
approximately 3 seconds and the
open sunroof warning appear on the
LCD display.
• If the driver turns off the vehicle and
opens the door when the sunroof is
not fully closed, the open sunroof
warning will appear on the LCD
display until the door is closed or the
sunroof is fully closed.
Close the sunroof securely when leaving
your vehicle.
Page 234 of 548
Convenient features
5-50
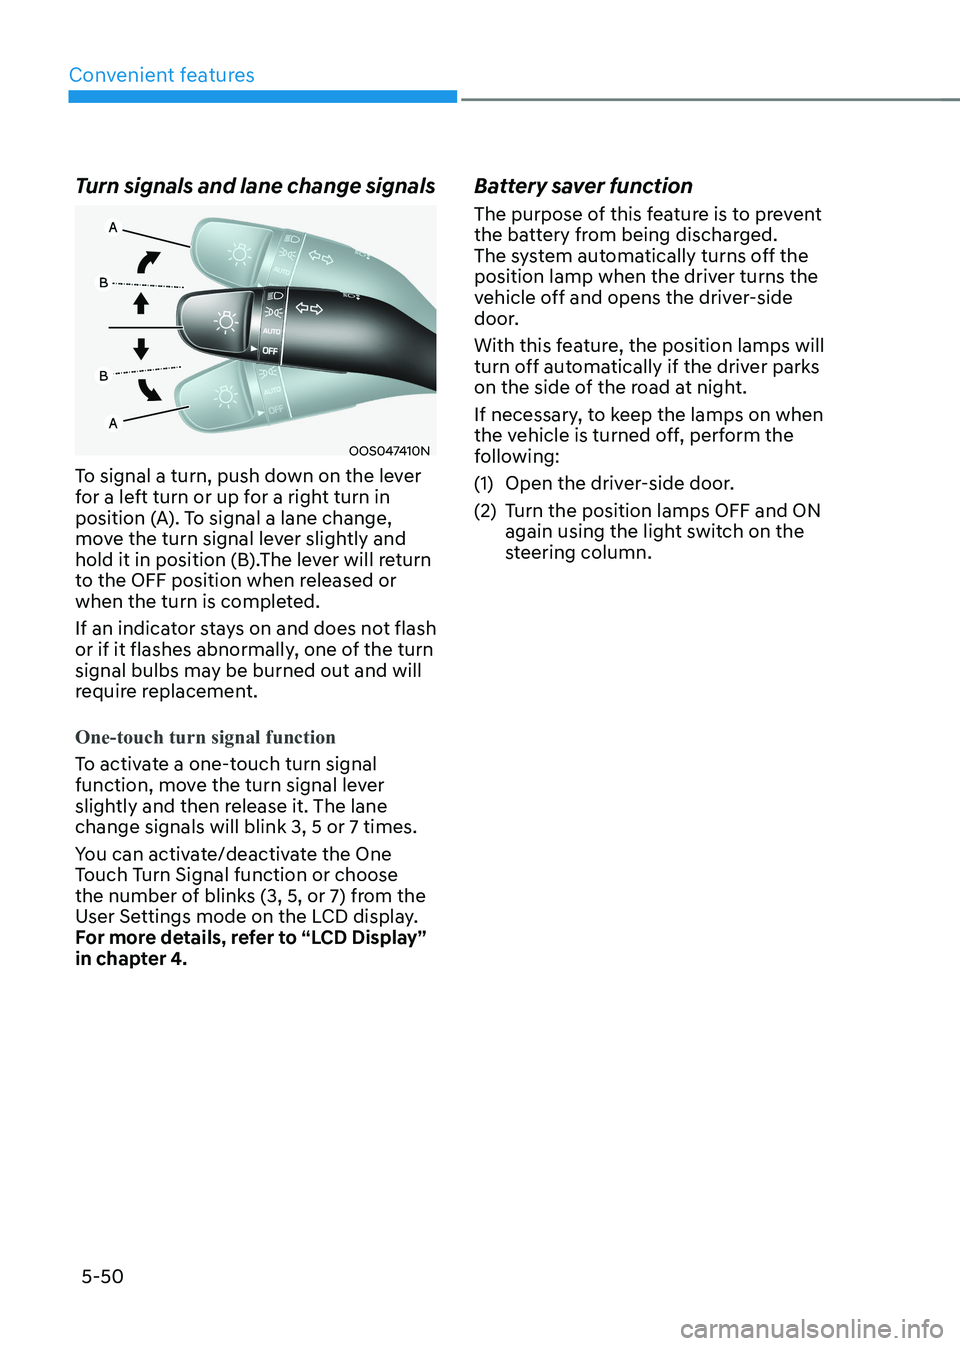
Turn signals and lane change signals
OOS047410N
To signal a turn, push down on the lever
for a left turn or up for a right turn in
position (A). To signal a lane change,
move the turn signal lever slightly and
hold it in position (B).The lever will return
to the OFF position when released or
when the turn is completed.
If an indicator stays on and does not flash
or if it flashes abnormally, one of the turn
signal bulbs may be burned out and will
require replacement.
One-touch turn signal function
To activate a one-touch turn signal
function, move the turn signal lever
slightly and then release it. The lane change signals will blink 3, 5 or 7 times.
You can activate/deactivate the One
Touch Turn Signal function or choose
the number of blinks (3, 5, or 7) from the
User Settings mode on the LCD display.
For more details, refer to “LCD Display”
in chapter 4. Battery saver function
The purpose of this feature is to prevent
the battery from being discharged.
The system automatically turns off the
position lamp when the driver turns the
vehicle off and opens the driver-side
door.
With this feature, the position lamps will
turn off automatically if the driver parks
on the side of the road at night.
If necessary, to keep the lamps on when
the vehicle is turned off, perform the
following:
(1) Open the driver-side door.
(2) Turn the position lamps OFF and ON
again using the light switch on the
steering column.
Page 235 of 548
05
5-51
Headlamp delay function (if equipped)
If you place the START/STOP button
to the ACC or OFF position with the
headlamps ON, the headlamps (and/or
position lamps) remain on for about 5
minutes. However, with the vehicle off if
the driver’s door is opened and closed,
the headlamps (and/or position lamps)
are turned off after 15 seconds.
The headlamps (and/or position lamps)
can be turned off by pressing the lock
button on the smart key twice or turning
the light switch to the OFF or AUTO
position. However, if you turn the light
switch to the AUTO position when it is
dark outside, the headlamps will not be
turned off.
You can activate or deactivate the
Headlamp Delay function from the User
Settings mode on the LCD display. For
more details, refer to “LCD Display” in
chapter 4.
NOTICE
If the driver gets out of the vehicle
through other doors (except driver’s
door), the battery saver function
does not operate and the headlamp
delay function does not turn off
automatically. Therefore, It causes the
battery to be discharged. In this case,
make sure to turn off the headlamps
before getting out of the vehicle.
Welcome system (if equipped)
Headlamp and position lamp
When the headlamp (lamp switch in the
headlamp or AUTO position) is on and
all doors (and tailgate) are locked and closed, the position lamp and headlamp
will come on for 15 seconds when the
door unlock button is pressed on the
smart key.
At this time, if you press the door lock
or unlock button, the position lamp and
headlamp will turn off immediately
Interior lamp
When the interior lamp switch is in
the DOOR position and all doors (and
tailgate) are closed and locked, the room
lamp will come on for 30 seconds if any
of the below is performed. • When the door unlock button is
pressed on the smart key.
• When the button of the outside door
handle is pressed with the smart key in possession.
At this time, if you press the door lock or
unlock button, the room lamp will turn
off immediately.
Page 236 of 548
Convenient features
5-52
Interior lights
WARNING
Do not use the interior lights when
driving in the dark. The interior lights
may obscure your view and cause an
accident.
NOTICE
Do not use the interior lights for
extended periods when the vehicle is
turned off or the battery will discharge.
Interior lamp AUTO cut
The interior lamps will automatically go
off approximately 20 minutes after the
vehicle is turned off and the doors are closed. If a door is opened, the lamp
will go off 40 minutes after the vehicle
is turned off. If the doors are locked and
the vehicle enters the armed stage of the
theft alarm system, the lamps will go off
five seconds later. Front lamps
„„Type A
OOSEV048023
„„Type B
OOSEV048045
Front map lamp (1)
Press either of these lens to turn the map
lamp on or off. This light produces a spot
beam for convenient use as a map lamp
at night or as a personal lamp for the
driver and the front passenger.
Page 238 of 548
Convenient features
5-54
Luggage compartment lamp
OOSEV040025L
The luggage compartment lamp comes
on when the tailgate is opened.
NOTICE
The luggage compartment lamp comes
on as long as the tailgate is open. To
prevent unnecessary charging system
drain, close the tailgate securely after
using the tailgate.
Vanity mirror lamp (if equipped)
OOS047055
Push the switch to turn the light on or off. •
: The lamp will turn on if this button is pressed.
•
: The lamp will turn off if this button is pressed.
NOTICE
Always have the switch in the off
position when the vanity mirror lamp
is not in use. If the sunvisor is closed
without the lamp off, it may discharge
the battery or damage the sunvisor.
Page 251 of 548
05
5-67
OOSEV040306CZ
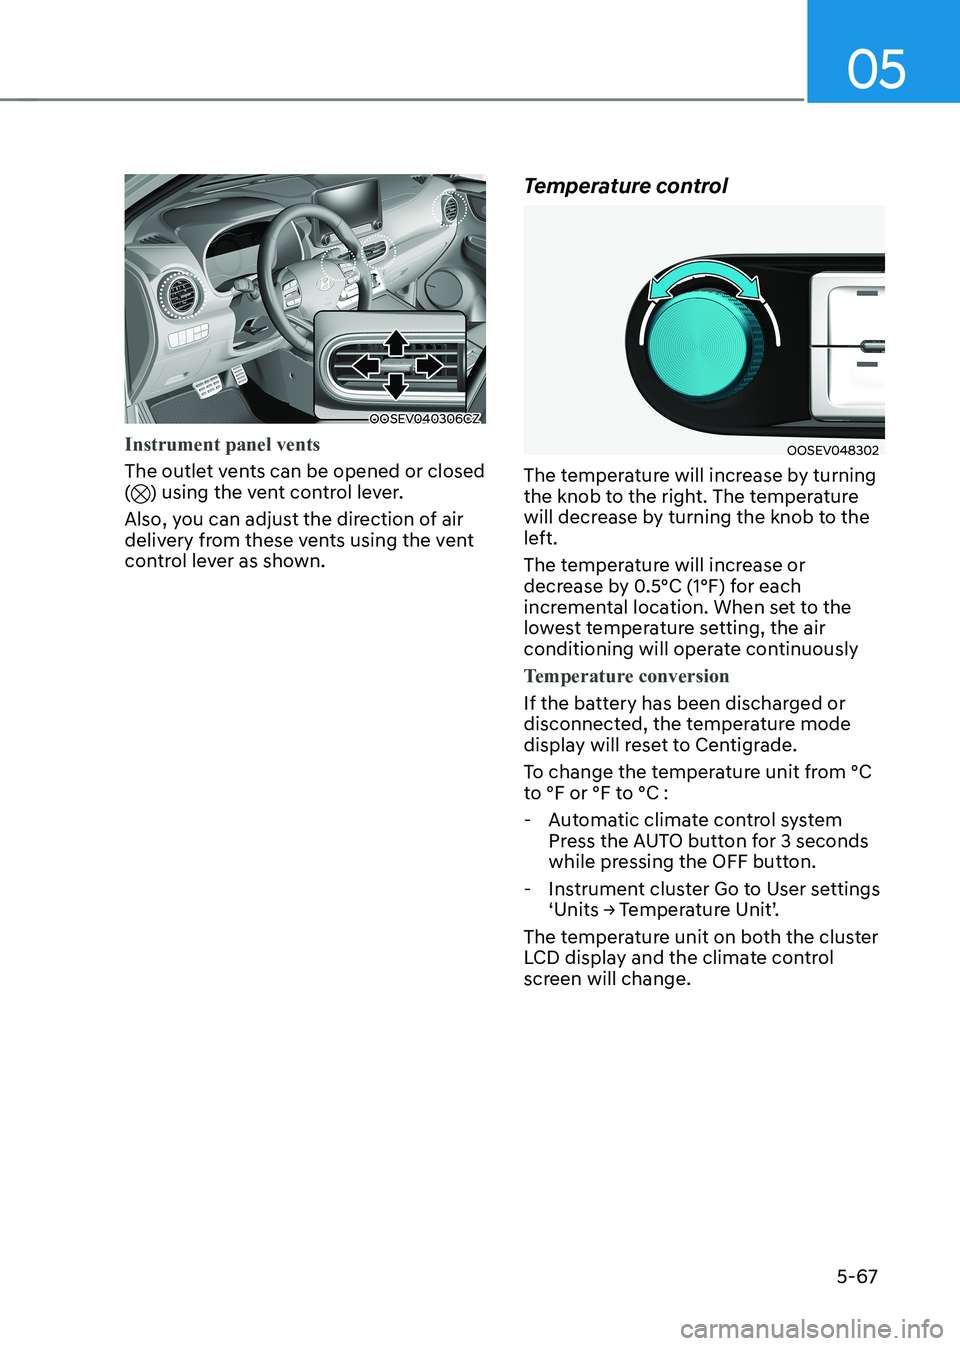
Instrument panel vents
The outlet vents can be opened or closed () using the vent control lever.
Also, you can adjust the direction of air
delivery from these vents using the vent
control lever as shown. Temperature control
OOSEV048302
The temperature will increase by turning
the knob to the right. The temperature
will decrease by turning the knob to the
left.
The temperature will increase or
decrease by 0.5°C (1°F) for each
incremental location. When set to the
lowest temperature setting, the air
conditioning will operate continuously
Temperature conversion
If the battery has been discharged or
disconnected, the temperature mode
display will reset to Centigrade.
To change the temperature unit from °C
to °F or °F to °C :
- Automatic climate control system Press the AUTO button for 3 seconds
while pressing the OFF button.
- Instrument cluster Go to User settings ‘Units → Temperature Unit’.
The temperature unit on both the cluster
LCD display and the climate control
screen will change.
Page 253 of 548
05
5-69
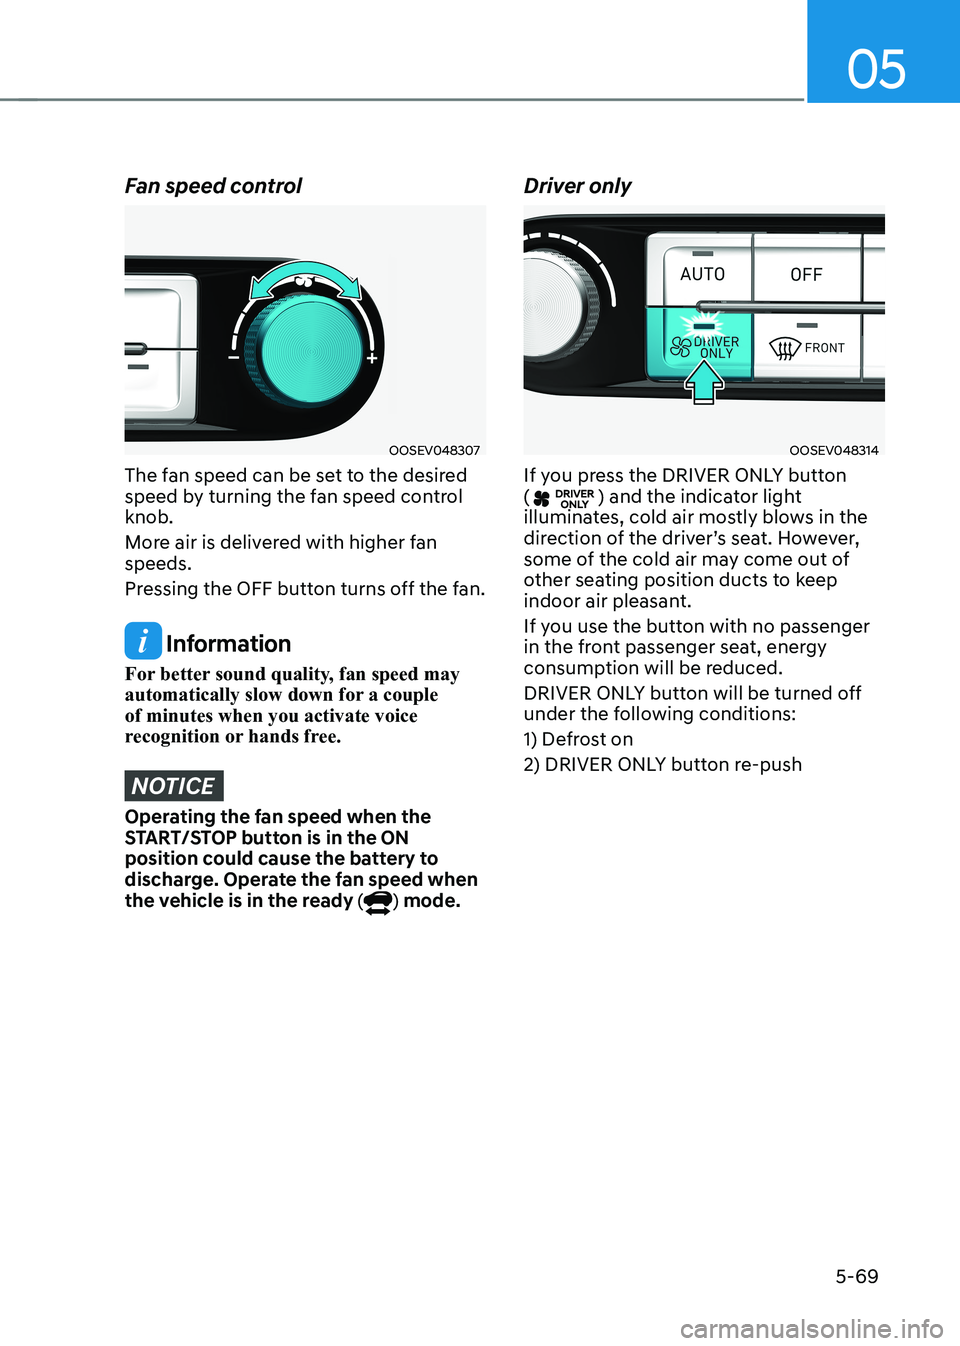
Fan speed control
OOSEV048307
The fan speed can be set to the desired
speed by turning the fan speed control knob.
More air is delivered with higher fan speeds.
Pressing the OFF button turns off the fan.
Information
For better sound quality, fan speed may
automatically slow down for a couple of minutes when you activate voice
recognition or hands free.
NOTICE
Operating the fan speed when the
START/STOP button is in the ON
position could cause the battery to
discharge. Operate the fan speed when
the vehicle is in the ready (
) mode. Driver only
OOSEV048314
If you press the DRIVER ONLY button (
) and the indicator light
illuminates, cold air mostly blows in the
direction of the driver’s seat. However,
some of the cold air may come out of
other seating position ducts to keep
indoor air pleasant.
If you use the button with no passenger
in the front passenger seat, energy
consumption will be reduced.
DRIVER ONLY button will be turned off
under the following conditions:
1) Defrost on
2) DRIVER ONLY button re-push