2023 HYUNDAI IONIQ 5 warning light
[x] Cancel search: warning lightPage 242 of 680

Convenience Features
5-50
Automatic-Dimming Night Vision Safety™ (NVS®
) Mirror (if equipped)
The NVS® Mirror automatically reduces
glare by monitoring light levels in the
front and the rear of the vehicle. Any
object that obstructs either light sensor
will degrade the automatic dimming
control feature.
For more information regarding NVS®
mirrors and other applications, please
refer to the Gentex website:
www.gentex.com
Your mirror will automatically dim
upon detecting glare from the vehicles
traveling behind you.
The mirror defaults to the ON position
each time the vehicle is started.
Integrated HomeLink ®
Wireless Control
System
The HomeLink® Wireless Control System
provides a convenient way to replace
up to three hand held radio-frequency
transmitters used to activate compatible
devices such as gate operators, garage
door openers, entry door locks, security
systems, and home lighting.
NOTICE
HomeLink® operates while the ignition
switch is in the ACC or ON position
for safety reasons. It is to prevent
unintentional security problems from
happening when the vehicle is parked
outside the garage.
WARNING
Before programming HomeLink® to a
garage door opener or gate operator,
make sure people and objects are out
of the way of the device to prevent
potential harm or damage. Do not
use the HomeLink® with any garage
door opener that lacks the safety
stop and reverse features required
by U.S. federal safety standards (this
includes any garage door opener model
manufactured before April 1, 1982).
A garage door that cannot detect an
object - signaling the door to stop and
reverse - does not meet current U.S.
federal safety standards. Using a garage
door opener without these features
increases the risk of serious injury or
death.
For more information, contact
HomeLink® at www.homelink.com, or
call Home-Link customer support at
1-800-355-3515.
It is also recommended that a new
battery be replaced in the handheld
transmitter of the device being trained
to HomeLink® for quicker training and
accurate transmission of the radio
frequency.
Page 259 of 680

05
5-67
ONE1051036
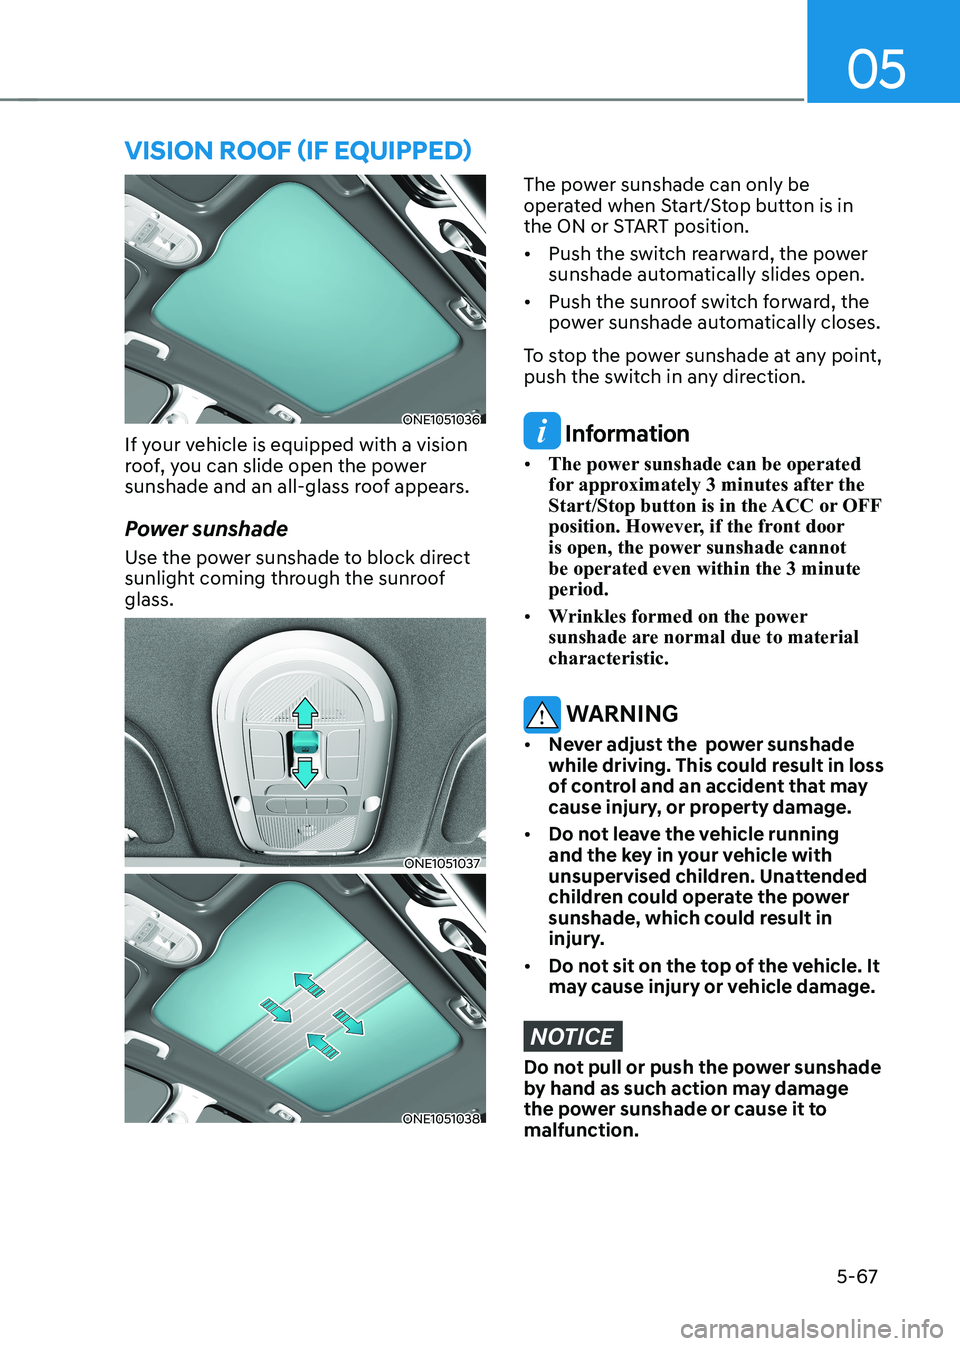
If your vehicle is equipped with a vision
roof, you can slide open the power
sunshade and an all-glass roof appears.
Power sunshade
Use the power sunshade to block direct
sunlight coming through the sunroof glass.
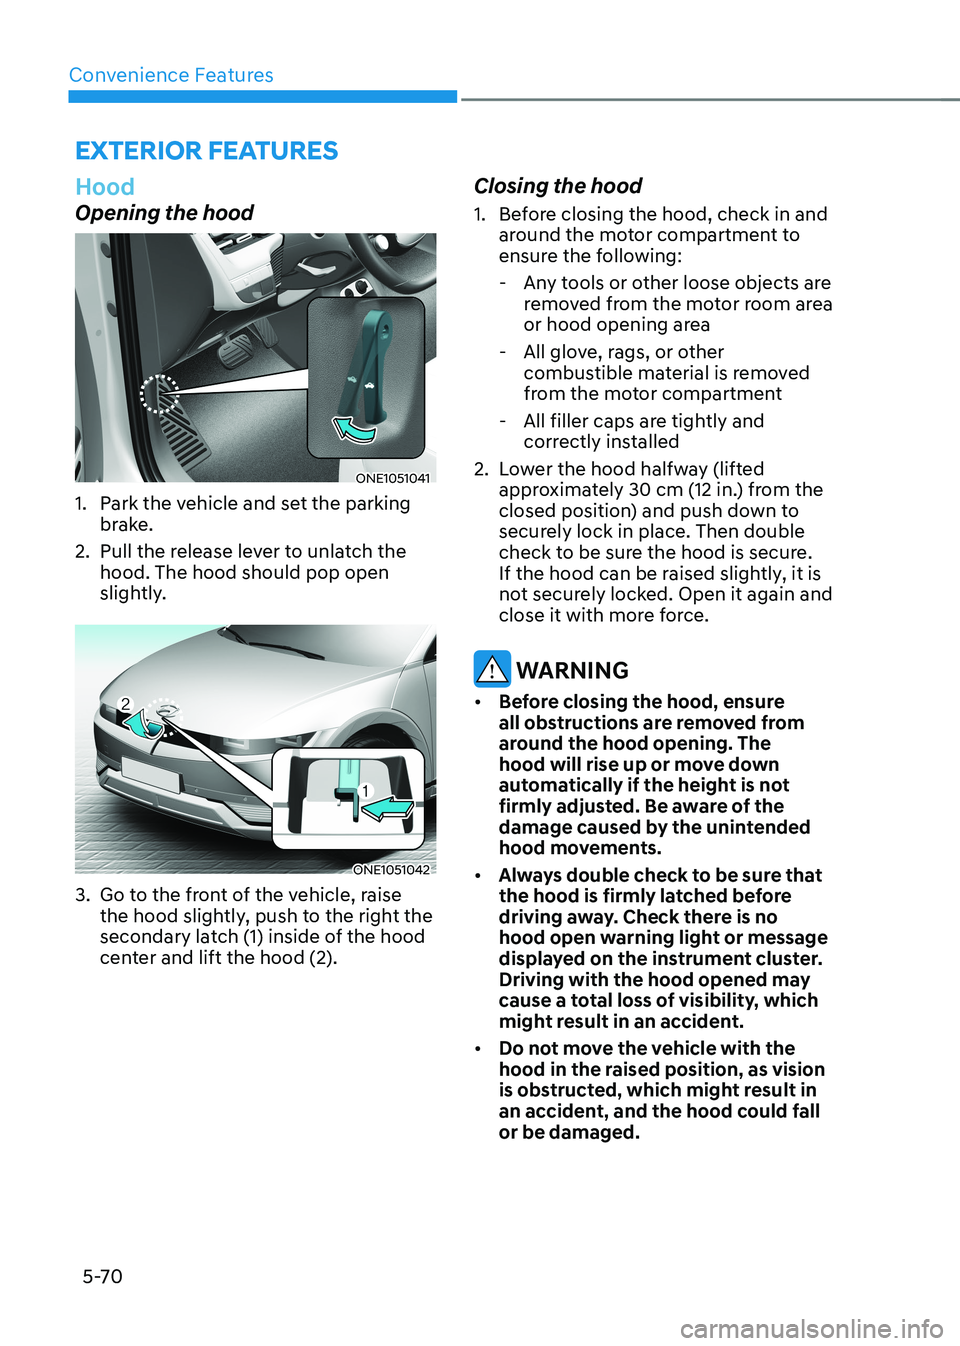
ONE1051037
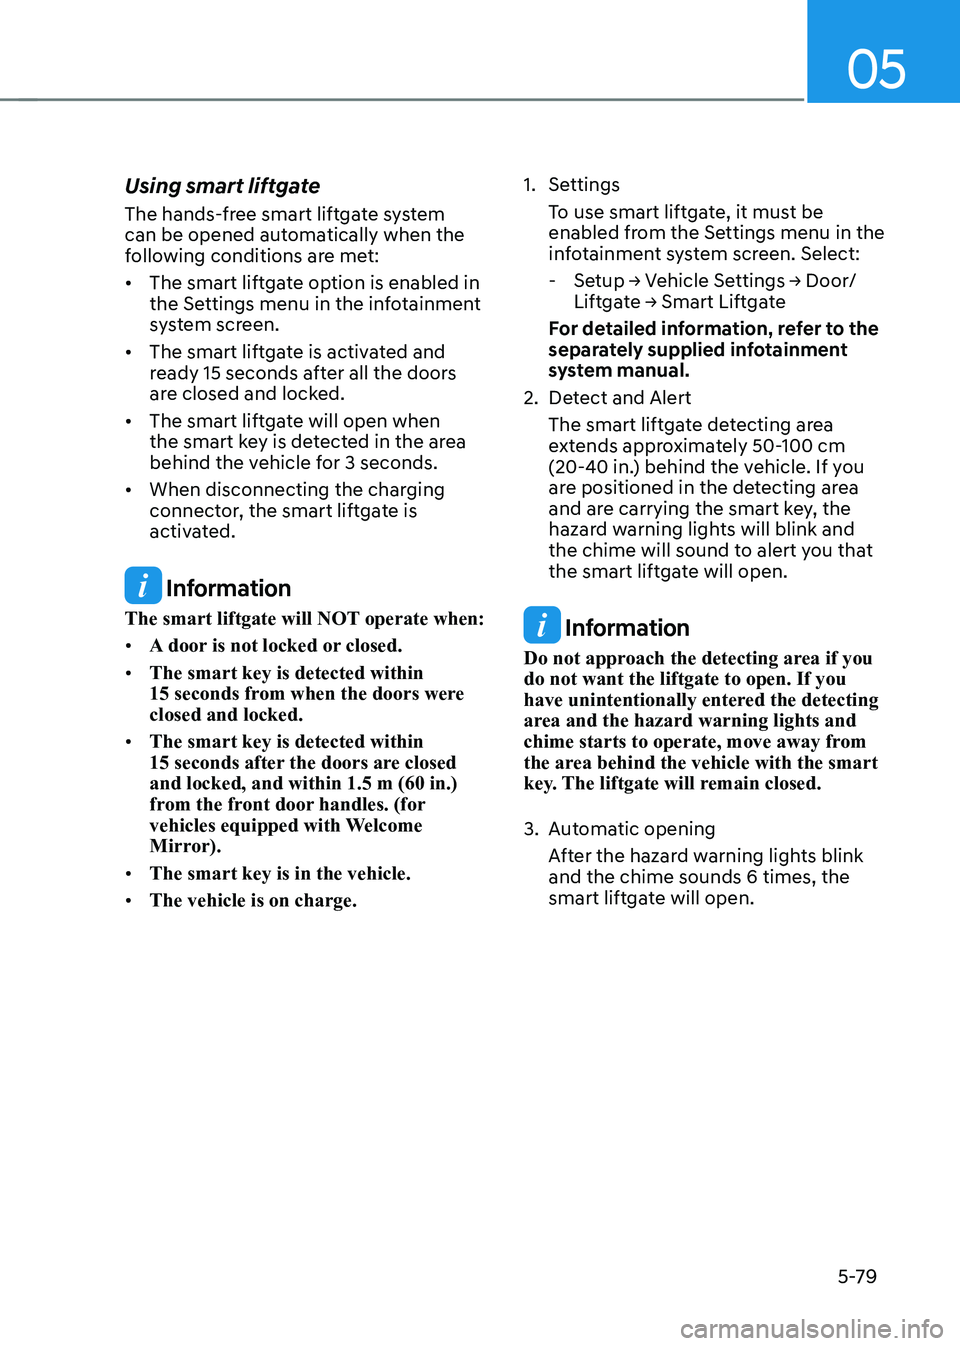
ONE1051038
The power sunshade can only be
operated when Start/Stop button is in
the ON or START position. • Push the switch rearward, the power
sunshade automatically slides open.
• Push the sunroof switch forward, the
power sunshade automatically closes.
To stop the power sunshade at any point,
push the switch in any direction.
Information
• The power sunshade can be operated
for approximately 3 minutes after the
Start/Stop button is in the ACC or OFF
position. However, if the front door
is open, the power sunshade cannot be operated even within the 3 minute period.
• Wrinkles formed on the power
sunshade are normal due to material characteristic.
WARNING
• Never adjust the power sunshade
while driving. This could result in loss
of control and an accident that may
cause injury, or property damage.
• Do not leave the vehicle running
and the key in your vehicle with
unsupervised children. Unattended
children could operate the power
sunshade, which could result in
injury.
• Do not sit on the top of the vehicle. It
may cause injury or vehicle damage.
NOTICE
Do not pull or push the power sunshade
by hand as such action may damage
the power sunshade or cause it to malfunction.
VIsIon roof (If eQUIPPed)
Page 262 of 680

Convenience Features
5-70
exterior feAtures
Hood
Opening the hood
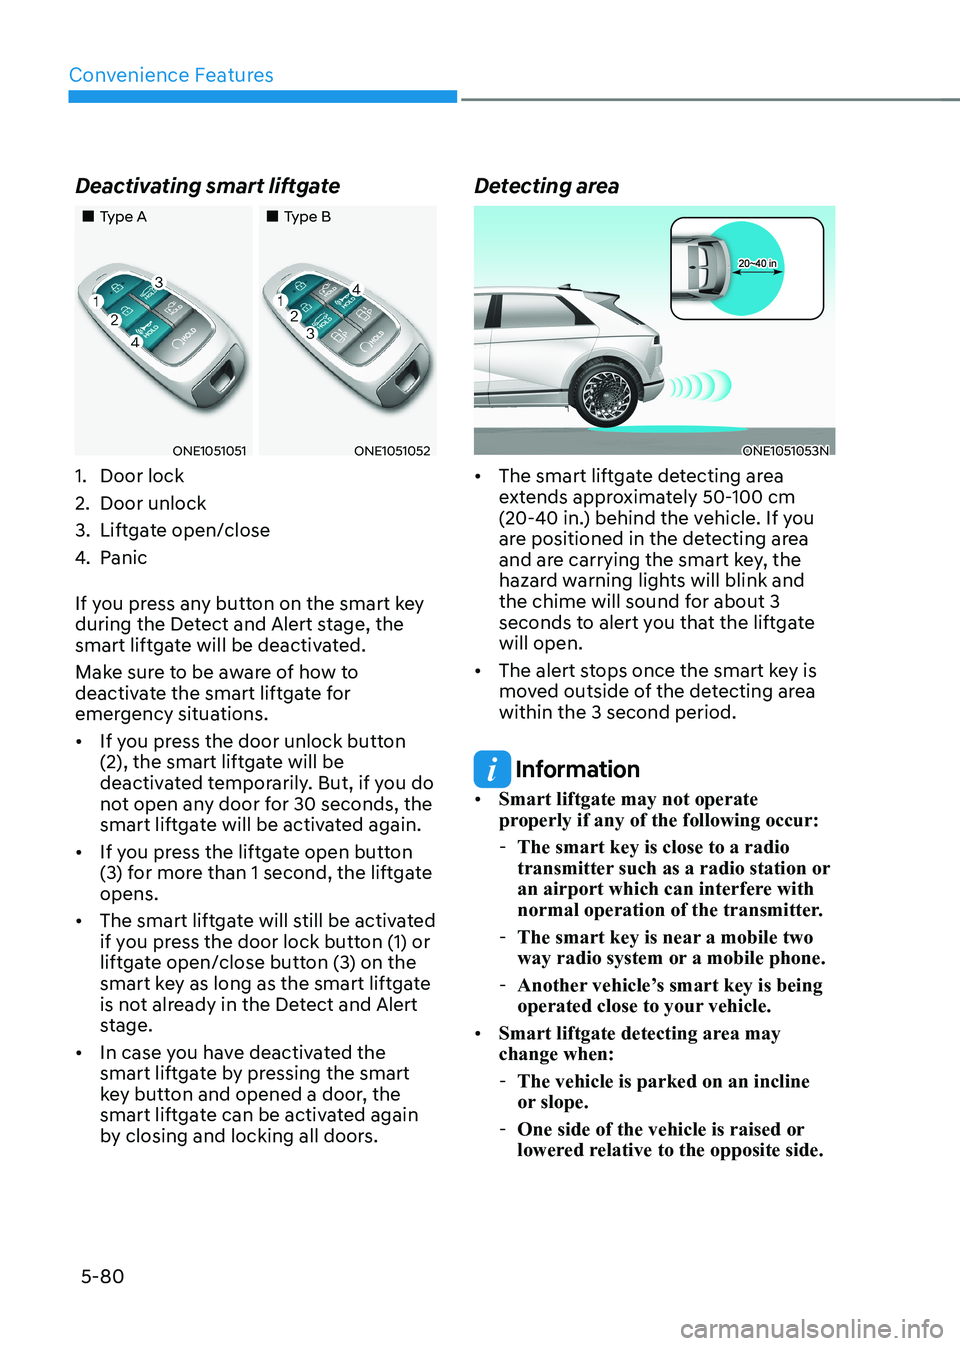
ONE1051041
1. Park the vehicle and set the parking brake.
2. Pull the release lever to unlatch the hood. The hood should pop open
slightly.
ONE1051042
3. Go to the front of the vehicle, raise the hood slightly, push to the right the
secondary latch (1) inside of the hood
center and lift the hood (2). Closing the hood
1. Before closing the hood, check in and
around the motor compartment to
ensure the following:
- Any tools or other loose objects are removed from the motor room area
or hood opening area
- All glove, rags, or other combustible material is removed
from the motor compartment
- All filler caps are tightly and correctly installed
2. Lower the hood halfway (lifted approximately 30 cm (12 in.) from the
closed position) and push down to
securely lock in place. Then double
check to be sure the hood is secure.
If the hood can be raised slightly, it is
not securely locked. Open it again and
close it with more force.
WARNING
• Before closing the hood, ensure
all obstructions are removed from
around the hood opening. The
hood will rise up or move down
automatically if the height is not
firmly adjusted. Be aware of the
damage caused by the unintended
hood movements.
• Always double check to be sure that
the hood is firmly latched before
driving away. Check there is no
hood open warning light or message
displayed on the instrument cluster.
Driving with the hood opened may
cause a total loss of visibility, which
might result in an accident.
• Do not move the vehicle with the
hood in the raised position, as vision
is obstructed, which might result in
an accident, and the hood could fall or be damaged.
Page 263 of 680

05
5-71
Front trunk
Opening the Front Trunk
ONE1051213
• Open the hood
• Lift up the front trunk cover while
depressing the front trunk lever (1).
Closing the Front Trunk
Push down the front trunk cover to the
right position.
Information
Available front trunk weight • 2WD : 55 lbs. (25 kg)
• AWD : 25 lbs. (10 kg)
Available front trunk weight depends on the specifications.
WARNING
• NEVER make an attempt to get inside
the front trunk. It will cause a fatal
injury.
• Before closing the hood, ensure
all obstructions are removed from
around the hood opening. The
hood will rise up or move down
automatically if the height is not
firmly adjusted. Be aware of the
damage caused by the unintended
hood movements.
• Never store cigarette lighters,
propane cylinders, or other
flammable/explosive materials in
the vehicle. These items may catch
fire and/or explode if the vehicle
is exposed to hot temperatures for
extended periods.
CAUTION
• Do not exceed the luggage volume
capacity of the front trunk. The
overweighted front trunk can be
severely damaged.
• Do not store the fragile objects in the
front trunk.
• ALWAYS keep the front trunk cover
closed securely while driving. Items
inside your vehicle are moving as fast
as the vehicle. If you have to stop or
turn quickly, or if there is a crash, the
items can be damaged.
• Do not spray water in the front
trunk. Vehicle driving system may
get damaged since the front trunk
is located at the center of motor
compartment.
• Be careful when you store any liquid
in the front trunk. If liquid leak
outside the front trunk, it will cause a
damage to the electric devices in the
motor compartment.
• Do not press the front trunk cover
or place the objects on the front
trunk cover. It may be deformed or damaged.
• When closing the front trunk cover,
be careful not to touch objects
inside the trunk. Loaded objects or
the front trunk may be deformed or
damaged and the front trunk cover
may be opened during driving due to
poor closing, resulting in joints and damage.
NOTICE
To avoid possible theft, do not leave
valuables in the storage compartments.
Page 271 of 680

05
5-79
Using smart liftgate
The hands-free smart liftgate system
can be opened automatically when the
following conditions are met: •
The smart liftgate option is enabled in
the Settings menu in the infotainment
system screen.
• The smart liftgate is activated and
ready 15 seconds after all the doors
are closed and locked.
• The smart liftgate will open when
the smart key is detected in the area
behind the vehicle for 3 seconds.
• When disconnecting the charging
connector, the smart liftgate is
activated.
Information
The smart liftgate will NOT operate when: • A door is not locked or closed.
• The smart key is detected within
15 seconds from when the doors were closed and locked.
• The smart key is detected within
15 seconds after the doors are closed and locked, and within 1.5 m (60 in.)
from the front door handles. (for
vehicles equipped with Welcome
Mirror).
• The smart key is in the vehicle.
• The vehicle is on charge. 1. Settings
To use smart liftgate, it must be
enabled from the Settings menu in the
infotainment system screen. Select: - Setup → Vehicle Settings → Door/
Liftgate → Smart Liftgate
For detailed information, refer to the
separately supplied infotainment
system manual.
2. Detect and Alert The smart liftgate detecting area
extends approximately 50-100 cm
(20-40 in.) behind the vehicle. If you
are positioned in the detecting area
and are carrying the smart key, the
hazard warning lights will blink and
the chime will sound to alert you that
the smart liftgate will open.
Information
Do not approach the detecting area if you do not want the liftgate to open. If you
have unintentionally entered the detecting
area and the hazard warning lights and
chime starts to operate, move away from
the area behind the vehicle with the smart
key. The liftgate will remain closed.
3. Automatic opening After the hazard warning lights blink and the chime sounds 6 times, the
smart liftgate will open.
Page 272 of 680

Convenience Features
5-80
Deactivating smart liftgate
„„Type A
„„Type B
ONE1051051ONE1051052
1. Door lock
2. Door unlock
3. Liftgate open/close
4. Panic
If you press any button on the smart key
during the Detect and Alert stage, the
smart liftgate will be deactivated.
Make sure to be aware of how to
deactivate the smart liftgate for
emergency situations. • If you press the door unlock button
(2), the smart liftgate will be
deactivated temporarily. But, if you do
not open any door for 30 seconds, the
smart liftgate will be activated again.
• If you press the liftgate open button
(3) for more than 1 second, the liftgate opens.
• The smart liftgate will still be activated
if you press the door lock button (1) or
liftgate open/close button (3) on the
smart key as long as the smart liftgate
is not already in the Detect and Alert
stage.
• In case you have deactivated the
smart liftgate by pressing the smart
key button and opened a door, the
smart liftgate can be activated again
by closing and locking all doors. Detecting areaONE1051053N
• The smart liftgate detecting area
extends approximately 50-100 cm
(20-40 in.) behind the vehicle. If you
are positioned in the detecting area
and are carrying the smart key, the
hazard warning lights will blink and
the chime will sound for about 3
seconds to alert you that the liftgate will open.
• The alert stops once the smart key is
moved outside of the detecting area within the 3 second period.
Information
• Smart liftgate may not operate
properly if any of the following occur:
- The smart key is close to a radio
transmitter such as a radio station or
an airport which can interfere with
normal operation of the transmitter.
- The smart key is near a mobile two
way radio system or a mobile phone.
- Another vehicle’s smart key is being
operated close to your vehicle.
• Smart liftgate detecting area may change when:
- The vehicle is parked on an incline
or slope.
- One side of the vehicle is raised or
lowered relative to the opposite side.
Page 273 of 680

05
5-81
electric chArging Door
ONE1Q011040
The driver can open and close the
charging door with the following
methods: • When the shift gear is in P (Park), push
the charging door to open/close
• Push the Close button located inner
part of the charging door
• Press the charging door button in the
smart key
• Use the Voice Recognition
NOTICE
• If the charging door does not open
because ice has formed around it,
tap lightly or push on the door to
break the ice and release the door.
If necessary, use hand temperature
to melt down the ice or move the
vehicle to a warm place and allow
the ice to melt. Do not pry on the
charging door or use unauthorized
tools to open the charging door.
• After closing the charging door, push
the door again to ensure that the
charging door is completely closed.
• Make sure that the charging door is
closed before driving the vehicle.
If the charging door is opened,
mechanical parts of the charging door can be damaged.
• After closed the charging door, be
sure to check the warning light is off. •
After charging the vehicle, close
the charging inlet by the charging
inlet cover properly. If the charging
inlet cover is closed improperly, the
charging inlet and the charging door can be damaged.
• Do not pry on the charging door
while the charging door is opening.
The charging door may stop moving.
Also, the electrical mechanism of the
charging door and its related parts
can be severely damaged.
• While washing the vehicle, do not
spray a high pressure water to the
charging door directly. The high
pressure can damage the charging
door.
CAUTION
• The charging door opens upwards.
Check the surrounding while the
charging door is open or close. Be
aware of your head or limbs from
being hit or stuck to the charging
door.
• Do not hold the hinge to prevent
damaging the charging door and
causing other accidents.
Information
• The charging door automatically closes when:
- The charging connector is disconnected
- The door is opened and the charging
connector is not connected for a certain period of time
- The gear is not in P (Park)
• After replacing battery (12 volt), open
and close the charging door once to
check that the charging door automatic opening mechanism is functioning
properly.
For more details, refer to “Charging
Electric Vehicle” section in chapter 1.
Page 276 of 680

Convenience Features
5-84
Precautions while Using the
Head-up display
• It may sometimes be difficult to read
information on the Head-Up Display in
the following situations.
- The driver is improperly positioned in the driver’s seat
- The driver wears polarizing-filter sunglasses
- An object is located above the head-up display cover
- The vehicle is driven on a wet road
- Any improper lighting accessory is installed inside the vehicle, or there
is incoming light from outside of the
vehicle
- The driver wears glasses
- The driver wears contact lenses
When it is difficult to read the Head-
up display information, adjust the
image position, brightness level or
AR matching information from the
Settings menu in the infotainment
system screen.
• The AR mode display information may
be difficult to recognize when the
vehicle is driven under severe weather
condition, such as heavy rain, heavy
snow, low visibility, etc.
• Since the information displayed on
the head-up display partially overlaps
with the road ahead, you may feel
fatigue and discomfort while driving.
If you feel tired or uncomfortable,
adjust the image, and if the symptoms
persist, turn off the head-up display
before driving.
• When the direct flash light or
sunlight hits the front windshield, a
warning message will appear. If the
temperature of the front windshield
keep rises, Head-up display will be
deactivated temporarily to protect
Head-up display from the high
temperature. When the temperature
drops, Head-up display will be
reactivated. •
For your safety, make sure to stop the
vehicle before adjusting the settings.
• Do not tint the front windshield glass
or add other types of metallic coating.
Otherwise, the Head-Up Display
image may be invisible.
• Do not place any accessories on the
crash pad or attach any objects on the windshield glass.
• When replacing the front windshield
glass, replace it with a windshield
glass designed for Head-Up Display
operation. Otherwise, duplicated
images may be displayed on the windshield glass.
WARNING
• The warning information of Blind-
Spot Safety on the Head-Up Display
are supplemental. Do not solely
depend on them to change lanes.
Always take a look around before changing lanes.
The driving route guidance display
in the augmented reality mode is an
auxiliary function. Be sure to check
the navigation screen together.
• ALWAYS pay attention on the road
while driving when the Head-Up
Display is on.
Information
Head-Up Display includes GPL, LGPL,
MPL and other open source license
softwares. All license notices including
related source code are provided at http://
www.mobis.co.kr/opensource/list.do.
If the driver requests on-board
software open source code via MOBIS_
[email protected] within 3 years
after buying this product, a CD-ROM or
other storage device will be sent with the minimum cost covering storage device cost and delivery cost.