Page 36 of 533

2-15
Safety system of your vehicle
2
Armrest (if equipped)
The armrest is located in the centre
of the rear seat. Pull the armrest
down from the seatback to use it.
Headrest
The vehicle’s front and rear seats have
adjustable headrests. The headrests
provide comfort for passengers, but
more importantly they are designed to
help protect passengers from whiplash
and other neck and spinal injuries dur-
ing an accident, especially in a rear
impact collision.
To reduce the risk of serious
injury or death in an accident,
take the following precautions
when adjusting your headrests:
Always properly adjust the
headrests for all passengers
BEFORE starting the vehicle.
NEVER let anyone ride in a seat
with the headrest removed.
(Continued)
(Continued)
Adjust the headrests so the
middle of the headrest is at the
same height as the height of
the top of the eyes.
NEVER adjust the headrest
position of the driver’s seat
when the vehicle is in motion.
Adjust the headrest as close
to the passenger’s head as
possible. Do not use a seat
cushion that holds the body
away from the seatback.
Make sure the headrest locks
into position after adjusting it.
WARNING OLF034072N
OPD036022
Page 38 of 533
2-17
Safety system of your vehicle
2
Forward and rearward adjustment
(if equipped)
The headrest may be adjusted for-
ward to 3 different positions by
pulling the headrest forward to the
desired detent. To adjust the head-
rest to it’s furthest rearwards posi-
tion, pull it fully forward to the farthest
position and release it.If you recline the seatback towards
the front with the headrest and
seat cushion raised, the headrest
may come in contact with the sun-
visor or other parts of the vehicle.
Removal/Reinstall
To remove the headrest:
1. Recline the seatback (2) using the
seatback angle lever or switch (1).
2. Raise the headrest as far as it can
go.
NOTICE
OPD037011R
OPDE036013R
■Type A
■Type BOLF034015OPD036009
Page 39 of 533
2-18
Safety system of your vehicle
3. Press the headrest release button
(3) whilst pulling the headrest up
(4).
To reinstall the headrest :
1. Recline the seatback.
2. Put the headrest poles (2) into the
holes whilst pressing the release
button (1).
3. Adjust the headrest to the appropri-
ate height.4. Recline the seatback (4) using the
seatback angle lever or switch (3).
Always make sure the headrest
locks into position after rein-
stalling and adjusting it properly.
WARNING
OPD037012R
OPDE036014R
■Type A
■Type B
NEVER allow anyone to travel in a
seat with the headrest removed.
WARNING
Page 44 of 533

2-23
Safety system of your vehicle
2
Damaged seat belts and seat
belt assemblies will not operate
properly. Always replace:
Frayed, contaminated, or dam-
aged webbing.
Damaged hardware.
The entire seat belt assembly
after it has been worn in an
accident, even if damage to
webbing or assembly is not
apparent.
WARNING
(Continued)
No modifications or additions
should be made by the user
which will either prevent the
seat belt adjusting devices
from operating to remove
slack, or prevent the seat belt
assembly from being adjusted
to remove slack.Seat belts are designed to bear
upon the bony structure of the
body, and should be worn low
across the front of the pelvis or
the pelvis, chest and shoulders,
as applicable; wearing the lap
section of the belt across the
abdominal area must be avoid-
ed.
Seat belts should be adjusted
as firmly as possible, consis-
tent with comfort, to provide the
protection for which they have
been designed.
A slack belt will greatly reduce
the protection afforded to the
wearer.
(Continued)
WARNING (Continued)
Care should be taken to avoid
contamination of the webbing
with polishes, oils and chemi-
cals, and particularly battery
acid. Cleaning may safely be
carried out using mild soap and
water.
The belt should be replaced if
webbing becomes frayed, con-
taminated or damaged. It is
essential to replace the entire
assembly after it has been worn
in a severe impact even if dam-
age to the assembly is not obvi-
ous. Belts should not be worn
with straps twisted. Each seat
belt assembly must only be
used by one occupant; it is dan-
gerous to put a belt around a
child being carried on the occu-
pant's lap.
Page 59 of 533

2-38
Safety system of your vehicle
Booster seats
A booster seat is a Child Restraint
System designed to improve the fit of
the vehicle’s seat belt system. A boost-
er seat positions the seat belt so that it
fits properly over the stronger parts of
your child’s body. Keep your children in
booster seats until they are big
enough to fit in a seat belt properly.
For a seat belt to fit properly, the lap
belt must lie comfortably across the
upper thighs, not the stomach. The
shoulder belt should lie comfortably
across the shoulder and chest and
not across the neck or face. Children
under age 13 must always be proper-
ly restrained to minimise the risk of
injury in an accident, sudden stop or
sudden manoeuvre.
Installing a Child Restraint
System (CRS) (if equipped)After selecting a proper Child Restraint
System for your child and checking
that the Child Restraint System fits
properly on the seating position, there
are three general steps for a proper
installation:
1.Properly secure the Child
Restraint System to the vehicle.
All child restraint systems must be
installed or secured in accordance
with their manufacturer instruc-
tions.
2.Make sure the Child Restraint
System is firmly secured.After
installing a Child Restraint System
to the vehicle, push and pull the
seat forward and from side-to-side
to verify that it is securely attached
to the seat. A Child Restraint
System secured with a seat belt
should be installed as firmly as
possible. However, some side-to-
side movement can be expected. Before installing your Child
Restraint System always:
Read and follow the instructions
provided by the manufacturer of
the Child Restraint System.
Failure to follow all warnings
and instructions could increase
the risk of SERIOUS INJURY or
DEATH if an accident occurs.
WARNING
If the vehicle headrest prevents
proper installation of a Child
Restraint System, the headrest
of the respective seating posi-
tion should be readjusted or
entirely removed.
WARNING
Page 64 of 533

2-43
Safety system of your vehicle
2
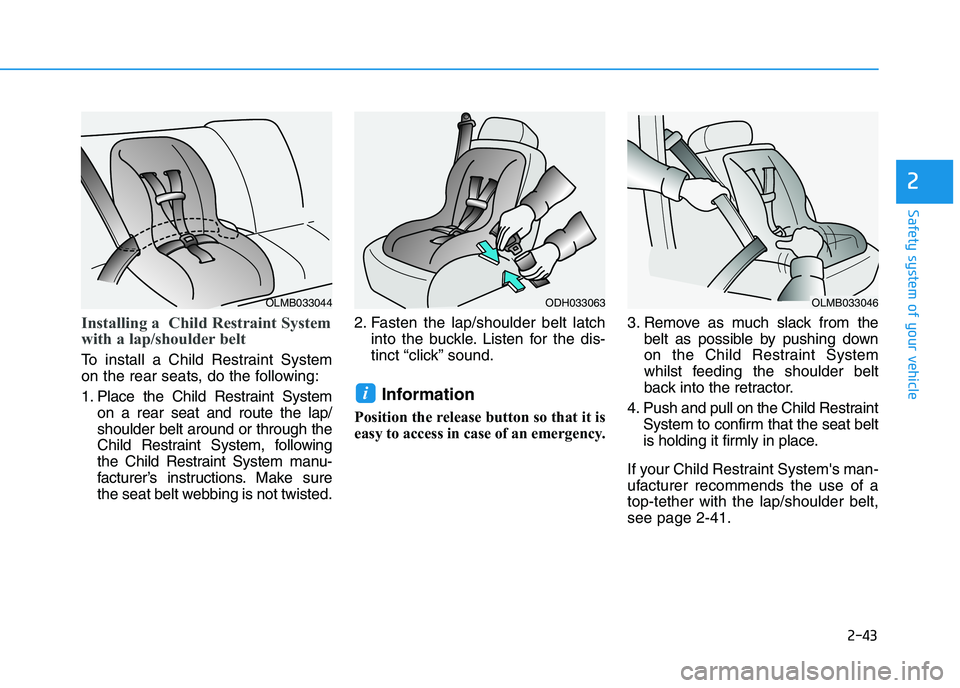
Installing a Child Restraint System
with a lap/shoulder belt
To install a Child Restraint System
on the rear seats, do the following:
1. Place the Child Restraint System
on a rear seat and route the lap/
shoulder belt around or through the
Child Restraint System, following
the Child Restraint System manu-
facturer’s instructions. Make sure
the seat belt webbing is not twisted.2. Fasten the lap/shoulder belt latch
into the buckle. Listen for the dis-
tinct “click” sound.
Information
Position the release button so that it is
easy to access in case of an emergency.3. Remove as much slack from the
belt as possible by pushing down
on the Child Restraint System
whilst feeding the shoulder belt
back into the retractor.
4. Push and pull on the Child Restraint
System to confirm that the seat belt
is holding it firmly in place.
If your Child Restraint System's man-
ufacturer recommends the use of a
top-tether with the lap/shoulder belt,
see page 2-41.
i
OLMB033044ODH033063OLMB033046
Page 65 of 533
2-44
Safety system of your vehicle
To remove the Child Restraint System,
press the release button on the buckle
and then pull the lap/shoulder belt out
of the Child Restraint System and
allow the seat belt to retract fully.
If the child seat moves, readjust the
length of the seat belt. In Australia/
New Zealand the child restraint man-
ufacturer's instructions must be fol-
lowed when fitting the unit to the
vehicle.
Page 113 of 533

3-30
Convenient features of your vehicle
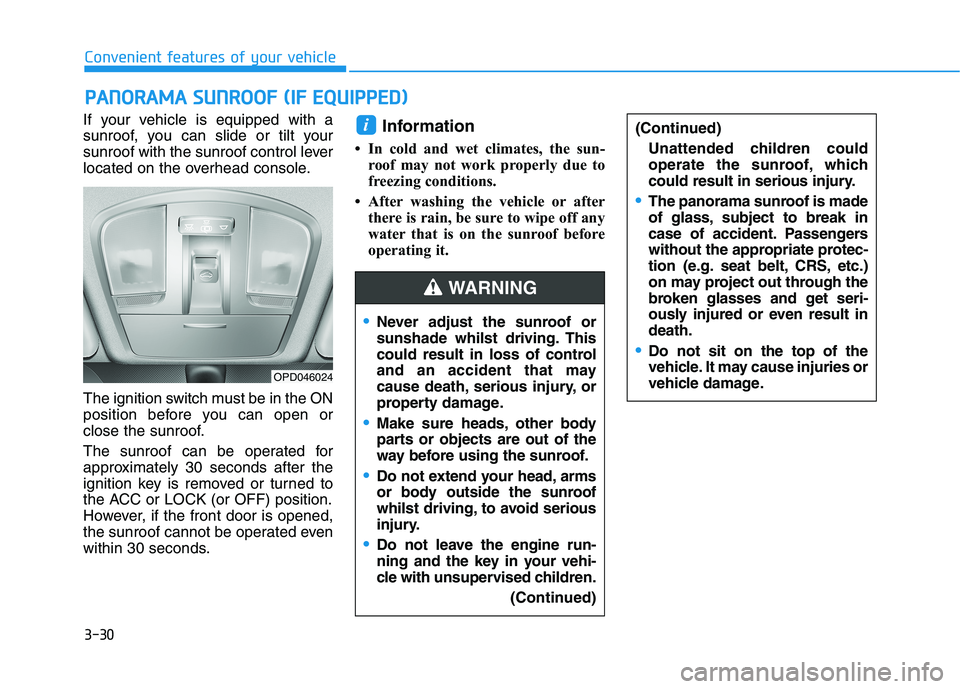
If your vehicle is equipped with a
sunroof, you can slide or tilt your
sunroof with the sunroof control lever
located on the overhead console.
The ignition switch must be in the ON
position before you can open or
close the sunroof.
The sunroof can be operated for
approximately 30 seconds after the
ignition key is removed or turned to
the ACC or LOCK (or OFF) position.
However, if the front door is opened,
the sunroof cannot be operated even
within 30 seconds.
Information
• In cold and wet climates, the sun-
roof may not work properly due to
freezing conditions.
• After washing the vehicle or after
there is rain, be sure to wipe off any
water that is on the sunroof before
operating it.
i
P PA
AN
NO
OR
RA
AM
MA
A
S
SU
UN
NR
RO
OO
OF
F
(
(I
IF
F
E
EQ
QU
UI
IP
PP
PE
ED
D)
)
OPD046024
Never adjust the sunroof or
sunshade whilst driving. This
could result in loss of control
and an accident that may
cause death, serious injury, or
property damage.
Make sure heads, other body
parts or objects are out of the
way before using the sunroof.
Do not extend your head, arms
or body outside the sunroof
whilst driving,to avoid serious
injury.
Do not leave the engine run-
ning and the key in your vehi-
cle with unsupervised children.
(Continued)
(Continued)
Unattended children could
operate the sunroof, which
could result in serious injury.
The panorama sunroof is made
of glass, subject to break in
case of accident. Passengers
without the appropriate protec-
tion (e.g. seat belt, CRS, etc.)
on may project out through the
broken glasses and get seri-
ously injured or even result in
death.
Do not sit on the top of the
vehicle. It may cause injuries or
vehicle damage.
WARNING