Page 237 of 814

236
Controls
Mirrors
Interior Rearview Mirror
Adjust the angle of the rearview mirror when you are sitting in the correct driving
position.
Flip the tab to switch the position.
The night position will help reduce the glare
from headlights behind you when driving
after dark.
When you are driving after dark, the
automatic dimming rearview mirror and
power door mirror
* reduces the glare from
headlights behind you. Press the AUTO button
to turn this function on and off. When
activated, the AUTO indicator comes on.
■Rearview Mirror with Day and Night Positions*
1 Mirrors
Keep the inside and out side mirrors clean and
adjusted for best visibility.
Adjust the mirrors before you start driving. 2 Front Seats P. 239
Tab
Daytime
Position Night
Position
■Automatic Dimming Rearview Mirror* and Power Door Mirrors*1Automatic Dimming Rearview Mirror* and Power Door Mirrors*
The auto dimming function cancels when the
transmission is in (R.
Sensor
Auto Button
* Not available on all models
23 PILOT-31T906000_03.book 236 ページ 2022年10月31日 月曜日 午前10時26分
Page 257 of 814

uuSeats uHead Restraints
256
Controls
Head restraints can be removed for cleaning or repair.
To remove a head restraint:
Pull the restraint up as far as it will go. Then, push the release button and pull the
restraint up and out.
To reinstall a head restraint:
Insert the legs back in place, then adjust the head restraint to an appropriate height
while pressing the release button. Pull up on the restraint to make sure it is locked
in position.
To remove a head restraint:
Pull the restraint up as far as it will go. Then push the release buttons which are
located on the both legs at the same time, and pull the restraint up and out.
To reinstall a head restraint:
Insert the legs back in place, then adjust the head restraint to an appropriate height
while pressing the right release button. Pull up on the restraint to make sure it is
locked in position.
■Removing and Reinstalling the Head Restraints1 Removing and Reinstalling the Head Restraints
To remove and install the front head restraint, recline
the seat-back slightly forward as the space between
the ceiling and the seat-back is limited.
3WARNING
Failure to reinstall, or correctly reinstall, the
head restraints can result in severe injury
during a crash.
Always replace the he ad restraints before
driving.
Except third row outer seat head restraints
Front and second row outer seat head restraints
Second row/third row center seat head restraint
23 PILOT-31T906000_03.book 256 ページ 2022年10月31日 月曜日 午前10時26分
Page 261 of 814

260
Controls
Interior Convenience Items
Interior Lights
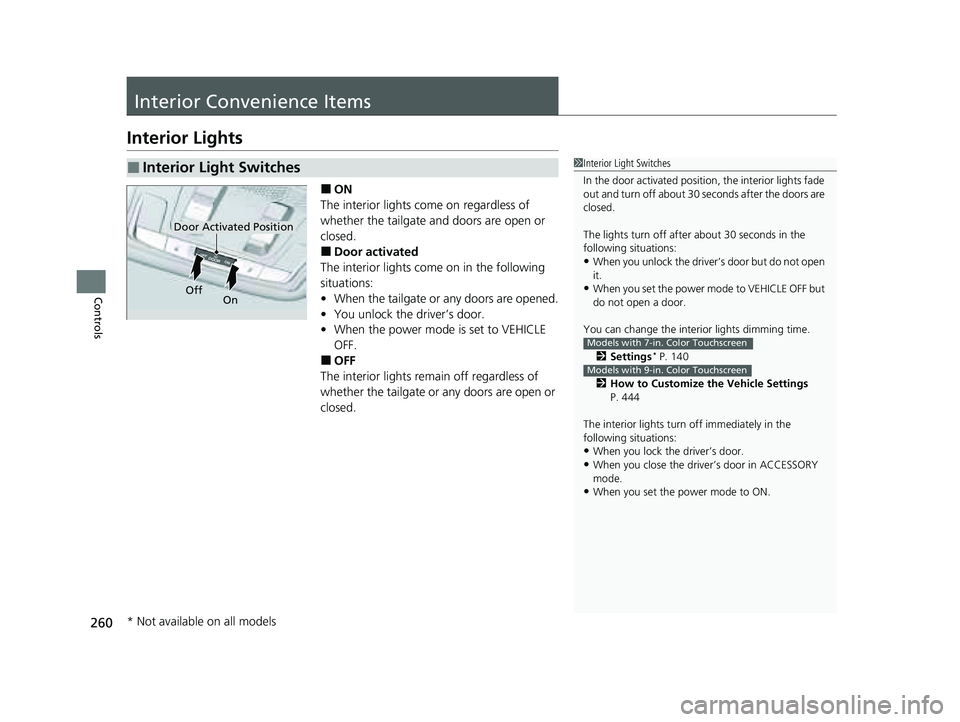
■ON
The interior lights come on regardless of
whether the tailgate and doors are open or
closed.
■Door activated
The interior lights come on in the following
situations:
• When the tailgate or any doors are opened.
• You unlock the driver’s door.
• When the power mode is set to VEHICLE
OFF.
■OFF
The interior lights remain off regardless of
whether the tailgate or any doors are open or
closed.
■Interior Light Switches1 Interior Light Switches
In the door activated position, the interior lights fade
out and turn off about 30 seconds after the doors are
closed.
The lights turn off afte r about 30 seconds in the
following situations:
•When you unlock the driver’s door but do not open
it.
•When you set the power mode to VEHICLE OFF but
do not open a door.
You can change the interi or lights dimming time.
2 Settings
* P. 140
2 How to Customize the Vehicle Settings
P. 444
The interior lights turn off immediately in the
following situations:
•When you lock the driver’s door.
•When you close the driver’s door in ACCESSORY
mode.
•When you set the power mode to ON.
Models with 7-in. Color Touchscreen
Models with 9-in. Color Touchscreen
Door Activated Position
Off On
* Not available on all models
23 PILOT-31T906000_03.book 260 ページ 2022年10月31日 月曜日 午前10時26分
Page 262 of 814
Continued261
uuInterior Convenience Items uInterior Lights
Controls
■Front
The map lights can be turned on and off by
pressing the (map light) button.
■Second and third row
The map lights can be turned on and off by
pressing the lenses when the front interior
light switch is in the door activated position or
ON position.
■Map Light Switches1 Interior Light Switches
If you leave any of the tailgate or doors open in
VEHICLE OFF mode, the inte rior lights go off after
about 15 minutes.
To avoid draining the ba ttery, do not leave the
interior light on for an extended length of time when
the engine is off.
Front
Second and third row
1 Map Light Switches
When the interior light swit ch is in the door activated
position and any door is ope n, the front map lights
will not go off when you press the button.
23 PILOT-31T906000_03.book 261 ページ 2022年10月31日 月曜日 午前10時26分
Page 263 of 814
uuInterior Convenience Items uInterior Lights
262
Controls
The cargo area light comes on when you open
the tailgate.
■Cargo Area Light1Cargo Area Light
The cargo area light does not have an on/off switch.
In case the tailgate is left open for an extended period
of time, they automaticall y turn off in 30 minutes.
23 PILOT-31T906000_03.book 262 ページ 2022年10月31日 月曜日 午前10時26分
Page 274 of 814
Continued273
uuInterior Convenience Items uOther Interior Convenience Items
Controls
The accessory power sockets can be used when the power mode is in ACCESSORY
or ON.
■Accessory power socket (console panel)
Open the cover to use it.
■Accessory power socket (cargo area)*
Open the cover to use it.
■Accessory Power Sockets1 Accessory Power Sockets
NOTICE
Do not insert an automotive type cigarette lighter
element. This can overheat the accessory power
socket.
The accessory power socket s are designed to supply
power for 12-volt DC accessories that are rated 180
watts (15 amps) or less.
To prevent battery drain, only use the accessory
power socket with the engine running.
When the accessory power soc ket is not in use, close
the cover to prevent any small foreign objects from
getting into the accessory power socket.
* Not available on all models
23 PILOT-31T906000_03.book 273 ページ 2022年10月31日 月曜日 午前10時26分
Page 275 of 814

uuInterior Convenience Items uOther Interior Convenience Items
274
Controls
The AC power outlet can be used when the engine is running.
Open the cover to use it. Plug in the appliance
slightly, turn it 90° clockwise, then push it all
the way.
■AC Power Outlet*1AC Power Outlet*
NOTICE
Do not use the AC power outlet for electric
appliances that require high initial peak wattage,
such as cathode-ray tube type televisions,
refrigerators, electric pumps, etc. It is not suitable for
devices that process precis e data, such as medical
equipment, and that require an extremely stable
power supply, such as microcomputer-controlled
electric blankets, touc h sensor lamps, etc.
The AC power outlet is desi gned to supply power for
up to 115 volt appliances that are rated 150 watts or
less.
Continued use of any elec tric appliance/device
exceeding these ratings may result in damage to the
appliance/device.
When the AC power outlet is not in use, close the
cover to prevent any small foreign objects from
getting into the AC power outlet.
* Not available on all models
23 PILOT-31T906000_03.book 274 ページ 2022年10月31日 月曜日 午前10時26分
Page 276 of 814

Continued275
uuInterior Convenience Items uOther Interior Convenience Items
Controls
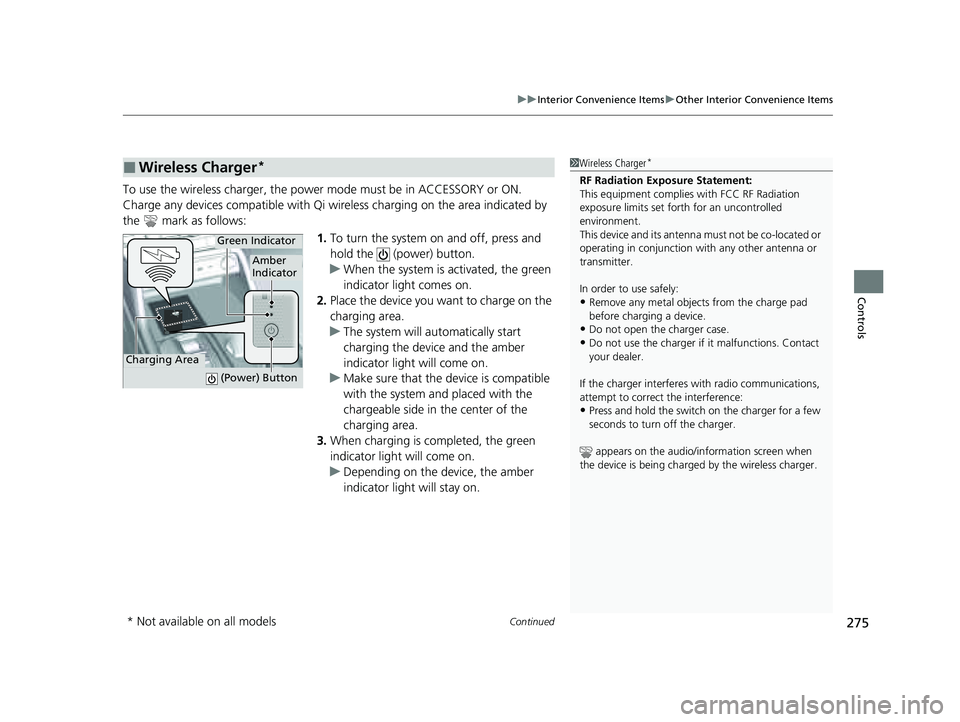
To use the wireless charger, the power mode must be in ACCESSORY or ON.
Charge any devices compatible with Qi wi reless charging on the area indicated by
the mark as follows:
1.To turn the system on and off, press and
hold the (power) button.
u When the system is activated, the green
indicator light comes on.
2. Place the device you want to charge on the
charging area.
u The system will au tomatically start
charging the device and the amber
indicator light will come on.
u Make sure that the device is compatible
with the system and placed with the
chargeable side in the center of the
charging area.
3. When charging is completed, the green
indicator light will come on.
u Depending on the device, the amber
indicator light will stay on.
■Wireless Charger*1Wireless Charger*
RF Radiation Exposure Statement:
This equipment complies with FCC RF Radiation
exposure limits set forth for an uncontrolled
environment.
This device and its antenna must not be co-located or
operating in conjunction with any other antenna or
transmitter.
In order to use safely:
•Remove any metal objects from the charge pad
before charging a device.
•Do not open the charger case.
•Do not use the charger if it malfunctions. Contact
your dealer.
If the charger interferes with radio communications,
attempt to correct the interference:
•Press and hold the switch on the charger for a few
seconds to turn off the charger.
appears on the audio/information screen when
the device is being charge d by the wireless charger.
Green Indicator
Charging Area
(Power) Button
Amber
Indicator
* Not available on all models
23 PILOT-31T906000_03.book 275 ページ 2022年10月31日 月曜日 午前10時26分