Page 107 of 664

Continued105
uuGauges and Driver Information Interface uGauges
Instrument Panel
Shows the total number of miles or kilome ters that your vehicle has accumulated.
Shows the outside temperature in Fahr enheit (U.S.) or Celsius (Canada).
■Adjusting the outside temperature display
Adjust the temperature reading by up to ±5°F or ±3°C if the temperature reading
seems incorrect.
Shows certain detected traffic signs while driving.
The indicator blinks when th e maximum speed of the traffic sign detected by the
Traffic Sign Recognition System is exceeded.
2 Traffic Sign Recognition System P. 519
■Odometer
■Outside Temperature
■Traffic Sign Recognition System
1Outside Temperature
The temperature sensor is in the front bumper.
Road heat and exhaust from another vehicle can
affect the temperature reading when your vehicle
speed is less than 19 mph (30 km/h).
It may take several minutes for the display to be
updated after the temperature reading has stabilized.
You can adjust the temperature reading.
2 Settings
* P. 123
2 Customized Features P. 345
* Not available on all models
23 HR-V-313V06000_01.book 105 ページ 2022年4月4日 月曜日 午前10時49分
Page 120 of 664

uuGauges and Driver Information Interface uDriver Information Interface
118
Instrument Panel
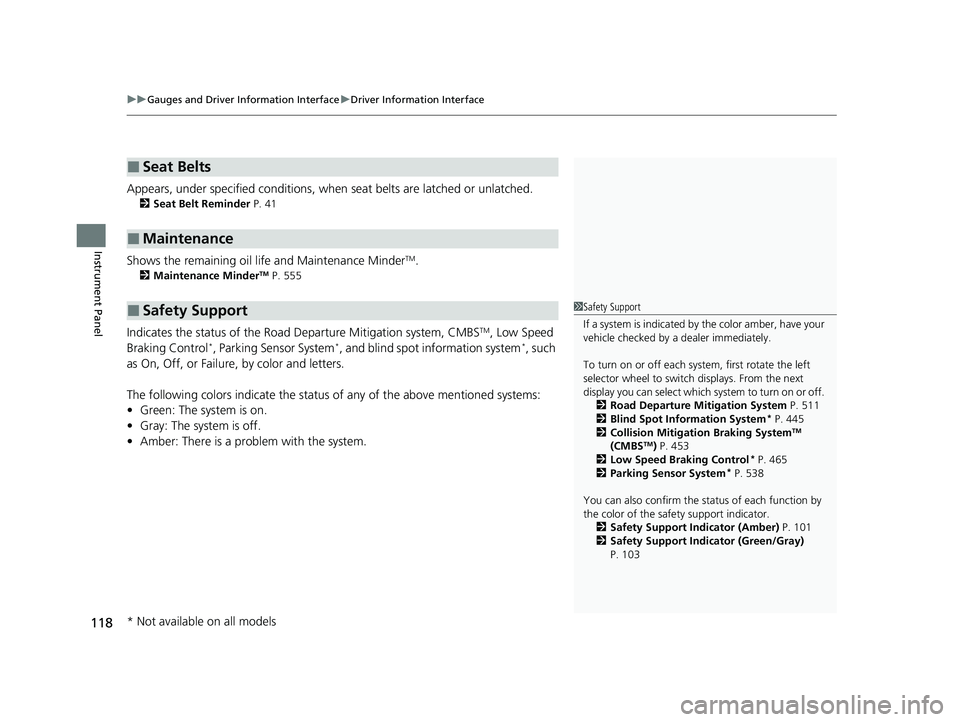
Appears, under specified conditions, when seat belts are latched or unlatched.
2Seat Belt Reminder P. 41
Shows the remaining oil life and Maintenance MinderTM.
2Maintenance MinderTM P. 555
Indicates the status of the Road Departure Mitigation system, CMBSTM, Low Speed
Braking Control*, Parking Sensor System*, and blind spot information system*, such
as On, Off, or Failure, by color and letters.
The following colors indica te the status of any of the above mentioned systems:
• Green: The system is on.
• Gray: The system is off.
• Amber: There is a probl em with the system.
■Seat Belts
■Maintenance
■Safety Support1Safety Support
If a system is indicated by the color amber, have your
vehicle checked by a dealer immediately.
To turn on or off each system, first rotate the left
selector wheel to switch displays. From the next
display you can select which system to turn on or off. 2 Road Departure Mitigation System P. 511
2 Blind Spot Information System
* P. 445
2 Collision Mitigation Braking SystemTM
(CMBSTM) P. 453
2 Low Speed Braking Control* P. 465
2 Parking Sensor System* P. 538
You can also confirm the st atus of each function by
the color of the safe ty support indicator.
2 Safety Support Indicator (Amber) P. 101
2 Safety Support Indicator (Green/Gray)
P. 103
* Not available on all models
23 HR-V-313V06000_01.book 118 ページ 2022年4月4日 月曜日 午前10時49分
Page 121 of 664
119
uuGauges and Driver Information Interface uDriver Information Interface
Continued
Instrument Panel
Area Info
for CMBSTM
Area Info
for Road
Departure
Mitigation
System
Area Info
for Blind
Spot
Information
System
Area Info
for Parking
Sensor
System Road
Departure
Mitigation
System Icon
and Status
Info
Area Info for Low
Speed Braking
Control
Blind Spot
Information
System Icon
and Status
Info
Parking
Sensor
System
Icon and
Status Info
CMBSTM
Icon and
Status
Info
Low
Speed
Braking
Control
Icon and
Status
Info
Models with Blind Spot
Information SystemModels with Low Speed
Braking Control
Models with Parking
Sensor System
23 HR-V-313V06000_01.book 119 ページ 2022年4月4日 月曜日 午前10時49分
Page 135 of 664

133
Controls
This chapter explains how to operate the various controls necessary for driving.
Clock.................................................. 134
Locking and Unlocking the Doors Key .................................................. 136
Low Keyless Remote Signal Strength ... 138
Locking/Unlocking the Doors from the Outside .......................................... 139
Locking/Unlocking the Doors from the Inside ............................................. 149
Childproof Door Locks ..................... 151
Auto Door Locking/Unlocking .......... 152
Tailgate .............................................. 153
Security System
Immobilizer System .......................... 156
Security System Alarm ...................... 156
Windows ........................................... 159 Moonroof*........................................ 162
Operating the Switches Around the Steering Wheel
ENGINE START/STOP Button............. 163
Lights............................................... 166
Auto High-Beam .............................. 171
Wipers and Washers ........................ 174
Rear Defogger/Heat ed Door Mirror
*
Button ........................................... 176
Heated Windshield Button ............... 176
Adjusting the Steering Wheel........... 177
Canadian models
Mirrors Interior Rearview Mirror ................... 178
Power Door Mirrors ......................... 179
Seats Front Seats ...................................... 180
Rear Seats........................................ 183
Maintain a Proper Sitting Position .... 185
Head Restraints................................ 186
Armrest ........................................... 188
Interior Convenience Items .............. 189
Climate Control System Using Automatic Climate Control .... 203
Automatic Climate Control Sensors ... 209
* Not available on all models
23 HR-V-313V06000_01.book 133 ページ 2022年4月4日 月曜日 午前10時49分
Page 142 of 664

uuLocking and Unlocking the Doors uLocking/Unlocking the Doors from the Outside
140
Controls
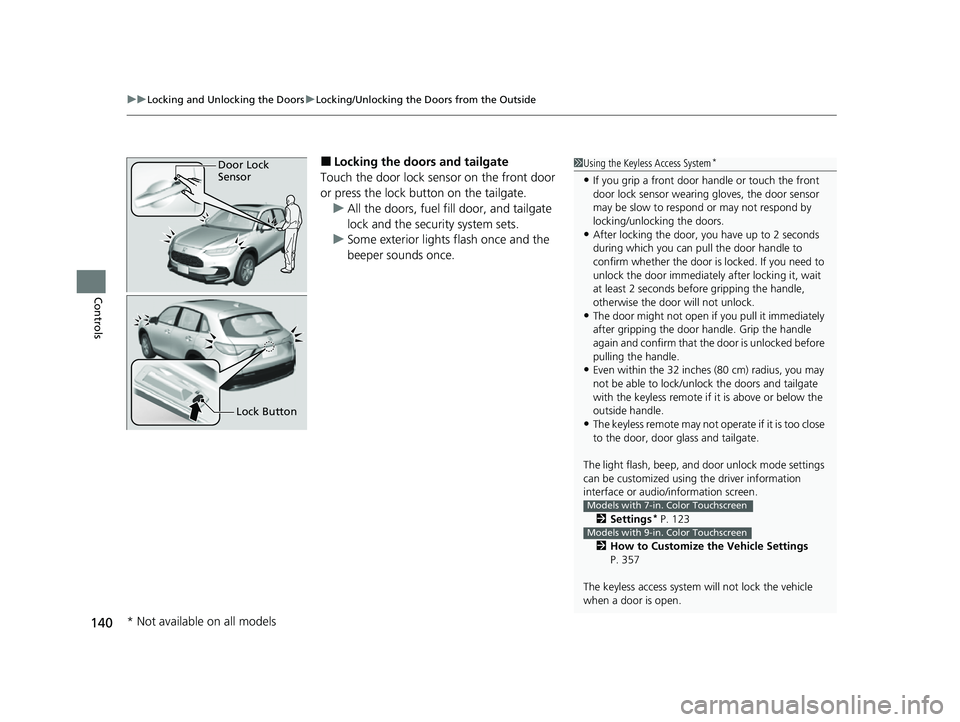
■Locking the doors and tailgate
Touch the door lock sensor on the front door
or press the lock button on the tailgate. u All the doors, fuel fill door, and tailgate
lock and the security system sets.
u Some exterior lights flash once and the
beeper sounds once.1Using the Keyless Access System*
•If you grip a front door handle or touch the front
door lock sensor wearing gloves, the door sensor
may be slow to respon d or may not respond by
locking/unlocking the doors.
•After locking the door, you have up to 2 seconds
during which you can pull the door handle to
confirm whether the door is locked. If you need to
unlock the door immediately after locking it, wait
at least 2 seconds befo re gripping the handle,
otherwise the door will not unlock.
•The door might not open if you pull it immediately
after gripping the door handle. Grip the handle
again and confirm that th e door is unlocked before
pulling the handle.
•Even within the 32 inches (80 cm) radius, you may
not be able to lock/unloc k the doors and tailgate
with the keyless remote if it is above or below the
outside handle.
•The keyless remote may not operate if it is too close
to the door, door glass and tailgate.
The light flash, beep, a nd door unlock mode settings
can be customized using the driver information
interface or audio/ information screen.
2 Settings
* P. 123
2 How to Customize the Vehicle Settings
P. 357
The keyless access system will not lock the vehicle
when a door is open.
Models with 7-in. Color Touchscreen
Models with 9-in. Color Touchscreen
Door Lock
Sensor
Lock Button
* Not available on all models
23 HR-V-313V06000_01.book 140 ページ 2022年4月4日 月曜日 午前10時49分
Page 146 of 664

uuLocking and Unlocking the Doors uLocking/Unlocking the Doors from the Outside
144
Controls
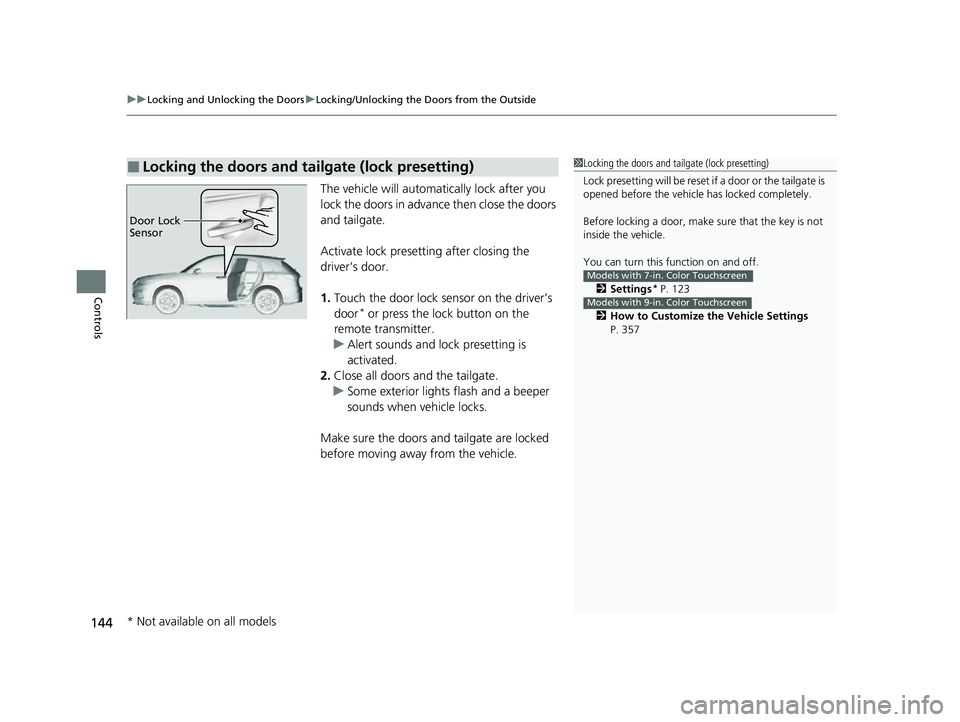
The vehicle will automatically lock after you
lock the doors in advance then close the doors
and tailgate.
Activate lock presetting after closing the
driver’s door.
1. Touch the door lock sensor on the driver’s
door
* or press the lock button on the
remote transmitter.
u Alert sounds and lock presetting is
activated.
2. Close all doors and the tailgate.
u Some exterior lights flash and a beeper
sounds when vehicle locks.
Make sure the doors and tailgate are locked
before moving away from the vehicle.
■Locking the doors and tailgate (lock presetting)1 Locking the doors and tailgate (lock presetting)
Lock presetting will be reset if a door or the tailgate is
opened before the vehicle has locked completely.
Before locking a door, make sure that the key is not
inside the vehicle.
You can turn this function on and off.
2 Settings
* P. 123
2 How to Customize the Vehicle Settings
P. 357
Models with 7-in. Color Touchscreen
Models with 9-in. Color Touchscreen
Door Lock
Sensor
* Not available on all models
23 HR-V-313V06000_01.book 144 ページ 2022年4月4日 月曜日 午前10時49分
Page 169 of 664
Continued167
uuOperating the Switches Around the Steering Wheel uLights
Controls
When the headlights are on, push the lever forward. Pull the lever back to return to
low beams.
■Flashing the high beams
Pull the lever back to switch on the high
beams.
u Release the lever to return to low beams.
■High Beams1Headlights/Parking Lights
The light sensor is in the location shown below. Do
not cover this light sensor with anything; otherwise,
the automatic lighting system may not work properly.
You can adjust the auto li ght sensitivity as follow:
2 Settings
* P. 123
2 How to Customize the Vehicle Settings
P. 357
SettingThe exterior lights come on
when the ambient light is at
Max
High
Mid
Low
Min
U.S. models
Bright
Dark
Models with 7-in. Color Touchscreen
Models with 9-in. Color Touchscreen
* Not available on all models
23 HR-V-313V06000_01.book 167 ページ 2022年4月4日 月曜日 午前10時49分
Page 180 of 664

178
Controls
Mirrors
Interior Rearview Mirror
Adjust the angle of the rearview mirror when you are sitting in the correct driving
position.
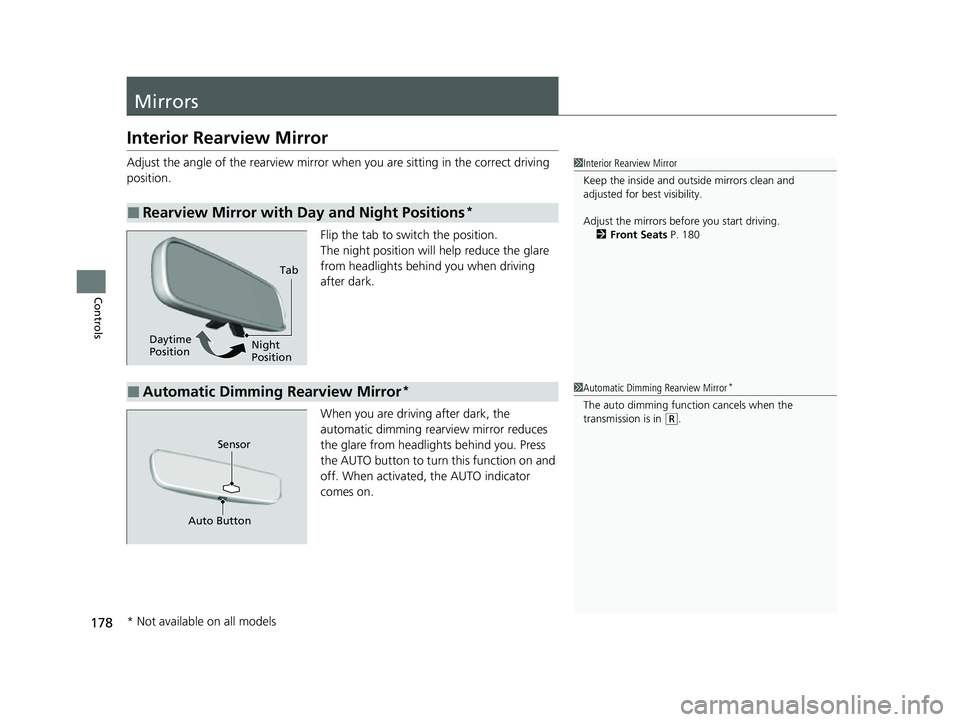
Flip the tab to switch the position.
The night position will help reduce the glare
from headlights behind you when driving
after dark.
When you are driving after dark, the
automatic dimming rearview mirror reduces
the glare from headlights behind you. Press
the AUTO button to turn this function on and
off. When activated, the AUTO indicator
comes on.
■Rearview Mirror with Day and Night Positions*
1 Interior Rearview Mirror
Keep the inside and out side mirrors clean and
adjusted for best visibility.
Adjust the mirrors before you start driving. 2 Front Seats P. 180
Tab
Daytime
Position Night
Position
■Automatic Dimming Rearview Mirror*1
Automatic Dimming Rearview Mirror*
The auto dimming function cancels when the
transmission is in (R.
Sensor
Auto Button
* Not available on all models
23 HR-V-313V06000_01.book 178 ページ 2022年4月4日 月曜日 午前10時49分