Page 543 of 664

541
uuParking Your Vehicle uParking Sensor System*
Driving
■When the distance between your vehicle and detected obstacles becomes shorter
*1:On the driver information interface
*2:On the audio/information screen
*3:At this stage, only the center sensors detect obstacles.
To temporarily turn off the beeper, press the left selector wheel while it is sounding. Temporary OFF will be canceled when the shift
position is switched or the vehicle sp eed reaches 9 mph (14 km/h) or higher.
Interval
between beepsDistance between the Bumper and Obstacle
IndicatorDriver information
interfaceAudio/Information ScreenCorner SensorsCenter Sensors
Moderate—
Front: About 35-24 in (90-60 cm)
Rear: About 40-31 in (100-80 cm)
Comes on*1/
Blinks*2 in Yellow*3
ShortAbout 24-18 in (60-45 cm) About 32-25 in (80-65 cm)
Comes on*1/
Blinks*2 in Amber
Very shortAbout 18-14 in (45-35 cm) About 25-16 in (65-40 cm)
ContinuousAbout 14 in
(35 cm) or lessAbout 16 in
(40 cm) or lessComes on*1/
Blinks*2 in Red
Indicators light up
where the sensor
detects an obstacle.
Indicators light up where the
sensor detects an obstacle.
Indicators light up where the
sensor detects an obstacle. Indicators light up where the
sensor detects an obstacle.
23 HR-V-313V06000_01.book 541 ページ 2022年4月4日 月曜日 午前10時49分
Page 546 of 664

uuParking Your Vehicle uCross Traffic Monitor*
544
Driving
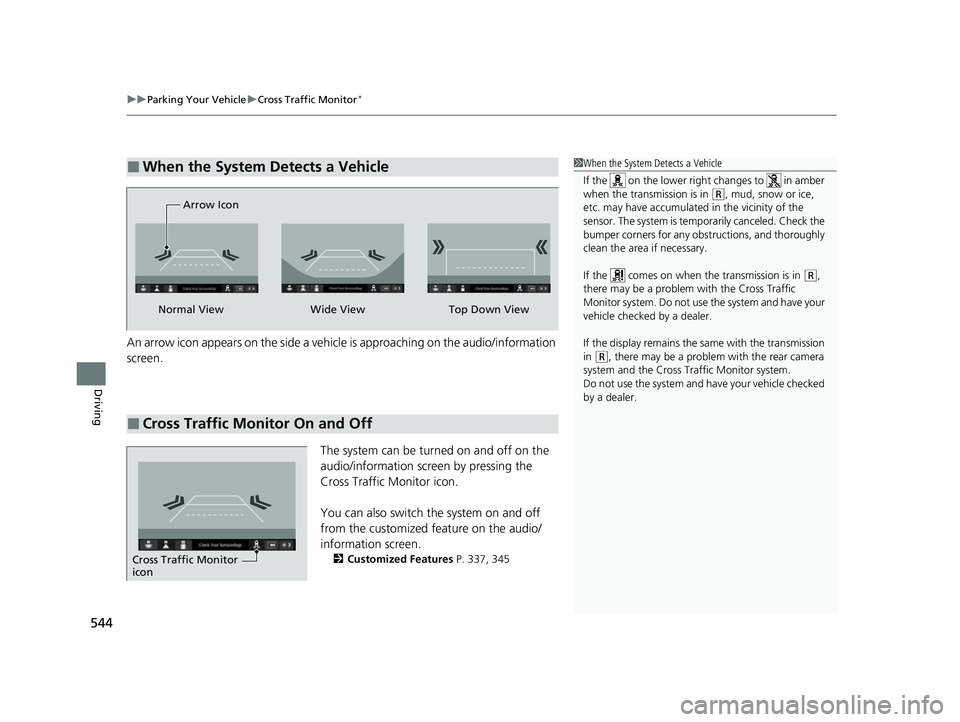
An arrow icon appears on the side a vehicl e is approaching on the audio/information
screen.
The system can be turned on and off on the
audio/information screen by pressing the
Cross Traffic Monitor icon.
You can also switch the system on and off
from the customized feature on the audio/
information screen.
2Customized Features P. 337, 345
■When the System Detects a Vehicle1When the System Detects a Vehicle
If the on the lower right changes to in amber
when the transmission is in
(R, mud, snow or ice,
etc. may have accumulated in the vicinity of the
sensor. The system is temporarily canceled. Check the
bumper corners for any obs tructions, and thoroughly
clean the area if necessary.
If the comes on when the transmission is in
( R,
there may be a problem with the Cross Traffic
Monitor system. Do not use the system and have your
vehicle checked by a dealer.
If the display remains the same with the transmission
in
( R, there may be a problem with the rear camera
system and the Cross Traffic Monitor system.
Do not use the system and have your vehicle checked
by a dealer.
■Cross Traffic Monitor On and Off
Wide View
Normal View Arrow IconTop Down View
Cross Traffic Monitor
icon
23 HR-V-313V06000_01.book 544 ページ 2022年4月4日 月曜日 午前10時49分
Page 547 of 664

545Continued
Driving
Multi-View Rear Camera
About Your Multi-View Rear Camera
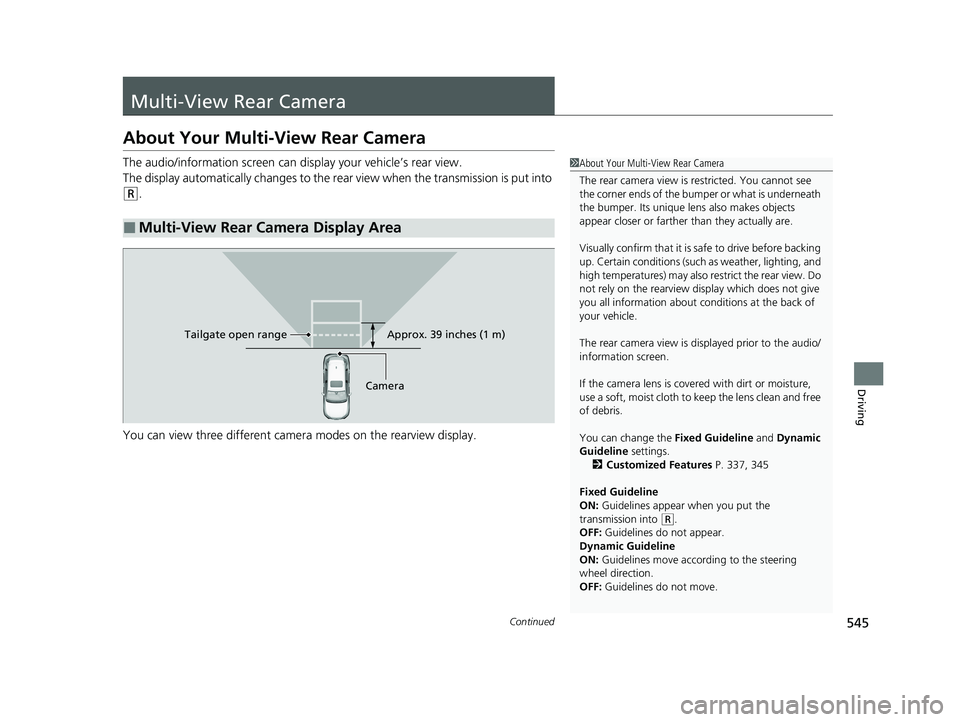
The audio/information screen can display your vehicle’s rear view.
The display automatically changes to the rear view when the transmission is put into
(R.
You can view three different camera modes on the rearview display.
■Multi-View Rear Camera Display Area
1 About Your Multi-View Rear Camera
The rear camera view is restricted. You cannot see
the corner ends of the bumper or what is underneath
the bumper. Its unique le ns also makes objects
appear closer or farther than they actually are.
Visually confirm that it is safe to drive before backing
up. Certain conditions (such as weather, lighting, and
high temperatures) may also restrict the rear view. Do
not rely on the rearview display which does not give
you all information about conditions at the back of
your vehicle.
The rear camera view is di splayed prior to the audio/
information screen.
If the camera lens is cove red with dirt or moisture,
use a soft, moist cloth to keep the lens clean and free
of debris.
You can change the Fixed Guideline and Dynamic
Guideline settings.
2 Customized Features P. 337, 345
Fixed Guideline
ON: Guidelines appear when you put the
transmission into
( R.
OFF: Guidelines do not appear.
Dynamic Guideline
ON: Guidelines move according to the steering
wheel direction.
OFF: Guidelines do not move.
Approx. 39 inches (1 m)
Camera
Tailgate open range
23 HR-V-313V06000_01.book 545 ページ 2022年4月4日 月曜日 午前10時49分
Page 564 of 664

uuMaintenance MinderTMuTo Use Maintenance MinderTM
562
Maintenance
Reset the maintenance minder informat ion display if you have performed the
maintenance service.
1. Set the power mode to ON.
2. Press the (home) button.
3. Roll the left selector wheel until is displayed.
4. Press the left selector wheel to go to the Maintenance Minder screen.
5. Press and hold the left selector wheel fo r about 10 seconds to enter the reset
mode.
6. Roll the left selector wheel to select a ma intenance item to reset, or to select All
due items (You can also select Cancel to end the process).
7. Press the left selector wheel to reset the selected item.
8. Repeat from step 5 for other items you wish to reset.
■Resetting the Display1Resetting the Display
NOTICE
Failure to reset the Maintenance MinderTM display
after a maintenance servic e results in the system
showing incorrect maintenance intervals, which can
lead to serious mechanical problems.
The dealer will reset the Maintenance Minder
TM
display after completing th e required maintenance
service. If someone other than a dealer performs
maintenance service, reset the Maintenance
Minder
TM display yourself.
You can also reset the Maintenance Minder
TM display
using the audio/information screen.
2 Customized Features P. 345
Models with 9-in. Color Touchscreen
Left Selector Wheel
(home) Button
23 HR-V-313V06000_01.book 562 ページ 2022年4月4日 月曜日 午前10時49分
Page 594 of 664

592
Maintenance
Battery
Checking the Battery
The condition of the battery is monitored by a
sensor located on the negative terminal of the
battery. If there is a problem with this sensor,
the driver information interface will display a
warning message. If this happens, have your
vehicle inspected by a dealer.
Check the battery te rminals for corrosion
monthly.
If your vehicle’s battery is disconnected or goes dead:
• The audio system is disabled.
2 Audio System Theft Protection P. 214
•The clock resets.
2 Clock P. 134
•
The immobilizer system needs to be reset.
2 Immobilizer System Indicator P. 97
1Battery
WARNING: Battery post, terminals,
and related accessories contain lead
and lead compounds.
Wash your hands after handling.
When replacing the battery, the replacement must be
of the same specifications.
Consult a dealer for more information.
3WARNING
The battery gives off explosive hydrogen
gas during normal operation.
A spark or flame can cause the battery to
explode with enough force to kill or
seriously hurt you.
When conducting any battery
maintenance, wear prot ective clothing and
a face shield, or have a skilled technician do
it.
Canadian models only
23 HR-V-313V06000_01.book 592 ページ 2022年4月4日 月曜日 午前10時49分
Page 598 of 664

596
Maintenance
Cleaning
Interior Care
Use a damp cloth with a mixture of mild detergent and warm water to remove dirt.
Use a clean cloth to remove detergent residue.
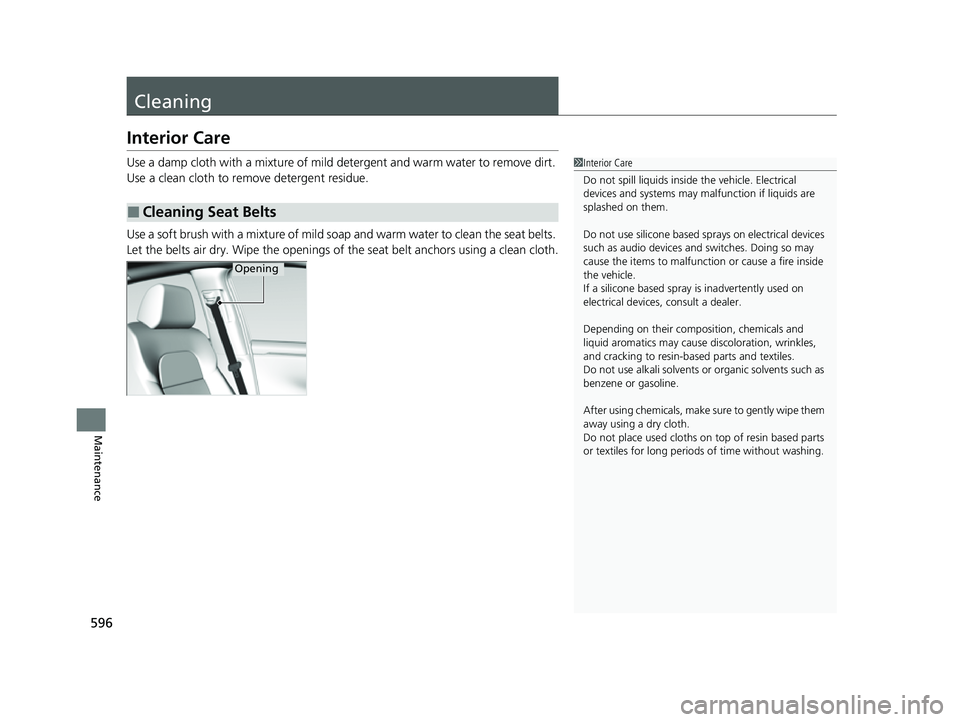
Use a soft brush with a mixture of mild soap and warm water to clean the seat belts.
Let the belts air dry. Wipe the openings of the seat belt anchors using a clean cloth.
■Cleaning Seat Belts
1 Interior Care
Do not spill liquids inside the vehicle. Electrical
devices and systems may ma lfunction if liquids are
splashed on them.
Do not use silicone based sprays on electrical devices
such as audio devices and switches. Doing so may
cause the items to malfunction or cause a fire inside
the vehicle.
If a silicone based spray is inadvertently used on
electrical devices, consult a dealer.
Depending on their compos ition, chemicals and
liquid aromatics may cause discoloration, wrinkles,
and cracking to resin-ba sed parts and textiles.
Do not use alkali solvents or organic solvents such as
benzene or gasoline.
After using chemicals, make su re to gently wipe them
away using a dry cloth.
Do not place used cloths on top of resin based parts
or textiles for long periods of time without washing.
Opening
23 HR-V-313V06000_01.book 596 ページ 2022年4月4日 月曜日 午前10時49分
Page 619 of 664

617Continued
Handling the Unexpected
If the Battery Is Dead
Jump Starting Procedure
Turn off the power to electric devices, such as audio and lights. Turn off the engine,
then open the hood. 1.Open the cover on the positive + terminal.
2. Connect the first jumper cable to your
vehicle’s battery + terminal.
3. Connect the other end of the first jumper
cable to the booster battery + terminal.
u Use a 12-volt booster battery only.
u When using the automotive battery
charger to boost your 12-volt battery,
select a lower charging voltage than 15-
volt. Check the charger manual for the
proper setting.
4. Connect the second jumper cable to the
booster battery - terminal.
5. Connect the other end of the second
jumper cable to the stud bolt as shown. Do
not connect this jumper cable to any other
part.
6. If your vehicle is connected to another
vehicle, start the assisting vehicle’s engine
and increase its rpm slightly.
7. Attempt to start your ve hicle’s engine. If it
turns over slowly, check that the jumper
cables have good metal-to-metal contact.1 Jump Starting Procedure
Securely attach the jumper cables clips so that they
do not come off when the e ngine vibrates. Be careful
not to tangle the jumper cables or allow the cable
ends to touch each other while attaching or
detaching the jumper cables.
Battery performance degrades in cold conditions and
may prevent the engi ne from starting.
3WARNING
A battery can explode if you do not follow
the correct procedure, seriously injuring
anyone nearby.
Keep all sparks, open flames, and smoking
materials away from the battery.
Booster Battery
23 HR-V-313V06000_01.book 617 ページ 2022年4月4日 月曜日 午前10時49分
Page 631 of 664

629
uuFuses uFuse Locations
Continued
Handling the Unexpected
■Circuit protected and fuse rating
Circuit ProtectedAmps
1BATTERY125 A
2 - 40 A
- 40 A
F/BOX OPTION 60 A - 40 A
F/BOX OPTION2 40 A - (30 A)
F/BOX MAIN 60 A
3
-30 A
-30 A
-70 A
RR DEFROSTER30 A
-(40 A)
-30 A
HTR MTR40 A
4 - 30 A
ABS/VSA MTR 40 A - (30 A)
- 30 A
IG MAIN 30 A - 30 A
IG MAIN2 30 A
5
ST MAGNETIC SW30 A
WIPER30 A
EPS70 A
-30 A
ABS/VSA FSR40 A
MAIN FAN30 A
F/BOX MAIN240 A
6 SUB FAN 30 A
7BOOSTER MTR40 A
8- (30 A)
9-(20 A)
10 AUDIO SUB*(7.5 A)
11FR DEICER*(15 A)
12 - -
13H/STRG*(10 A)
14 - (10 A)
15-(15 A)
16 MG CLUTCH 10 A
17WASHER15 A
18 HORN 10 A
19BACK UP15 A
20 AUDIO (15 A)
21R/M120 A
22 DBW 15 A
23R/M220 A
24 BACKUP FI-ECU 10 A
25IGP15 A
Circuit ProtectedAmps
26 TCU 15 A
27LCM L20 A
28 - (20 A)
29STOP10 A
30 LCM R 20 A
31IG COIL15 A
32 - -
33HAZARD15 A
34 - -
35--
36 - -
37-(30 A)
38 - -
39--
40 - (7.5 A)
41IGPS [LAF]10 A
42 IG1 MON2 10 A
Circuit ProtectedAmps
* Not available on all models
23 HR-V-313V06000_01.book 629 ページ 2022年4月4日 月曜日 午前10時49分