2023 FORD F650/750 air suspension
[x] Cancel search: air suspensionPage 7 of 378

Pneumatic Locking Differ-
ential
What Is the Pneumatic Locking
Differential .................................................135
How Does the Pneumatic Locking
Differential Work ......................................135
Pneumatic Locking Differential
Precautions ................................................135
Switching the Pneumatic Locking
Differential On and Off ..........................135
Pneumatic Locking Differential
Indicators ....................................................136
Brakes
General Information ....................................137
Hints on Driving With Anti-Lock Brakes
.........................................................................138
Parking Brake ................................................138
Hill Start Assist ..............................................141
Air Brakes ........................................................142
Exhaust Brake ...............................................143
Trailer Brakes .................................................145
Traction Control
Principle of Operation ...............................149
Using Traction Control - Vehicles With:
Air Brakes ...................................................149
Using Traction Control - Vehicles With:
Hydraulic Brakes ......................................149
Stability Control
Principle of Operation - Vehicles With:
Hydraulic Brakes .......................................151
Principle of Operation - Vehicles With:
Air Brakes ....................................................152
Using Stability Control ...............................153
Cruise Control - Vehicles With:
Adaptive Cruise Control
Using Adaptive Cruise Control ................155
Cruise Control - Vehicles With:
Cruise Control
What Is Cruise Control ................................161
Switching Cruise Control On and Off
..........................................................................161
Setting the Cruise Control Speed ..........161
Canceling the Set Speed ..........................162
Resuming the Set Speed ..........................162
Cruise Control Indicators ..........................162
Driving Aids
Driver Alert .....................................................163
Lane Keeping System ................................164
Steering ...........................................................167
Pre-Collision Assist - Vehicles With: Air
Brakes ..........................................................168
Pre-Collision Assist - Vehicles With:
Hydraulic Brakes ......................................170
Load Carrying
Load Limit .......................................................175
Air Suspension ..............................................176
Towing
Towing a Trailer .............................................178
Recommended Towing Weights ............179
Essential Towing Checks .........................180
Fifth Wheel Operation ................................181
Driving Hints
General Driving Points ...............................183
Economical Driving .....................................184
Cold Weather Precautions .......................184
Breaking-In ....................................................186
Driving Through Water ...............................187
Roadside Emergencies
Roadside Assistance .................................188
Hazard Flashers ...........................................189
Fuel Shutoff ..................................................189
3
Table of Contents
Page 8 of 378

Jump Starting the Vehicle ........................190
Transporting the Vehicle ...........................192
Towing Points ...............................................193
Customer Assistance
Getting the Services You Need ..............194
In California (U.S. Only) ............................195
The Better Business Bureau (BBB) Auto
Line Program (U.S. Only) .....................196
Getting Assistance Outside the U.S. and
Canada ........................................................197
Ordering Additional Owner's Literature
........................................................................1 9 8
Reporting Safety Defects (U.S. Only)
........................................................................1 9 8
Reporting Safety Defects (Canada Only)
........................................................................1 9 9
Fuses
Fuse Specification Chart .........................200
Changing a Fuse .........................................208
Vehicle Inspection Guide
Vehicle Inspection Information ..............210
Maintenance
General Information ...................................219
Opening and Closing the Hood .............220
Under Hood Overview - 6.7L Diesel ......222
Under Hood Overview - 7.3L ...................223
Engine Oil Dipstick - 6.7L Diesel ............224
Engine Oil Dipstick - 7.3L ..........................224
Engine Oil Check - 6.7L Diesel ...............224
Engine Oil Check - 7.3L .............................225
Changing the Engine Oil and Oil Filter
........................................................................226
Oil Change Indicator Reset ......................227
Changing the Engine Air Filter - 6.7L
Diesel ...........................................................228
Changing the Engine Air Filter - 7.3L .....230Draining the Fuel Filter Water Trap - 6.7L
Diesel ...........................................................232
Engine Coolant Check - 6.7L Diesel ......233
Engine Coolant Check - 7.3L ...................238
Automatic Transmission Fluid Check
........................................................................242
Brake Fluid Check .......................................244
Power Steering Fluid Check ....................245
Changing the 12V Battery ........................246
Adjusting the Headlamps ........................247
Washer Fluid Check ...................................249
Fuel Filter - 7.3L ...........................................249
Checking the Wiper Blades ....................249
Changing the Wiper Blades ....................249
Removing a Headlamp ............................250
Changing a Bulb .........................................250
Changing the Engine-Mounted and
Diesel Fuel Conditioner Module Fuel
Filters - 6.7L Diesel ..................................251
Electrical System Inspection ..................254
Air Induction System Inspection ...........254
Exhaust System Inspection ....................255
Brake System Inspection .........................255
Axle Inspection ............................................258
Steering System Inspection ...................259
Suspension System Inspection .............259
Frame and Tow Hook Inspection .........260
Rear Axle Fluid Check ...............................260
Spring U-Bolt Check .................................260
Vehicle Care
General Information ..................................262
Cleaning Products ......................................262
Cleaning the Exterior .................................263
Waxing ............................................................264
Cleaning the Engine ..................................264
Cleaning the Windows and Wiper Blades
........................................................................265
Cleaning the Interior ..................................265
Cleaning the Instrument Panel and
Instrument Cluster Lens ......................266
4
Table of Contents
Page 70 of 378

Diesel Exhaust Fluid Gauge
Indicates the fluid level in the diesel
exhaust fluid (DEF) tank.
Voltmeter
Displays electrical system voltage.
WARNING LAMPS AND
INDICATORS
The following warning lamps and
indicators alert you to a vehicle condition
that may become serious. Some lamps
illuminate when you start your vehicle to
make sure they work. If any lamps remain
on after starting your vehicle, refer to the
respective system warning lamp for further
information.
Note:Some warning indicators appear in
the information display and operate the
same as a warning lamp but do not
illuminate when you start your vehicle.
Anti-Lock Braking System
If it illuminates when you are
driving, this indicates a
malfunction. Your vehicle
continues to have normal braking without
the anti-lock brake system function. Have
your vehicle checked as soon as possible.
Automatic Regeneration Control
(If Equipped)
E208811
Illuminates when you switch it
off.
Battery
If it illuminates when driving, it
indicates a malfunction. Switch
off all unnecessary electrical
equipment and have the system
immediately checked.
Brake System
WARNING: Driving your vehicle
with the warning lamp on is dangerous.
A significant decrease in braking
performance may occur. It may take you
longer to stop your vehicle. Have your
vehicle checked as soon as possible.
Driving extended distances with the
parking brake engaged can cause brake
failure and the risk of personal injury.
E209041
Indicates low brake fluid level or
a brake system malfunction.
Have the system immediately
checked.
Check Suspension (If Equipped)
E208808
Illuminates when you press the
air suspension dump switch.
Cruise Control
E71340
Illuminates when you switch on
this feature. See What Is Cruise
Control (page 161).
Diesel Exhaust Fluid (If Equipped)
E163176
Illuminates with the key in the
ON position, when the fluid is
contaminated or the level falls
below 1.0 gal (3.8 L). Refill the tank or, at
a minimum, add at least 1.0 gal (3.8 L) in
the tank.
Direction Indicator
Illuminates when you switch on
the left or right direction
indicator, or when you switch on
the hazard warning flashers. Check for a
burned out bulb if the indicators stay on or
flash faster.
66
Instrument Cluster
Page 156 of 378

Traction Control
The system helps maintain traction of the
wheels by detecting and controlling wheel
spin. See Using Traction Control (page
149).
E72903
Vehicle without stability control
skidding off its intended route. A
Vehicle with stability control
maintaining control on a slippery
surface. B
PRINCIPLE OF OPERATION -
VEHICLES WITH: AIR BRAKES
WARNING: Vehicle modifications
involving braking system, aftermarket
roof racks, suspension, steering system,
tire construction and wheel and tire size
may change the handling characteristics
of your vehicle and may adversely affect
the performance of the electronic
stability control system. In addition,
installing any stereo loudspeakers may
interfere with and adversely affect the
electronic stability control system. Install
any aftermarket stereo loudspeaker as
far as possible from the front center
console, the tunnel, and the front seats
in order to minimize the risk of interfering
with the electronic stability control
sensors. Reducing the effectiveness of
the electronic stability control system
could lead to an increased risk of loss of
vehicle control, vehicle rollover, personal
injury and death.
WARNING: Remember that even
advanced technology cannot defy the
laws of physics. It's always possible to
lose control of a vehicle due to
inappropriate driver input for the
conditions. Aggressive driving on any
road condition can cause you to lose
control of your vehicle increasing the risk
of personal injury or property damage.
Activation of the electronic stability
control system is an indication that at
least some of the tires have exceeded
their ability to grip the road; this could
reduce the operator's ability to control
the vehicle potentially resulting in a loss
of vehicle control, vehicle rollover,
personal injury and death. If your
electronic stability control system
activates, SLOW DOWN.
The system automatically turns on each
time you switch the ignition on.
If a fault occurs in either the stability
control or the traction control system, you
may experience the following conditions:
• The stability and traction control light
illuminates steadily.
152
Stability Control
Page 158 of 378

• Your load shifts due to improper
retention, accident damage or the
inherently mobile nature of some loads,
for example, hanging meat, live
animals or partially laden tankers.
• Your vehicle or load has an unusually
high or off-set center of gravity.
• Your brakes are not properly adjusted
or maintained.
• One side of your vehicle drops off the
pavement at an angle that is too great
to be counteracted by a reduction in
speed.
To Maximize the Effectiveness Of
Stability Control
• Make sure that the weight of your load
is evenly distributed, from front to back,
side to side and you secure it properly
at all times.
• Exercise extreme caution at all times
while driving and avoid sharp turns,
sudden steering inputs or abrupt lane
changes at high speeds, particularly if:
• Hauling loads that can shift.
• Your vehicle or load has a high or
off-set center of gravity when
loaded.
• You are towing doubles or triples.
Electronic Stability Control Usage with
Tractor/Trailer
The electronic stability control system is
designed to work with trailer air brake
systems. We do not recommend its use
with any other trailer brake system.
Electronic Stability Control and Towing
with Non-tractor Trucks (Straight or
Kick-up Frame)
Non-tractor trucks (straight or kick-up
frame) with air brake electronic stability
control, should not be used for towing any
type of trailer.Chassis Modifications
Stability control is specifically calibrated
and validated only for your vehicle's
original configuration. If you alter your
vehicle's chassis components, for example,
a wheel base extension or reduction, tag
axle addition or removal, a major body
change such as conversion of a tractor into
a truck. Ford Motor Company is not
responsible for the performance of the
stability control system if you modify any
major components such as axle,
suspension or steering system.
154
Stability Control
Page 180 of 378

AIR SUSPENSION
Note:Do not operate your vehicle without
air in the suspension springs. Operating your
vehicle without air in the suspension springs
damages the suspension, degrades ride
performance and may cause property
damage.
The air suspension system automatically
adjusts to different loads to maintain a
constant frame height, allows for ease of
vehicle loading, provides improved vehicle
ride, and increased driver comfort.
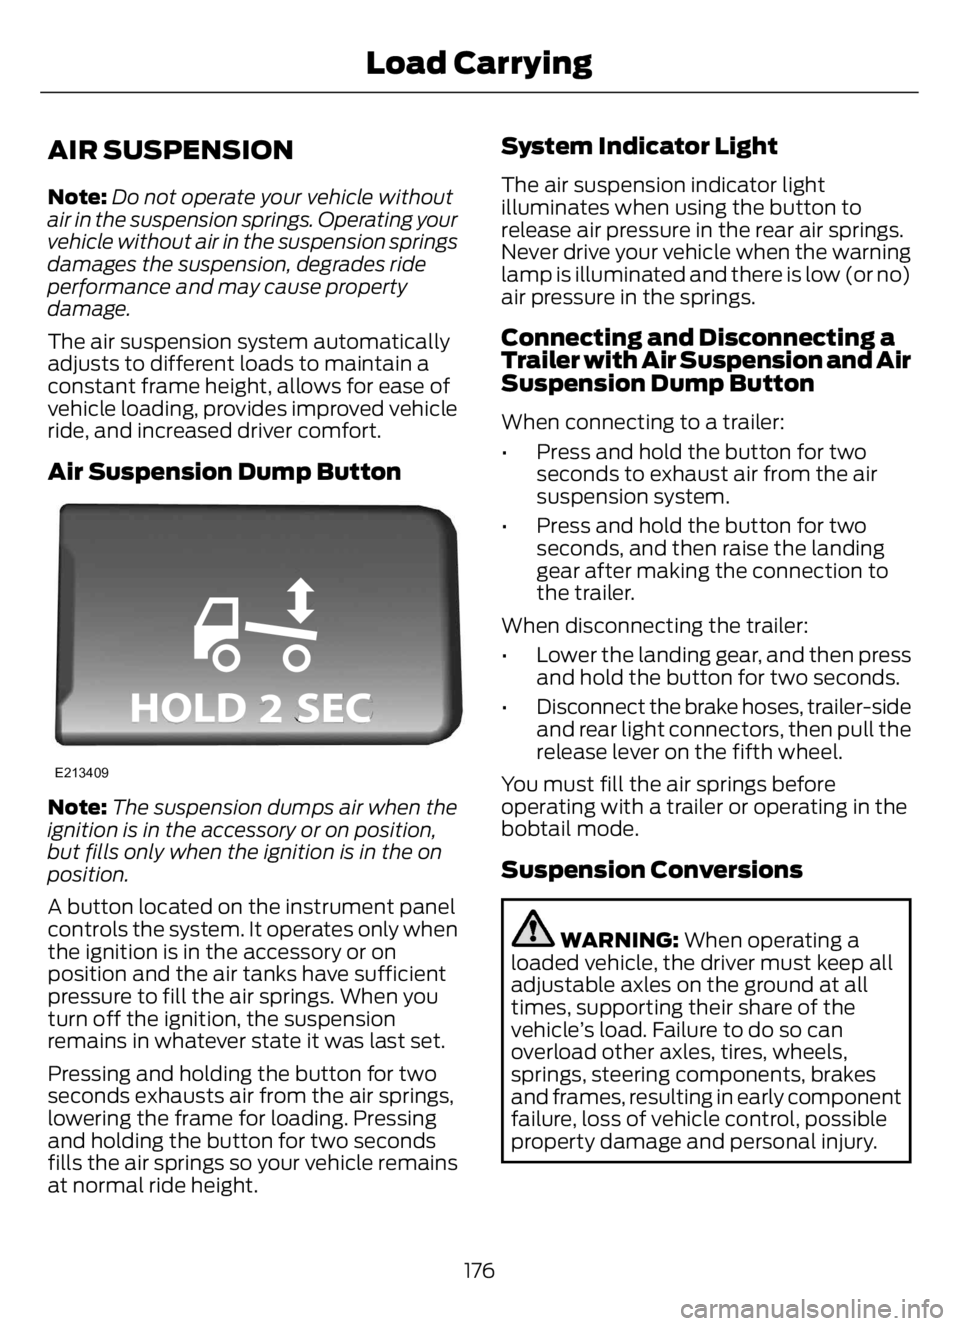
Air Suspension Dump Button
E213409
Note:The suspension dumps air when the
ignition is in the accessory or on position,
but fills only when the ignition is in the on
position.
A button located on the instrument panel
controls the system. It operates only when
the ignition is in the accessory or on
position and the air tanks have sufficient
pressure to fill the air springs. When you
turn off the ignition, the suspension
remains in whatever state it was last set.
Pressing and holding the button for two
seconds exhausts air from the air springs,
lowering the frame for loading. Pressing
and holding the button for two seconds
fills the air springs so your vehicle remains
at normal ride height.
System Indicator Light
The air suspension indicator light
illuminates when using the button to
release air pressure in the rear air springs.
Never drive your vehicle when the warning
lamp is illuminated and there is low (or no)
air pressure in the springs.
Connecting and Disconnecting a
Trailer with Air Suspension and Air
Suspension Dump Button
When connecting to a trailer:
• Press and hold the button for two
seconds to exhaust air from the air
suspension system.
• Press and hold the button for two
seconds, and then raise the landing
gear after making the connection to
the trailer.
When disconnecting the trailer:
• Lower the landing gear, and then press
and hold the button for two seconds.
• Disconnect the brake hoses, trailer-side
and rear light connectors, then pull the
release lever on the fifth wheel.
You must fill the air springs before
operating with a trailer or operating in the
bobtail mode.
Suspension Conversions
WARNING: When operating a
loaded vehicle, the driver must keep all
adjustable axles on the ground at all
times, supporting their share of the
vehicle’s load. Failure to do so can
overload other axles, tires, wheels,
springs, steering components, brakes
and frames, resulting in early component
failure, loss of vehicle control, possible
property damage and personal injury.
176
Load Carrying
Page 181 of 378

We do not recommend performing, or
approve of, suspension conversions.
However, we understand that, on occasion,
others install aftermarket add-on
suspensions on the truck chassis that allow
operator control for weight transfer from
other axles (such as air lift axles).
177
Load Carrying
Page 214 of 378

VEHICLE INSPECTION
INFORMATION
To make sure your vehicle is ready to
operate, conduct a pre-trip inspection at
the beginning of each work period. Follow
the steps listed in this section to verify a
proper vehicle inspection procedure.
WARNING: Exercise great caution
when working on a vehicle equipped with
an automatic fan clutch. The fan starts
in motion only after the engine coolant
reaches a predetermined temperature
or the refrigerant pressure (if equipped
with air conditioning) reaches a
predetermined setting. The fan starts at
this point with no advance warning.
Never reach near, or permit objects to
protrude into, the fan blade radius while
the engine is running as this could result
in vehicle damage, personal injury or
death.
WARNING: Do not operate the
vehicle if any suspension conditions
listed in the following charts are evident.
Loss of steering or suspension could
result in property damage, personal injury
or death.
WARNING: If a wheel must be
changed, obtain expert tire service help.
Mounting and un-mounting of tires
should only be performed by a qualified
technician using necessary safety
procedures and equipment, otherwise
the result could be property damage,
personal injury or death.
Note:Always make sure you apply the
parking brake before starting the engine.
Engine compartment (with engine off)
Use the dipstick to verify the oil level is in the proper operating
range. See Engine Oil Dipstick (page 224). Engine oil
Look through the plastic reservoir and verify the coolant level
is within the proper operating range. Do not remove the
pressure cap until the coolant has cooled. See Engine
Coolant Check (page 238). Engine coolant
Verify that the fluid level is in the proper operating range. See
Power Steering Fluid Check (page 245). Power steering fluid
Remove the master cylinder caps and inspect the fluid level.
See Brake Fluid Check (page 244). Brake fluid
210
Vehicle Inspection Guide