2023 FORD EXPEDITION transmission
[x] Cancel search: transmissionPage 8 of 658
Locking the Rear Window Controls......128
Interior Mirror
Interior Mirror Precautions........................129
Manually Dimming the Interior Mirror.........................................................................129
Auto-Dimming Interior Mirror..................129
Exterior Mirrors
Adjusting the Exterior Mirrors.................130
Folding the Exterior Mirrors - VehiclesWith: Manual Folding Mirrors.............130
Folding the Exterior Mirrors - VehiclesWith: Power Folding Mirrors.................131
Auto-Dimming Exterior Mirror..................131
Moonroof
Opening and Closing the Sunshade......132
Opening and Closing the Moonroof......132
Venting the Moonroof................................133
Moonroof Bounce-Back............................133
Instrument Cluster
Instrument Cluster Overview - VehiclesWith: 8 Inch Screen................................134
Instrument Cluster Overview - VehiclesWith: 12 Inch Screen...............................135
Tachometer....................................................135
Speedometer................................................135
Fuel Gauge.....................................................135
Engine Coolant Temperature Gauge.........................................................................136
Engine Oil Pressure Gauge.......................136
Transmission Fluid Temperature Gauge.........................................................................136
Turbo Boost Gauge - Vehicles With: 12Inch Screen................................................136
What Are the Instrument ClusterWarning Lamps........................................136
Instrument Cluster Warning Lamps......136
What Are the Instrument ClusterIndicators....................................................138
Instrument Cluster Indicators.................138
Instrument Cluster Display
Using the Instrument Cluster DisplayControls......................................................140
Instrument Cluster Display Main Menu -Vehicles With: 8 Inch Screen..............140
Instrument Cluster Display Main Menu -Vehicles With: 12 Inch Screen..............141
Trip Computer - Vehicles With: 8 InchScreen/12 Inch Screen............................141
Customizing the Instrument ClusterDisplay..........................................................141
Personalized Settings -Vehicles With: 12 Inch Screen
Changing the Language............................142
Changing the Measurement Unit..........142
Changing the Temperature Unit............142
Changing the Tire Pressure Unit............142
Personalized Settings -Vehicles With: 15 InchScreen
Changing the Language............................143
Changing the Measurement Unit..........143
Changing the Temperature Unit............143
Changing the Tire Pressure Unit............143
Remote Start
What Is Remote Start................................144
Remote Start Precautions.......................144
Remote Start Limitations.........................144
Enabling Remote Start - Vehicles With:12 Inch Screen...........................................144
Enabling Remote Start - Vehicles With:15 Inch Screen...........................................144
Remotely Starting and Stopping theVehicle.........................................................144
Extending the Remote Start Duration.........................................................................145
4
2023 Expedition (TB8) Canada/United States of America, enUSA, Edition date: 202207, DOMTable of Contents
Page 11 of 658

Starting the Engine.....................................194
Engine Block Heater...................................195
Stopping the Engine...................................196
Automatic Engine Stop.............................197
Accessing the Passive Key BackupPosition.......................................................198
Starting and Stopping the Engine –Troubleshooting......................................199
Auto-Start-Stop
What Is Auto-Start-Stop.........................202
Auto-Start-Stop Precautions................202
Switching Auto-Start-Stop On and Off........................................................................202
Stopping the Engine..................................202
Restarting the Engine...............................202
Auto-Start-Stop Indicators....................202
Auto-Start-Stop – Troubleshooting........................................................................203
Fuel and Refueling
Fuel and Refueling Precautions............205
Fuel Quality..................................................206
Locating the Fuel Filler Funnel..............206
Running Out of Fuel...................................207
Refueling.......................................................208
Fuel Tank Capacity.....................................210
Fuel and Refueling – Troubleshooting.........................................................................210
Catalytic Converter
What Is the Catalytic Converter.............212
Catalytic Converter Precautions............212
Catalytic Converter – Troubleshooting.........................................................................212
Automatic Transmission
Automatic Transmission Precautions.........................................................................213
Automatic Transmission Positions.......213
Shifting Your Vehicle Into Gear...............214
Automatic Transmission PositionIndicators....................................................214
Manually Shifting Gears............................215
Temporary Neutral Mode.........................216
Using Progressive Range Selection.......217
Automatic Return to Park (P).................217
Automatic Transmission AudibleWarnings.....................................................218
Four-Wheel Drive
How Does Four-Wheel Drive Work.......219
Four-Wheel Drive Precautions...............219
Four-Wheel Drive Limitations................220
Selecting a Four-Wheel Drive Mode....220
Four-Wheel Drive Modes..........................221
Four-Wheel Drive Indicators...................222
Four-Wheel Drive Driving Hints.............222
Four-Wheel Drive – Troubleshooting........................................................................224
Electronic Limited-Slip Differ-ential
What Is the Electronic Limited-SlipDifferential................................................226
Electronic Limited-Slip DifferentialIndicators...................................................226
Locking and Unlocking the ElectronicLimited-Slip Differential.......................227
Electronic Limited-Slip Differential –Troubleshooting......................................228
Brakes
Brake Precautions......................................229
Anti-Lock Braking System.......................229
Brake Over Accelerator.............................229
Locating the Brake Fluid Reservoir.......229
Checking the Brake Fluid.........................229
Brake Fluid Specification.........................230
Brakes – Troubleshooting.......................230
7
2023 Expedition (TB8) Canada/United States of America, enUSA, Edition date: 202207, DOMTable of Contents
Page 57 of 658
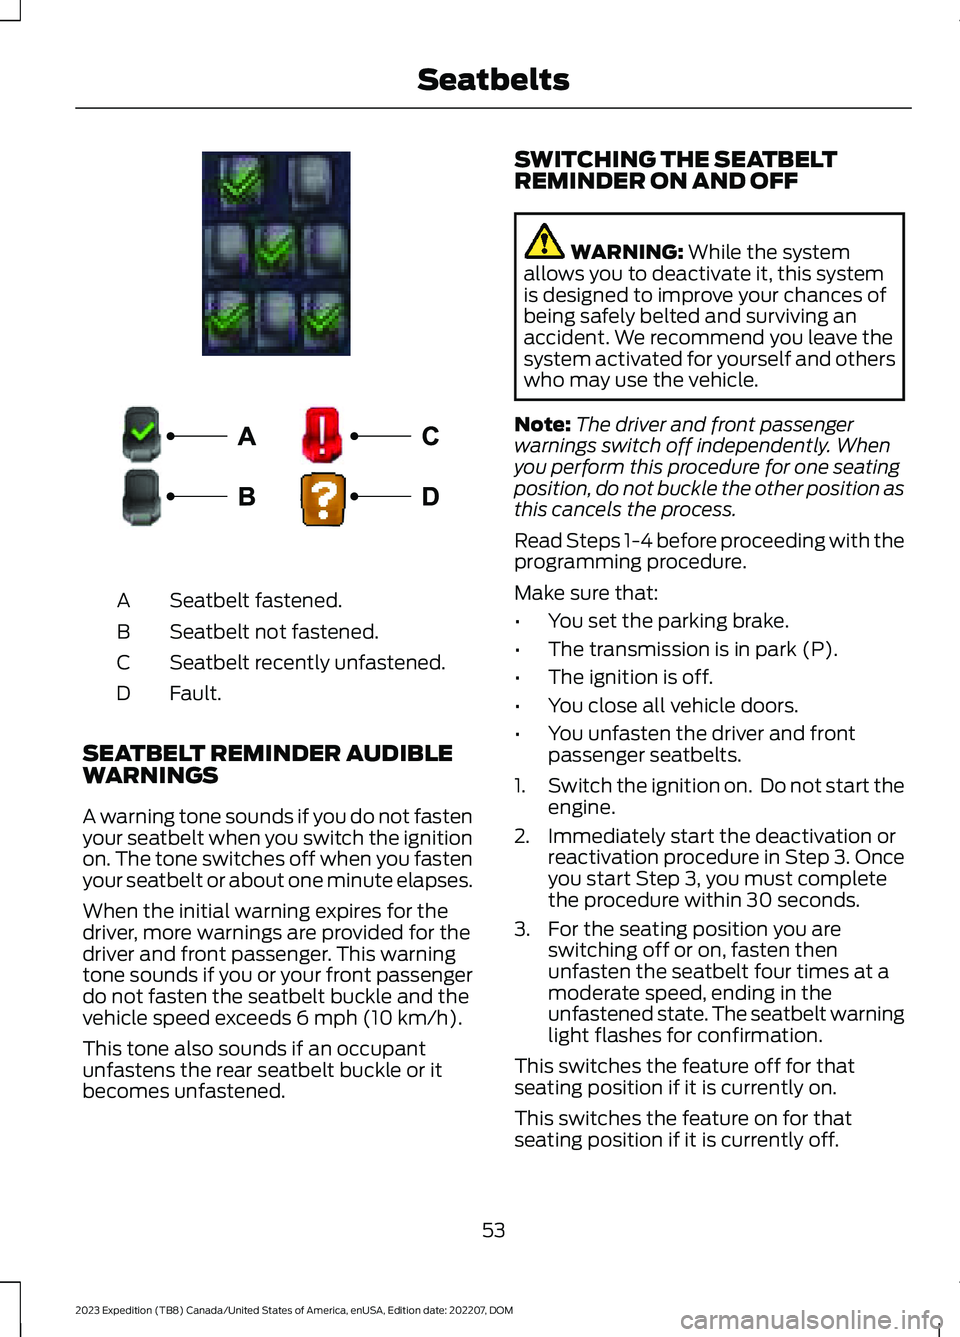
Seatbelt fastened.A
Seatbelt not fastened.B
Seatbelt recently unfastened.C
Fault.D
SEATBELT REMINDER AUDIBLEWARNINGS
A warning tone sounds if you do not fastenyour seatbelt when you switch the ignitionon. The tone switches off when you fastenyour seatbelt or about one minute elapses.
When the initial warning expires for thedriver, more warnings are provided for thedriver and front passenger. This warningtone sounds if you or your front passengerdo not fasten the seatbelt buckle and thevehicle speed exceeds 6 mph (10 km/h).
This tone also sounds if an occupantunfastens the rear seatbelt buckle or itbecomes unfastened.
SWITCHING THE SEATBELTREMINDER ON AND OFF
WARNING: While the systemallows you to deactivate it, this systemis designed to improve your chances ofbeing safely belted and surviving anaccident. We recommend you leave thesystem activated for yourself and otherswho may use the vehicle.
Note:The driver and front passengerwarnings switch off independently. Whenyou perform this procedure for one seatingposition, do not buckle the other position asthis cancels the process.
Read Steps 1-4 before proceeding with theprogramming procedure.
Make sure that:
•You set the parking brake.
•The transmission is in park (P).
•The ignition is off.
•You close all vehicle doors.
•You unfasten the driver and frontpassenger seatbelts.
1.Switch the ignition on. Do not start theengine.
2.Immediately start the deactivation orreactivation procedure in Step 3. Onceyou start Step 3, you must completethe procedure within 30 seconds.
3.For the seating position you areswitching off or on, fasten thenunfasten the seatbelt four times at amoderate speed, ending in theunfastened state. The seatbelt warninglight flashes for confirmation.
This switches the feature off for thatseating position if it is currently on.
This switches the feature on for thatseating position if it is currently off.
53
2023 Expedition (TB8) Canada/United States of America, enUSA, Edition date: 202207, DOMSeatbeltsE373494 E274703
Page 95 of 658
LIFTGATE PRECAUTIONS
WARNING: It is extremelydangerous to ride in a cargo area, insideor outside of a vehicle. In a crash, peopleriding in these areas are more likely to beseriously injured or killed. Do not allowpeople to ride in any area of your vehiclethat is not equipped with seats andseatbelts. Make sure everyone in yourvehicle is in a seat and properly using aseatbelt. Failure to follow this warningcould result in serious personal injury ordeath.
WARNING: Make sure that you fullyclose the liftgate to prevent exhaustfumes from entering your vehicle. If youare unable to fully close the liftgate,open the air vents or the windows toallow fresh air to enter your vehicle.Failure to follow this instruction couldresult in personal injury or death.
WARNING: Keep keys out of reachof children. Do not allow children tooperate or play near an open or movingpower liftgate. You should supervise theoperation of the power liftgate at alltimes.
OPENING THE LIFTGATE
OPENING THE LIFTGATE FROMINSIDE YOUR VEHICLE
With the transmission in park(P), press the button on theinstrument panel.
Note:Be careful when opening or closingthe liftgate in a garage or other enclosedarea to avoid damaging the liftgate.
Note: Do not hang anything, for examplea bike rack, from the glass or liftgate. Thiscould damage the liftgate and itscomponents.
Note: Do not leave the liftgate open whiledriving. This could damage the liftgate andits components.
OPENING THE LIFTGATE FROMOUTSIDE YOUR VEHICLE
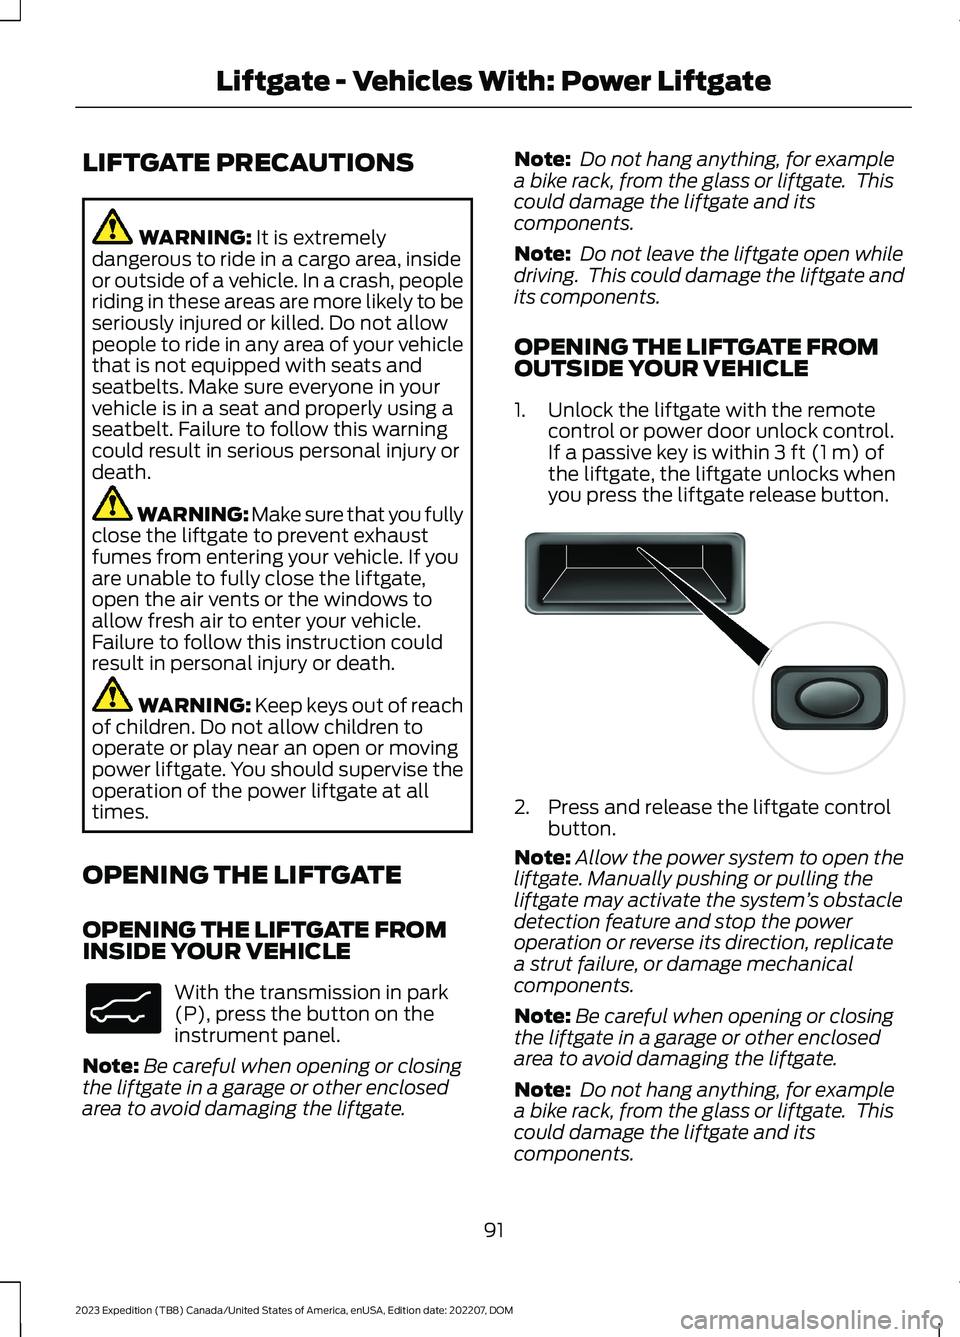
1.Unlock the liftgate with the remotecontrol or power door unlock control.If a passive key is within 3 ft (1 m) ofthe liftgate, the liftgate unlocks whenyou press the liftgate release button.
2.Press and release the liftgate controlbutton.
Note:Allow the power system to open theliftgate. Manually pushing or pulling theliftgate may activate the system’s obstacledetection feature and stop the poweroperation or reverse its direction, replicatea strut failure, or damage mechanicalcomponents.
Note:Be careful when opening or closingthe liftgate in a garage or other enclosedarea to avoid damaging the liftgate.
Note: Do not hang anything, for examplea bike rack, from the glass or liftgate. Thiscould damage the liftgate and itscomponents.
91
2023 Expedition (TB8) Canada/United States of America, enUSA, Edition date: 202207, DOMLiftgate - Vehicles With: Power LiftgateE138633 E138632
Page 97 of 658
Note:Allow the power system to open theliftgate. Manually pushing or pulling theliftgate may activate the system’s obstacledetection feature and stop the poweroperation or reverse its direction, replicatea strut failure, or damage mechanicalcomponents.
Note:Any physical actions that mimic akicking motion such as splashing water,trailer chains or vacuum hoses may causethe hands-free liftgate to activate. Switchthe power liftgate off through your vehiclesettings or keep the passive key away fromthe rear bumper detection area.
SETTING THE LIFTGATE
OPENING HEIGHT
1.Open the liftgate.
2.Stop the liftgate movement by pressingthe control button on the liftgate whenit reaches the desired height.
Note:Once the liftgate stops moving, youcan manually move it to the desired height.
3.Press and hold the control button onthe liftgate until a tone sounds,indicating programming is complete.
Note:You can only use the liftgate controlbutton to program the height.
Note:You cannot program the height if theliftgate position is too low.
4.The power liftgate now opens at theprogrammed height. To change theprogrammed height, repeat the steps.
Note:You can fully open the liftgate bymanually pushing it upward to themaximum open position if it opens in alower position.
Note:The system recalls the newprogrammed height until you reprogram it,even if you disconnect the battery.
CLOSING THE LIFTGATE
CLOSING THE LIFTGATE FROMINSIDE YOUR VEHICLE
WARNING: Make sure all personsare clear of the power liftgate areabefore using the power liftgate control.
With the transmission in park(P), press the button on theinstrument panel.
Note: Make sure that you close the liftgatebefore operating or moving your vehicle,especially in an enclosure, like a garage ora parking structure. This could damage theliftgate and its components.
Note: Make sure the area behind yourvehicle is free from obstruction and thatthere is enough room for you to operate theliftgate. Objects too close to your vehicle,for example a wall, garage door or anothervehicle may come into contact with themoving liftgate. This could damage theliftgate and its components.
Note:Make sure that you fully close theliftgate to prevent cargo from falling out.
CLOSING THE LIFTGATE FROMOUTSIDE YOUR VEHICLE
WARNING: Make sure all personsare clear of the power liftgate areabefore using the power liftgate control.
93
2023 Expedition (TB8) Canada/United States of America, enUSA, Edition date: 202207, DOMLiftgate - Vehicles With: Power LiftgateE138633
Page 101 of 658
LIFTGATE – FREQUENTLY ASKEDQUESTIONS
Why won't my power liftgate function?
It can happen in freezing conditions orwhen parking on downhill slopes. Makesure the power liftgate is enabled.Make sure the transmission is in park(P), ensure nothing is obstructing theliftgate path and there is not excessiveweight on the liftgate. If there arecontinued issues, the battery voltagemay be low or there may be othersystem issues. See an authorizeddealer.
97
2023 Expedition (TB8) Canada/United States of America, enUSA, Edition date: 202207, DOMLiftgate - Vehicles With: Power Liftgate
Page 121 of 658
EXTERIOR LAMPS
USING THE TURN SIGNAL LAMPS
Push the lever up or down toswitch the turn signal lamps on.
Set the lever to the middle position toswitch the turn signal lamps off.
Note:Tap the lever up or down to make theturn signal lamps flash three times.
Turn Signal Lamp Indicator
It flashes when you switch theturn signal lamps on.
Note:An increase in the rate of flashingwarns of a failed turn signal lamp.
SWITCHING THE DAYTIMERUNNING LAMPS ON AND OFF -VEHICLES WITH: CONFIGURABLEDAYTIME RUNNING LAMPS/12INCH SCREEN
WARNING: The daytime runninglamps system does not activate the rearlamps and may not provide adequatelighting during low visibility drivingconditions. Make sure you switch theheadlamps on, as appropriate, during alllow visibility conditions. Failure to do somay result in a crash.
1.Press Settings on the touchscreen.
2.Press Vehicle Settings.
3.Press Lighting.
4.Switch Daytime Running Lights on oroff.
The daytime running lamps turn on whenall of the following occur:
•You switch the system on.
•You switch your vehicle on.
•The transmission is not in park (P) forvehicles with automatic transmissionsor you release the parking brake forvehicles with manual transmissions.
•The lighting control is in the autolampsposition.
•The headlamps are off.
Note:Other lighting control positions donot turn on the daytime running lamps.
117
2023 Expedition (TB8) Canada/United States of America, enUSA, Edition date: 202207, DOMExterior LightingE311431 E67018 E67018
Page 122 of 658
SWITCHING THE DAYTIMERUNNING LAMPS ON AND OFF -VEHICLES WITH: CONFIGURABLEDAYTIME RUNNING LAMPS/15INCH SCREEN
WARNING: The daytime runninglamps system does not activate the rearlamps and may not provide adequatelighting during low visibility drivingconditions. Make sure you switch theheadlamps on, as appropriate, during alllow visibility conditions. Failure to do somay result in a crash.
1.Access the vehicle drawer on thetouchscreen.
2.Press SETTINGS.
3.Press Vehicle.
4.Press Lighting.
5.Switch Daytime Running Lights on oroff.
The daytime running lamps turn on whenall of the following occur:
•You switch the system on.
•You switch the vehicle on.
•The transmission is not in park (P) forvehicles with automatic transmissionsor you release the parking brake forvehicles with manual transmissions.
•The lighting control is in the autolampsposition.
•The headlamps are off.
Note:Other lighting control positions donot turn on the daytime running lamps.
SWITCHING THE DAYTIMERUNNING LAMPS ON AND OFF -VEHICLES WITH: DAYTIMERUNNING LAMPS (DRL)
WARNING: The daytime runninglamps system does not activate the rearlamps and may not provide adequatelighting during low visibility drivingconditions. Make sure you switch theheadlamps on, as appropriate, during alllow visibility conditions. Failure to do somay result in a crash.
Daytime running lamps are always onunless you switch on the headlamps oryour vehicle is in park (P).
USING THE FRONT FOG LAMPS (If
Equipped)
To switch the lamps on or off:
1.Set the lighting control to the parkinglamps, headlamps or autolampsposition.
Note:When the lighting control is in theautolamps position, you cannot switch thefog lamps on unless the low beamheadlamps are on.
2.
Press the button on thelighting control to switch the front foglamps on or off.
Note:Only switch the front fog lamps onduring reduced visibility.
Note:The brightness of the daytime runninglamps may decrease when the front foglamps are switched on.
Note:The front fog lamps lights switch offautomatically when high beams areactivated.
118
2023 Expedition (TB8) Canada/United States of America, enUSA, Edition date: 202207, DOMExterior Lighting