2023 FORD EXPEDITION center console
[x] Cancel search: center consolePage 193 of 658
WHAT IS THE POWER OUTLET
The power outlet can power devices usinga 12 V outlet adapter.
POWER OUTLET
PRECAUTIONS
WARNING: Do not plug optionalelectrical accessories into the cigarlighter socket. Incorrect use of the cigarlighter can cause damage not coveredby the vehicle warranty, and can resultin fire or serious injury.
When you switch the vehicle on, you canuse the socket to power 12 V applianceswith a maximum current rating of 20 A. Donot use the power point over the vehiclecapacity of 12 V DC 240 W or a fuse couldblow. Do not plug in any device thatsupplies power to the vehicle through thepower points. This could result in damageto vehicle systems. Do not hang anyaccessory from the accessory plug. Alwayskeep the power point caps closed whennot in use. Do not insert objects other thanan accessory plug into the power point.
To prevent the battery from running out ofcharge:
•Do not use the power point longer thannecessary when the vehicle is off.
•Do not leave devices plugged inovernight or when you park your vehiclefor extended periods.
LOCATING THE POWER
OUTLETS
Power outlets are in the followinglocations:
•On the instrument panel.
•Inside the center console.
•On the rear of the center console.
189
2023 Expedition (TB8) Canada/United States of America, enUSA, Edition date: 202207, DOMPower Outlet - Vehicles With: 12V Power Outlet
Page 194 of 658
WHAT IS THE WIRELESS
ACCESSORY CHARGER
The wireless accessory charger allows youto charge one compatible Qi wirelesscharging device on the charging area.
WIRELESS ACCESSORY
CHARGER PRECAUTIONS
WARNING: Wireless chargingdevices can affect the operation ofimplanted medical devices, includingcardiac pacemakers. If you have anyimplanted medical devices, werecommend that you consult with yourphysician.
Keep the charging area clean and removeforeign objects prior to charging a device.
Do not place items with a magnetic stripor radio-frequency identification chip, forexample passports, parking tickets,transportation passes or credit cards, nearthe charging area when charging a device.Damage could occur to the magnetic stripor radio-frequency identification chip.
Do not place metal objects, for exampleremote controls, coins and candywrappers, on or near the charging areawhen charging a device. Metal objects mayheat up and degrade the chargingperformance, in addition to causinginterruptions in charging.
Charging could be interrupted, degraded,or could stop if any of the following occur:
•The system detects a foreign object.
•The device is misaligned on thecharging area.
•The device moves on the activecharging area when the vehicle is inmotion.
•The vehicle ambient temperature is toohigh.
•You attempt to charge a non-Qicompatible device on the wirelesscharger.
Note:During charging, the device and thecharger could heat up, this is normal. If thebattery gets hotter than usual, the devicemay stop charging.
LOCATING THE WIRELESS
ACCESSORY CHARGER
The charging area is on thecenter console or in the mediabin below the instrument panel.
CHARGING A WIRELESS
DEVICE
Place the device on the center of thecharging surface with the charging sidedown. The charging stops after your devicereaches a full charge.
You can use the charger when the vehicleis in accessory mode, when the vehicle isrunning, or when SYNC is on.
Displays on the status bar whenwireless charging is in progress.
Displays on the status bar whenwireless charging has beeninterrupted.
Note:The charging performance may beaffected if your device is in a case. It may benecessary to remove the case to wirelesslycharge your device.
Note:Software and firmware updates mayaffect device compatibility, including theuse of unofficial software or firmware. Youshould verify charging functionality with yourspecific devices in-vehicle.
190
2023 Expedition (TB8) Canada/United States of America, enUSA, Edition date: 202207, DOMWireless Accessory Charger (If Equipped)E297549 E263583 E372644
Page 195 of 658
OVERHEAD STORAGE
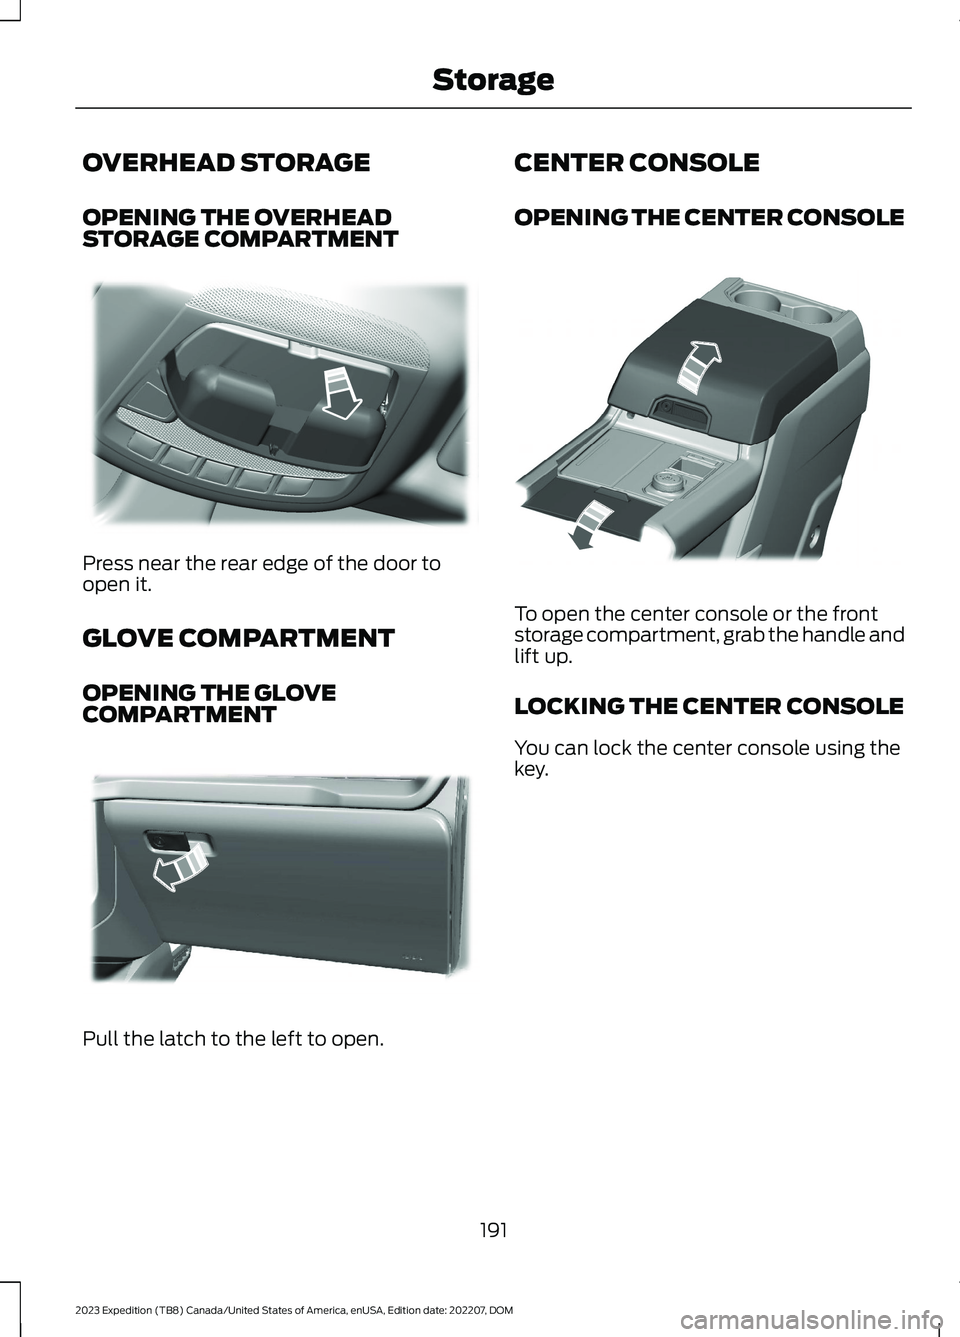
OPENING THE OVERHEADSTORAGE COMPARTMENT
Press near the rear edge of the door toopen it.
GLOVE COMPARTMENT
OPENING THE GLOVECOMPARTMENT
Pull the latch to the left to open.
CENTER CONSOLE
OPENING THE CENTER CONSOLE
To open the center console or the frontstorage compartment, grab the handle andlift up.
LOCKING THE CENTER CONSOLE
You can lock the center console using thekey.
191
2023 Expedition (TB8) Canada/United States of America, enUSA, Edition date: 202207, DOMStorageE332434 E310218 E351263
Page 218 of 658
MANUAL (M)
In manual (M) you can select a specificgear. See Manually Shifting Gears (page215).
Note:We recommend using this mode fordriving on hilly or mountainous roads orwhen towing a trailer. See Towing a Trailer(page 358).
SHIFTING YOUR VEHICLE INTO
GEAR
Console Shifter
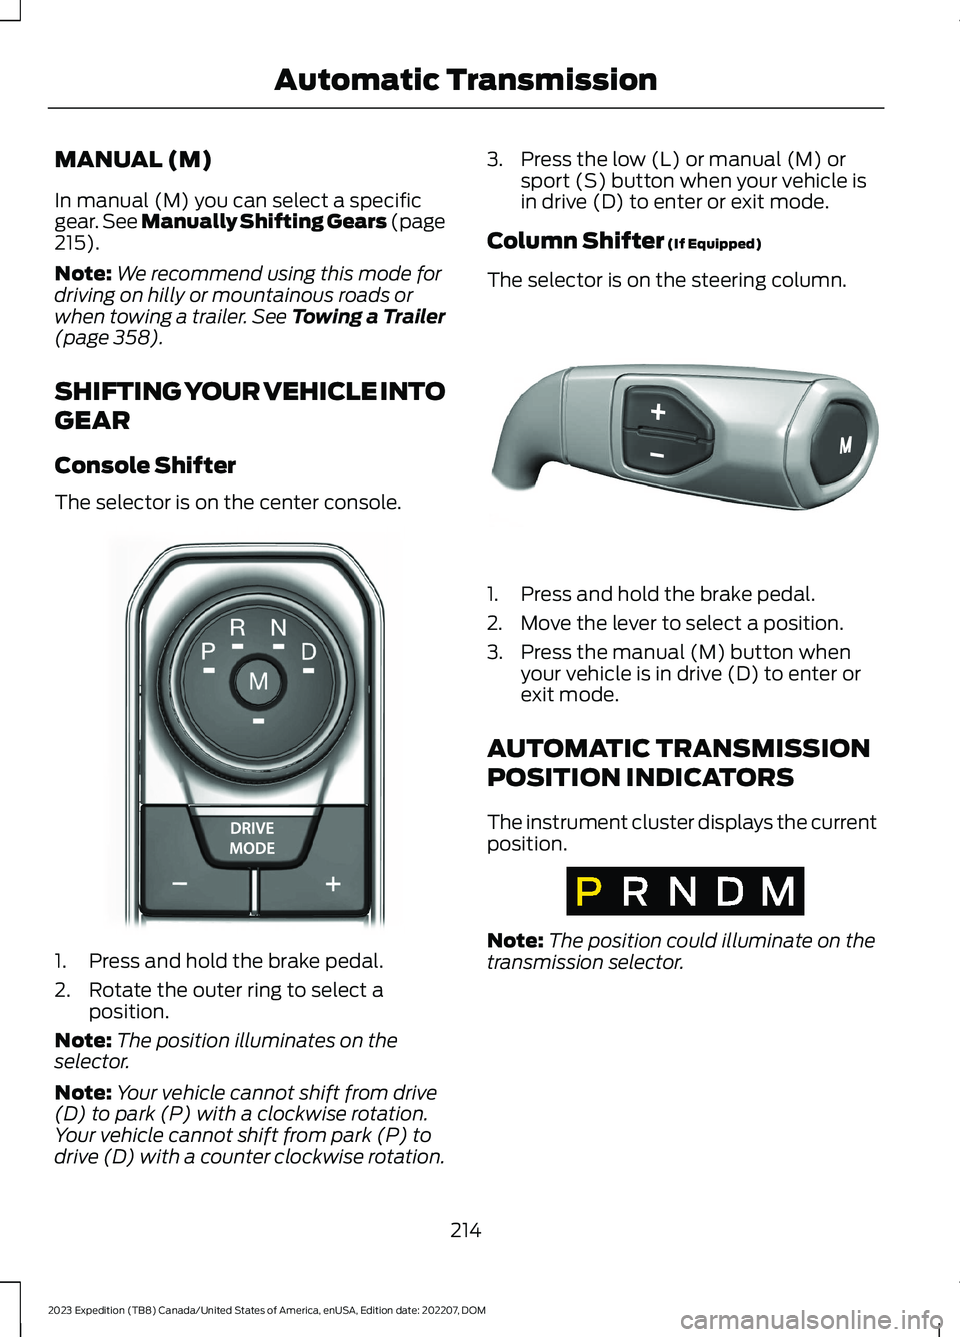
The selector is on the center console.
1.Press and hold the brake pedal.
2.Rotate the outer ring to select aposition.
Note:The position illuminates on theselector.
Note:Your vehicle cannot shift from drive(D) to park (P) with a clockwise rotation.Your vehicle cannot shift from park (P) todrive (D) with a counter clockwise rotation.
3.Press the low (L) or manual (M) orsport (S) button when your vehicle isin drive (D) to enter or exit mode.
Column Shifter (If Equipped)
The selector is on the steering column.
1.Press and hold the brake pedal.
2.Move the lever to select a position.
3.Press the manual (M) button whenyour vehicle is in drive (D) to enter orexit mode.
AUTOMATIC TRANSMISSION
POSITION INDICATORS
The instrument cluster displays the currentposition.
Note:The position could illuminate on thetransmission selector.
214
2023 Expedition (TB8) Canada/United States of America, enUSA, Edition date: 202207, DOMAutomatic TransmissionE252861 E327267 E317778
Page 225 of 658
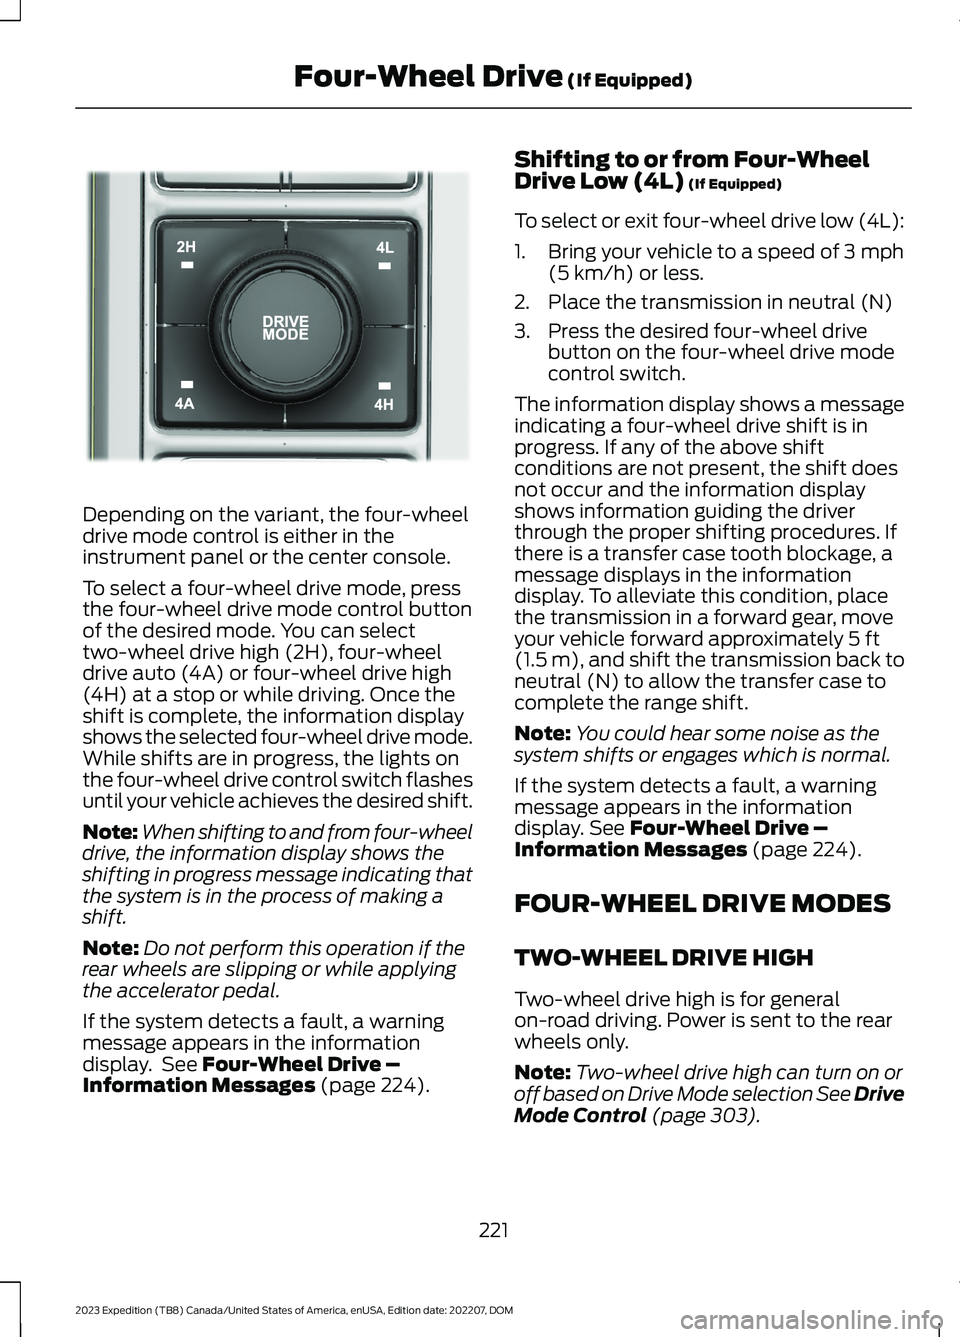
Depending on the variant, the four-wheeldrive mode control is either in theinstrument panel or the center console.
To select a four-wheel drive mode, pressthe four-wheel drive mode control buttonof the desired mode. You can selecttwo-wheel drive high (2H), four-wheeldrive auto (4A) or four-wheel drive high(4H) at a stop or while driving. Once theshift is complete, the information displayshows the selected four-wheel drive mode.While shifts are in progress, the lights onthe four-wheel drive control switch flashesuntil your vehicle achieves the desired shift.
Note:When shifting to and from four-wheeldrive, the information display shows theshifting in progress message indicating thatthe system is in the process of making ashift.
Note:Do not perform this operation if therear wheels are slipping or while applyingthe accelerator pedal.
If the system detects a fault, a warningmessage appears in the informationdisplay. See Four-Wheel Drive –Information Messages (page 224).
Shifting to or from Four-WheelDrive Low (4L) (If Equipped)
To select or exit four-wheel drive low (4L):
1.Bring your vehicle to a speed of 3 mph(5 km/h) or less.
2.Place the transmission in neutral (N)
3.Press the desired four-wheel drivebutton on the four-wheel drive modecontrol switch.
The information display shows a messageindicating a four-wheel drive shift is inprogress. If any of the above shiftconditions are not present, the shift doesnot occur and the information displayshows information guiding the driverthrough the proper shifting procedures. Ifthere is a transfer case tooth blockage, amessage displays in the informationdisplay. To alleviate this condition, placethe transmission in a forward gear, moveyour vehicle forward approximately 5 ft(1.5 m), and shift the transmission back toneutral (N) to allow the transfer case tocomplete the range shift.
Note:You could hear some noise as thesystem shifts or engages which is normal.
If the system detects a fault, a warningmessage appears in the informationdisplay. See Four-Wheel Drive –Information Messages (page 224).
FOUR-WHEEL DRIVE MODES
TWO-WHEEL DRIVE HIGH
Two-wheel drive high is for generalon-road driving. Power is sent to the rearwheels only.
Note:Two-wheel drive high can turn on oroff based on Drive Mode selection See DriveMode Control (page 303).
221
2023 Expedition (TB8) Canada/United States of America, enUSA, Edition date: 202207, DOMFour-Wheel Drive (If Equipped)E357408
Page 260 of 658
WHAT IS HILL DESCENT
CONTROL
Hill descent control allows the driver to setand maintain vehicle speed whiledescending steep slopes in various surfaceconditions.
HOW DOES HILL DESCENT
CONTROL WORK
Hill descent control can maintain vehiclespeeds on downhill slopes between2–20 mph (3–32 km/h). Above 20 mph(32 km/h), the system remains on but thedescent speed cannot be set ormaintained.
Note:The system does not function below2 mph (3 km/h).
The system requires a cool down intervalafter a period of sustained use. Hill descentcontrol provides a warning in the messagecenter and a tone sounds when the systemis about to disengage for cooling. At thistime, manually apply the brakes as neededto maintain descent speed.
Note:The amount of time that the systemcan remain active before cooling varies withconditions.
HILL DESCENT CONTROL
PRECAUTIONS
WARNING: The system does notcontrol speed in low traction conditionsor extremely steep slopes. The systemis designed to be an aid and does notrelieve you of your responsibility to drivewith due care and attention. Failure tofollow this instruction could result inpersonal injury.
WARNING: Hill descent controlcannot control descent in all surfaceconditions and circumstances, such asice or extremely steep grades. Hilldescent control is a driver assist systemand cannot substitute for good judgmentby the driver. Failure to do so may resultin loss of vehicle control, crash or seriousinjury.
WARNING: The system does notreplace the parking brake. When youleave your vehicle, always apply theparking brake and shift the transmissioninto park (P) for automatic transmissionor first gear for manual transmission.
SWITCHING HILL DESCENT
CONTROL ON AND OFF
Press the button on theinstrument panel or the centerconsole. A light illuminates anda tone sounds when the system is active.
SETTING THE HILL DESCENT
SPEED
To increase or decrease the descent speed,press the accelerator or brake pedal, or usethe SET + and SET - buttons on thesteering wheel. Once you reach thepreferred speed remove your feet from thepedals.
HILL DESCENT CONTROL
INDICATOR
Illuminates when you switch hilldescent control on.
256
2023 Expedition (TB8) Canada/United States of America, enUSA, Edition date: 202207, DOMHill Descent Control (If Equipped)E163171
Page 307 of 658
WHAT IS DRIVE MODE
CONTROL
Your vehicle has various drive modes thatyou can select for different drivingconditions. Depending on the drive modethat you select, the system adjusts variousvehicle settings.
HOW DOES DRIVE MODE
CONTROL WORK
Drive mode control adjusts your vehicleconfiguration for each mode you select.
Changing the drive mode adjusts thesteering effort and feel of the steeringsystem.
The stability and traction control assistyour vehicle control in adverse conditionsor high-performance driving.
Throttle control enhances the powertrainresponse, transmission controls becomeoptimized with shift schedules, andfour-wheel drive settings are optimizedand tuned to each mode.
Changing the drive mode can engage ordisengage the electronic lockingdifferentials.
Changing the drive mode changes thefour-wheel drive mode to the defaultsetting for the selected drive mode.
Note:The system has diagnostic checksthat continuously monitor the system forproper operation. If a mode is unavailabledue to a system fault, the drive modesystem defaults to normal. When thesystem defaults to normal, the drivelinesettings remain the same as prior to thesystem fault.
Note:The system reverts to the normalmode each time you start your vehicle. Atstartup the system also displays a prompton the instrument cluster display that givesyou the option to return to the previouslyselected drive mode during the last ignitioncycle. If you select yes, the system returnsto the last selected drive mode and thedefault driveline settings associated withthat mode. If you select no, the systemremains in normal mode and the drivelinesettings remain the same as selected in theprior ignition cycle. If you do not select yesor no, the system stays in normal mode andthe driveline settings remain the same asselected in the prior ignition cycle.
SELECTING A DRIVE MODE
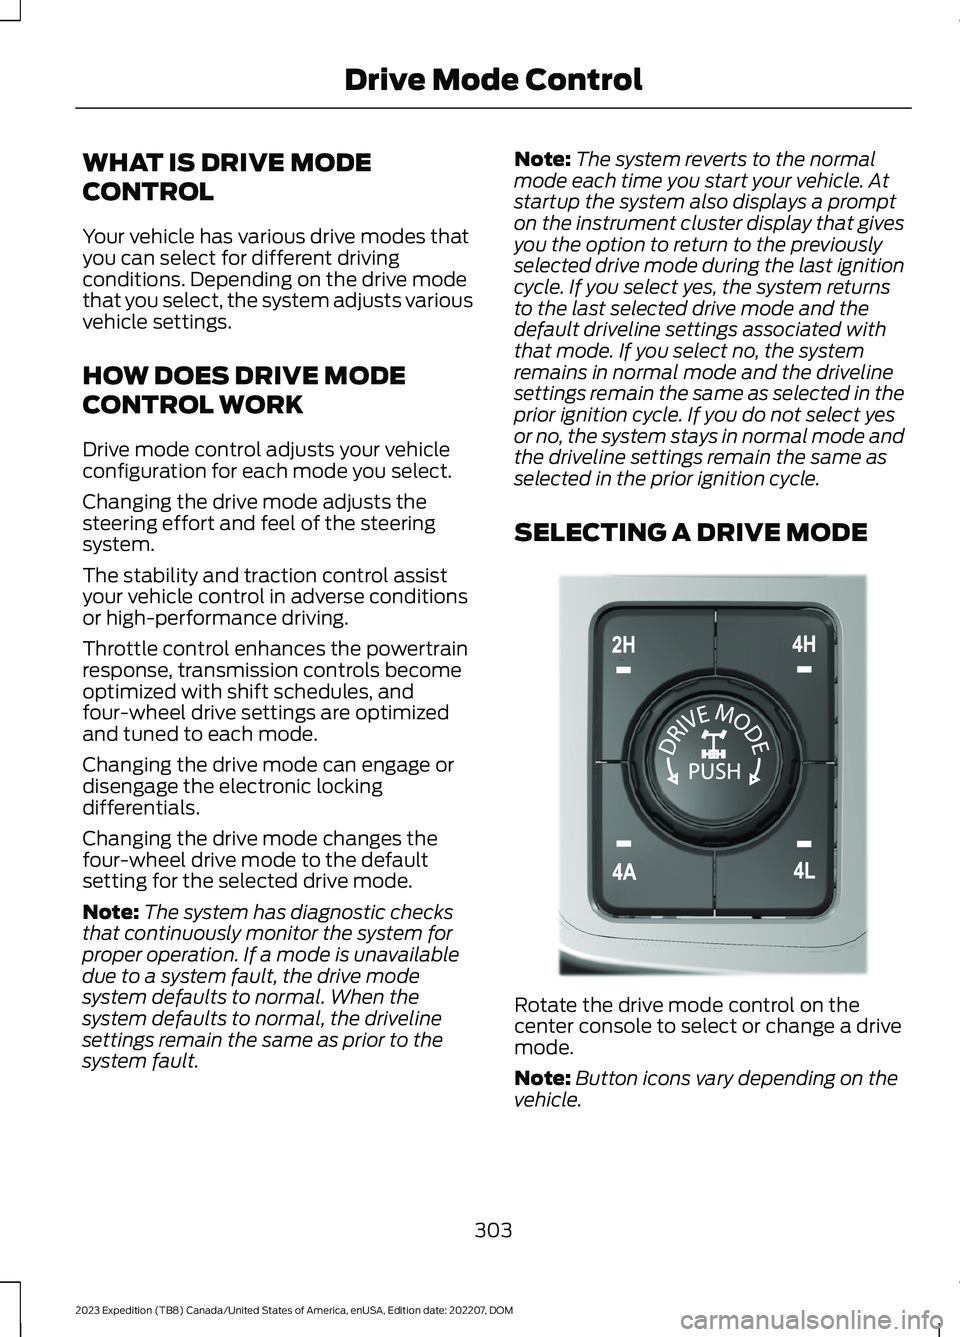
Rotate the drive mode control on thecenter console to select or change a drivemode.
Note:Button icons vary depending on thevehicle.
303
2023 Expedition (TB8) Canada/United States of America, enUSA, Edition date: 202207, DOMDrive Mode ControlE308146
Page 636 of 658

Blind Spot Information System.............320Blind Spot Information System –Troubleshooting............................................324Blind Spot Information System With TrailerCoverage...........................................................322Blind Spot Information SystemIndicators.....................................................323Blind Spot Information SystemLimitations..................................................320Blind Spot Information SystemPrecautions.................................................320Blind Spot Information SystemRequirements............................................320Blind Spot Information System –Troubleshooting........................................324Blind Spot Information System –Information Messages................................324Blind Spot Information System WithTrailer Coverage.........................................322Blind Spot Information System With TrailerCoverage Limitations...................................322Selecting a Trailer..............................................323Setting a Trailer Length....................................322What Is Blind Spot Information System withTrailer Coverage.............................................322BlueCruise Alerts.........................................300BlueCruise AutomaticCancellation...............................................300BlueCruise.......................................................297BlueCruise – Troubleshooting.......................301BlueCruise Indicators................................300BlueCruise Limitations..............................298BlueCruise Precautions.............................297BlueCruise Requirements........................298BlueCruise Settings....................................299BlueCruise – Troubleshooting.................301BlueCruise – Information Messages...........301Bluetooth®....................................................520Body Control Module Fuse Box.............408Accessing the Body Control Module FuseBox.....................................................................408Identifying the Fuses in the Body ControlModule Fuse Box..........................................408Locating the Body Control Module FuseBox.....................................................................408Bonnet LockSee: Opening and Closing the Hood...........412Booster Seats..................................................45
Brake Fluid Specification..........................230Brake Over Accelerator..............................229Brake Precautions.......................................229Brakes..............................................................229Anti-Lock Braking System..............................229Brakes – Troubleshooting..............................230Brakes – Troubleshooting........................230Brakes – Frequently Asked Questions........231Brakes – Warning Lamps...............................230Breaking-In....................................................389
C
Calculating Payload....................................347Calculating the Load Limit.......................347Canceling the Set Speed..........................250Capacities and Specifications................463Catalytic Converter.......................................212Catalytic Converter –Troubleshooting.............................................212Catalytic Converter Precautions.............212Catalytic Converter –Troubleshooting.........................................212Catalytic Converter – WarningLamps.................................................................212Center Console...............................................191Locking the Center Console.............................191Opening the Center Console...........................191Center Display Limitations......................499Center Display Overview..........................499Center Display Precautions.....................499Changing a Flat Tire...................................456Changing a Road Wheel...........................456Changing the 12V Battery.........................420Changing the Fuel Filter.............................419Changing the Language.............................142Changing the Measurement Unit...........142Changing the Remote Control Battery -Vehicles With: Flip Key..............................69Changing the Remote Control Battery -Vehicles With: Push Button Start..........70Changing the Temperature Unit.............142Changing the Tire Pressure Unit.............142Changing the Vehicle Wi-Fi HotspotName or Password - Vehicles With: 12Inch Screen.................................................479
632
2023 Expedition (TB8) Canada/United States of America, enUSA, Edition date: 202207, DOMIndex