2023 DODGE CHALLENGER center console
[x] Cancel search: center consolePage 38 of 300
36GETTING TO KNOW YOUR VEHICLE
POWER MIRRORS
The power mirror switch is located on the driver's side door
trim panel.
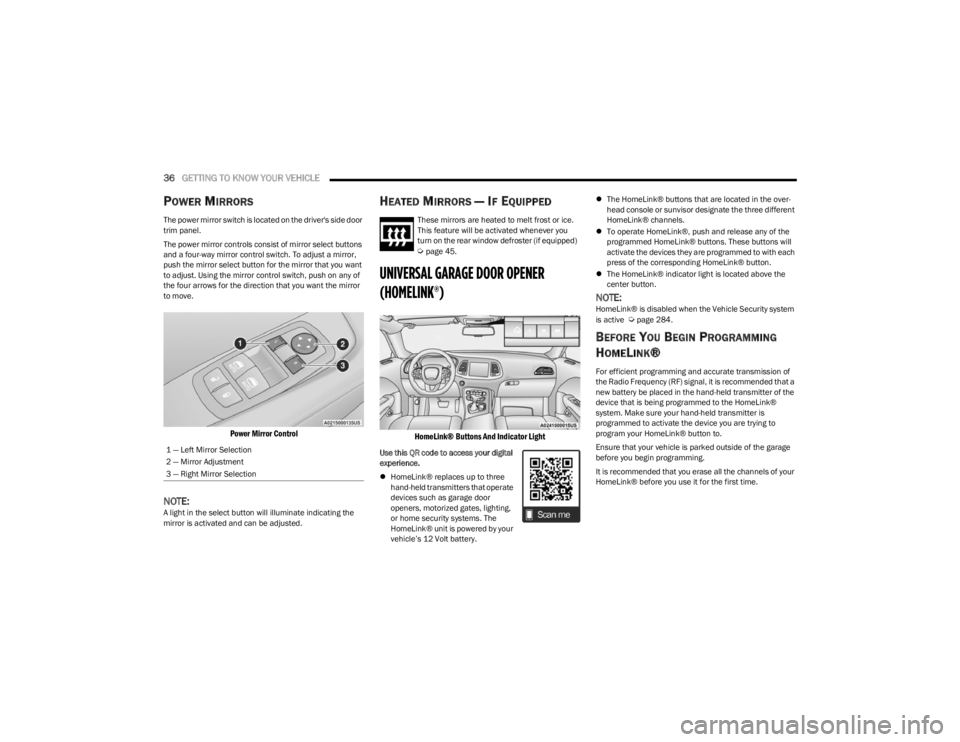
The power mirror controls consist of mirror select buttons
and a four-way mirror control switch. To adjust a mirror,
push the mirror select button for the mirror that you want
to adjust. Using the mirror control switch, push on any of
the four arrows for the direction that you want the mirror
to move.
Power Mirror Control
NOTE:A light in the select button will illuminate indicating the
mirror is activated and can be adjusted.
HEATED MIRRORS — IF EQUIPPED
These mirrors are heated to melt frost or ice.
This feature will be activated whenever you
turn on the rear window defroster (if equipped)
Úpage 45.
UNIVERSAL GARAGE DOOR OPENER
(HOMELINK®)
HomeLink® Buttons And Indicator Light
Use this QR code to access your digital
experience.
HomeLink® replaces up to three
hand-held transmitters that operate
devices such as garage door
openers, motorized gates, lighting,
or home security systems. The
HomeLink® unit is powered by your
vehicle’s 12 Volt battery.
The HomeLink® buttons that are located in the over -
head console or sunvisor designate the three different
HomeLink® channels.
To operate HomeLink®, push and release any of the
programmed HomeLink® buttons. These buttons will
activate the devices they are programmed to with each
press of the corresponding HomeLink® button.
The HomeLink® indicator light is located above the
center button.
NOTE:HomeLink® is disabled when the Vehicle Security system
is active Úpage 284.
BEFORE YOU BEGIN PROGRAMMING
H
OMELINK®
For efficient programming and accurate transmission of
the Radio Frequency (RF) signal, it is recommended that a
new battery be placed in the hand-held transmitter of the
device that is being programmed to the HomeLink®
system. Make sure your hand-held transmitter is
programmed to activate the device you are trying to
program your HomeLink® button to.
Ensure that your vehicle is parked outside of the garage
before you begin programming.
It is recommended that you erase all the channels of your
HomeLink® before you use it for the first time.
1 — Left Mirror Selection
2 — Mirror Adjustment
3 — Right Mirror Selection
23_LA_OM_EN_USC_t.book Page 36
Page 44 of 300

42GETTING TO KNOW YOUR VEHICLE
FOG LIGHTS — IF EQUIPPED
To activate the front fog lights, turn on the parking lights or
the low beam headlights, and push the fog light button on
the headlight switch.
Fog Light Switch
Fog Light Switch (Vehicles Sold In Canada Only)
The fog lights will operate only when the parking lights are
on or when the vehicle headlights are on low beam. An
indicator light located in the instrument cluster will
illuminate when the fog lights are on. The fog lights will
turn off when the switch is pushed a second time, when
the headlight switch is rotated to the off position, or the
high beam is selected.
TURN SIGNALS
Move the multifunction lever up or down to activate the
turn signals. The arrows on each side of the instrument
cluster flash to show proper operation.
NOTE:
If either light remains on and does not flash, or there is
a very fast flash rate, check for a defective outside light
bulb.
A “Turn Signal On” message will appear in the instru -
ment cluster display and a continuous chime will sound
if the vehicle is driven more than 1 mile (1.6 km) with
either turn signal on.
LANE CHANGE ASSIST — IF EQUIPPED
Lightly push the multifunction lever up or down, without
moving beyond the detent, and the turn signal will flash
three times then automatically turn off.
INTERIOR LIGHTS
The interior lights come on when a door is opened.
To protect the battery, the interior lights will turn off
automatically 10 minutes after the ignition is placed in the
OFF position. This will occur if the interior lights were
turned on manually, or are on because a door is open. The battery protection also includes the glove
compartment light and the trunk light (if equipped).
To restore interior light operation after automatic battery
protection is enabled (lights off), either place the ignition
in the ON/RUN position or cycle the light switch.
FRONT MAP/READING LIGHTS
These lights are mounted between the sun visors on the
overhead console. Each light is turned on by pushing the
lens. Push the lens a second time to turn off the light.
These lights also turn on when a door is opened, when the
unlock button on the remote keyless entry key fob is
pushed, or when the dimmer control is turned fully
upward, to the second detent.
Map/Reading Lights
AMBIENT LIGHT — IF EQUIPPED
The overhead console is equipped with an ambient light
feature. This light casts illumination for improved visibility
of the floor and center console area.
23_LA_OM_EN_USC_t.book Page 42
Page 51 of 300
GETTING TO KNOW YOUR VEHICLE49
Cabin Air Filter
The Climate Control system filters out dust and pollen
from the air. Contact an authorized dealer to service your
cabin air filter, and to have it replaced when needed.
Operating Tips Chart
INTERIOR STORAGE AND EQUIPMENT
STORAGE
Glove Compartment
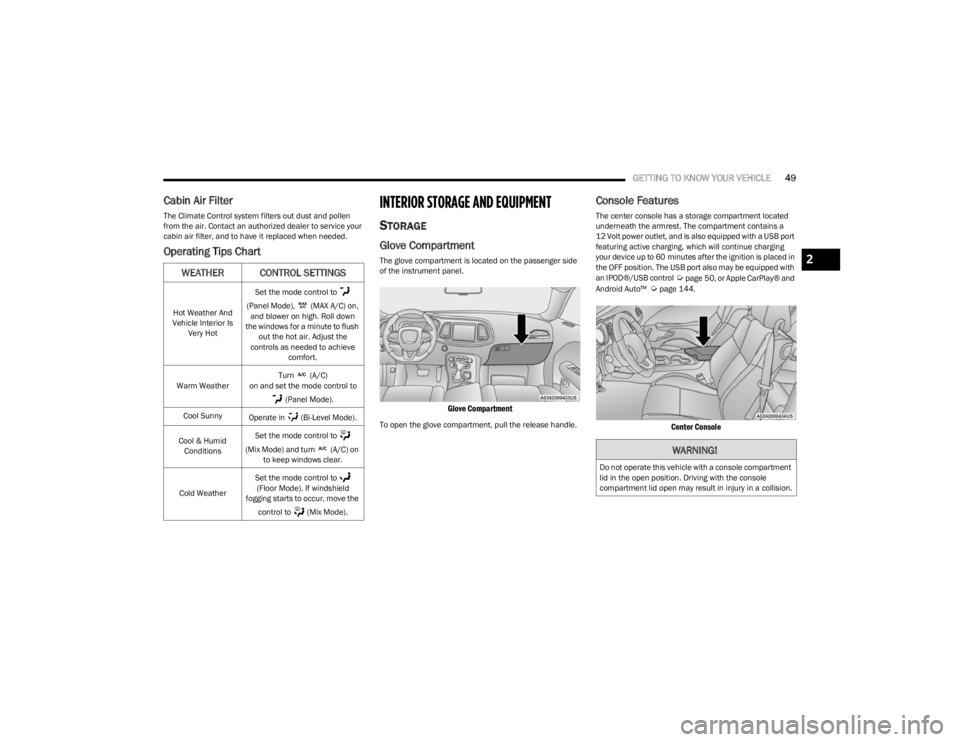
The glove compartment is located on the passenger side
of the instrument panel.
Glove Compartment
To open the glove compartment, pull the release handle.
Console Features
The center console has a storage compartment located
underneath the armrest. The compartment contains a
12 Volt power outlet, and is also equipped with a USB port
featuring active charging, which will continue charging
your device up to 60 minutes after the ignition is placed in
the OFF position. The USB port also may be equipped with
an IPOD®/USB control
Úpage 50, or Apple CarPlay® and
Android Auto™ Úpage 144.
Center Console
WEATHER CONTROL SETTINGS
Hot Weather And
Vehicle Interior Is Very Hot Set the mode control to
(Panel Mode), (MAX A/C) on, and blower on high. Roll down
the windows for a minute to flush out the hot air. Adjust the
controls as needed to achieve comfort.
Warm Weather Turn (A/C)
on and set the mode control to
(Panel Mode).
Cool Sunny Operate in (Bi-Level Mode).
Cool & Humid Conditions Set the mode control to
(Mix Mode) and turn (A/C) on to keep windows clear.
Cold Weather Set the mode control to
(Floor Mode). If windshield
fogging starts to occur, move the
control to (Mix Mode).
WARNING!
Do not operate this vehicle with a console compartment
lid in the open position. Driving with the console
compartment lid open may result in injury in a collision.
2
23_LA_OM_EN_USC_t.book Page 49
Page 52 of 300
50GETTING TO KNOW YOUR VEHICLE
ILLUMINATED CUPHOLDERS —
I
F EQUIPPED
The front cupholders are equipped with a light ring that
illuminates the cupholders for the front passengers. The
light ring is controlled by the dimmer control
Úpage 43.
Light Ring In Front Cupholder
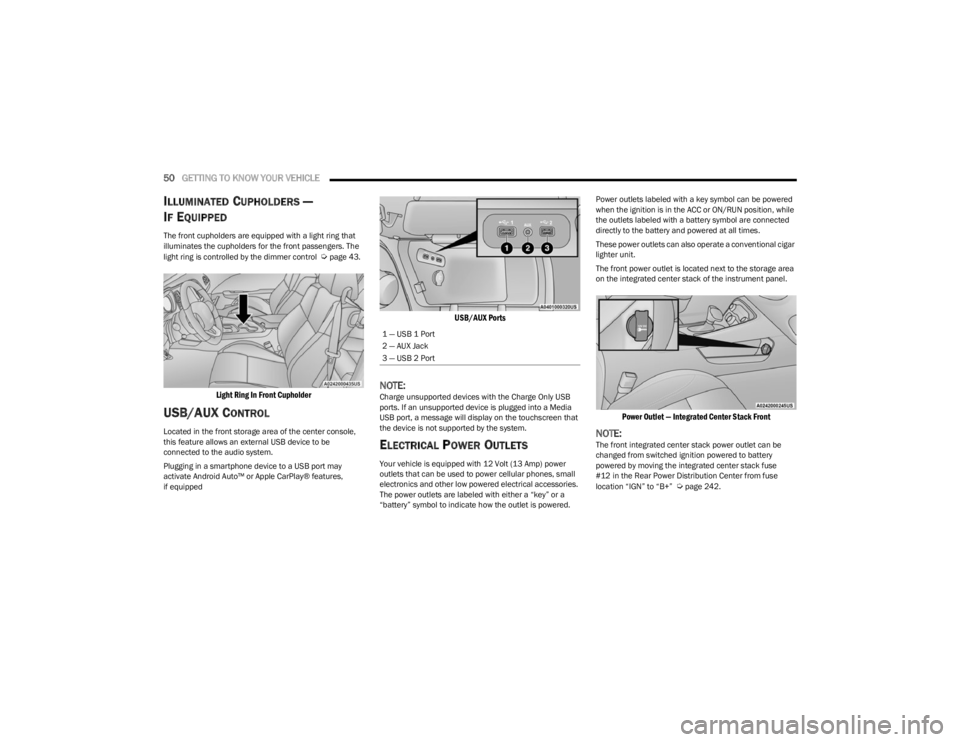
USB/AUX CONTROL
Located in the front storage area of the center console,
this feature allows an external USB device to be
connected to the audio system.
Plugging in a smartphone device to a USB port may
activate Android Auto™ or Apple CarPlay® features,
if equipped
USB/AUX Ports
NOTE:Charge unsupported devices with the Charge Only USB
ports. If an unsupported device is plugged into a Media
USB port, a message will display on the touchscreen that
the device is not supported by the system.
ELECTRICAL POWER OUTLETS
Your vehicle is equipped with 12 Volt (13 Amp) power
outlets that can be used to power cellular phones, small
electronics and other low powered electrical accessories.
The power outlets are labeled with either a “key” or a
“battery” symbol to indicate how the outlet is powered. Power outlets labeled with a key symbol can be powered
when the ignition is in the ACC or ON/RUN position, while
the outlets labeled with a battery symbol are connected
directly to the battery and powered at all times.
These power outlets can also operate a conventional cigar
lighter unit.
The front power outlet is located next to the storage area
on the integrated center stack of the instrument panel.
Power Outlet — Integrated Center Stack Front
NOTE:The front integrated center stack power outlet can be
changed from switched ignition powered to battery
powered by moving the integrated center stack fuse
#12 in the Rear Power Distribution Center from fuse
location “IGN” to “B+”
Úpage 242.
1 — USB 1 Port
2 — AUX Jack
3 — USB 2 Port
23_LA_OM_EN_USC_t.book Page 50
Page 53 of 300
GETTING TO KNOW YOUR VEHICLE51
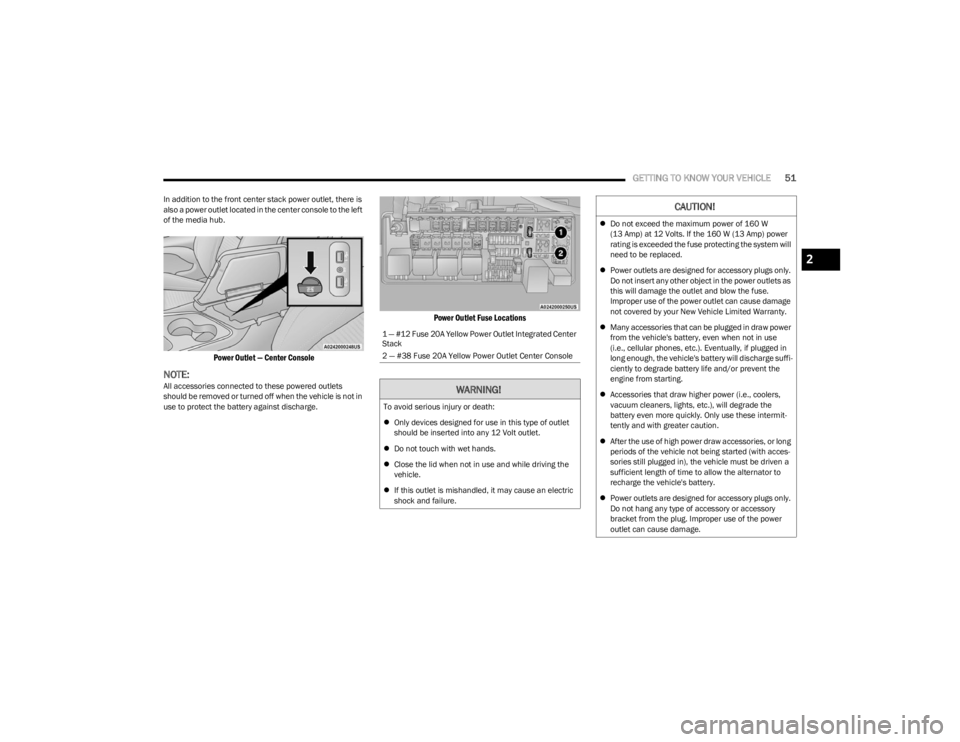
In addition to the front center stack power outlet, there is
also a power outlet located in the center console to the left
of the media hub.
Power Outlet — Center Console
NOTE:All accessories connected to these powered outlets
should be removed or turned off when the vehicle is not in
use to protect the battery against discharge.
Power Outlet Fuse Locations
1 — #12 Fuse 20A Yellow Power Outlet Integrated Center
Stack
2 — #38 Fuse 20A Yellow Power Outlet Center Console
WARNING!
To avoid serious injury or death:
Only devices designed for use in this type of outlet
should be inserted into any 12 Volt outlet.
Do not touch with wet hands.
Close the lid when not in use and while driving the
vehicle.
If this outlet is mishandled, it may cause an electric
shock and failure.
CAUTION!
Do not exceed the maximum power of 160 W
(13 Amp) at 12 Volts. If the 160 W (13 Amp) power
rating is exceeded the fuse protecting the system will
need to be replaced.
Power outlets are designed for accessory plugs only.
Do not insert any other object in the power outlets as
this will damage the outlet and blow the fuse.
Improper use of the power outlet can cause damage
not covered by your New Vehicle Limited Warranty.
Many accessories that can be plugged in draw power
from the vehicle's battery, even when not in use
(i.e., cellular phones, etc.). Eventually, if plugged in
long enough, the vehicle's battery will discharge suffi -
ciently to degrade battery life and/or prevent the
engine from starting.
Accessories that draw higher power (i.e., coolers,
vacuum cleaners, lights, etc.), will degrade the
battery even more quickly. Only use these intermit -
tently and with greater caution.
After the use of high power draw accessories, or long
periods of the vehicle not being started (with acces -
sories still plugged in), the vehicle must be driven a
sufficient length of time to allow the alternator to
recharge the vehicle's battery.
Power outlets are designed for accessory plugs only.
Do not hang any type of accessory or accessory
bracket from the plug. Improper use of the power
outlet can cause damage.
2
23_LA_OM_EN_USC_t.book Page 51
Page 149 of 300

MULTIMEDIA147
Messages
Push and hold the VR button on the steering
wheel to activate a Siri voice recognition
session. Apple CarPlay® allows you to use Siri
to send or reply to text messages. Siri can also
read incoming text messages, but drivers will not be able
to read messages, as everything is done via voice.
Maps
Push and hold the VR button on the steering
wheel until the beep or tap the Microphone
icon to ask Apple® Siri to take you to a desired
destination by voice. You can also touch the
Navigation icon in Apple CarPlay® to access
Apple® Maps.
Apps
The Apple CarPlay® App plays all compatible apps that are
available to use, every time it is launched. You must have
the compatible app downloaded, and you must be signed
in to the app through your mobile device for it to work with
Apple CarPlay®.
Refer to http://www.apple.com/ios/carplay/ (US) or
https://www.apple.com/ca/ios/carplay/ (Canada) to see
the latest list of available apps for Apple CarPlay®.
Apple CarPlay® Voice Command
NOTE:Feature availability depends on your carrier and mobile
phone maker. Some Apple CarPlay® features may not be
available in every region and/or language.
Apple CarPlay® allows you to use your voice to interact
with Siri through your vehicle’s voice recognition system,
and use your smartphone’s data plan to project your
iPhone® and a number of its apps onto your Uconnect
touchscreen. Connect your iPhone® 5 or higher to one of
the media USB ports, using the factory-provided Lightning
cable, and press the new Apple CarPlay® icon that
replaces your Phone icon on the main menu bar to begin
Apple CarPlay®. Push and hold the VR button on the
steering wheel, or press and hold the Home button within
Apple CarPlay®, to activate Siri, which recognizes natural
voice commands to use a list of your iPhone® features:
Phone
Music
Messages
Maps — If Equipped
Additional Apps — If Equipped
NOTE:Apple CarPlay® is a trademark of Apple® Inc. iPhone® is
a trademark of Apple® Inc., registered in the US and other
countries. Apple® terms of use and privacy statements
apply.
ANDROID AUTO™ AND APPLE
C
ARPLAY® TIPS AND TRICKS
Android Auto™ And Apple CarPlay® Automatic Bluetooth®
Pairing
After connecting to Android Auto™ or Apple CarPlay® for
the first time and undergoing the setup procedure, the
smartphone pairs to the Uconnect system via Bluetooth®
without any setup required every time it is within range, if
Bluetooth® is turned on.
NOTE:Apple CarPlay® uses a USB connection while Android
Auto™ uses both USB and Bluetooth® connections to
function. The connected device is unavailable to other
devices when connected using Android Auto™ or Apple
CarPlay®.
Multiple Devices Connecting To The Uconnect System —
If Equipped
It is possible to have multiple devices connected to the
Uconnect system. For example, if using Android Auto™/
Apple CarPlay®, the connected device will be used to
place hands-free phone calls or send hands-free text
messages. However, another device can also be paired to
the Uconnect system, via Bluetooth®, as an audio source,
so the passenger can stream music.
NOTE:Apple CarPlay® and Android Auto™ can only be launched
from the front and center console USB ports.
5
23_LA_OM_EN_USC_t.book Page 147
Page 221 of 300
IN CASE OF EMERGENCY219
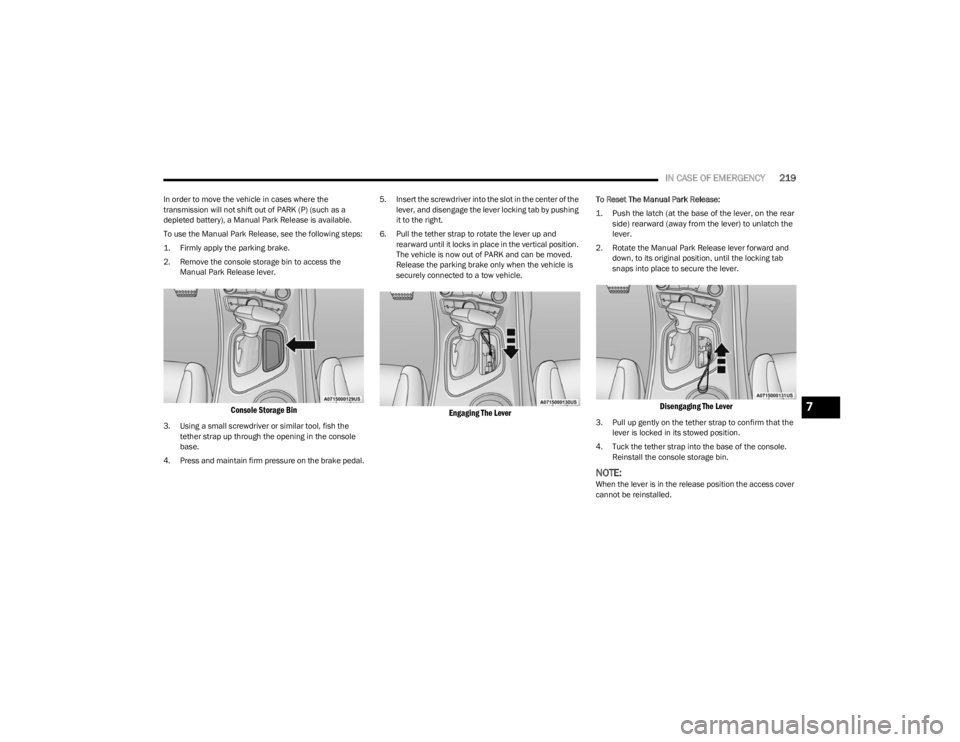
In order to move the vehicle in cases where the
transmission will not shift out of PARK (P) (such as a
depleted battery), a Manual Park Release is available.
To use the Manual Park Release, see the following steps:
1. Firmly apply the parking brake.
2. Remove the console storage bin to access the
Manual Park Release lever.
Console Storage Bin
3. Using a small screwdriver or similar tool, fish the tether strap up through the opening in the console
base.
4. Press and maintain firm pressure on the brake pedal. 5. Insert the screwdriver into the slot in the center of the
lever, and disengage the lever locking tab by pushing
it to the right.
6. Pull the tether strap to rotate the lever up and rearward until it locks in place in the vertical position.
The vehicle is now out of PARK and can be moved.
Release the parking brake only when the vehicle is
securely connected to a tow vehicle.
Engaging The Lever
To Reset The Manual Park Release:
1. Push the latch (at the base of the lever, on the rear side) rearward (away from the lever) to unlatch the
lever.
2. Rotate the Manual Park Release lever forward and down, to its original position, until the locking tab
snaps into place to secure the lever.
Disengaging The Lever
3. Pull up gently on the tether strap to confirm that the lever is locked in its stowed position.
4. Tuck the tether strap into the base of the console. Reinstall the console storage bin.
NOTE:When the lever is in the release position the access cover
cannot be reinstalled.
7
23_LA_OM_EN_USC_t.book Page 219