2023 CHRYSLER PACIFICA seats
[x] Cancel search: seatsPage 164 of 328

162MULTIMEDIA
Display
App Drawer Unfavoritings Popups This setting will allow you to unfavorite app drawer pop-ups with “On” and “Off” options.
New Text Message Popups This setting will allow you to have pop-up notifications for new text messages. This setting
options are “On” and “Off”.
Missed Calls Message This setting will allow you to have pop-up notifications for missed calls. This setting
options are “On” and “Off”.
Navigation Popups This setting will allow you to have pop-up notifications for Navigation. This setting options
are “On” and “Off”.
Navigation Settings This setting will allow you to customize the settings within Navigation Mode.
Auto-On Driver Heated Seat & Steering Wheel This setting will activate the vehicle’s comfort systems and heated seats or heated
steering wheel when the vehicle is remote started or ignition is started. The “Off” setting
will not activate the comfort systems. The “Remote Start” setting will only activate the
comfort systems when using Remote Start. The “All Start” setting will activate the comfort
systems whenever the vehicle is started.
Audio Settings This setting will take you to the audio settings for the vehicle profiles.
Reset App Drawer to Default Order This setting will reset the app drawer to its factory default layout.
Restore Settings to Default This setting will return all the previously changed settings to their factory defaults.
More Profile Options This setting will give access to more profile options.
Setting NameDescription
After pressing the Display button on the touchscreen, the following settings will be available:
NOTE:Depending on the vehicle’s options, feature settings may vary.
Setting NameDescription
Language This setting will change the language of the Uconnect system and Instrument Cluster
Display. The available languages are English, Français, Español, and Italiano.
23_RUP_OM_EN_USC_t.book Page 162
Page 173 of 328

MULTIMEDIA171
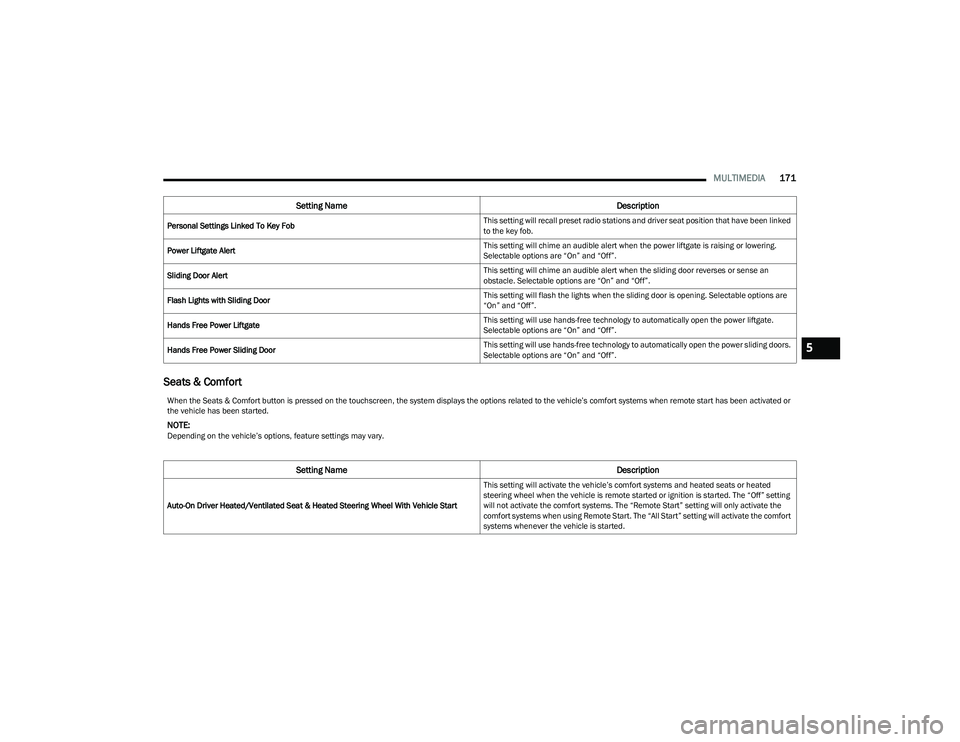
Seats & Comfort
Personal Settings Linked To Key Fob This setting will recall preset radio stations and driver seat position that have been linked
to the key fob.
Power Liftgate Alert This setting will chime an audible alert when the power liftgate is raising or lowering.
Selectable options are “On” and “Off”.
Sliding Door Alert This setting will chime an audible alert when the sliding door reverses or sense an
obstacle. Selectable options are “On” and “Off”.
Flash Lights with Sliding Door This setting will flash the lights when the sliding door is opening. Selectable options are
“On” and “Off”.
Hands Free Power Liftgate This setting will use hands-free technology to automatically open the power liftgate.
Selectable options are “On” and “Off”.
Hands Free Power Sliding Door This setting will use hands-free technology to automatically open the power sliding doors.
Selectable options are “On” and “Off”.
Setting Name
Description
When the Seats & Comfort button is pressed on the touchscreen, the system displays the options related to the vehicle’s comfort systems when remote start has been activated or
the vehicle has been started.
NOTE:Depending on the vehicle’s options, feature settings may vary.
Setting NameDescription
Auto-On Driver Heated/Ventilated Seat & Heated Steering Wheel With Vehicle Start This setting will activate the vehicle’s comfort systems and heated seats or heated
steering wheel when the vehicle is remote started or ignition is started. The “Off” setting
will not activate the comfort systems. The “Remote Start” setting will only activate the
comfort systems when using Remote Start. The “All Start” setting will activate the comfort
systems whenever the vehicle is started.
5
23_RUP_OM_EN_USC_t.book Page 171
Page 174 of 328

172MULTIMEDIA
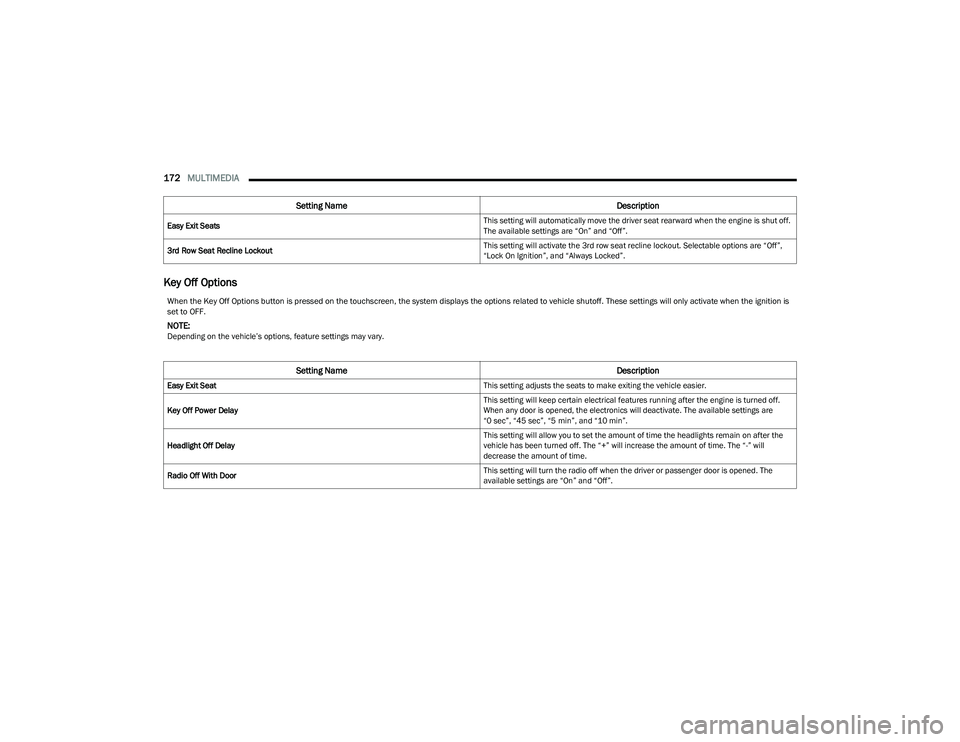
Key Off Options
Easy Exit Seats This setting will automatically move the driver seat rearward when the engine is shut off.
The available settings are “On” and “Off”.
3rd Row Seat Recline Lockout This setting will activate the 3rd row seat recline lockout. Selectable options are “Off”,
“Lock On Ignition”, and “Always Locked”.
Setting Name
Description
When the Key Off Options button is pressed on the touchscreen, the system displays the options related to vehicle shutoff. These settings will only activate when the ignition is
set to OFF.
NOTE:Depending on the vehicle’s options, feature settings may vary.
Setting NameDescription
Easy Exit Seat This setting adjusts the seats to make exiting the vehicle easier.
Key Off Power Delay This setting will keep certain electrical features running after the engine is turned off.
When any door is opened, the electronics will deactivate. The available settings are
“0 sec”, “45 sec”, “5 min”, and “10 min”.
Headlight Off Delay This setting will allow you to set the amount of time the headlights remain on after the
vehicle has been turned off. The “+” will increase the amount of time. The “-” will
decrease the amount of time.
Radio Off With Door This setting will turn the radio off when the driver or passenger door is opened. The
available settings are “On” and “Off”.
23_RUP_OM_EN_USC_t.book Page 172
Page 185 of 328

MULTIMEDIA183
FIRE TV APPS/GAMES (USING THE
R
EAR SCREENS)
Apps and games can be accessed using Rear Seat
Entertainment with Fire TV built-in.
To access Apps on the rear screen, turn on the system and
select “Find” in the top menu. On the Find page, select
“App store®”. Within the App store® you can purchase
apps and games. From here you can also select from all
the apps and games that have been purchased.
USING THE VIDEO USB PORT
Plug in a USB drive or mass storage device and play your
favorite music or movies.
NOTE:To view USB media on the rear screens, insert a USB drive
into the port next to the DVD/Blu-ray™ Disc player. The
USB drive port is located under the radio controls in the
instrument panel.
On the rear screen you can browse the content of the USB
device by going to the USB source in the inputs. Use the
search feature to find your media faster.
PLAY VIDEO GAMES
Connect the video game console to either of the HDMI
ports located behind either of the first row seats.
AUX/HDMI/USB
NOTE:
Certain high-end video games may exceed the power limit
of the vehicle's Power Inverter Úpage 77.
HEADPHONES OPERATION
Rear Seat Entertainment with Fire TV built-in does not
come equipped with headphones. Customers will need to
provide their own wireless headphones that can be paired
with the system using Bluetooth®. Customers can also
use their own wired headphones and plug them into a
Headphone Jack located under one of the rear screens.
Wireless Headphones Pairing
To pair wireless headphones with Rear Seat
Entertainment with Fire TV built-in using the rear screens,
follow these steps:
1. Push the Gear/Settings button on the Voice Remote with Alexa or tap the screen.
2. Select the Gear/Settings icon on the screen.
3. Select “Settings” on the screen.
4. While in Settings, select “Controllers & Bluetooth® Devices”.
5. Select “Other Bluetooth® Devices” and follow the on-screen steps for pairing.
While multiple headphones can be paired, only one will
output audio at a time.
1 — Headphone Jack (Headphone Output Only)
2 — HDMI Port
3 — USB Port (Charge Only)
5
23_RUP_OM_EN_USC_t.book Page 183
Page 193 of 328

SAFETY191
(Continued)
Disabling And Enabling HSA
This feature can be turned on or turned off. To change the
current setting, proceed as follows: Úpage 157.
Towing With HSA
HSA will also provide assistance to mitigate roll back while
towing a trailer.
Rain Brake Support (RBS)
RBS may improve braking performance in wet conditions.
It will periodically apply a small amount of brake pressure
to remove any water buildup on the front brake rotors. It
functions when the windshield wipers are in LO or HI
speed. When RBS is active, there is no notification to the
driver and no driver interaction is required.
Ready Alert Braking (RAB)
RAB may reduce the time required to reach full braking
during emergency braking situations. It anticipates when
an emergency braking situation may occur by monitoring
how fast the throttle is released by the driver. The
Electronic Brake Control (EBC) system will prepare the
brake system for a panic stop.
Rear Seat Reminder Alert (RSRA)
RSRA alerts you through a visual and auditory notification
of the possible presence of an object, passenger, or pet in
the rear seats if a rear door was opened up to 10 minutes
before the ignition was placed in the ON/RUN position.
RSRA does not directly detect objects, passengers, or pets
in the rear seats. When the previous conditions are met,
RSRA displays the message “Check Rear Seat” on the
instrument cluster display and sounds an auditory alert
upon the driver placing the ignition in the OFF position to
exit the vehicle.
To enable or disable RSRA, see
Úpage 157.
Traction Control System (TCS)
The TCS monitors the amount of wheel spin of each of the
driven wheels. If wheel spin is detected, the TCS may apply
brake pressure to the spinning wheel(s) and/or reduce
vehicle power to provide enhanced acceleration and
stability. A feature of the TCS, Brake Limited Differential
(BLD) functions similarly to a limited slip differential and
controls the wheel spin across a driven axle. If one wheel
on a driven axle is spinning faster than the other, the
system will apply the brake of the spinning wheel. This will
allow more vehicle torque to be applied to the wheel that
is not spinning. BLD may remain enabled even if TCS and
the Electronic Stability Control (ESC) are in reduced
modes.
WARNING!
If you use a trailer brake controller with your trailer,
the trailer brakes may be activated and deactivated
with the brake switch. If so, there may not be enough
brake pressure to hold both the vehicle and the
trailer on a hill when the brake pedal is released. In
order to avoid rolling down an incline while resuming
acceleration, manually activate the trailer brake or
apply more vehicle brake pressure prior to releasing
the brake pedal.
HSA is not a parking brake. Always apply the parking
brake fully when exiting your vehicle. Also, be certain
to place the transmission in PARK.
Failure to follow these warnings can result in a colli -
sion or serious personal injury.
WARNING!
Before exiting a vehicle, always come to a complete
stop, then shift the automatic transmission into
PARK and apply the parking brake.
Always make sure the keyless ignition node is in the
OFF position, key fob is removed from the vehicle
and vehicle is locked.
Never leave children alone in a vehicle, or with
access to an unlocked vehicle. Leaving children in a
vehicle unattended is dangerous for a number of
reasons. A child or others could be seriously or fatally
injured. Children should be warned not to touch the
parking brake, brake pedal or the gear selector.
Do not leave children or animals inside parked vehi -
cles in hot weather. Interior heat buildup may cause
serious injury or death.
WARNING!
6
23_RUP_OM_EN_USC_t.book Page 191
Page 202 of 328

200SAFETY
Should this occur, you should stop as soon as possible
and inflate the tires with low pressure (those in a different
color in the instrument cluster graphic) to the vehicle’s
recommended cold placard pressure value as shown in
the "Inflate to XX" message. Once the system receives the
updated tire pressures, the system will automatically
update, the pressure values in the graphic display in the
instrument cluster will return to their original color, and
the TPMS Warning Light will turn off. The vehicle may need
to be driven for up to 20 minutes above 15 mph
(24 km/h) in order for the TPMS to receive this
information.
TPMS DEACTIVATION — IF EQUIPPED
The Tire Pressure Monitoring System (TPMS) can be
deactivated if replacing all four wheel and tire assemblies
(road tires) with wheel and tire assemblies that do not
have TPMS sensors, such as when installing winter wheel
and tire assemblies on your vehicle.
To deactivate the TPMS, first, replace all four wheel and
tire assemblies (road tires) with tires not equipped with
Tire Pressure Monitoring System (TPMS) sensors. Then,
drive the vehicle for 20 minutes above 15 mph (24 km/h).
The TPMS will chime, the TPMS Warning Light will flash on
and off for 75 seconds and then remain on. The
instrument cluster will display the “SERVICE TPM
SYSTEM” message and then display dashes (--) in place of
the pressure values.
Beginning with the next ignition cycle, the TPMS will no
longer chime or display the “SERVICE TPM SYSTEM” message in the instrument cluster but dashes (--) will
remain in place of the pressure values.
To reactivate the TPMS, replace all four wheel and tire
assemblies (road tires) with tires equipped with TPMS
sensors. Then, drive the vehicle for up to 20 minutes
above 15 mph (24 km/h). The TPMS will chime, the TPMS
Warning Light will flash on and off for 75 seconds and then
turn off. The instrument cluster will display the “SERVICE
TPM SYSTEM” message and then display pressure values
in place of the dashes. On the next ignition cycle the
"SERVICE TPM SYSTEM" message will no longer be
displayed as long as no system fault exists.OCCUPANT RESTRAINT SYSTEMS
Some of the most important safety features in your vehicle
are the restraint systems:
OCCUPANT RESTRAINT SYSTEMS
F
EATURES
Seat Belt Systems
Supplemental Restraint Systems (SRS) Air Bags
Child Restraints
Some of the safety features described in this section may
be standard equipment on some models, or may be
optional equipment on others. If you are not sure, ask an
authorized dealer.
IMPORTANT SAFETY PRECAUTIONS
Please pay close attention to the information in this
section. It tells you how to use your restraint system properly, to keep you and your passengers as safe as
possible.
Here are some simple steps you can take to minimize the
risk of harm from a deploying air bag:
1. Children 12 years old and under should always ride
buckled up in the rear seat of a vehicle with a rear
seat.
2. A child who is not big enough to wear the vehicle seat belt properly must be secured in the appropriate child
restraint or belt-positioning booster seat in a rear
seating position
Úpage 219.
3. If a child from 2 to 12 years old (not in a rear-facing child restraint) must ride in the front passenger seat,
move the seat as far back as possible and use the
proper child restraint
Úpage 219.
4. Never allow children to slide the shoulder belt behind them or under their arm.
5. You should read the instructions provided with your child restraint to make sure that you are using it
properly.
6. All occupants should always wear their lap and shoulder belts properly.
7. The driver and front passenger seats should be moved back as far as practical to allow the front air
bags room to inflate.
8. Do not lean against the door or window. If your vehicle has side air bags, and deployment occurs, the side air
bags will inflate forcefully into the space between
occupants and the door and occupants could be injured.
9. If the air bag system in this vehicle needs to be modified to accommodate a disabled person, see
23_RUP_OM_EN_USC_t.book Page 200
Page 204 of 328

202SAFETY
(Continued)
(Continued)
(Continued)
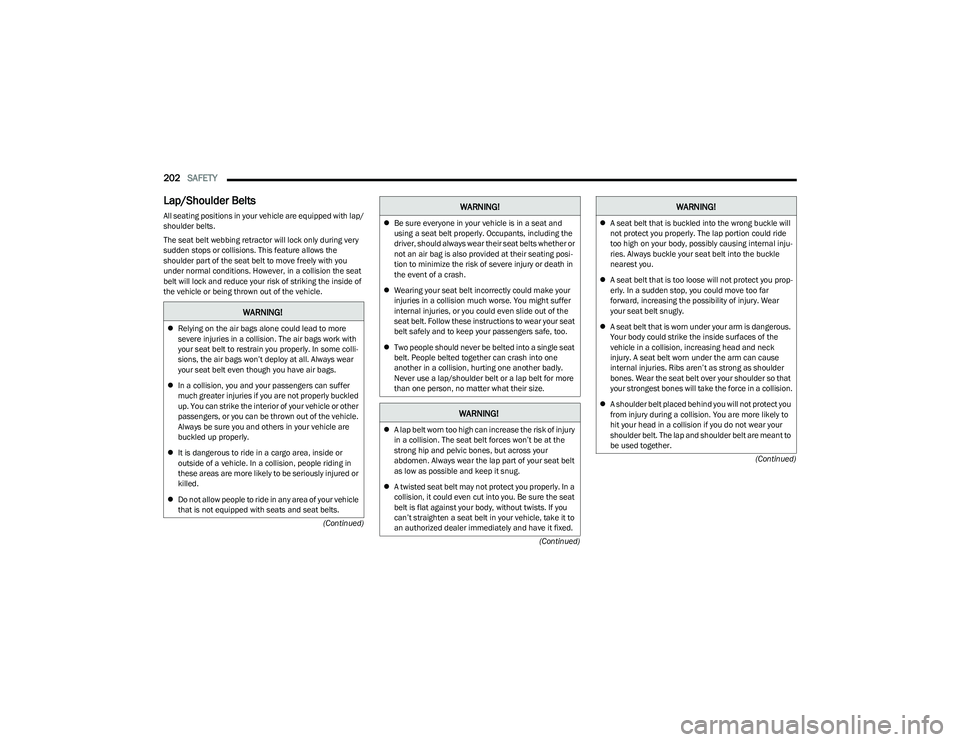
Lap/Shoulder Belts
All seating positions in your vehicle are equipped with lap/
shoulder belts.
The seat belt webbing retractor will lock only during very
sudden stops or collisions. This feature allows the
shoulder part of the seat belt to move freely with you
under normal conditions. However, in a collision the seat
belt will lock and reduce your risk of striking the inside of
the vehicle or being thrown out of the vehicle.
WARNING!
Relying on the air bags alone could lead to more
severe injuries in a collision. The air bags work with
your seat belt to restrain you properly. In some colli -
sions, the air bags won’t deploy at all. Always wear
your seat belt even though you have air bags.
In a collision, you and your passengers can suffer
much greater injuries if you are not properly buckled
up. You can strike the interior of your vehicle or other
passengers, or you can be thrown out of the vehicle.
Always be sure you and others in your vehicle are
buckled up properly.
It is dangerous to ride in a cargo area, inside or
outside of a vehicle. In a collision, people riding in
these areas are more likely to be seriously injured or
killed.
Do not allow people to ride in any area of your vehicle
that is not equipped with seats and seat belts.
Be sure everyone in your vehicle is in a seat and
using a seat belt properly. Occupants, including the
driver, should always wear their seat belts whether or
not an air bag is also provided at their seating posi -
tion to minimize the risk of severe injury or death in
the event of a crash.
Wearing your seat belt incorrectly could make your
injuries in a collision much worse. You might suffer
internal injuries, or you could even slide out of the
seat belt. Follow these instructions to wear your seat
belt safely and to keep your passengers safe, too.
Two people should never be belted into a single seat
belt. People belted together can crash into one
another in a collision, hurting one another badly.
Never use a lap/shoulder belt or a lap belt for more
than one person, no matter what their size.
WARNING!
A lap belt worn too high can increase the risk of injury
in a collision. The seat belt forces won’t be at the
strong hip and pelvic bones, but across your
abdomen. Always wear the lap part of your seat belt
as low as possible and keep it snug.
A twisted seat belt may not protect you properly. In a
collision, it could even cut into you. Be sure the seat
belt is flat against your body, without twists. If you
can’t straighten a seat belt in your vehicle, take it to
an authorized dealer immediately and have it fixed.
WARNING!
A seat belt that is buckled into the wrong buckle will
not protect you properly. The lap portion could ride
too high on your body, possibly causing internal inju -
ries. Always buckle your seat belt into the buckle
nearest you.
A seat belt that is too loose will not protect you prop -
erly. In a sudden stop, you could move too far
forward, increasing the possibility of injury. Wear
your seat belt snugly.
A seat belt that is worn under your arm is dangerous.
Your body could strike the inside surfaces of the
vehicle in a collision, increasing head and neck
injury. A seat belt worn under the arm can cause
internal injuries. Ribs aren’t as strong as shoulder
bones. Wear the seat belt over your shoulder so that
your strongest bones will take the force in a collision.
A shoulder belt placed behind you will not protect you
from injury during a collision. You are more likely to
hit your head in a collision if you do not wear your
shoulder belt. The lap and shoulder belt are meant to
be used together.
WARNING!
23_RUP_OM_EN_USC_t.book Page 202
Page 206 of 328

204SAFETY
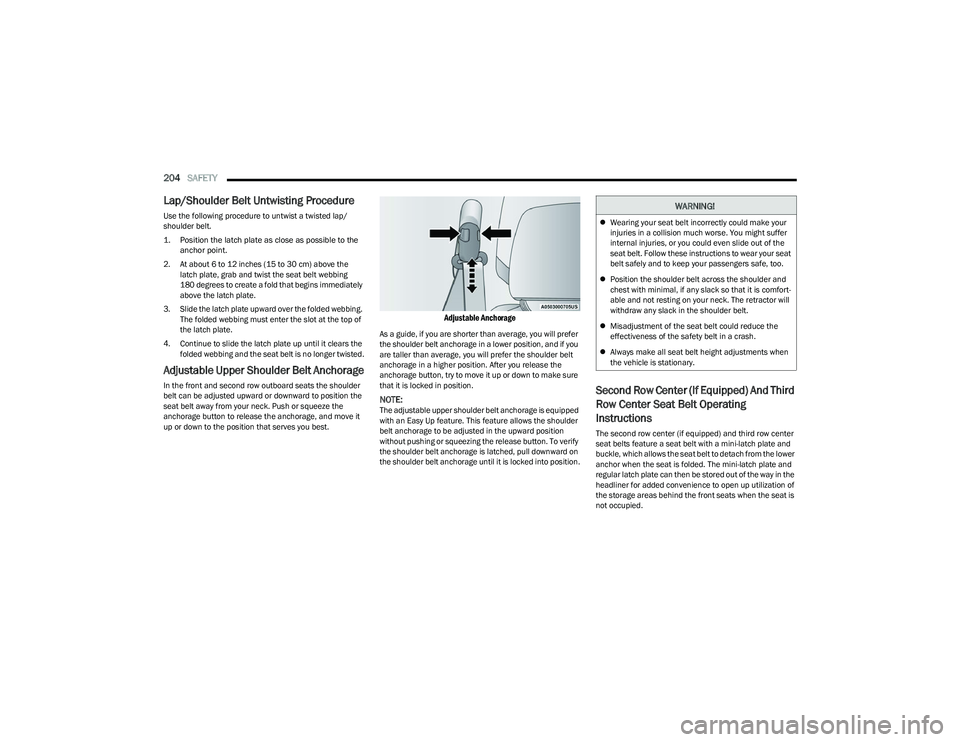
Lap/Shoulder Belt Untwisting Procedure
Use the following procedure to untwist a twisted lap/
shoulder belt.
1. Position the latch plate as close as possible to the
anchor point.
2. At about 6 to 12 inches (15 to 30 cm) above the latch plate, grab and twist the seat belt webbing
180 degrees to create a fold that begins immediately
above the latch plate.
3. Slide the latch plate upward over the folded webbing. The folded webbing must enter the slot at the top of
the latch plate.
4. Continue to slide the latch plate up until it clears the folded webbing and the seat belt is no longer twisted.
Adjustable Upper Shoulder Belt Anchorage
In the front and second row outboard seats the shoulder
belt can be adjusted upward or downward to position the
seat belt away from your neck. Push or squeeze the
anchorage button to release the anchorage, and move it
up or down to the position that serves you best.
Adjustable Anchorage
As a guide, if you are shorter than average, you will prefer
the shoulder belt anchorage in a lower position, and if you
are taller than average, you will prefer the shoulder belt
anchorage in a higher position. After you release the
anchorage button, try to move it up or down to make sure
that it is locked in position.
NOTE:The adjustable upper shoulder belt anchorage is equipped
with an Easy Up feature. This feature allows the shoulder
belt anchorage to be adjusted in the upward position
without pushing or squeezing the release button. To verify
the shoulder belt anchorage is latched, pull downward on
the shoulder belt anchorage until it is locked into position.
Second Row Center (If Equipped) And Third
Row Center Seat Belt Operating
Instructions
The second row center (if equipped) and third row center
seat belts feature a seat belt with a mini-latch plate and
buckle, which allows the seat belt to detach from the lower
anchor when the seat is folded. The mini-latch plate and
regular latch plate can then be stored out of the way in the
headliner for added convenience to open up utilization of
the storage areas behind the front seats when the seat is
not occupied.
WARNING!
Wearing your seat belt incorrectly could make your
injuries in a collision much worse. You might suffer
internal injuries, or you could even slide out of the
seat belt. Follow these instructions to wear your seat
belt safely and to keep your passengers safe, too.
Position the shoulder belt across the shoulder and
chest with minimal, if any slack so that it is comfort -
able and not resting on your neck. The retractor will
withdraw any slack in the shoulder belt.
Misadjustment of the seat belt could reduce the
effectiveness of the safety belt in a crash.
Always make all seat belt height adjustments when
the vehicle is stationary.
23_RUP_OM_EN_USC_t.book Page 204