2023 CHRYSLER PACIFICA HYBRID radio
[x] Cancel search: radioPage 184 of 328

182MULTIMEDIA
The front radio screen offers some options:
Power — This will turn Fire TV on or off.
Screen 1 and Screen 2 Toggle — This toggles between
the Rear Screens (for use with front radio screen only).
Collapse — While viewing on the front radio screen, this
will collapse the screen to dashboard view.
Source Drawer — This will open the “Source Drawer”
and the source logo will be displayed on the icon.
Browse Media — This will open the “Browse Media”
pop-up.
Back — This will let you go back the previous page.
Fire TV Home — This will take you back to the Fire TV
home page.
Menu — This will open the Fire TV menu.
Remote icon — This will display the on-screen remote.
NOTE:Front radio screen mirroring and watching can only be
done when the vehicle is in PARK. The vehicle must be in
an active and usable cellular range and properly equipped
with a Uconnect 5 NAV system and Rear Seat Enter -
tainment with Fire TV package. For streaming, a Wi-Fi
connection and registered Amazon account are required
to run Fire TV in the vehicle. Streaming service subscrip -
tions are not included. Services and features are subject
to change or withdrawal at any time, may not be available
in all areas and languages, and may require separate
subscriptions.
PLAY A BLU-RAY™ OR DVD —
I
F EQUIPPED
Playing a Blu-ray™ or DVD from the Front Radio Screen
1. Insert a Blu-ray™ disc or DVD disc into the disc
player with the label facing up.
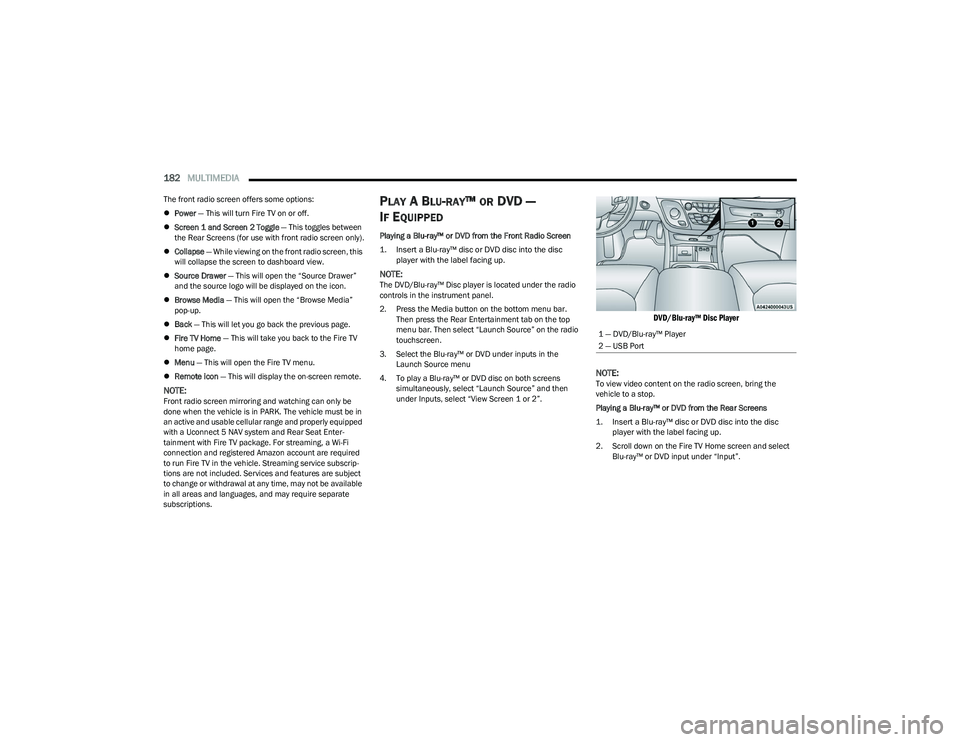
NOTE:The DVD/Blu-ray™ Disc player is located under the radio
controls in the instrument panel.
2. Press the Media button on the bottom menu bar. Then press the Rear Entertainment tab on the top
menu bar. Then select “Launch Source” on the radio
touchscreen.
3. Select the Blu-ray™ or DVD under inputs in the Launch Source menu
4. To play a Blu-ray™ or DVD disc on both screens simultaneously, select “Launch Source” and then
under Inputs, select “View Screen 1 or 2”.
DVD/Blu-ray™ Disc Player
NOTE:
To view video content on the radio screen, bring the
vehicle to a stop.
Playing a Blu-ray™ or DVD from the Rear Screens
1. Insert a Blu-ray™ disc or DVD disc into the disc player with the label facing up.
2. Scroll down on the Fire TV Home screen and select Blu-ray™ or DVD input under “Input”.
1 — DVD/Blu-ray™ Player
2 — USB Port
23_RUP_OM_EN_USC_t.book Page 182
Page 185 of 328

MULTIMEDIA183
FIRE TV APPS/GAMES (USING THE
R
EAR SCREENS)
Apps and games can be accessed using Rear Seat
Entertainment with Fire TV built-in.
To access Apps on the rear screen, turn on the system and
select “Find” in the top menu. On the Find page, select
“App store®”. Within the App store® you can purchase
apps and games. From here you can also select from all
the apps and games that have been purchased.
USING THE VIDEO USB PORT
Plug in a USB drive or mass storage device and play your
favorite music or movies.
NOTE:To view USB media on the rear screens, insert a USB drive
into the port next to the DVD/Blu-ray™ Disc player. The
USB drive port is located under the radio controls in the
instrument panel.
On the rear screen you can browse the content of the USB
device by going to the USB source in the inputs. Use the
search feature to find your media faster.
PLAY VIDEO GAMES
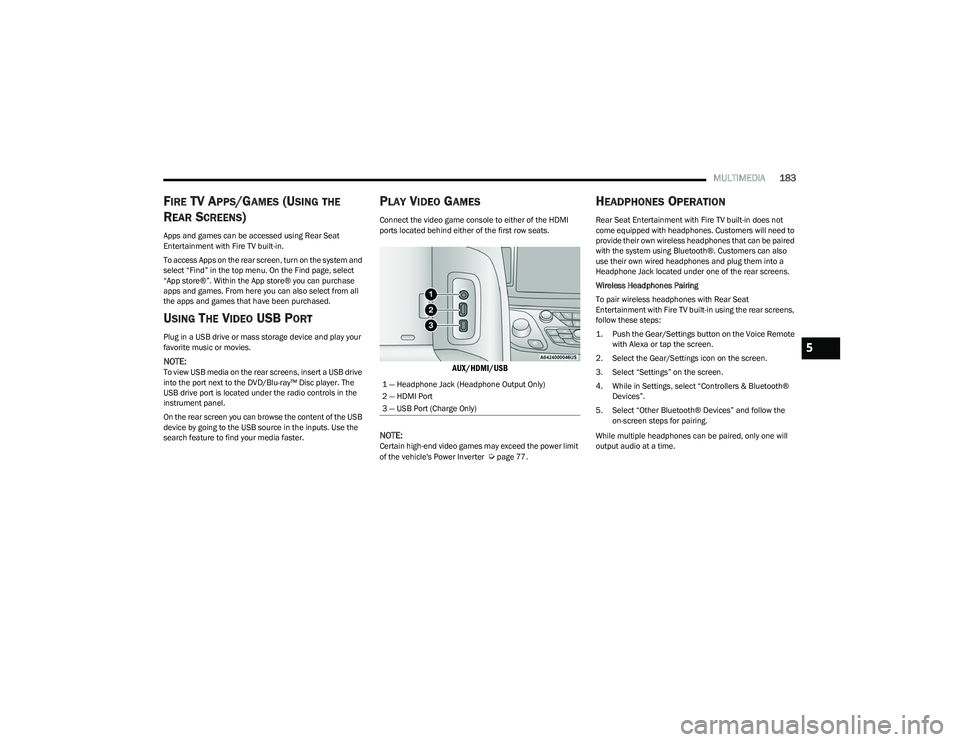
Connect the video game console to either of the HDMI
ports located behind either of the first row seats.
AUX/HDMI/USB
NOTE:
Certain high-end video games may exceed the power limit
of the vehicle's Power Inverter Úpage 77.
HEADPHONES OPERATION
Rear Seat Entertainment with Fire TV built-in does not
come equipped with headphones. Customers will need to
provide their own wireless headphones that can be paired
with the system using Bluetooth®. Customers can also
use their own wired headphones and plug them into a
Headphone Jack located under one of the rear screens.
Wireless Headphones Pairing
To pair wireless headphones with Rear Seat
Entertainment with Fire TV built-in using the rear screens,
follow these steps:
1. Push the Gear/Settings button on the Voice Remote with Alexa or tap the screen.
2. Select the Gear/Settings icon on the screen.
3. Select “Settings” on the screen.
4. While in Settings, select “Controllers & Bluetooth® Devices”.
5. Select “Other Bluetooth® Devices” and follow the on-screen steps for pairing.
While multiple headphones can be paired, only one will
output audio at a time.
1 — Headphone Jack (Headphone Output Only)
2 — HDMI Port
3 — USB Port (Charge Only)
5
23_RUP_OM_EN_USC_t.book Page 183
Page 188 of 328

186MULTIMEDIA
LEGAL & COMPLIANCE
To access Legal and Compliance information about Rear
Seat Entertainment with Fire TV built-in from the rear
screens, follow these steps:
1. Push the Gear/Settings button on the Voice Remote
with Alexa or tap the screen.
2. Select the Gear/Settings icon on the screen.
3. Select “Settings” on the screen.
4. While in the Settings menu, select “My Fire TV” and then “Legal & Compliance”.
RADIO OPERATION AND MOBILE PHONES
Under certain conditions, the mobile phone being on in
your vehicle can cause erratic or noisy performance from
your radio. This condition may be lessened or eliminated
by repositioning the mobile phone within the vehicle. This
condition is not harmful to the radio. If your radio
performance does not satisfactorily improve from
repositioning the mobile phone, it is recommended that
the volume be turned down or off during mobile phone
operation when not using the Uconnect system.
REGULATORY AND SAFETY
I
NFORMATION
US/CANADA
Exposure to Radio Frequency Radiation
The radiated output power of the internal wireless radio is
far below the FCC and IC radio frequency exposure limits.
Nevertheless, the wireless radio will be used in such a
manner that the radio is 8 inches (20 cm) or further from
the human body.
The internal wireless radio operates within guidelines
found in radio frequency safety standards and
recommendations, which reflect the consensus of the
scientific community.
The radio manufacturer believes the internal wireless
radio is safe for use by consumers. The level of energy
emitted is far less than the electromagnetic energy
emitted by wireless devices such as mobile phones.
However, the use of wireless radios may be restricted in
some situations or environments, such as aboard
airplanes. If you are unsure of restrictions, you are
encouraged to ask for authorization before turning on the
wireless radio
Úpage 312.
23_RUP_OM_EN_USC_t.book Page 186
Page 189 of 328

187
(Continued)
SAFETY
SAFETY FEATURES
ANTI-LOCK BRAKE SYSTEM (ABS)
If applicable, refer to the “Hybrid Supplement” for
additional information.
The ABS provides increased vehicle stability and brake
performance under most braking conditions. The system
automatically prevents wheel lock and enhances vehicle
control during braking.
The ABS performs a self-check cycle to ensure that the
ABS is working properly each time the vehicle is started
and driven. During this self-check, you may hear a slight
clicking sound as well as some related motor noises.
The ABS is activated during braking when the system
detects one or more wheels are beginning to lock. Road
conditions such as ice, snow, gravel, bumps, railroad
tracks, loose debris, or panic stops may increase the
likelihood of ABS activation(s).
You also may experience the following normal
characteristics when the ABS activates:
ABS motor noise or clicking sounds (you may continue
to hear for a short time after the stop)
Brake pedal pulsations
A slight drop of the brake pedal at the end of the stop The ABS is designed to function with the Original
Equipment Manufacturer (OEM) tires. Modification may
result in degraded ABS performance.
Anti-Lock Brake System (ABS) Warning
Light
The yellow ABS Warning Light will turn on when the ignition
is placed in the ON/RUN mode and may stay on for as long
as four seconds.
If the ABS Warning Light remains on or comes on while
driving, it indicates that the anti-lock portion of the brake
system is not functioning and that service is required.
However, the conventional brake system will continue to
operate normally if the ABS Warning Light is on.
If the ABS Warning Light is on, the brake system should be
serviced as soon as possible to restore the benefits of
Anti-Lock Brakes. If the ABS Warning Light does not come
on when the ignition is placed in the ON/RUN mode, have
the light repaired as soon as possible.
WARNING!
The ABS contains sophisticated electronic equip -
ment that may be susceptible to interference caused
by improperly installed or high output radio transmit -
ting equipment. This interference can cause possible
loss of anti-lock braking capability. Installation of
such equipment should be performed by qualified
professionals.
Pumping of the Anti-Lock Brakes will diminish their
effectiveness and may lead to a collision. Pumping
makes the stopping distance longer. Just press firmly
on your brake pedal when you need to slow down or
stop.
The ABS cannot prevent the natural laws of physics
from acting on the vehicle, nor can it increase
braking or steering efficiency beyond that afforded
by the condition of the vehicle brakes and tires or the
traction afforded.
The ABS cannot prevent collisions, including those
resulting from excessive speed in turns, following
another vehicle too closely, or hydroplaning.
The capabilities of an ABS equipped vehicle must
never be exploited in a reckless or dangerous
manner that could jeopardize the user’s safety or the
safety of others.
WARNING!
6
23_RUP_OM_EN_USC_t.book Page 187
Page 195 of 328

SAFETY193
If the system detects degraded performance due to
contamination or foreign objects, a message will warn you
of a blocked sensor and the warning indicators in side
view mirrors will be on. The warning indicators will remain
illuminated until blockage clearing conditions are met.
First clear the fascia/bumper area around the sensors of
the blockage. After removing the blockage, cycle the
ignition from on to off and then back on again to reset the
system.
If the blockage message is still present after cycling the
ignition and driving in traffic, check again for a blockage.
The BSM system notifies the driver of objects in the
detection zones by illuminating the BSM Warning Light
located in the outside mirrors in addition to sounding an
audible (chime) alert and reducing the radio volume
Úpage 194.
Warning Light Location
The BSM system monitors the detection zone from three
different entry points (side, rear, front) while driving to see
if an alert is necessary. The BSM system will issue an alert
during these types of zone entries. Entering From The Side
Vehicles that move into your adjacent lanes from either
side of the vehicle.
Side Monitoring
Entering From The Rear
Vehicles that come up from behind your vehicle on either
side and enter the rear detection zone with a relative
speed of less than 30 mph (48 km/h).
Rear Monitoring
Overtaking Traffic
If you pass another vehicle slowly with a relative speed
less than 15 mph (24 km/h) and the vehicle remains in
the blind spot for approximately 1.5 seconds, the warning
light will be illuminated. If the difference in speed between
the two vehicles is greater than 15 mph (24 km/h), the
warning light will not illuminate.
Overtaking/Approaching
Overtaking/Passing
6
23_RUP_OM_EN_USC_t.book Page 193
Page 196 of 328

194SAFETY
The BSM system is designed not to issue an alert on
stationary objects such as guardrails, posts, walls, foliage,
berms, snow banks, car washes, etc. However,
occasionally the system may alert on such objects. This is
normal operation and your vehicle does not require
service.
The BSM system will not alert you of objects that are
traveling in the opposite direction of the vehicle in
adjacent lanes
Úpage 312.
Opposing Traffic
Rear Cross Path (RCP)
RCP is intended to aid the driver when backing out of
parking spaces where their vision of oncoming vehicles
may be blocked. Proceed slowly and cautiously out of the
parking space until the rear end of the vehicle is exposed.
The RCP system will then have a clear view of the cross
traffic and if an oncoming vehicle is detected, alert the
driver.
RCP Detection Zones
RCP monitors the rear detection zones on both sides of
the vehicle, for objects that are moving toward the side of
the vehicle with a minimum speed of approximately 3 mph
(5 km/h), to objects moving a maximum of approximately
20 mph (32 km/h), such as in parking lot situations.
NOTE:In a parking lot situation, oncoming vehicles can be
blocked by vehicles parked on either side. If the sensors
are blocked by other structures or vehicles, the system will
not be able to alert the driver. Additionally, if your vehicle is obscured by a flat object on one side the system can
false alert on vehicles approaching from the opposite
direction.
When RCP is on and the vehicle is in REVERSE (R), the
driver is alerted using both the visual and audible alarms,
including reducing the radio volume.
Blind Spot Modes
Three selectable modes of operation are available in the
Uconnect system.
Blind Spot Alert Lights Only — Default Setting
When operating in Blind Spot Alert mode, the BSM system
will provide a visual alert in the appropriate side view
mirror based on a detected object. However, when the
system is operating in Rear Cross Path (RCP) mode, the
system will respond with both visual and audible alerts
when a detected object is present. Whenever an audible
alert is requested, the radio is muted.
WARNING!
The Blind Spot Monitoring system is only an aid to help
detect objects in the blind spot zones. The BSM system
is not designed to detect pedestrians, bicyclists, or
animals. Even if your vehicle is equipped with the BSM
system, always check your vehicle’s mirrors, glance
over your shoulder, and use your turn signal before
changing lanes. Failure to do so can result in serious
injury or death.
WARNING!
Rear Cross Path Detection (RCP) is not a back up aid
system. It is intended to be used to help a driver detect
an oncoming vehicle in a parking lot situation. Drivers
must be careful when backing up, even when using
RCP. Always check carefully behind your vehicle, look
behind you, and be sure to check for pedestrians,
animals, other vehicles, obstructions, and blind spots
before backing up. Failure to do so can result in serious
injury or death.
23_RUP_OM_EN_USC_t.book Page 194
Page 197 of 328

SAFETY195
Blind Spot Alert Lights/Chime
When operating in Blind Spot Alert Lights/Chime mode,
the BSM system will provide a visual alert in the
appropriate side view mirror based on a detected object.
If the turn signal is then activated, and it corresponds to
an alert present on that side of the vehicle, an audible
chime will also be sounded. Whenever a turn signal and
detected object are present on the same side at the same
time, both the visual and audible alerts will be issued. In
addition to the audible alert the radio (if on) will also be
muted.
NOTE:Whenever an audible alert is requested by the BSM
system, the radio is also muted.
When the system is in RCP, the system shall respond with
both visual and audible alerts when a detected object is
present. Whenever an audible alert is requested, the radio
is also muted. Turn/hazard signal status is ignored; the
RCP state always requests the chime.
Blind Spot Alert Off
When the BSM system is turned off there will be no visual
or audible alerts from either the BSM or RCP systems.
NOTE:
The BSM system will store the current operating mode
when the vehicle is shut off. Each time the vehicle is
started the previously stored mode will be recalled and
used.
The BSM system can work in conjunction with the
KeySense function of the vehicle (if equipped)
Úpage 98.
FORWARD COLLISION WARNING (FCW)
W
ITH MITIGATION — IF EQUIPPED
FCW with Mitigation provides the driver with audible
warnings, visual warnings (within the instrument cluster
display), and may apply a brake jerk to warn the driver
when it detects a potential frontal collision. The warnings
and limited braking are intended to provide the driver with
enough time to react, avoid or mitigate the potential
collision.
NOTE:FCW monitors the information from the forward looking
sensors as well as the Electronic Brake Controller (EBC), to
calculate the probability of a forward collision. When the
system determines that a forward collision is probable, the
driver will be provided with audible and visual warnings
and may provide a brake jerk warning.
If the driver does not take action based upon these
progressive warnings, then the system will provide a
limited level of active braking to help slow the vehicle and
mitigate the potential forward collision. If the driver reacts
to the warnings by braking and the system determines
that the driver intends to avoid the collision by braking but
has not applied sufficient brake force, the system will
compensate and provide additional brake force as
required.
If a FCW with Mitigation event begins at a speed below
37 mph (60 km/h), the system may provide the maximum
braking possible to mitigate the potential forward
collision. If the Forward Collision Warning with Mitigation
event stops the vehicle completely, the system will hold
the vehicle at standstill for two seconds and then release the brakes. If a pedestrian is encountered in the path at
the same speed threshold, the system will attempt to
bring the vehicle to a stop.
FCW Message
When the system determines a collision with the vehicle in
front of you is no longer probable, the warning message
will be deactivated
Úpage 312.
NOTE:
The minimum speed for FCW activation is 1 mph
(2 km/h).
The FCW alerts may be triggered on objects other than
vehicles such as guardrails or sign posts based on the
course prediction. This is expected and is a part of
normal FCW activation and functionality.
It is unsafe to test the FCW system. To prevent such
misuse of the system, after four Active Braking events
within a key cycle, the Active Braking portion of FCW will
be deactivated until the next key cycle.
6
23_RUP_OM_EN_USC_t.book Page 195
Page 199 of 328

SAFETY197
This indicates there is an internal system fault. Although
the vehicle is still drivable under normal conditions, have
the system checked by an authorized dealer.
Pedestrian Emergency Braking (PEB) —
If Equipped
PEB is a subsystem of the FCW system which provides the
driver with audible and visual warnings in the instrument
cluster display, and may apply automatic braking when it
detects a potential frontal collision with a pedestrian.
PEB Message
If a PEB event begins at a speed below 37 mph (60 km/h),
the system may provide braking to mitigate the potential
collision with a pedestrian. If the PEB event stops the
vehicle completely, the system will hold the vehicle at a
standstill for two seconds and then release the brakes.
When the system determines a collision with the
pedestrian in front of you is no longer probable, the
warning message will be deactivated.
The minimum speed for PEB activation is 3 mph (5 km/h). Turning PEB On Or Off
NOTE:The default status of PEB is “On.” This allows the system
to warn you of a possible frontal collision with the pedes
-
trian.
The PEB button is located in the Uconnect display in the
Controls settings
Úpage 157.
To turn the PEB system off, push the Pedestrian
Emergency Braking OFF button.
To turn the PEB system back on, push the Warning Active
Braking button.
Changing the PEB status to “Off” deactivates the system,
so no warning or active braking will be available in case of
a possible frontal collision with the pedestrian.
NOTE:The PEB system will NOT retain the last setting selected by
the driver after ignition shut down. The system will reset to
the default setting when the vehicle is restarted.
TIRE PRESSURE MONITORING SYSTEM
(TPMS)
The Tire Pressure Monitoring System (TPMS) will warn the
driver of a low tire pressure based on the vehicle
recommended cold placard pressure.
NOTE:The TPMS Warning Light will illuminate in the instrument
cluster and a chime will sound when tire pressure is low in
one or more of the four active road tires. In addition, the
instrument cluster will display a graphic showing the
pressure values of each tire with the low tire pressure
values in a different color, or the Uconnect radio will
display a TPMS message. When this occurs you must
increase the tire pressure to the recommended cold
placard pressure in order for the TPMS Warning Light to
turn off.
The tire pressure will vary with temperature by
approximately 1 psi (7 kPa) for every 12°F (6.5°C). This
means that when the outside temperature decreases, the
tire pressure will decrease. Tire pressure should always be
set based on cold inflation tire pressure. This is defined as
the tire pressure after the vehicle has not been driven for
at least three hours, or driven less than 1 mile (1.6 km)
after a three hour period. The cold tire inflation pressure
must not exceed the maximum inflation pressure molded
into the tire sidewall. The tire pressure will also increase
as the vehicle is driven. This is normal and there should be
no adjustment for this increased pressure.
See
Úpage 291 for information on how to properly inflate
the vehicle’s tires.
WARNING!
Pedestrian Emergency Braking (PEB) is not intended to
avoid a collision on its own, nor can PEB detect every
type of potential collision with a pedestrian. The driver
has the responsibility to avoid a collision by controlling
the vehicle via braking and steering. Failure to follow
this warning could lead to serious injury or death.
6
23_RUP_OM_EN_USC_t.book Page 197