2023 CHRYSLER PACIFICA HYBRID lights
[x] Cancel search: lightsPage 58 of 328
56GETTING TO KNOW YOUR VEHICLE
HIGH/LOW BEAM SWITCH
Push the multifunction lever toward the instrument panel
to switch the headlights to high beams. Pulling the
multifunction lever back will turn the low beams on.
AUTOMATIC HIGH BEAM — IF EQUIPPED
The Automatic High Beam system provides increased
forward lighting at night by automatically controlling the
high beams through the use of a camera mounted on the
windshield. This camera detects vehicle specific light and
automatically switches from high beams to low beams
until the approaching vehicle is out of view.
NOTE:Broken, muddy, or obstructed headlights and taillights of
vehicles in the field of view will cause headlights to remain
on longer (closer to the vehicle). Also, dirt, film and other
obstructions on the windshield or camera lens will cause
the system to function improperly.
To Activate
1. Select “Auto Dim High Beams” through the
Uconnect system to enable the feature
Ú
page 157.
2. Rotate the headlight switch clockwise to the AUTO position.
3. Push the multifunction lever away from you to switch the headlights to the high beam position. Refer to
“Multifunction Lever” in this section for further
information.
NOTE:This system will not activate until the vehicle is at, or
above 16 mph (25 km/h).
To Deactivate
Perform either of the following steps to deactivate the
Automatic High Beam system.
1. Deselect “Auto Dim High Beams” through the
Uconnect system
Ú
page 157.
2. Pull the multifunction lever toward you to switch the headlights from the high beam to the low beam
position.
3. Rotate the headlight switch counterclockwise from the AUTO to the on position.
NOTE:Once active, the Automatic High Beam system will stop
functioning below 12 mph (20 km/h).
FLASH-TO-PASS
You can signal another vehicle with your headlights by
lightly pulling the multifunction lever toward you. This will
cause the high beam headlights to turn on, and remain on,
until the lever is released.
AUTOMATIC HEADLIGHTS — IF EQUIPPED
This system automatically turns your headlights on or off
based on ambient light levels. To turn the system on, turn
the headlight switch to the extreme clockwise position
aligning the indicator with the AUTO on the headlight
switch. When the system is on, the Headlight Time Delay
feature is also on. This means your headlights will stay on
for up to 90 seconds after the ignition is placed in the OFF
position. To turn the automatic system off, move the
headlight switch out of the AUTO position.
NOTE:The engine must be running before the headlights will
come on in the Automatic mode.
HEADLIGHTS ON WITH WIPERS —
I
F EQUIPPED
When your headlights are in the AUTO mode and the
engine is running, the headlights will automatically turn on
when the wiper system is also turned on. Headlights on
when windshield wipers are on may be found on vehicles
equipped with an automatic headlight system.
NOTE:The Headlights with Wipers feature can be turned on or off
through the Uconnect system Úpage 157.
HEADLIGHT TIME DELAY — IF EQUIPPED
This feature provides the safety of headlight illumination
for up to 90 seconds after exiting your vehicle.
To activate the delay feature, place the ignition in the OFF
position while the headlights are still on. The 90 second
delay interval begins when headlight switch is turned off.
If the headlights or parking lights are turned back on or the
ignition is placed in the ON position, the delay will be
cancelled.
When exiting the vehicle the driver can choose to have the
headlights remain on for 30, 60, or 90 seconds or not
remain on. You can change the timer setting through the
Uconnect system
Úpage 157.
23_RUP_OM_EN_USC_t.book Page 56
Page 59 of 328
GETTING TO KNOW YOUR VEHICLE57
If the headlights are turned off before the ignition, they will
turn off in the normal manner.
NOTE:The headlights must be turned off within 45 seconds of
placing the ignition in the OFF position to activate this
feature.
LIGHTS-ON REMINDER
If the headlights or the parking lights are left on after the
ignition is placed in the OFF position, the vehicle will chime
when the driver's door is opened.
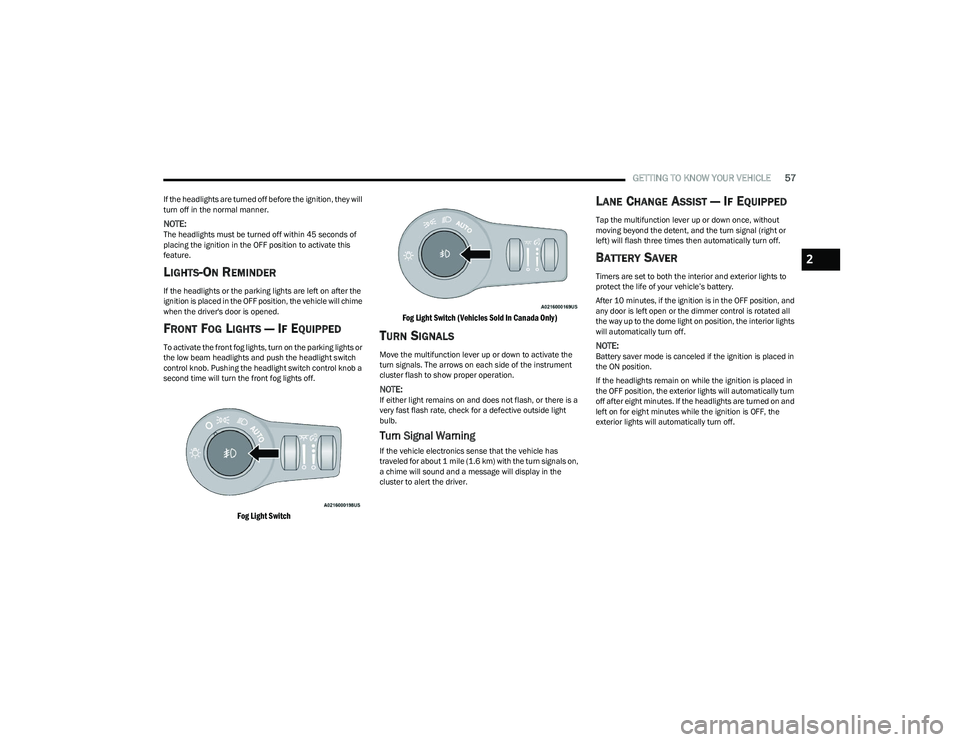
FRONT FOG LIGHTS — IF EQUIPPED
To activate the front fog lights, turn on the parking lights or
the low beam headlights and push the headlight switch
control knob. Pushing the headlight switch control knob a
second time will turn the front fog lights off.
Fog Light Switch Fog Light Switch (Vehicles Sold In Canada Only)
TURN SIGNALS
Move the multifunction lever up or down to activate the
turn signals. The arrows on each side of the instrument
cluster flash to show proper operation.
NOTE:If either light remains on and does not flash, or there is a
very fast flash rate, check for a defective outside light
bulb.
Turn Signal Warning
If the vehicle electronics sense that the vehicle has
traveled for about 1 mile (1.6 km) with the turn signals on,
a chime will sound and a message will display in the
cluster to alert the driver.
LANE CHANGE ASSIST — IF EQUIPPED
Tap the multifunction lever up or down once, without
moving beyond the detent, and the turn signal (right or
left) will flash three times then automatically turn off.
BATTERY SAVER
Timers are set to both the interior and exterior lights to
protect the life of your vehicle’s battery.
After 10 minutes, if the ignition is in the OFF position, and
any door is left open or the dimmer control is rotated all
the way up to the dome light on position, the interior lights
will automatically turn off.
NOTE:Battery saver mode is canceled if the ignition is placed in
the ON position.
If the headlights remain on while the ignition is placed in
the OFF position, the exterior lights will automatically turn
off after eight minutes. If the headlights are turned on and
left on for eight minutes while the ignition is OFF, the
exterior lights will automatically turn off.
2
23_RUP_OM_EN_USC_t.book Page 57
Page 60 of 328

58GETTING TO KNOW YOUR VEHICLE
INTERIOR LIGHTS
INTERIOR COURTESY LIGHTS
The courtesy light switches are used to turn the courtesy
lights on/off.
Courtesy Light Switches
To operate the courtesy lights, push either the driver or
passenger light switch.
NOTE:
Before exiting the vehicle, make sure that the interior
lights are turned off. This will prevent the battery from
discharging once the doors are closed.
If a light is left on, it will automatically be turned off
approximately 10 minutes after the ignition is placed in
the OFF position.
Rear Courtesy/Reading Lights —
If Equipped
Located above the rear passengers are courtesy/reading
lights. The lights turn on when a front door, a sliding door
or the liftgate is opened. If your vehicle is equipped with
Remote Keyless Entry (RKE) the lights will also turn on
when the unlock button on the key fob is pushed.
The courtesy lights also function as reading lights. Push
the lens to turn these lights on while inside the vehicle.
Push the lens a second time to turn each light off.
Dimmer Controls
The dimmer controls are part of the headlight switch, and
are located on the driver’s side of the instrument panel.
With the parking lights or headlights on, rotating the right
dimmer control upward will increase the brightness of the
instrument cluster lights. Rotating the left dimmer control
will adjust the interior light levels of the ambient lighting
on the instrument panel and doors.
Dimmer Controls
Dimmer Controls (Vehicles Sold In Canada Only)
1 — Ambient Light Dimmer Control
2 — Instrument Panel Dimmer Control
1 — Ambient Light Dimmer Control
2 — Instrument Panel Dimmer Control
23_RUP_OM_EN_USC_t.book Page 58
Page 61 of 328
GETTING TO KNOW YOUR VEHICLE59
At the top detent of the instrument panel dimmer, all the
interior lights will illuminate. At the bottom most setting
(extreme bottom) interior lights are turned off (dome off),
and the cluster, radio and instrument lighting go to their
lowest dimmable setting.
WINDSHIELD WIPER AND WASHERS
The windshield wiper/washer controls are located on the
right side of the steering column. The front wipers are
operated by rotating a switch, located on the end of the
lever.
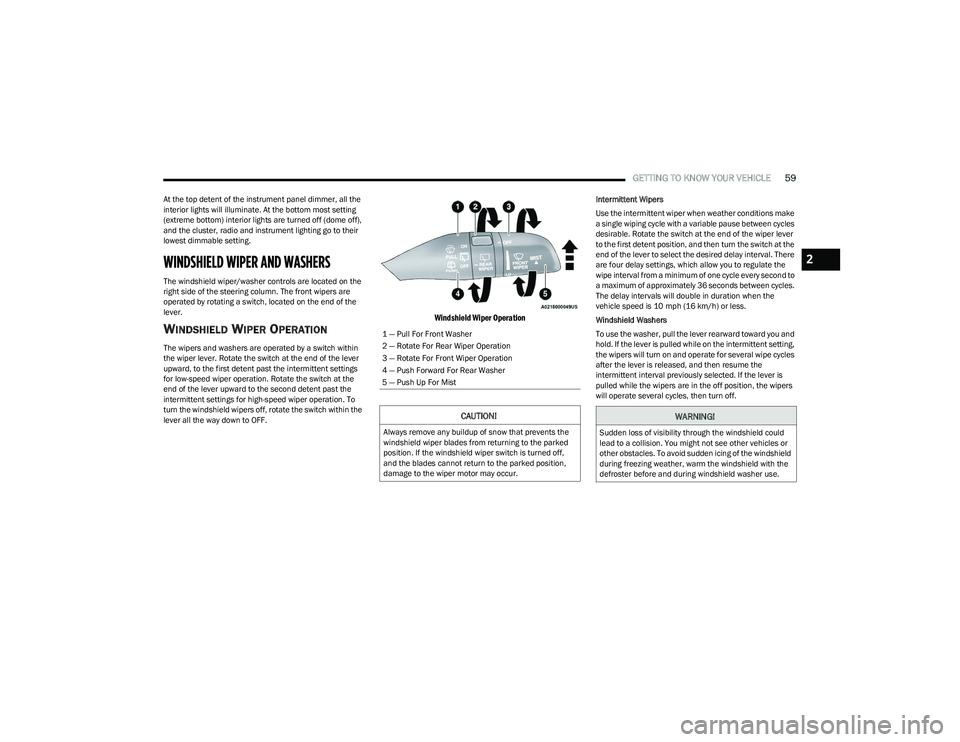
WINDSHIELD WIPER OPERATION
The wipers and washers are operated by a switch within
the wiper lever. Rotate the switch at the end of the lever
upward, to the first detent past the intermittent settings
for low-speed wiper operation. Rotate the switch at the
end of the lever upward to the second detent past the
intermittent settings for high-speed wiper operation. To
turn the windshield wipers off, rotate the switch within the
lever all the way down to OFF.
Windshield Wiper Operation
Intermittent Wipers
Use the intermittent wiper when weather conditions make
a single wiping cycle with a variable pause between cycles
desirable. Rotate the switch at the end of the wiper lever
to the first detent position, and then turn the switch at the
end of the lever to select the desired delay interval. There
are four delay settings, which allow you to regulate the
wipe interval from a minimum of one cycle every second to
a maximum of approximately 36 seconds between cycles.
The delay intervals will double in duration when the
vehicle speed is 10 mph (16 km/h) or less.
Windshield Washers
To use the washer, pull the lever rearward toward you and
hold. If the lever is pulled while on the intermittent setting,
the wipers will turn on and operate for several wipe cycles
after the lever is released, and then resume the
intermittent interval previously selected. If the lever is
pulled while the wipers are in the off position, the wipers
will operate several cycles, then turn off.
1 — Pull For Front Washer
2 — Rotate For Rear Wiper Operation
3 — Rotate For Front Wiper Operation
4 — Push Forward For Rear Washer
5 — Push Up For Mist
CAUTION!
Always remove any buildup of snow that prevents the
windshield wiper blades from returning to the parked
position. If the windshield wiper switch is turned off,
and the blades cannot return to the parked position,
damage to the wiper motor may occur.
WARNING!
Sudden loss of visibility through the windshield could
lead to a collision. You might not see other vehicles or
other obstacles. To avoid sudden icing of the windshield
during freezing weather, warm the windshield with the
defroster before and during windshield washer use.
2
23_RUP_OM_EN_USC_t.book Page 59
Page 79 of 328
GETTING TO KNOW YOUR VEHICLE77
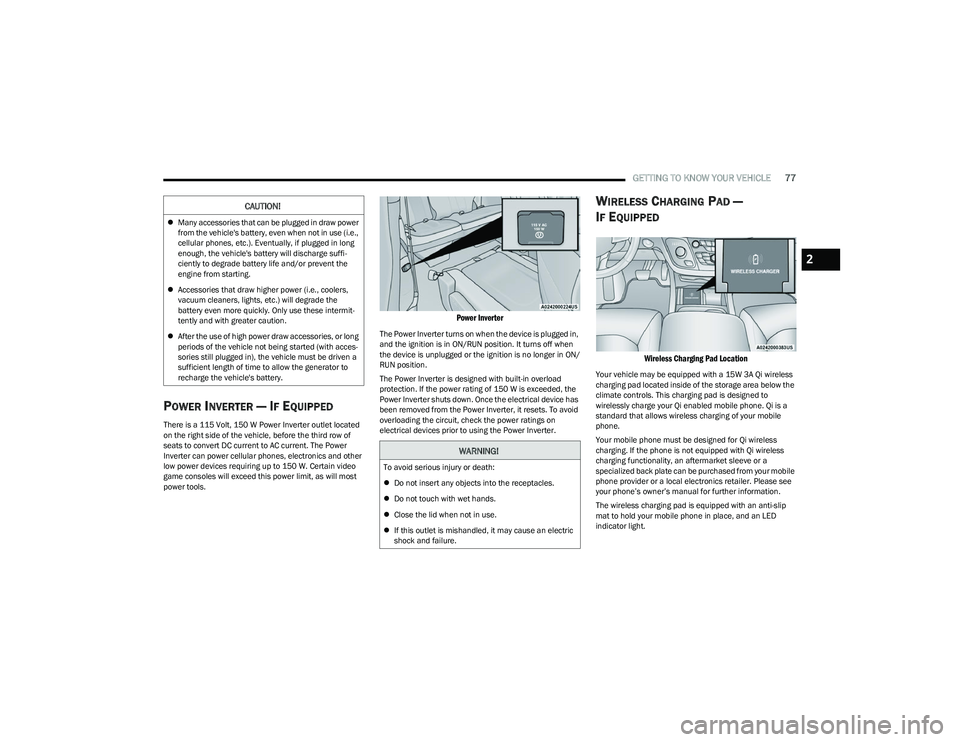
POWER INVERTER — IF EQUIPPED
There is a 115 Volt, 150 W Power Inverter outlet located
on the right side of the vehicle, before the third row of
seats to convert DC current to AC current. The Power
Inverter can power cellular phones, electronics and other
low power devices requiring up to 150 W. Certain video
game consoles will exceed this power limit, as will most
power tools.
Power Inverter
The Power Inverter turns on when the device is plugged in,
and the ignition is in ON/RUN position. It turns off when
the device is unplugged or the ignition is no longer in ON/
RUN position.
The Power Inverter is designed with built-in overload
protection. If the power rating of 150 W is exceeded, the
Power Inverter shuts down. Once the electrical device has
been removed from the Power Inverter, it resets. To avoid
overloading the circuit, check the power ratings on
electrical devices prior to using the Power Inverter.
WIRELESS CHARGING PAD —
I
F EQUIPPED
Wireless Charging Pad Location
Your vehicle may be equipped with a 15W 3A Qi wireless
charging pad located inside of the storage area below the
climate controls. This charging pad is designed to
wirelessly charge your Qi enabled mobile phone. Qi is a
standard that allows wireless charging of your mobile
phone.
Your mobile phone must be designed for Qi wireless
charging. If the phone is not equipped with Qi wireless
charging functionality, an aftermarket sleeve or a
specialized back plate can be purchased from your mobile
phone provider or a local electronics retailer. Please see
your phone’s owner’s manual for further information.
The wireless charging pad is equipped with an anti-slip
mat to hold your mobile phone in place, and an LED
indicator light.
CAUTION!
Many accessories that can be plugged in draw power
from the vehicle's battery, even when not in use (i.e.,
cellular phones, etc.). Eventually, if plugged in long
enough, the vehicle's battery will discharge suffi -
ciently to degrade battery life and/or prevent the
engine from starting.
Accessories that draw higher power (i.e., coolers,
vacuum cleaners, lights, etc.) will degrade the
battery even more quickly. Only use these intermit -
tently and with greater caution.
After the use of high power draw accessories, or long
periods of the vehicle not being started (with acces -
sories still plugged in), the vehicle must be driven a
sufficient length of time to allow the generator to
recharge the vehicle's battery.
WARNING!
To avoid serious injury or death:
Do not insert any objects into the receptacles.
Do not touch with wet hands.
Close the lid when not in use.
If this outlet is mishandled, it may cause an electric
shock and failure.
2
23_RUP_OM_EN_USC_t.book Page 77
Page 87 of 328

GETTING TO KNOW YOUR VEHICLE85
Vehicles Equipped With A Trailer Tow Package
NOTE:If your vehicle is equipped with the Trailer Tow Package,
the hands-free activation zone(s) for the Power Liftgate
will be located on the left and right side of the receiver.
Use a straight kicking motion under either activation zone
to open the Hands-Free Liftgate.
Hands-Free Liftgate Trailer Tow Activation Zones
When a valid kicking motion is completed, the liftgate will
chime, the hazard lights will flash and the liftgate will open
after approximately one second. This assumes all options
are enabled in the Uconnect system.
NOTE:To open the Hands-Free Liftgate requires a valid Passive
Entry key fob within 5 ft (1.5 m) of the door handle. If a
valid Passive Entry key fob is not within 5 ft (1.5 m), the
liftgate will not respond to any kicks.
NOTE:
The Hands-Free Liftgate will only operate when the
transmission is in PARK.
If anything obstructs the Hands-Free Liftgate while it is
opening or closing, the liftgate will automatically
reverse to the closed position, provided it meets suffi -
cient resistance.
There are pinch sensors attached to the side of the lift -
gate opening. Light pressure anywhere along these
strips will cause the liftgate to return to the open posi -
tion.
If the power liftgate encounters multiple obstructions
within the same cycle, the system will automatically stop.
If this occurs, the liftgate must be operated manually.
The power liftgate will release, but not power open, in
temperatures below −12°F (−24°C). Be sure to
remove any buildup of snow or ice from the liftgate
before opening the liftgate.
If the liftgate is left open for an extended period of time,
the liftgate may need to be closed manually to reset
power liftgate functionality.
The Hands-Free Liftgate only works to open the liftgate. Gas props support the liftgate in the open position.
However, because the gas pressure drops with
temperature, it may be necessary to assist the props when
opening the liftgate in cold weather.
NOTE:Allow the power system to open the liftgate. Manually
pushing or pulling the liftgate may activate the liftgate
obstacle detection feature and stop the power operation
or reverse its direction.
CAUTION!
The Hands-Free Liftgate feature may be turned on or off
in Uconnect Settings. The Hands-Free Liftgate feature
should be turned off during jacking, tire changing, and
vehicle service
Úpage 157.
WARNING!
Driving with the liftgate open can allow poisonous
exhaust gases into your vehicle. You and your
passengers could be injured by these fumes. Keep
the liftgate closed when you are operating the
vehicle.
If you are required to drive with the liftgate open,
make sure that all windows are closed, and the
climate control blower switch is set at high speed. Do
not use the recirculation mode.
WARNING!
During power operation, personal injury or cargo
damage may occur. Ensure the liftgate travel path is
clear. Make sure the liftgate is closed and latched
before driving away.
2
23_RUP_OM_EN_USC_t.book Page 85
Page 104 of 328

102GETTING TO KNOW YOUR INSTRUMENT PANEL
NOTE:
The charging system is independent from load reduc -
tion. The charging system performs a diagnostic on the
charging system continuously.
If the Battery Charge Warning Light is on it may indicate
a problem with the charging system
Úpage 103.
The electrical loads that may be switched off (if equipped),
and vehicle functions which can be effected by load
reduction:
Heated Seat/Vented Seats/Heated Wheel
Heated/Cooled Cup Holders — If Equipped
Rear Defroster And Heated Mirrors
HVAC System
115 Volts AC Power Inverter System
Audio and Telematics System
Loss of the battery charge may indicate one or more of the
following conditions:
The charging system cannot deliver enough electrical
power to the vehicle system because the electrical
loads are larger than the capability of charging system.
The charging system is still functioning properly.
Turning on all possible vehicle electrical loads (e.g.
HVAC to max settings, exterior and interior lights, over -
loaded power outlets +12 Volts, 150W, USB ports)
during certain driving conditions (city driving, towing,
frequent stopping).
Installing options like additional lights, upfitter elec -
trical accessories, audio systems, alarms and similar
devices.
Unusual driving cycles (short trips separated by long
parking periods).
The vehicle was parked for an extended period of time
(weeks, months).
The battery was recently replaced and was not charged
completely.
The battery was discharged by an electrical load left on
when the vehicle was parked.
The battery was used for an extended period with the
engine not running to supply radio, lights, chargers,
+12 Volt portable appliances like vacuum cleaners,
game consoles and similar devices.
What to do when an electrical load reduction action
message is present (“Battery Saver On” or “Battery Saver
Mode”)
During a trip:
Reduce power to unnecessary loads if possible:
Turn off redundant lights (interior or exterior)
Check what may be plugged in to power outlets
+12 Volts, 150W, USB ports
Check HVAC settings (blower, temperature)
Check the audio settings (volume)
After a trip:
Check if any aftermarket equipment was installed
(additional lights, upfitter electrical accessories, audio
systems, alarms) and review specifications if any (load
and Ignition Off Draw currents).
Evaluate the latest driving cycles (distance, driving
time and parking time).
The vehicle should have service performed if the
message is still present during consecutive trips and
the evaluation of the vehicle and driving pattern did not
help to identify the cause.
WARNING LIGHTS AND MESSAGES
The warning/indicator lights will illuminate in the
instrument panel together with a dedicated message and/
or acoustic signal when applicable. These indications are
indicative and precautionary and as such must not be
considered as exhaustive and/or alternative to the
information contained in the Owner’s Manual, which you
are advised to read carefully in all cases. Always refer to
the information in this chapter in the event of a failure
indication. All active telltales will display first if applicable.
The system check menu may appear different based upon
equipment options and current vehicle status. Some
telltales are optional and may not appear.
RED WARNING LIGHTS
Air Bag Warning Light
This warning light will illuminate to indicate a
fault with the air bag, and will turn on for four to
eight seconds as a bulb check when the ignition
is placed in the ON/RUN or ACC/ON/RUN
position. This light will illuminate with a single chime when a
fault with the air bag has been detected, it will stay on until
the fault is cleared. If the light is either not on during startup,
stays on, or turns on while driving, have the system
inspected at an authorized dealer as soon as possible.
23_RUP_OM_EN_USC_t.book Page 102
Page 107 of 328
GETTING TO KNOW YOUR INSTRUMENT PANEL105
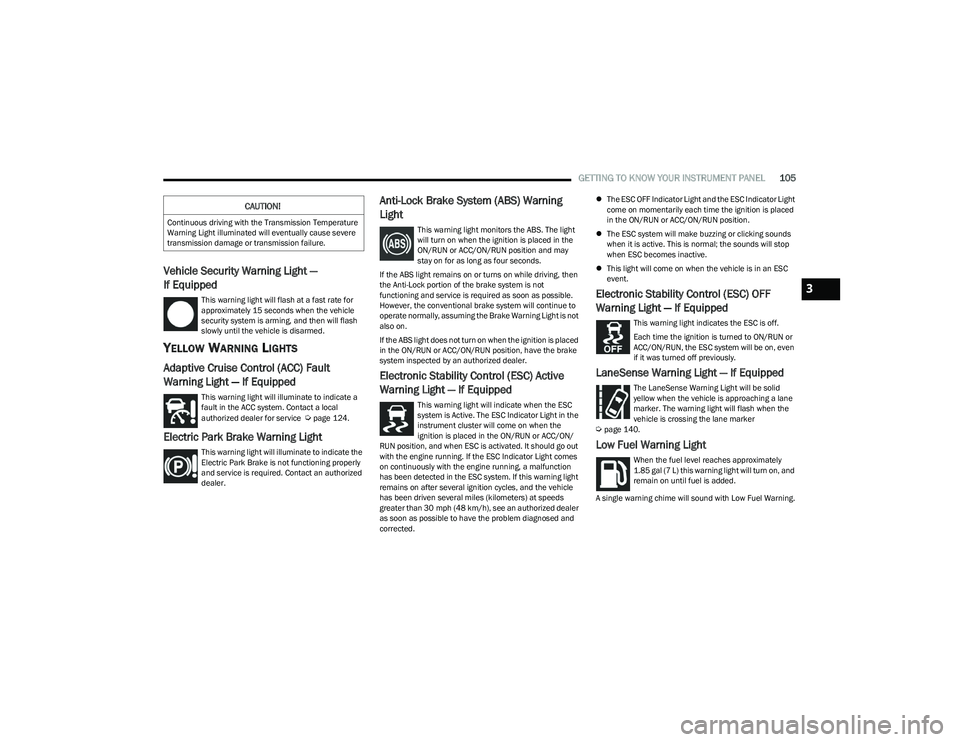
Vehicle Security Warning Light —
If Equipped
This warning light will flash at a fast rate for
approximately 15 seconds when the vehicle
security system is arming, and then will flash
slowly until the vehicle is disarmed.
YELLOW WARNING LIGHTS
Adaptive Cruise Control (ACC) Fault
Warning Light — If Equipped
This warning light will illuminate to indicate a
fault in the ACC system. Contact a local
authorized dealer for service
Úpage 124.
Electric Park Brake Warning Light
This warning light will illuminate to indicate the
Electric Park Brake is not functioning properly
and service is required. Contact an authorized
dealer.
Anti-Lock Brake System (ABS) Warning
Light
This warning light monitors the ABS. The light
will turn on when the ignition is placed in the
ON/RUN or ACC/ON/RUN position and may
stay on for as long as four seconds.
If the ABS light remains on or turns on while driving, then
the Anti-Lock portion of the brake system is not
functioning and service is required as soon as possible.
However, the conventional brake system will continue to
operate normally, assuming the Brake Warning Light is not
also on.
If the ABS light does not turn on when the ignition is placed
in the ON/RUN or ACC/ON/RUN position, have the brake
system inspected by an authorized dealer.
Electronic Stability Control (ESC) Active
Warning Light — If Equipped
This warning light will indicate when the ESC
system is Active. The ESC Indicator Light in the
instrument cluster will come on when the
ignition is placed in the ON/RUN or ACC/ON/
RUN position, and when ESC is activated. It should go out
with the engine running. If the ESC Indicator Light comes
on continuously with the engine running, a malfunction
has been detected in the ESC system. If this warning light
remains on after several ignition cycles, and the vehicle
has been driven several miles (kilometers) at speeds
greater than 30 mph (48 km/h), see an authorized dealer
as soon as possible to have the problem diagnosed and
corrected.
The ESC OFF Indicator Light and the ESC Indicator Light
come on momentarily each time the ignition is placed
in the ON/RUN or ACC/ON/RUN position.
The ESC system will make buzzing or clicking sounds
when it is active. This is normal; the sounds will stop
when ESC becomes inactive.
This light will come on when the vehicle is in an ESC
event.
Electronic Stability Control (ESC) OFF
Warning Light — If Equipped
This warning light indicates the ESC is off.
Each time the ignition is turned to ON/RUN or
ACC/ON/RUN, the ESC system will be on, even
if it was turned off previously.
LaneSense Warning Light — If Equipped
The LaneSense Warning Light will be solid
yellow when the vehicle is approaching a lane
marker. The warning light will flash when the
vehicle is crossing the lane marker
Úpage 140.
Low Fuel Warning Light
When the fuel level reaches approximately
1.85 gal (7 L) this warning light will turn on, and
remain on until fuel is added.
A single warning chime will sound with Low Fuel Warning.
CAUTION!
Continuous driving with the Transmission Temperature
Warning Light illuminated will eventually cause severe
transmission damage or transmission failure.
3
23_RUP_OM_EN_USC_t.book Page 105