2023 CHRYSLER PACIFICA HYBRID ad blue
[x] Cancel search: ad bluePage 181 of 328
MULTIMEDIA179
Account Sign-in
The next step will be the option to sign in to your Amazon
account.
There are two options to sign into the system:
I already have an Amazon account: Sign in with an
already existing Amazon account
I am new to Amazon: Create a new Amazon Account
If “I am new to Amazon” is selected, follow the on-screen
steps to set up an Amazon account with the system.
Parental Controls
Another feature that will appear during this first time set
up is parental controls.
When the parental controls page appears, it will give the
options “Enable Parental Controls” and “No Parental
Controls”. If “Enable Parental Controls” is selected, follow
the on-screen steps to set up parental controls for the
system.
ALEXA VOICE CONTROL
A feature with Rear Seat Entertainment with Fire TV
built-in that enhances your experience is Alexa. It is simple
to get started using this feature. Push the Microphone
button at the top of the Voice Remote with Alexa to
activate Alexa and get started.
LISTEN VIA VEHICLE SPEAKERS
A feature within Rear Seat Entertainment with Fire TV
built-in is the front radio Listen feature. On the front radio
Home screen for Fire TV, select the Listen button in the top
right corner on either card for Screen 1 or 2. This will allow
you to have either rear screen play audio through all the
speakers in the vehicle.
QUICK MENU
Accessing the quick menu will give you more options for
Fire TV.
To access the quick menu, tap the screen and it will
appear. The quick menu is also accessible by pushing the
Gear/Settings button on the Voice Remote with Alexa.
Some options of the quick menu are:
Power — This will power the screen off.
On-Screen Remote — This will bring up the on-screen
remote to use with the system.
Back — This will let you go back a page.
Home — This will take you to the Home screen.
Gear/Settings — This will let you access certain settings
in the system. For more setting options, select
“Settings” within the on-screen Gear/Settings menu.
Vehicle — This will bring up the Vehicle menu. From
here you can adjust rear climate controls and the Are
We There Yet? app.
PARENTAL CONTROLS (USING THE REAR
S
CREENS)
If parental controls were not set during the first time start
up of the system, they can be set by following these steps:
1. Push the Gear/Settings button on the Voice Remote
with Alexa or tap the screen to access Settings in the
“quick menu”.
2. Select the Gear/Settings icon on the screen.
3. Select “Settings” on the screen.
4. While in Settings, select “Preferences”.
5. Select “Parental Controls”; from here you can turn Parental Controls on or off and set up a PIN for the
controls using the Voice Remote with Alexa.
VOICE REMOTE WITH ALEXA PAIRING
(U
SING THE REAR SCREENS)
If the Voice Remote with Alexa needs to be paired again or
a new remote is being paired, follow these procedures:
1. Install batteries into the remote.
2. Tap the screen and Select the Gear/Settings icon on
the screen.
3. Select “Settings” on the screen.
4. In Settings, select “Controllers & Bluetooth® Devices”.
5. From this menu, select “Add New Remote”.
6. Follow the on-screen steps for Voice Remote with Alexa pairing.
5
23_RUP_OM_EN_USC_t.book Page 179
Page 185 of 328
MULTIMEDIA183
FIRE TV APPS/GAMES (USING THE
R
EAR SCREENS)
Apps and games can be accessed using Rear Seat
Entertainment with Fire TV built-in.
To access Apps on the rear screen, turn on the system and
select “Find” in the top menu. On the Find page, select
“App store®”. Within the App store® you can purchase
apps and games. From here you can also select from all
the apps and games that have been purchased.
USING THE VIDEO USB PORT
Plug in a USB drive or mass storage device and play your
favorite music or movies.
NOTE:To view USB media on the rear screens, insert a USB drive
into the port next to the DVD/Blu-ray™ Disc player. The
USB drive port is located under the radio controls in the
instrument panel.
On the rear screen you can browse the content of the USB
device by going to the USB source in the inputs. Use the
search feature to find your media faster.
PLAY VIDEO GAMES
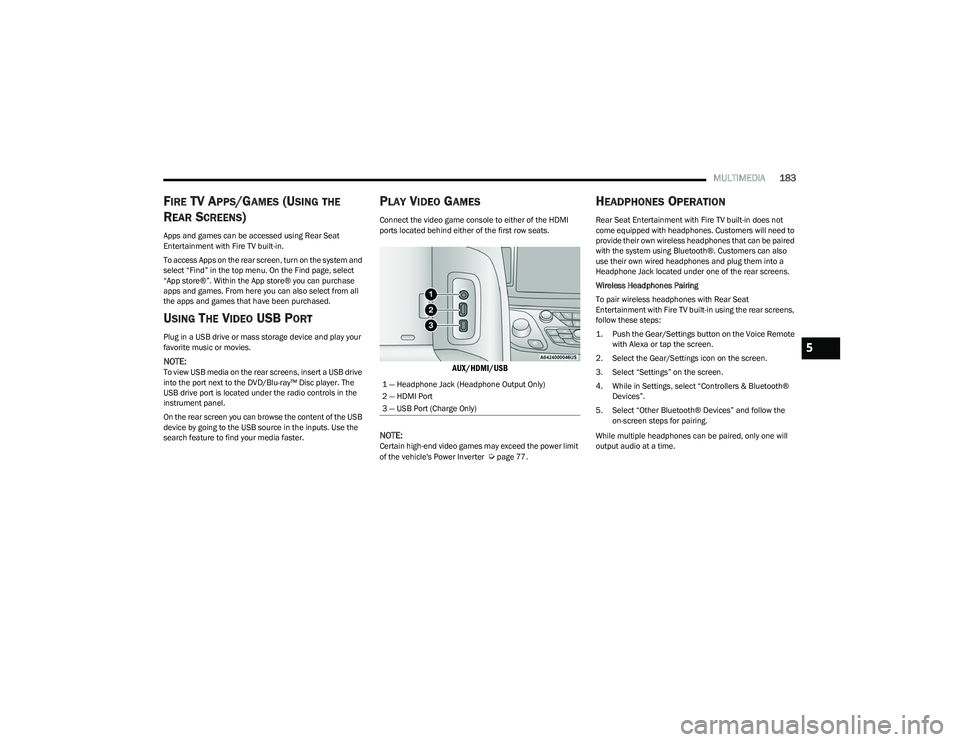
Connect the video game console to either of the HDMI
ports located behind either of the first row seats.
AUX/HDMI/USB
NOTE:
Certain high-end video games may exceed the power limit
of the vehicle's Power Inverter Úpage 77.
HEADPHONES OPERATION
Rear Seat Entertainment with Fire TV built-in does not
come equipped with headphones. Customers will need to
provide their own wireless headphones that can be paired
with the system using Bluetooth®. Customers can also
use their own wired headphones and plug them into a
Headphone Jack located under one of the rear screens.
Wireless Headphones Pairing
To pair wireless headphones with Rear Seat
Entertainment with Fire TV built-in using the rear screens,
follow these steps:
1. Push the Gear/Settings button on the Voice Remote with Alexa or tap the screen.
2. Select the Gear/Settings icon on the screen.
3. Select “Settings” on the screen.
4. While in Settings, select “Controllers & Bluetooth® Devices”.
5. Select “Other Bluetooth® Devices” and follow the on-screen steps for pairing.
While multiple headphones can be paired, only one will
output audio at a time.
1 — Headphone Jack (Headphone Output Only)
2 — HDMI Port
3 — USB Port (Charge Only)
5
23_RUP_OM_EN_USC_t.book Page 183
Page 186 of 328
184MULTIMEDIA
REAR CLIMATE CONTROLS
The Rear Climate Controls can also be controlled using Rear Seat Entertainment with Fire TV built-in Úpage 60.
Rear Climate Controls can be accessed by using the Vehicle menu. Tap on either rear screen and select the Vehicle icon or press the Vehicle button on the Voice Remote with Alexa.
Then select the Rear Climate Controls option.
Options within Rear Climate Controls include:
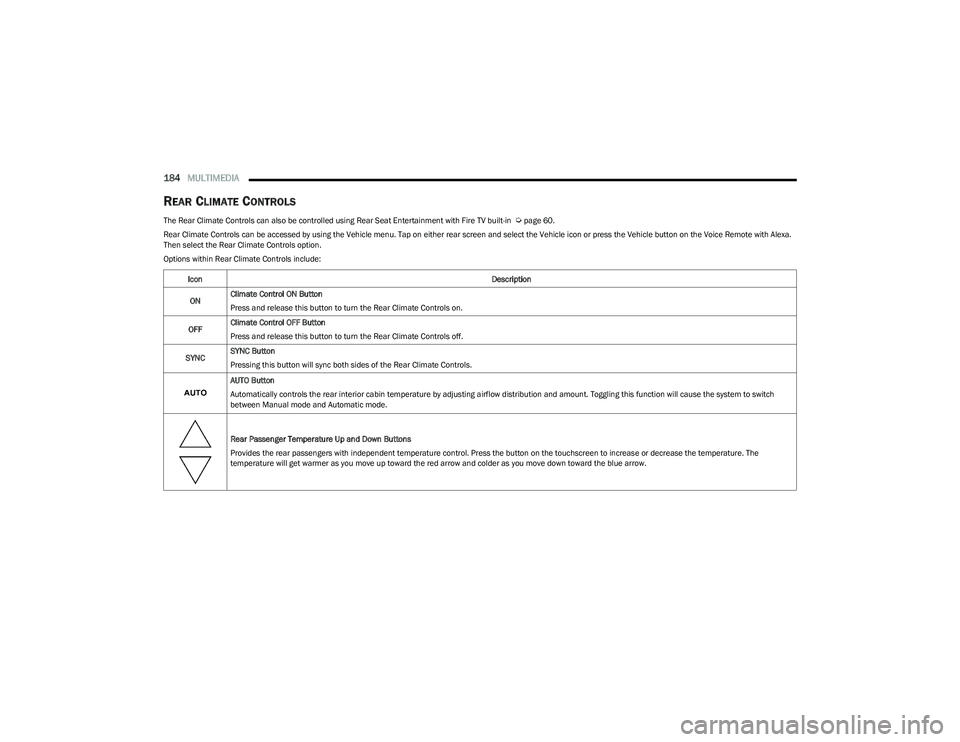
Icon Description
ON Climate Control ON Button
Press and release this button to turn the Rear Climate Controls on.
OFF Climate Control OFF Button
Press and release this button to turn the Rear Climate Controls off.
SYNC SYNC Button
Pressing this button will sync both sides of the Rear Climate Controls.
AUTO Button
Automatically controls the rear interior cabin temperature by adjusting airflow distribution and amount. Toggling this function will cause the system to switch
between Manual mode and Automatic mode.
Rear Passenger Temperature Up and Down Buttons
Provides the rear passengers with independent temperature control. Press the button on the touchscreen to increase or decrease the temperature. The
temperature will get warmer as you move up toward the red arrow and colder as you move down toward the blue arrow.
23_RUP_OM_EN_USC_t.book Page 184
Page 279 of 328
SERVICING AND MAINTENANCE277
F10 ––Not Populated
F11 ––Not Populated
F12 –5 Amp TanBattery Sensor (IBS)
F13 –10 Amp Red ECM (S) *
F14 –10 Amp Red ECM
F15 40 Amp Green –CBC / Power Locks
F16 –20 Amp Yellow ECM
F17 30 Amp Pink –Starter
F18 40 Amp Green –CBC / EXT LIGHTS
F19 25 Amp Clear –2nd Row Folding Seats Solenoid LT *
F20 –10 Amp Red A/C Compressor Clutch
F21 25 Amp Clear –2nd Row Folding Seat Solenoid RT *
F22 ––Not Populated
F23 ––Not Populated
F24 –20 Amp Yellow RR Wiper
F25 –10 Amp RedHands-Free Dr Mod / Active Grille Shutter /
Pwr Mirror / VRM
F26 40 Amp Green –Front HVAC Blower Motor
F27 25 Amp Clear –RR Slide Door Module-RT *
F28 –10 Amp RedDiagnostic Port / USB+(IP) / Video USB
Port / Overhead DVD Player(Aftermarket)
F29 ––Not Populated
F30 –15 Amp BlueMedia HUB / Power Lumbar *
Cavity
Cartridge Fuse Blade FuseDescription
*If Equipped
8
23_RUP_OM_EN_USC_t.book Page 277
Page 280 of 328
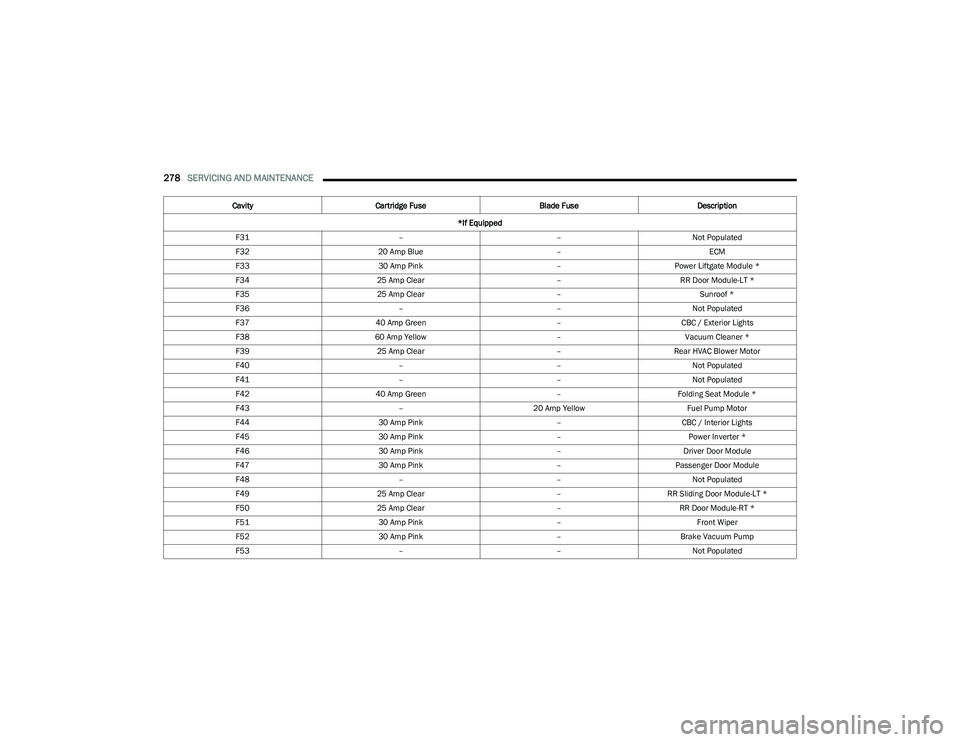
278SERVICING AND MAINTENANCE
F31 ––Not Populated
F32 20 Amp Blue –ECM
F33 30 Amp Pink –Power Liftgate Module *
F34 25 Amp Clear –RR Door Module-LT *
F35 25 Amp Clear –Sunroof *
F36 ––Not Populated
F37 40 Amp Green –CBC / Exterior Lights
F38 60 Amp Yellow –Vacuum Cleaner *
F39 25 Amp Clear –Rear HVAC Blower Motor
F40 ––Not Populated
F41 ––Not Populated
F42 40 Amp Green –Folding Seat Module *
F43 –20 Amp Yellow Fuel Pump Motor
F44 30 Amp Pink –CBC / Interior Lights
F45 30 Amp Pink –Power Inverter *
F46 30 Amp Pink –Driver Door Module
F47 30 Amp Pink –Passenger Door Module
F48 ––Not Populated
F49 25 Amp Clear –RR Sliding Door Module-LT *
F50 25 Amp Clear –RR Door Module-RT *
F51 30 Amp Pink –Front Wiper
F52 30 Amp Pink –Brake Vacuum Pump
F53 ––Not Populated
Cavity
Cartridge Fuse Blade FuseDescription
*If Equipped
23_RUP_OM_EN_USC_t.book Page 278
Page 281 of 328

SERVICING AND MAINTENANCE279
F54 40 Amp Green –ESP-ECU And Valves
F55 –15 Amp BlueRadio Frequency HUB/ Keyless Ignition
System (KIN) / ESL / DVD
F56 –10 Amp RedFront and Rear HVAC Control Module /
Occupant Classification Module (OCM) /
Electronic Steering Lock (ESL) / ESP / ESC
F57 ––Not Populated
F58 –10 Amp RedDrive Train Control Mod / Power Transfer
Unit *
F59 30 Amp Pink –Trailer Tow Receptacle *
F60 –20 Amp Yellow Rear Cargo Pwr Outlet
F61 –20 Amp YellowTrailer Tow Right Stop/Turn *
F62 –20 Amp Yellow Power Transfer Unit *
F63 –20 Amp Yellow Trailer Tow Left Stop/Turn *
F64 –15 Amp Blue RT HID Headlamp *
F65 ––Not Populated
F66 –15 Amp Blue Cluster
F67 –10 Amp RedHaptic Lane Feedback Module (HALF) /
Parktronics System (PTS)/Drivers Assist System Module (DASM)
F68 ––Not Populated
F69 ––Not Populated
F70 ––Not Populated
F71 –20 Amp Yellow Horn
Cavity
Cartridge Fuse Blade FuseDescription
*If Equipped
8
23_RUP_OM_EN_USC_t.book Page 279
Page 282 of 328

280SERVICING AND MAINTENANCE
F72 –10 Amp Red Heated Mirror *
F73 30 Amp Pink –Rear Defroster
F74 20 Amp Blue –Trailer Tow Backup Lights*
F75 –5 Amp TanOverhead Console / RR Center Stack
F76 –20 Amp YellowUconnect / Center Display / Telematics
F77 –10 Amp RedRR Entertainment / Media HUB / USB(S) /
Rain Sensor / Sunroof / RR View Mirror/ Overhead DVD Player / INT Monitoring Camera / Wireless Charging Pad
F78 –15 Amp BlueTCM (ZF) / E-Shifter / Cluster
F79 –10 Amp RedICS / HVAC / SCCM/ EPB SW
F80 ––Not Populated
F81 ––Not Populated
F82 ––Not Populated
F83 20 Amp Blue
–TT Park Lights *
30 Amp Pink –Headlamp Washer Pump *
F84 30 Amp Pink –Drive Train Control MOD *
F85 –20 Amp Yellow Cigar Lighter
F86 ––Not Populated
F87 ––Not Populated
F88 –20 Amp Yellow Front Heated Seats *
F89 –20 Amp Yellow Rear Heated Seats *
F90 ––Not Populated
Cavity
Cartridge Fuse Blade FuseDescription
*If Equipped
23_RUP_OM_EN_USC_t.book Page 280
Page 283 of 328

SERVICING AND MAINTENANCE281
30 Amp mini fuse is substituted for 25 Amp Circuit Breaker.F91
–15 Amp BlueFront Ventilated Seats/Heated Steering
Wheel *
F92 –5 Amp Tan Security Gateway
F93 ––Not Populated
F94 40 Amp Green –ESC Motor Pump
F95A –10 Amp RedUSB Charge Port — ACC/RUN
F95B –10 Amp Red
Selectable Fuse Location – USB IP (Direct) B+
F96 –10 Amp Red Airbag
F97 –10 Amp Red Airbag
F98 –15 Amp Blue Left HID Headlamp *
F99 30 Amp Pink –Trailer Tow Elect Brake Module *
F100 –10 Amp RedHeadlamp Level / RR Camera / Blindspot /
Humidity SNSR / In Car Temp SNSR / Headlamp SW *
Circuit Breakers
CB1 25 AmpPower Seats (Driver)
CB2 25 Amp *Power Seats (Pass)
CB3 25 AmpFRT PWR Window W/O Door Nodes + RR
PWR Window Lockout
Cavity
Cartridge Fuse Blade FuseDescription
*If Equipped
8
23_RUP_OM_EN_USC_t.book Page 281