2023 CHEVROLET SUBURBAN Manual gear
[x] Cancel search: Manual gearPage 226 of 443
Chevrolet Tahoe/Suburban Owner Manual (GMNA-Localizing-U.S./Canada/
Mexico-16416971) - 2023 - CRC - 5/16/22
Driving and Operating 225
Brake Assist
Brake Assist detects rapid brake pedal
applications due to emergency braking
situations and provides additional braking to
activate the Antilock Brake System (ABS) if
the brake pedal is not pushed hard enough
to activate ABS normally. Minor noise, brake
pedal pulsation, and/or pedal movement
during this time may occur. Continue to
apply the brake pedal as the driving
situation dictates. Brake Assist disengages
when the brake pedal is released.
Hill Start Assist (HSA)
{Warning
Do not rely on the HSA feature. HSA does
not replace the need to pay attention
and drive safely. You may not hear or
feel alerts or warnings provided by this
system. Failure to use proper care when
driving may result in injury, death,
or vehicle damage. SeeDefensive Driving
0 196.
When the vehicle is stopped on a grade, Hill
Start Assist (HSA) prevents the vehicle from
rolling in an unintended direction during the
transition from brake pedal release to accelerator pedal apply. The brakes release
when the accelerator pedal is applied. If the
accelerator pedal is not applied within a few
minutes, the Electric Parking Brake will
apply. The brakes may also release under
other conditions. Do not rely on HSA to hold
the vehicle.
HSA is available when the vehicle is facing
uphill in a forward gear, or when facing
downhill in R (Reverse). The vehicle must
come to a complete stop on a grade for HSA
to activate.
Ride Control Systems
Traction Control/Electronic
Stability Control
System Operation
The vehicle has a Traction Control System
(TCS) and StabiliTrak/Electronic Stability
Control (ESC). These systems help limit
wheel spin and assist the driver in
maintaining control, especially on slippery
road conditions.
TCS activates if it senses that any of the
drive wheels are spinning or beginning to
lose traction. When this happens, TCS
applies the brakes to the spinning wheels
and reduces engine power to limit
wheel spin.
StabiliTrak/ESC activates when the vehicle
senses a difference between the intended
path and the direction the vehicle is actually
traveling. StabiliTrak/ESC selectively applies
braking pressure to any one of the vehicle
wheel brakes to assist the driver in keeping
the vehicle on the intended path. Trailer
Sway Control (TSC) is also on automatically
when the vehicle is started. See
Trailer Sway
Control (TSC) 0305.
If cruise control is being used and traction
control or StabiliTrak/ESC begins to limit
wheel spin, cruise control will disengage.
Cruise control may be turned back on when
road conditions allow.
Both systems come on automatically when
the vehicle is started and begins to move.
The systems may be heard or felt while
they are operating or while performing
diagnostic checks. This is normal and does
not mean there is a problem with the
vehicle.
It is recommended to leave both systems on
for normal driving conditions, but it may be
necessary to turn TCS off if the vehicle gets
Page 228 of 443
Chevrolet Tahoe/Suburban Owner Manual (GMNA-Localizing-U.S./Canada/
Mexico-16416971) - 2023 - CRC - 5/16/22
Driving and Operating 227
For vehicles without four corner air
suspension StabiliTrak/ESC will automatically
turn on if the vehicle exceeds 56 km/h
(35 mph). Traction control will remain off.
For vehicles with four corner air suspension
StabiliTrak/ESC will automatically turn on if
the vehicle exceeds 32 km/h (20 mph).
The vehicle has a Trailer Sway Control (TSC)
feature and a Hill Start Assist (HSA) feature.
SeeTrailer Sway Control (TSC) 0305 or
Hill Start Assist (HSA) 0225.
Adding accessories can affect the vehicle
performance. See Accessories and
Modifications 0319.
Hill Descent Control (HDC)
If equipped, Hill Descent Control (HDC) sets
and maintains vehicle speed while driving
down steep grades in a forward or reverse
gear. The HDC switch is on the instrument
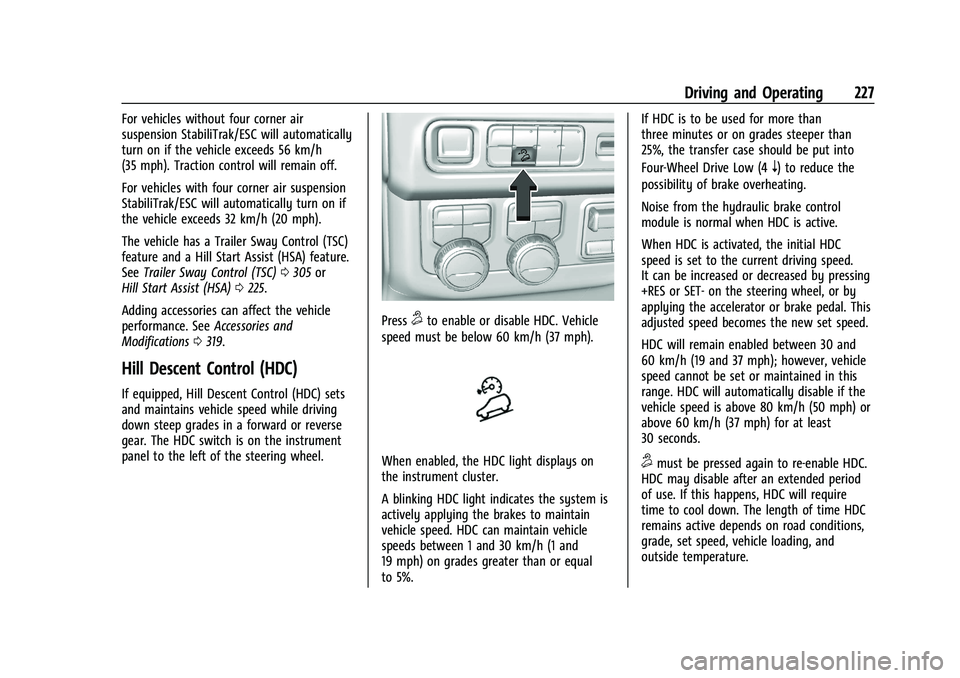
panel to the left of the steering wheel.
Press5to enable or disable HDC. Vehicle
speed must be below 60 km/h (37 mph).
When enabled, the HDC light displays on
the instrument cluster.
A blinking HDC light indicates the system is
actively applying the brakes to maintain
vehicle speed. HDC can maintain vehicle
speeds between 1 and 30 km/h (1 and
19 mph) on grades greater than or equal
to 5%. If HDC is to be used for more than
three minutes or on grades steeper than
25%, the transfer case should be put into
Four-Wheel Drive Low (4
n) to reduce the
possibility of brake overheating.
Noise from the hydraulic brake control
module is normal when HDC is active.
When HDC is activated, the initial HDC
speed is set to the current driving speed.
It can be increased or decreased by pressing
+RES or SET- on the steering wheel, or by
applying the accelerator or brake pedal. This
adjusted speed becomes the new set speed.
HDC will remain enabled between 30 and
60 km/h (19 and 37 mph); however, vehicle
speed cannot be set or maintained in this
range. HDC will automatically disable if the
vehicle speed is above 80 km/h (50 mph) or
above 60 km/h (37 mph) for at least
30 seconds.
5must be pressed again to re-enable HDC.
HDC may disable after an extended period
of use. If this happens, HDC will require
time to cool down. The length of time HDC
remains active depends on road conditions,
grade, set speed, vehicle loading, and
outside temperature.
Page 229 of 443
Chevrolet Tahoe/Suburban Owner Manual (GMNA-Localizing-U.S./Canada/
Mexico-16416971) - 2023 - CRC - 5/16/22
228 Driving and Operating
When enabled, if the vehicle speed is above
30 km/h (19 mph) and below 60 km/h
(37 mph), a DIC message will display.
Driver Mode Control
Driver Mode Control (DMC) allows the driver
to adjust the overall driving experience to
better suit preference by adjusting multiple
subsystems simultaneously. Drive Mode
availability and affected vehicle subsystems
are dependent upon vehicle trim level,
region, and optional features.
Normal Mode is the default mode every
time the vehicle is started. A unique and
persistent indicator is displayed in the
instrument cluster for each mode.
Depending on trim level, Normal, Sport,
Snow/Ice, Off-Road, Tow/Haul, and Terrain
modes may be available.
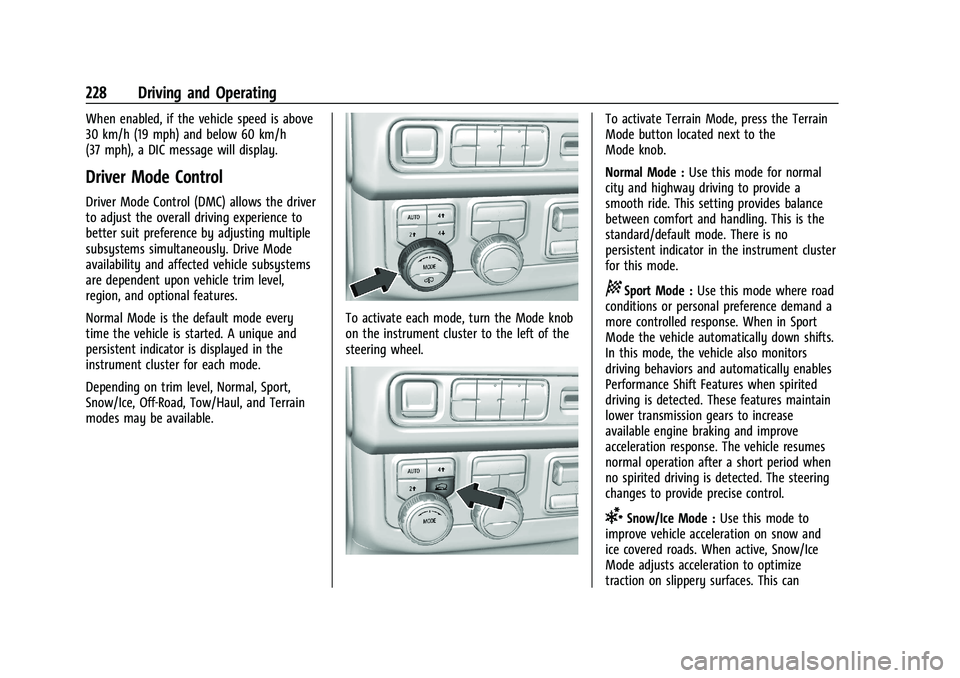
To activate each mode, turn the Mode knob
on the instrument cluster to the left of the
steering wheel.
To activate Terrain Mode, press the Terrain
Mode button located next to the
Mode knob.
Normal Mode :Use this mode for normal
city and highway driving to provide a
smooth ride. This setting provides balance
between comfort and handling. This is the
standard/default mode. There is no
persistent indicator in the instrument cluster
for this mode.
8Sport Mode : Use this mode where road
conditions or personal preference demand a
more controlled response. When in Sport
Mode the vehicle automatically down shifts.
In this mode, the vehicle also monitors
driving behaviors and automatically enables
Performance Shift Features when spirited
driving is detected. These features maintain
lower transmission gears to increase
available engine braking and improve
acceleration response. The vehicle resumes
normal operation after a short period when
no spirited driving is detected. The steering
changes to provide precise control.
6Snow/Ice Mode : Use this mode to
improve vehicle acceleration on snow and
ice covered roads. When active, Snow/Ice
Mode adjusts acceleration to optimize
traction on slippery surfaces. This can
Page 230 of 443

Chevrolet Tahoe/Suburban Owner Manual (GMNA-Localizing-U.S./Canada/
Mexico-16416971) - 2023 - CRC - 5/16/22
Driving and Operating 229
compromise the acceleration on dry asphalt.
This feature is not intended for use when
the vehicle is stuck in sand, mud, ice, snow,
or gravel. If the vehicle becomes stuck, seeIf
the Vehicle Is Stuck 0204.
7Off-Road Mode : Use this mode for
off-road recreational driving. Off-Road Mode
should be used to improve driving at
moderate speeds, on grass, gravel, dirt,
unpaved roads, or snow-covered roads. The
accelerator pedal is tuned for off-road use.
This mode modifies pedal mapping, ride
height, and Traction Control System (TCS)
performance. For more information on
off-road driving, see Off-Road Driving0198.
_Tow/Haul Mode : Use this mode
when hauling heavy loads to provide
increased performance and vehicle control.
Tow/Haul Mode adjusts the transmission
shift pattern, steering, and Electronic
Stability Control (ESC) performance.
If the vehicle is turned off while in Tow/
Haul Mode and then restarted within four
hours or less, it will remain active.
Otherwise, the vehicle will start in
Normal Mode. If the vehicle has a diesel engine, exhaust
braking is automatically activated when
Tow/Haul Mode is selected. It maintains
vehicle speed by automatically
implementing a shift pattern that uses the
engine and the transmission to slow the
vehicle. The system will command
downshifts and use the turbo charger on the
engine to reduce vehicle speed when the
brake is applied. The normal Tow/Haul shift
pattern will return once the vehicle is on a
low grade or when the accelerator pedal is
pressed.
For more information, see
Towing
Equipment 0296 orTransporting a Disabled
Vehicle 0386.
If equipped, select Terrain Mode by
pressing the
gbelow the 4mtransfer
case button.
gTerrain Mode : Use this mode when
traveling on very rough roads at very low
speeds, such as a two-track or heavily rutted
road. This mode can also be used for pulling
a boat out of the water on a trailer. When
in Terrain Mode, the vehicle shifts
automatically, but will hold a lower gear
longer to maximize engine torque. This
mode has a unique pedal map and
transmission shift pattern for better control
at lower speeds and over rough terrain. This
mode modifies accelerator pedal mapping,
transmission shift pattern, ride height, and
electronic Limited Slip Differential (eLSD).
When the vehicle comes to a stop on an
upward grade, automatic vehicle hold is
engaged until the driver presses the
accelerator pedal. Stop/Start and cruise
control are disabled in Terrain Mode.
Page 231 of 443
Chevrolet Tahoe/Suburban Owner Manual (GMNA-Localizing-U.S./Canada/
Mexico-16416971) - 2023 - CRC - 5/16/22
230 Driving and Operating
Active Braking during lift throttle will be
engaged. This feature automatically applies
light braking to simulate heavy engine
braking of four-wheel-dive low. It also
applies light braking in D (Drive) until the
vehicle is at idle speeds. In L1 and L2 light
braking will typically bring the vehicle to a
stop. Active Braking during lift throttle also
reduces trailer braking.
Terrain Mode automatically exits to Normal
Mode if the brake temperatures become too
hot, electronic parking brake becomes
inoperable, or the vehicle cannot perform
braking or vehicle hold.
For more information on off-road driving,
seeOff-Road Driving 0198 and
Hill and Mountain Roads 0202. Terrain Mode Drive
Select Expected Vehicle Behavior Ideal Terrain
Drive (L3-Lx) Minor deceleration when off
throttle and mild ability to
modulate throttle; mimics
performance of 4
nwithout torque
multiplication. Grassy fields,
mild two tracks,
rutted roads,
large rolling hills
L2 Moderate deceleration when off
throttle and moderate ability to
modulate throttle; brings vehicle to
a stop in most cases. Mild rock crawling,
heavy ruts,
short, steeper grades
L1 Significant deceleration when off
throttle and significant ability to
modulate throttle; brings vehicle to
a stop in most cases. Rock crawling downhill
Vehicle Hold Features
.When the vehicle comes to a stop on an
incline grade in forward gear or on a
decline grade in reverse gear, Vehicle
Hold is engaged until the accelerator
pedal is pressed.
.When the vehicle is in forward gear on a
decline, the vehicle will creep down the
hill when the brake pedal is released without pressing the accelerator pedal.
The vehicle will also creep forward on flat
ground.
.If the driver seat belt is removed and the
driver door is opened while the vehicle is
being held, Electric Parking Brake (EPB) is
engaged.
.EPB engages if the vehicle is held for an
extended period.
Page 265 of 443

Chevrolet Tahoe/Suburban Owner Manual (GMNA-Localizing-U.S./Canada/
Mexico-16416971) - 2023 - CRC - 5/16/22
264 Driving and Operating
Touch the camera view buttons along the
bottom of the infotainment display to
access each view (if equipped):
1. Front/Rear Standard View
Displays an image of the area in front
or behind the vehicle. To select, touch
Front/Rear Standard View on the
infotainment display when a camera
view is active.
When the hitch guidance is selected,
Rear Standard View will remain visible
across gear changes, otherwise the
view will toggle between Front and
Rear Standard View based on gear
position.
If equipped, the front view camera
also displays when the Park Assist
system detects an object within
30 cm (12 in).
To access this view when in a forward
gear above 12 km/h (8 mph), select
CAMERA on the infotainment display
and select Rear Standard View. The
view will close after 8 seconds and
can be closed early by selecting X,
Home or Back.
2. Front/Rear Top-Down View
Displays a front or rear overhead view
of the vehicle. To view, select Front/
Rear Top-Down View on the
infotainment display when the camera
app is active.
3. Front/Rear side View
Displays a view that shows objects
next to the front or rear sides of the
vehicle. To select, touch Front/Rear
Side View on the infotainment display
when a camera view is active. Touch
the button to toggle between front
and rear camera views. Park Assist and
RCTA overlays are not available when
Front/Rear Side View is active.
4. Hitch View
Displays a zoomed-in view of the hitch
area to assist with aligning the
vehicle’s hitch ball with the trailer
coupler and monitoring the trailer
connection. To view, select Hitch View
on the infotainment display when the
Camera App is active. To access this
view when in a forward gear above
12 km/h (8 mph), select CAMERA on
the infotainment display and select
Hitch View. The view will close after
eight seconds and can be closed earlyby selecting X, Home or Back. Shifting
into P (Park) while in this view will
automatically engage the Electric
Parking Brake (EPB).
5. Surround View
Displays an image of the area
surrounding the vehicle. Surround
View is displayed alongside the
currently selected view when below 12
kph (8 mph). Surround View is
disabled when above 12 kph (8 mph).
6. Camera App Guidance Lines
The Camera App supports three
possible guidance modes: No
Guidance, Vehicle Guidance and
Trailering Guidance. To change
guidance mode, select the appropriate
guidance icon. Depending on the
guidance mode and view selected,
different guidance lines may appear.
A grayed-out icon indicates that
guidance lines are not available.
Certain views do not support Guidance
lines.
.Standard Guidance Lines are
available in Front/Rear Standard
Views, Front/Rear Top-Down Views
and Surround View when the
Page 266 of 443
Chevrolet Tahoe/Suburban Owner Manual (GMNA-Localizing-U.S./Canada/
Mexico-16416971) - 2023 - CRC - 5/16/22
Driving and Operating 265
vehicle guidance mode is selected.
Standard Guidance Lines show
current and intended vehicle path.
.Hitch Guidance Line is available in
Rear Standard View when the
Trailering Guidance mode is
selected. Hitch Guidance displays a
single centered guidance line on
the infotainment display to assist
with aligning the vehicle’s hitch
with a trailer coupler. Align the
Hitch Guidance Line with the
trailer coupler by continuously
steering the vehicle to keep the
guidance line centered on the
coupler when backing. Park Assist
overlays will not display when the
Hitch Guidance Line is active.
.Rear Trailer Guidance Lines are
available in the Rear Trailer View
when the Trailering Guidance
mode is selected and the rear
trailer camera calibration has been
successfully completed. Rear Trailer
Guidance Lines show the intended
path (yellow) and the current path
(blue) of the trailer. The current
path guidance lines will converge
with the intended path guidance
lines.
7. Interior Trailer View
Displays a view of the interior of the
trailer. The feature is available when a
trailer is connected. The feature
requires user installation of an
accessory trailer camera on the
interior of the trailer per the accessory
trailer camera installation instructions
(see your dealer for accessory trailer
camera(s) and information). To view,
select Interior Trailer View on the
infotainment display when the Camera
App is active. To access this view
when in a forward gear above
12 km/h (8 mph), select CAMERA on
the infotainment display and select
Interior Trailer View. The view will
close after 8 seconds and can be
closed early by selecting X, Home
or Back.
8. Transparent Trailer View
Displays a view that allows the driver
to virtually“see through” the trailer.
The feature is available when a
compatible trailer is connected, a valid
profile is selected and the vehicle is
not in Reverse. The feature requires
user installation of an accessory trailer
camera on the rear exterior surface of
the trailer per the accessory trailer camera installation instructions (see
your dealer for accessory trailer
camera(s) and information). To view,
select Transparent Trailer View on the
infotainment display when the Camera
App is active. To access this view
when in a forward gear above
12 km/h (8 mph), select CAMERA on
the infotainment display and select
Transparent Trailer View. The view can
be closed by selecting X, Home
or Back.
When the system is calibrated and
trailer position is known one of three
views will be shown; Transparent
Trailer View, Left Transparent Trailer
View or Right Transparent Trailer
View. The Transparent Trailer View is
shown when the position of the trailer
is relatively straight behind the
vehicle. The Left or Right Transparent
Trailer view is shown when the
position of the trailer is too far to the
left or right. When the system is not
calibrated or trailer position is not
known the Transparent Trailer
Picture-in-Picture View will be shown.
Page 267 of 443
Chevrolet Tahoe/Suburban Owner Manual (GMNA-Localizing-U.S./Canada/
Mexico-16416971) - 2023 - CRC - 5/16/22
266 Driving and Operating
9. Rear Trailer Views
.Rear Trailer View
Displays a view of the area behind
the trailer when a trailer is
connected. The feature requires
user installation of an accessory
trailer camera on the rear exterior
surface of the trailer per the
accessory trailer camera
installation instructions (see your
dealer for accessory trailer
camera(s) and information). To
view, select Rear Trailer View on
the infotainment display when the
Camera App is active. To access
this view when in a forward gear
above 12 km/h (8 mph), select
CAMERA on the infotainment
display and select Rear Trailer
View. The view can be closed by
selecting X, Home or Back.
.Rear Side View with Available
Articulation Functionality
Displays a rearward split view of
the left and right sides of the
vehicle and trailer, when a trailer is
connected. The view will
automatically pan to show more of
the left or right side based on theposition of the trailer when a
compatible profile is configured
and selected via the Trailering App.
To view, select Rear Side View with
Available Articulation Functionality
on the infotainment display when
the Camera App is active. To access
this view when in a forward gear
above 12 km/h (8 mph), select
CAMERA on the infotainment
display and select Rear Side View
with Available Articulation
Functionality. The view can be
closed by selecting X, Home
or Back.
.Picture-in-Picture Side View
Displays a rearward split view of
the left and right sides of the
vehicle and trailer with an overlay
view of the area behind the trailer
when a trailer is connected. The
feature requires user installation of
an accessory trailer camera on the
rear exterior surface of the trailer
per the accessory trailer camera
installation instructions (see your
dealer for accessory trailer
camera(s) and information). To
view, select Picture-in-Picture Side
View on the infotainment displaywhen the Camera App is active. To
access this view when in a forward
gear above 12 km/h (8 mph), select
CAMERA on the infotainment
display and select Picture-in-Picture
Side View. The view can be closed
by selecting X, Home or Back.
Additional Views and Alerts
.Turn Signal Activated Views
Displays a rearward view of the left or
right side of the vehicle and trailer when
a trailer is connected. Views are provided
based on turn signal activation with the
right-side view being shown when the
right turn signal is active and the left side
view being shown when the left turn
signal is active. The feature can be
enabled or disabled. To view available
settings from the infotainment screen,
touch Settings > Vehicle > Collision/
Detection Systems. The view can be
closed early by selecting X, Home or Back.
A Trailer Length Indicator Overlay is
available in the Turn Signal Activated
Views when the trailer is relatively
straight behind the vehicle and a
compatible profile is configured and
selected via the Trailering App. The
overlay will not be visible when the