2023 CHEVROLET SILVERADO 2500 tow
[x] Cancel search: towPage 93 of 441
Chevrolet Silverado 2500 HD/3500 HD Owner Manual (GMNA-Localizing-U.
S./Canada/Mexico-15546003) - 2022 - CRC - 5/5/21
92 Seats and Restraints
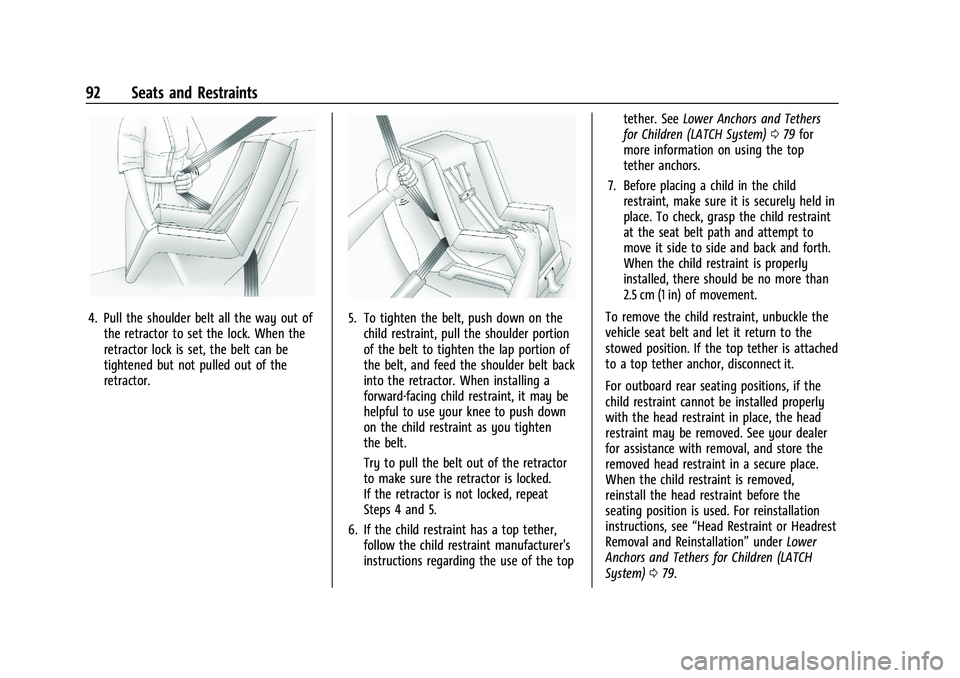
4. Pull the shoulder belt all the way out ofthe retractor to set the lock. When the
retractor lock is set, the belt can be
tightened but not pulled out of the
retractor.5. To tighten the belt, push down on thechild restraint, pull the shoulder portion
of the belt to tighten the lap portion of
the belt, and feed the shoulder belt back
into the retractor. When installing a
forward-facing child restraint, it may be
helpful to use your knee to push down
on the child restraint as you tighten
the belt.
Try to pull the belt out of the retractor
to make sure the retractor is locked.
If the retractor is not locked, repeat
Steps 4 and 5.
6. If the child restraint has a top tether, follow the child restraint manufacturer's
instructions regarding the use of the top tether. See
Lower Anchors and Tethers
for Children (LATCH System) 079 for
more information on using the top
tether anchors.
7. Before placing a child in the child restraint, make sure it is securely held in
place. To check, grasp the child restraint
at the seat belt path and attempt to
move it side to side and back and forth.
When the child restraint is properly
installed, there should be no more than
2.5 cm (1 in) of movement.
To remove the child restraint, unbuckle the
vehicle seat belt and let it return to the
stowed position. If the top tether is attached
to a top tether anchor, disconnect it.
For outboard rear seating positions, if the
child restraint cannot be installed properly
with the head restraint in place, the head
restraint may be removed. See your dealer
for assistance with removal, and store the
removed head restraint in a secure place.
When the child restraint is removed,
reinstall the head restraint before the
seating position is used. For reinstallation
instructions, see “Head Restraint or Headrest
Removal and Reinstallation” underLower
Anchors and Tethers for Children (LATCH
System) 079.
Page 96 of 441

Chevrolet Silverado 2500 HD/3500 HD Owner Manual (GMNA-Localizing-U.
S./Canada/Mexico-15546003) - 2022 - CRC - 5/5/21
Seats and Restraints 95
6. To tighten the belt, push down on thechild restraint, pull the shoulder portion
of the belt to tighten the lap portion of
the belt, and feed the shoulder belt back
into the retractor. When installing a
forward-facing child restraint, it may be
helpful to use your knee to push down
on the child restraint as you tighten
the belt.
Try to pull the belt out of the retractor
to make sure the retractor is locked.
If the retractor is not locked, repeat
Steps 5 and 6.
7. If the vehicle does not have a rear seat and the child restraint manufacturer
recommends using a top tether anchor,
attach the top tether to the top tether anchor. Refer to the instructions that
came with the child restraint and to
Lower Anchors and Tethers for Children
(LATCH System)
079.
8. Before placing a child in the child restraint, make sure it is securely held in
place. To check, grasp the child restraint
at the seat belt path and attempt to
move it side to side and back and forth.
When the child restraint is properly
installed, there should be no more than
2.5 cm (1 in) of movement.
If the airbag is off, the OFF indicator in the
passenger airbag status indicator will come
on and stay on when the vehicle is started.
If a child restraint has been installed and
the ON indicator is lit, see “If the On
Indicator Is Lit for a Child Restraint” under
Passenger Sensing System 067.
To remove the child restraint, unbuckle the
vehicle seat belt and let it return to the
stowed position.
Securing Child Restraints (With
the Seat Belt in the Center
Front Seat)
{Warning
A child in a child restraint in the center
front seat can be badly injured or killed
by the frontal airbags if they inflate.
Never secure a child restraint in the
center front seat. It is always better to
secure a child restraint in a rear seat.
Do not use child restraints in the center
front seat position.
Page 98 of 441
Chevrolet Silverado 2500 HD/3500 HD Owner Manual (GMNA-Localizing-U.
S./Canada/Mexico-15546003) - 2022 - CRC - 5/5/21
Storage 97
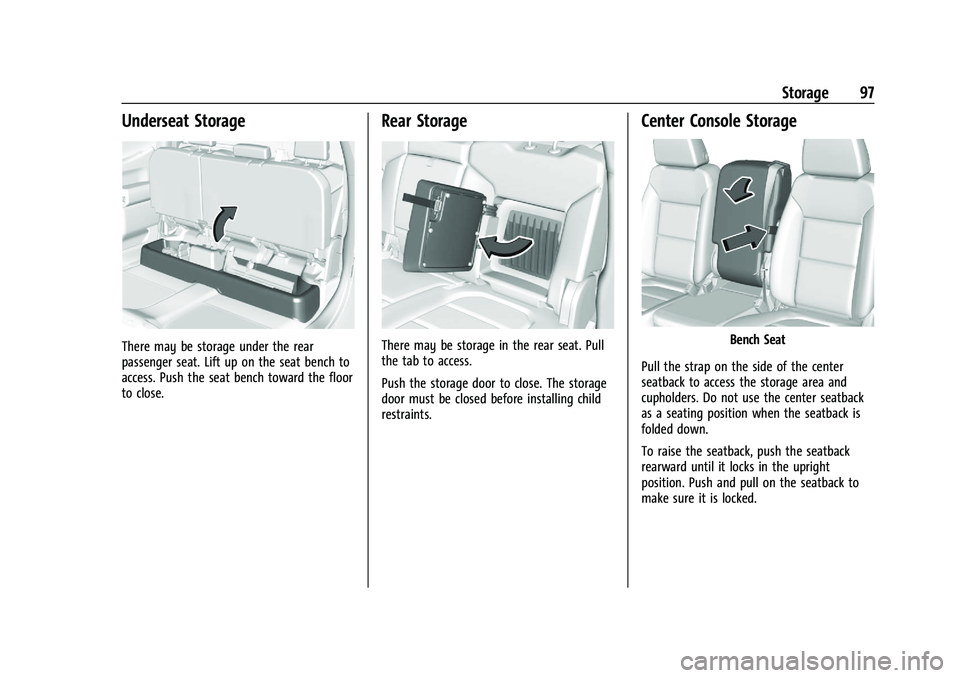
Underseat Storage
There may be storage under the rear
passenger seat. Lift up on the seat bench to
access. Push the seat bench toward the floor
to close.
Rear Storage
There may be storage in the rear seat. Pull
the tab to access.
Push the storage door to close. The storage
door must be closed before installing child
restraints.
Center Console Storage
Bench Seat
Pull the strap on the side of the center
seatback to access the storage area and
cupholders. Do not use the center seatback
as a seating position when the seatback is
folded down.
To raise the seatback, push the seatback
rearward until it locks in the upright
position. Push and pull on the seatback to
make sure it is locked.
Page 118 of 441
Chevrolet Silverado 2500 HD/3500 HD Owner Manual (GMNA-Localizing-U.
S./Canada/Mexico-15546003) - 2022 - CRC - 5/12/21
Instruments and Controls 117
To help prevent damage, reduce vehicle
speed and avoid hard accelerations and
uphill grades. If towing a trailer, reduce the
amount of cargo being hauled as soon as
possible.
If the light continues to flash, find a safe
place to park. Turn the vehicle off and wait
at least 10 seconds before restarting the
engine. If the light is still flashing, follow
the previous guidelines and see your dealer
for service as soon as possible.
If the light is on steady :A malfunction has
been detected. Diagnosis and service may be
required.
Check the following:
.If fuel has been added to the vehicle
using the capless funnel adapter, make
sure that it has been removed. See
“Filling the Tank with a Portable Gas Can”
under Filling the Tank (Chassis Cab and
Box Delete Models) 0272 or
Filling the Tank (Pickup Models) 0271. The
diagnostic system can detect if the
adapter has been left installed in the
vehicle, allowing fuel to evaporate into
the atmosphere. A few driving trips with
the adapter removed may turn off the
light.
.Poor fuel quality can cause inefficient
engine operation and poor driveability,
which may go away once the engine is
warmed up. If this occurs, change the fuel
brand. It may require at least one full
tank of the proper fuel to turn the light
off. See Recommended Fuel 0269.
If the light remains on, see your dealer.
Emissions Inspection and Maintenance
Programs
If the vehicle requires an Emissions
Inspection/Maintenance test, the test
equipment will likely connect to the
vehicle's Data Link Connector (DLC).
The DLC is under the instrument panel to
the left of the steering wheel. Connecting
devices that are not used to perform an
Emissions Inspection/Maintenance test or to
service the vehicle may affect vehicle operation. See
Add-On Electrical Equipment
0 303. See your dealer if assistance is
needed.
The vehicle may not pass inspection if:
.The light is on when the engine is
running.
.The light does not come on when the
ignition is on while the engine is off.
.Critical emission control systems have not
been completely diagnosed. If this
happens, the vehicle would not be ready
for inspection and might require
several days of routine driving before the
system is ready for inspection. This can
happen if the 12-volt battery has recently
been replaced or run down, or if the
vehicle has been recently serviced.
See your dealer if the vehicle will not pass
or cannot be made ready for the test.
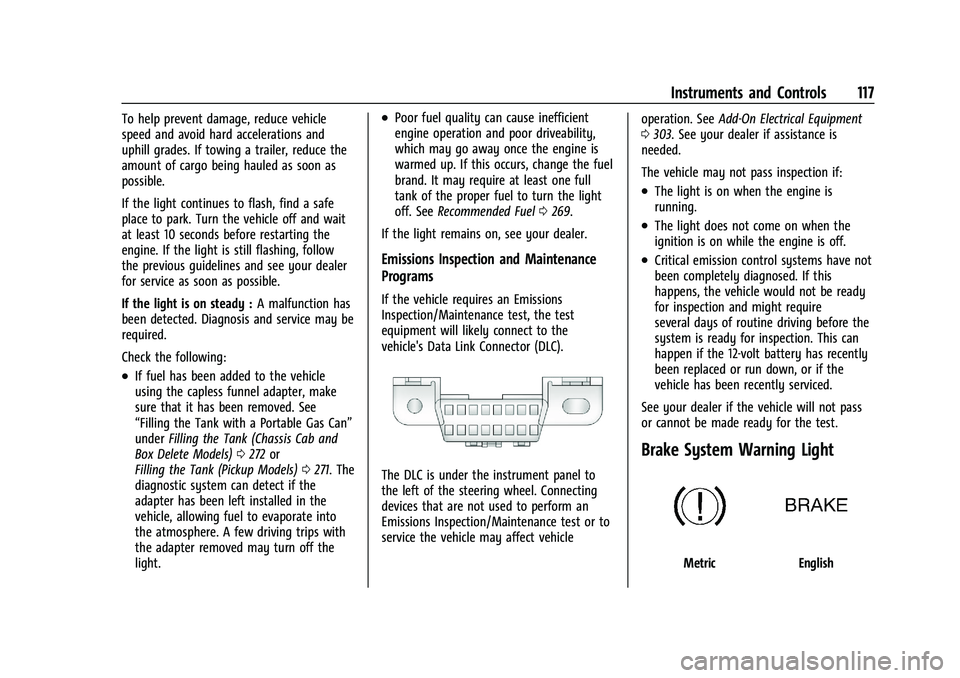
Brake System Warning Light
MetricEnglish
Page 119 of 441
Chevrolet Silverado 2500 HD/3500 HD Owner Manual (GMNA-Localizing-U.
S./Canada/Mexico-15546003) - 2022 - CRC - 5/12/21
118 Instruments and Controls
This light should come on briefly when the
vehicle is turned on. If it does not come on
then, have it fixed so it will be ready to
warn you if there is a problem.
If the light comes on and stays on at start
up, there is a brake problem. Have the brake
system inspected right away.
If the light comes on while driving, pull off
the road and stop carefully. The brake pedal
might be harder to push, or the brake pedal
may go closer to the floor. It could take
longer to stop. If the light is still on, have
the vehicle towed for service. SeeTowing
the Vehicle 0377.
{Warning
The brake system might not be working
properly if the brake system warning
light is on. Driving with the brake system
warning light on can lead to a crash.
If the light is still on after the vehicle has
been pulled off the road and carefully
stopped, have the vehicle towed for
service.
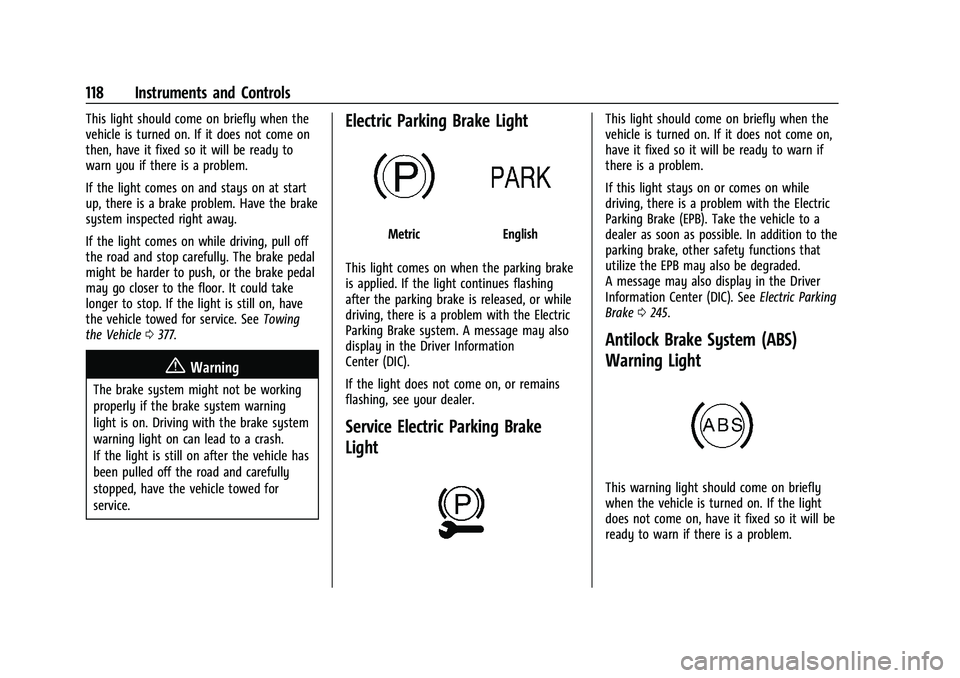
Electric Parking Brake Light
MetricEnglish
This light comes on when the parking brake
is applied. If the light continues flashing
after the parking brake is released, or while
driving, there is a problem with the Electric
Parking Brake system. A message may also
display in the Driver Information
Center (DIC).
If the light does not come on, or remains
flashing, see your dealer.
Service Electric Parking Brake
Light
This light should come on briefly when the
vehicle is turned on. If it does not come on,
have it fixed so it will be ready to warn if
there is a problem.
If this light stays on or comes on while
driving, there is a problem with the Electric
Parking Brake (EPB). Take the vehicle to a
dealer as soon as possible. In addition to the
parking brake, other safety functions that
utilize the EPB may also be degraded.
A message may also display in the Driver
Information Center (DIC). See Electric Parking
Brake 0245.
Antilock Brake System (ABS)
Warning Light
This warning light should come on briefly
when the vehicle is turned on. If the light
does not come on, have it fixed so it will be
ready to warn if there is a problem.
Page 122 of 441
Chevrolet Silverado 2500 HD/3500 HD Owner Manual (GMNA-Localizing-U.
S./Canada/Mexico-15546003) - 2022 - CRC - 5/12/21
Instruments and Controls 121
serviced by your dealer. If the system is
working normally, the indicator light then
turns off. This light comes on when the
Electronic Stability Control (ESC) system is
turned off. If ESC is off, the Traction Control
System (TCS) is also off. To turn ESC off and
on, seeTraction Control/Electronic Stability
Control 0247.
If ESC and TCS are off, the systems do not
assist in controlling the vehicle. Adjust
driving accordingly.
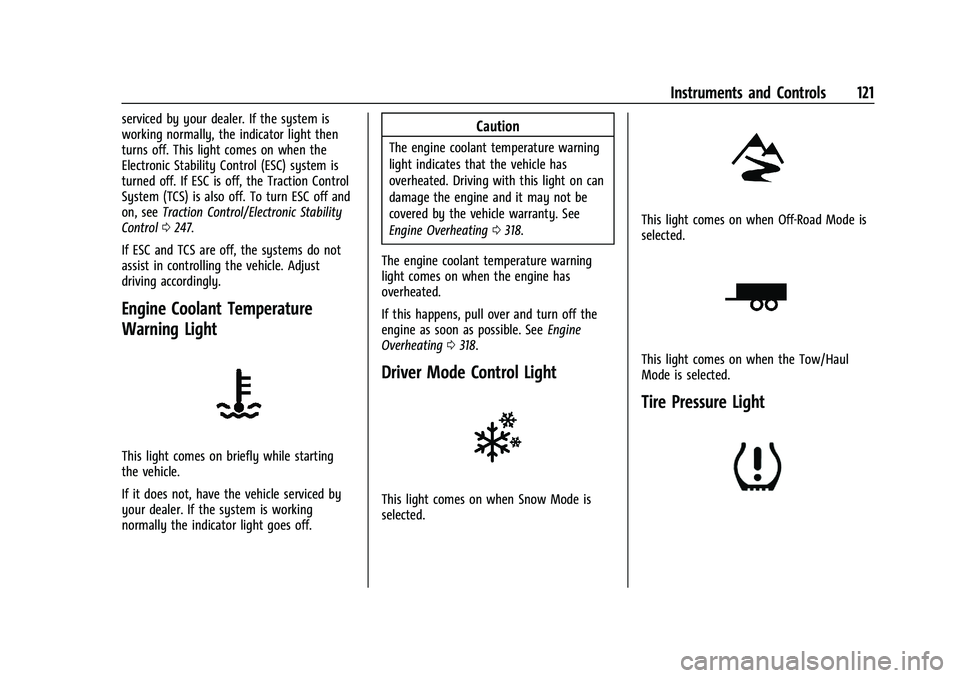
Engine Coolant Temperature
Warning Light
This light comes on briefly while starting
the vehicle.
If it does not, have the vehicle serviced by
your dealer. If the system is working
normally the indicator light goes off.
Caution
The engine coolant temperature warning
light indicates that the vehicle has
overheated. Driving with this light on can
damage the engine and it may not be
covered by the vehicle warranty. See
Engine Overheating 0318.
The engine coolant temperature warning
light comes on when the engine has
overheated.
If this happens, pull over and turn off the
engine as soon as possible. See Engine
Overheating 0318.
Driver Mode Control Light
This light comes on when Snow Mode is
selected.
This light comes on when Off-Road Mode is
selected.
This light comes on when the Tow/Haul
Mode is selected.
Tire Pressure Light
Page 128 of 441
Chevrolet Silverado 2500 HD/3500 HD Owner Manual (GMNA-Localizing-U.
S./Canada/Mexico-15546003) - 2022 - CRC - 5/12/21
Instruments and Controls 127
system. When the REPLACE AT NEXT OIL
CHANGE message displays, the engine air
filter should be replaced at the time of the
next oil change. When the REPLACE SOON
message displays, the engine air filter
should be replaced at the earliest
convenience.
The Air Filter Life display must be reset after
the engine air filter replacement. To reset,
seeEngine Air Filter Life System 0314.
Brake Pad Life : This displays an estimate of
the remaining life of the front and rear
brake pads. Messages will display based on
brake pad wear and the state of the system.
Reset the Brake Pad Life display after
replacing the brake pads. See Brake Pad Life
System 0322.
Fuel Economy : Displays average fuel
economy, the best fuel economy over the
selected distance, and a bar graph showing
instantaneous fuel economy.
Press the thumbwheel to change the
selected distance. Press and hold the
thumbwheel while this display is active to
reset the best fuel economy and average
fuel economy. This display can also be reset
by selecting reset in the menu. Engine Hours (Hourmeter) :
Shows the total
number of hours the engine has run. This
display also shows the engine idle hours.
Transmission Fluid Temperature : Shows the
temperature of the automatic transmission
fluid in either degrees Celsius (°C) or degrees
Fahrenheit (°F).
Trailer Brake : On vehicles with the
Integrated Trailer Brake Control (ITBC)
system, the trailer brake display appears in
the DIC.
TRAILER GAIN shows the trailer gain setting.
This setting can be adjusted from 0.0 to 10.0
with either a trailer connected or
disconnected.
TRAILER OUTPUT shows the power output to
the trailer any time a trailer with electric
brakes is connected. Output is displayed as a
bar graph. Dotted lines may appear in the
OUTPUT display if a trailer is not connected.
Off Road : Displays vehicle pitch and roll
information, road wheel angle, and
four-wheel drive (4WD) status.
Follow Distance : If equipped, the current
follow time to the vehicle ahead is displayed
as a time value on this page. Driver Assistance :
If equipped, shows
information for Lane Departure Warning
(LDW) and Forward Collision Alert (FCA).
Info Page Options : Scroll to choose which
info pages appear on the DIC. Press the
thumbwheel to select or deselect.
Blank Page : Shows no information.
Head-Up Display (HUD)
{Warning
If the HUD image is too bright or too
high in your field of view, it may take
you more time to see things you need to
see when it is dark outside. Be sure to
keep the HUD image dim and placed low
in your field of view.
If equipped with HUD, some information
about the operation of the vehicle is
projected onto the windshield. The image is
projected through the HUD lens on top of
the instrument panel. The information
appears as an image focused out toward the
front of the vehicle.
Page 133 of 441
Chevrolet Silverado 2500 HD/3500 HD Owner Manual (GMNA-Localizing-U.
S./Canada/Mexico-15546003) - 2022 - CRC - 5/12/21
132 Instruments and Controls
Alert Type
This feature sets the type of alert from the
driver assistance systems to help avoid
crashes.
Touch Beeps or Safety Alert Seat.
Forward Collision System
This setting can alert of a potential crash
with a detected vehicle ahead and can apply
brakes to help reduce a collision’s severity.
Touch Off, Alert, or Alert and Brake.
Lane Change Alert
This allows the feature to be turned on or
off. SeeLane Change Alert (LCA) 0266.
Touch Off or On.
Park Assist
This allows the feature to be turned on or
off. See Assistance Systems for Parking or
Backing 0253.
Select Off, On, or On with Towbar.
Rear Camera Park Assist Symbols
This setting enables the Rear Camera Park
Assist Symbols. See Assistance Systems for
Parking or Backing 0253.
Touch Off or On. Rear Cross Traffic Alert
This allows the Rear Cross Traffic Alert
feature to be turned on or off. See
Assistance Systems for Parking or Backing
0
253.
Touch Off or On.
Comfort and Convenience
Touch and the following may display:
.Chime Volume
.Reverse Tilt Mirror
.Remote Mirror Folding
Chime Volume
This determines the chime volume level.
Touch the controls on the infotainment
display to adjust the volume.
Reverse Tilt Mirror
When on, the driver, passenger, or both
driver and passenger outside mirrors will tilt
downward when the vehicle is shifted into
R (Reverse) to improve visibility of the
ground near the rear wheels. They may
move from their tilted position when the
vehicle is shifted out of R (Reverse) or
turned off. See Reverse Tilt Mirrors 038. Touch Off, On - Driver and Passenger, On -
Driver, or On - Passenger.
Remote Mirror Folding
When on, the outside mirrors will remotely
fold or unfold when the Remote Keyless
Entry (RKE) transmitter
QorKbutton is
pressed and held. See Folding Mirrors036.
Touch Off or On.
Lighting
Touch and the following may display:
.Vehicle Locator Lights
.Exit Lighting
.Automatic High Beam Assist
Vehicle Locator Lights
This setting flashes the vehicle’s headlamps
when
Kis pressed on the Remote Keyless
Entry (RKE) transmitter.
Touch Off or On.
Exit Lighting
This setting specifies how long the
headlamps stay on after the vehicle is
turned off and exited.
Touch Off, 30 Seconds, 60 Seconds,
or 120 Seconds.