2023 CHEVROLET SILVERADO 1500 change wheel
[x] Cancel search: change wheelPage 198 of 463
Chevrolet Silverado 1500 Owner Manual (GMNA-Localizing-U.S./Canada/
Mexico/Paraguay-16515119) - 2023 - CRC - 6/2/22
Driving and Operating 197
.Holding both sides of the steering wheel
allows you to turn 180 degrees without
removing a hand.
.The Antilock Brake System (ABS) allows
steering while braking.
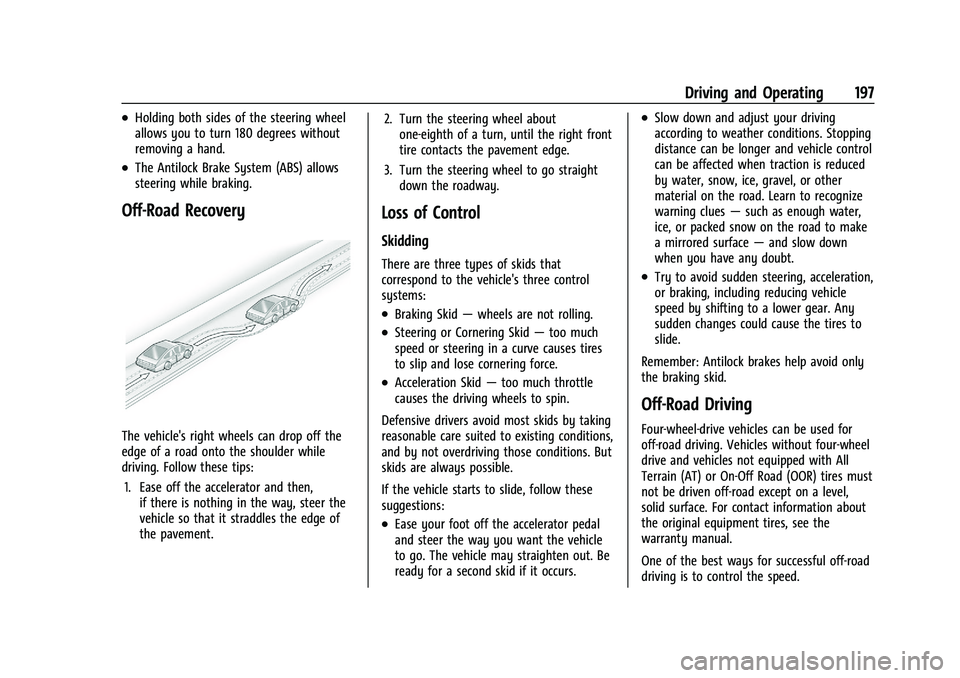
Off-Road Recovery
The vehicle's right wheels can drop off the
edge of a road onto the shoulder while
driving. Follow these tips:1. Ease off the accelerator and then, if there is nothing in the way, steer the
vehicle so that it straddles the edge of
the pavement. 2. Turn the steering wheel about
one-eighth of a turn, until the right front
tire contacts the pavement edge.
3. Turn the steering wheel to go straight down the roadway.
Loss of Control
Skidding
There are three types of skids that
correspond to the vehicle's three control
systems:
.Braking Skid —wheels are not rolling.
.Steering or Cornering Skid —too much
speed or steering in a curve causes tires
to slip and lose cornering force.
.Acceleration Skid —too much throttle
causes the driving wheels to spin.
Defensive drivers avoid most skids by taking
reasonable care suited to existing conditions,
and by not overdriving those conditions. But
skids are always possible.
If the vehicle starts to slide, follow these
suggestions:
.Ease your foot off the accelerator pedal
and steer the way you want the vehicle
to go. The vehicle may straighten out. Be
ready for a second skid if it occurs.
.Slow down and adjust your driving
according to weather conditions. Stopping
distance can be longer and vehicle control
can be affected when traction is reduced
by water, snow, ice, gravel, or other
material on the road. Learn to recognize
warning clues —such as enough water,
ice, or packed snow on the road to make
a mirrored surface —and slow down
when you have any doubt.
.Try to avoid sudden steering, acceleration,
or braking, including reducing vehicle
speed by shifting to a lower gear. Any
sudden changes could cause the tires to
slide.
Remember: Antilock brakes help avoid only
the braking skid.
Off-Road Driving
Four-wheel-drive vehicles can be used for
off-road driving. Vehicles without four-wheel
drive and vehicles not equipped with All
Terrain (AT) or On-Off Road (OOR) tires must
not be driven off-road except on a level,
solid surface. For contact information about
the original equipment tires, see the
warranty manual.
One of the best ways for successful off-road
driving is to control the speed.
Page 199 of 463
Chevrolet Silverado 1500 Owner Manual (GMNA-Localizing-U.S./Canada/
Mexico/Paraguay-16515119) - 2023 - CRC - 6/2/22
198 Driving and Operating
{Warning
When driving off-road, bouncing and
quick changes in direction can easily
throw you out of position. This could
cause you to lose control and crash. You
and your passengers should always wear
seat belts.
Before Driving Off-Road
.Have all necessary maintenance and
service work completed.
.Fuel the vehicle, fill fluid levels, and check
inflation pressure in all tires, including the
spare, if equipped.
.Read all the information about
four-wheel-drive vehicles in this manual.
.Remove any underbody air deflector,
if equipped. Re-attach the air deflector
after off-road driving.
.Know the local laws that apply to off-road
driving.
To gain more ground clearance if needed, it
may be necessary to remove the front fascia
lower air dam, if equipped. However, driving
without the air dam reduces fuel economy.
Caution
Operating the vehicle for extended
periods without the front fascia lower air
dam installed can cause improper airflow
to the engine. Reattach the front fascia
air dam after off-road driving.
Loading the Vehicle for Off-Road Driving
{Warning
.Unsecured cargo on the load floor can
be tossed about when driving over
rough terrain. You or your passengers
can be struck by flying objects. Secure
the cargo properly.
.Keep cargo in the cargo area as far
forward and as low as possible. The
heaviest things should be on the floor,
forward of the rear axle.
.Heavy loads on the roof raise the
vehicle's center of gravity, making it
more likely to roll over. You can be
seriously or fatally injured if the
vehicle rolls over. Put heavy loads
inside the cargo area, not on the roof. For more information about loading the
vehicle, see
Vehicle Load Limits 0204 and
Tires 0369.
Environmental Concerns
.Always use established trails, roads, and
areas that have been set aside for public
off-road recreational driving and obey all
posted regulations.
.Do not damage shrubs, flowers, trees,
or grasses or disturb wildlife.
.Do not park over things that burn. See
Parking over Things That Burn 0219.
Driving on Hills
Driving safely on hills requires good
judgment and an understanding of what the
vehicle can and cannot do.
{Warning
Many hills are simply too steep for any
vehicle. Driving up hills can cause the
vehicle to stall. Driving down hills can
cause loss of control. Driving across hills
can cause a rollover. You could be injured
or killed. Do not drive on steep hills.
Page 205 of 463
Chevrolet Silverado 1500 Owner Manual (GMNA-Localizing-U.S./Canada/
Mexico/Paraguay-16515119) - 2023 - CRC - 6/2/22
204 Driving and Operating
For information about using tire chains on
the vehicle, seeTire Chains0387.
Rocking the Vehicle to Get It Out
Caution
Do not hold the steering wheel at full
rotation for more than 15 seconds and/or
at an elevated RPM. Damage may occur
to the power steering system and there
may be loss of power steering assist.
Turn the steering wheel left and right to
clear the area around the front wheels. Then
make sure the wheels are pointed straight
ahead. For four-wheel-drive vehicles, shift
into Four-Wheel Drive High. Turn the TCS
off. Shift back and forth between R (Reverse)
and a forward gear, spinning the wheels as
little as possible. To prevent transmission
wear, wait until the wheels stop spinning
before shifting gears. Slowly spinning the
wheels in the forward and reverse directions
causes a rocking motion that could free the
vehicle. If that does not get the vehicle out
after a few tries, it might need to be towed
out. See Transporting a Disabled Vehicle
0 402. Recovery hooks can be used, if the
vehicle has them.
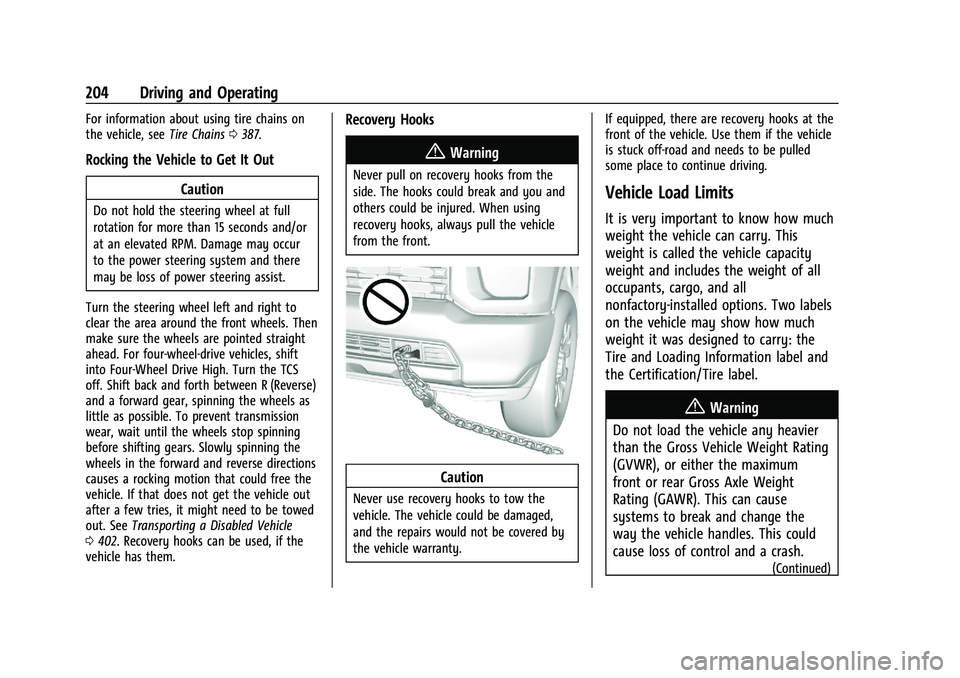
Recovery Hooks
{Warning
Never pull on recovery hooks from the
side. The hooks could break and you and
others could be injured. When using
recovery hooks, always pull the vehicle
from the front.
Caution
Never use recovery hooks to tow the
vehicle. The vehicle could be damaged,
and the repairs would not be covered by
the vehicle warranty. If equipped, there are recovery hooks at the
front of the vehicle. Use them if the vehicle
is stuck off-road and needs to be pulled
some place to continue driving.
Vehicle Load Limits
It is very important to know how much
weight the vehicle can carry. This
weight is called the vehicle capacity
weight and includes the weight of all
occupants, cargo, and all
nonfactory-installed options. Two labels
on the vehicle may show how much
weight it was designed to carry: the
Tire and Loading Information label and
the Certification/Tire label.
{Warning
Do not load the vehicle any heavier
than the Gross Vehicle Weight Rating
(GVWR), or either the maximum
front or rear Gross Axle Weight
Rating (GAWR). This can cause
systems to break and change the
way the vehicle handles. This could
cause loss of control and a crash.
(Continued)
Page 232 of 463
Chevrolet Silverado 1500 Owner Manual (GMNA-Localizing-U.S./Canada/
Mexico/Paraguay-16515119) - 2023 - CRC - 6/2/22
Driving and Operating 231
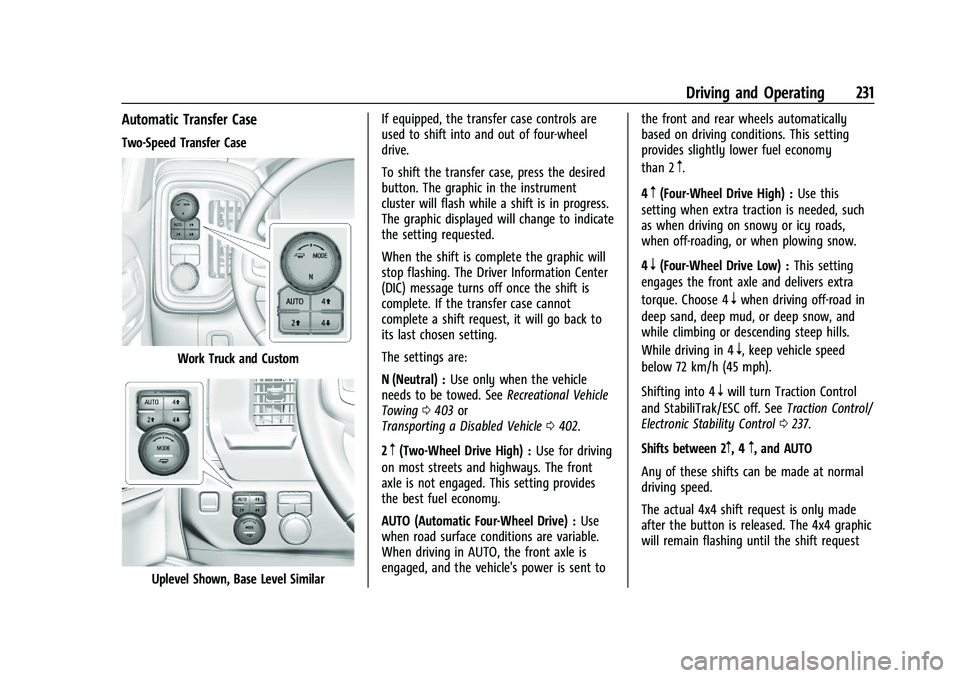
Automatic Transfer Case
Two-Speed Transfer Case
Work Truck and Custom
Uplevel Shown, Base Level SimilarIf equipped, the transfer case controls are
used to shift into and out of four-wheel
drive.
To shift the transfer case, press the desired
button. The graphic in the instrument
cluster will flash while a shift is in progress.
The graphic displayed will change to indicate
the setting requested.
When the shift is complete the graphic will
stop flashing. The Driver Information Center
(DIC) message turns off once the shift is
complete. If the transfer case cannot
complete a shift request, it will go back to
its last chosen setting.
The settings are:
N (Neutral) :
Use only when the vehicle
needs to be towed. See Recreational Vehicle
Towing 0403 or
Transporting a Disabled Vehicle 0402.
2
m(Two-Wheel Drive High) : Use for driving
on most streets and highways. The front
axle is not engaged. This setting provides
the best fuel economy.
AUTO (Automatic Four-Wheel Drive) : Use
when road surface conditions are variable.
When driving in AUTO, the front axle is
engaged, and the vehicle's power is sent to the front and rear wheels automatically
based on driving conditions. This setting
provides slightly lower fuel economy
than 2
m.
4
m(Four-Wheel Drive High) : Use this
setting when extra traction is needed, such
as when driving on snowy or icy roads,
when off-roading, or when plowing snow.
4
n(Four-Wheel Drive Low) : This setting
engages the front axle and delivers extra
torque. Choose 4
nwhen driving off-road in
deep sand, deep mud, or deep snow, and
while climbing or descending steep hills.
While driving in 4
n, keep vehicle speed
below 72 km/h (45 mph).
Shifting into 4
nwill turn Traction Control
and StabiliTrak/ESC off. See Traction Control/
Electronic Stability Control 0237.
Shifts between 2
m, 4m, and AUTO
Any of these shifts can be made at normal
driving speed.
The actual 4x4 shift request is only made
after the button is released. The 4x4 graphic
will remain flashing until the shift request
Page 235 of 463
Chevrolet Silverado 1500 Owner Manual (GMNA-Localizing-U.S./Canada/
Mexico/Paraguay-16515119) - 2023 - CRC - 6/2/22
234 Driving and Operating
If equipped, the transfer case controls are
used to shift into and out of four-wheel
drive.
To shift the transfer case, press the desired
button. The graphic in the instrument
cluster will flash while a shift is in progress.
The graphic displayed will change to indicate
the setting requested.
When the shift is complete the graphic will
stop flashing. The DIC message turns off
once the shift is complete. If the transfer
case cannot complete a shift request, it will
go back to its last chosen setting.
The settings are:
2
m(Two-Wheel Drive High) :Use for driving
on most streets and highways. The front
axle is not engaged. This setting provides
the best fuel economy.
4
m(Four-Wheel Drive High) : Use this
setting when extra traction is needed, such
as when driving on snowy or icy roads,
when off-roading, or when plowing snow.
AUTO (Automatic Four-Wheel Drive)
Use when road surface conditions are
variable. When driving in AUTO, the front
axle is engaged, and the vehicle's power is
sent to the front and rear wheels automatically based on driving conditions.
This setting provides slightly lower fuel
economy than 2
m.
Shifts between 2
m, 4m, and AUTO
Any of these shifts can be made at normal
driving speed.
The actual 4x4 shift request is only made
after the button is released. The 4x4 graphic
will remain flashing until the shift request
has completed. A DIC message displays.
Once the 4x4 shift has completed, the DIC
message disappears, the 4x4 graphic stops
flashing, and the current setting is indicated.
The actual 4x4 shift request is only made
after the button is released. The 4x4 graphic
will remain flashing until the shift request
has completed.
A DIC message displays. Once the 4x4 shift
has completed, the DIC message disappears,
the 4x4 graphic stops flashing, and the
current setting is indicated.
Brakes
Electric Brake Boost
Vehicles equipped with electric brake boost
have hydraulic brake circuits that are
electronically controlled when the brake
pedal is applied during normal operation.
The system performs routine tests and turns
off within a few minutes after the vehicle is
turned off. Noise may be heard during this
time. If the brake pedal is pressed during
the tests or when the electric brake boost
system is off, a noticeable change in pedal
force and travel may be felt. This is normal.
Antilock Brake System (ABS)
The Antilock Brake System (ABS) helps
prevent a braking skid and maintain steering
while braking hard.
ABS performs a system check when the
vehicle is first driven. A momentary motor
or clicking noise may be heard while this
test is going on, and the brake pedal may
move slightly. This is normal.
Page 239 of 463
Chevrolet Silverado 1500 Owner Manual (GMNA-Localizing-U.S./Canada/
Mexico/Paraguay-16515119) - 2023 - CRC - 6/2/22
238 Driving and Operating
Ifdcomes on and stays on, the vehicle
may need more time to diagnose the
problem. If the condition persists, see your
dealer.
Turning the Systems Off and On
(Except ZR2)
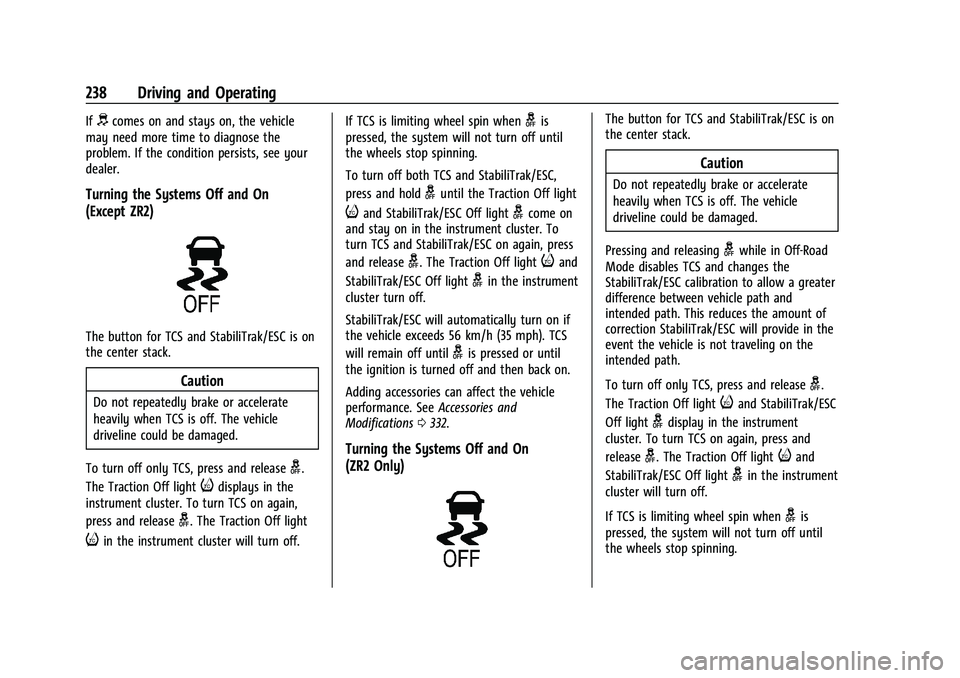
The button for TCS and StabiliTrak/ESC is on
the center stack.
Caution
Do not repeatedly brake or accelerate
heavily when TCS is off. The vehicle
driveline could be damaged.
To turn off only TCS, press and release
g.
The Traction Off light
idisplays in the
instrument cluster. To turn TCS on again,
press and release
g. The Traction Off light
iin the instrument cluster will turn off. If TCS is limiting wheel spin when
gis
pressed, the system will not turn off until
the wheels stop spinning.
To turn off both TCS and StabiliTrak/ESC,
press and hold
guntil the Traction Off light
iand StabiliTrak/ESC Off lightgcome on
and stay on in the instrument cluster. To
turn TCS and StabiliTrak/ESC on again, press
and release
g. The Traction Off lightiand
StabiliTrak/ESC Off light
gin the instrument
cluster turn off.
StabiliTrak/ESC will automatically turn on if
the vehicle exceeds 56 km/h (35 mph). TCS
will remain off until
gis pressed or until
the ignition is turned off and then back on.
Adding accessories can affect the vehicle
performance. See Accessories and
Modifications 0332.
Turning the Systems Off and On
(ZR2 Only)
The button for TCS and StabiliTrak/ESC is on
the center stack.
Caution
Do not repeatedly brake or accelerate
heavily when TCS is off. The vehicle
driveline could be damaged.
Pressing and releasing
gwhile in Off-Road
Mode disables TCS and changes the
StabiliTrak/ESC calibration to allow a greater
difference between vehicle path and
intended path. This reduces the amount of
correction StabiliTrak/ESC will provide in the
event the vehicle is not traveling on the
intended path.
To turn off only TCS, press and release
g.
The Traction Off light
iand StabiliTrak/ESC
Off light
gdisplay in the instrument
cluster. To turn TCS on again, press and
release
g. The Traction Off lightiand
StabiliTrak/ESC Off light
gin the instrument
cluster will turn off.
If TCS is limiting wheel spin when
gis
pressed, the system will not turn off until
the wheels stop spinning.
Page 240 of 463
Chevrolet Silverado 1500 Owner Manual (GMNA-Localizing-U.S./Canada/
Mexico/Paraguay-16515119) - 2023 - CRC - 6/2/22
Driving and Operating 239
To turn off both TCS and StabiliTrak/ESC,
press and hold
guntil the Traction Off light
iand StabiliTrak/ESC Off lightgcome on
and stay on in the instrument cluster and
the ESC OFF message appears in the DIC. To
turn TCS and StabiliTrak/ESC on again, press
and release
g. The Traction Off lightiand
StabiliTrak/ESC Off light
gin the instrument
cluster turn off.
StabiliTrak/ESC will automatically turn on if
the vehicle exceeds 56 km/h (35 mph). TCS
will remain off until
gis pressed or until
the ignition is turned off and then back on.
Adding accessories can affect the vehicle
performance. See Accessories and
Modifications 0332.
Stability Control Interaction with
Off-Road Mode (ZR2 Only)
The TCS and StabiliTrak/ESC calibrations are
different while in Off-Road Mode. They
provide optimum performance in an off-road
environment.
Pressing and releasing
gdisables TCS and
changes the StabiliTrak/ESC calibration to
allow a greater difference between vehicle
path and intended path. This reduces the amount of correction StabiliTrak/ESC will
provide in the event the vehicle is not
traveling on the intended path.
To turn off only TCS, press and release
g.
iandgwill display in the instrument
cluster. To turn TCS on again, press and
release
g.iandgin the instrument
cluster will turn off.
To turn off both TCS and StabiliTrak/ESC,
press and hold
guntil a StabiliTrak/ESC off
message displays in the instrument cluster
and the ESC OFF message appears in the
DIC. To turn TCS and StabiliTrak/ESC on
again, press and release
g.iandgin the
instrument cluster will turn off.
StabiliTrak/ESC will not automatically turn
on while in Off-Road Mode. TCS and
StabiliTrak/ESC will remain off in Off-Road
Mode until
gis pressed or the ignition is
turned off and then back on.
Hill Descent Control (HDC)
If equipped, Hill Descent Control (HDC) sets
and maintains vehicle speed while driving
down steep grades in a forward or reverse
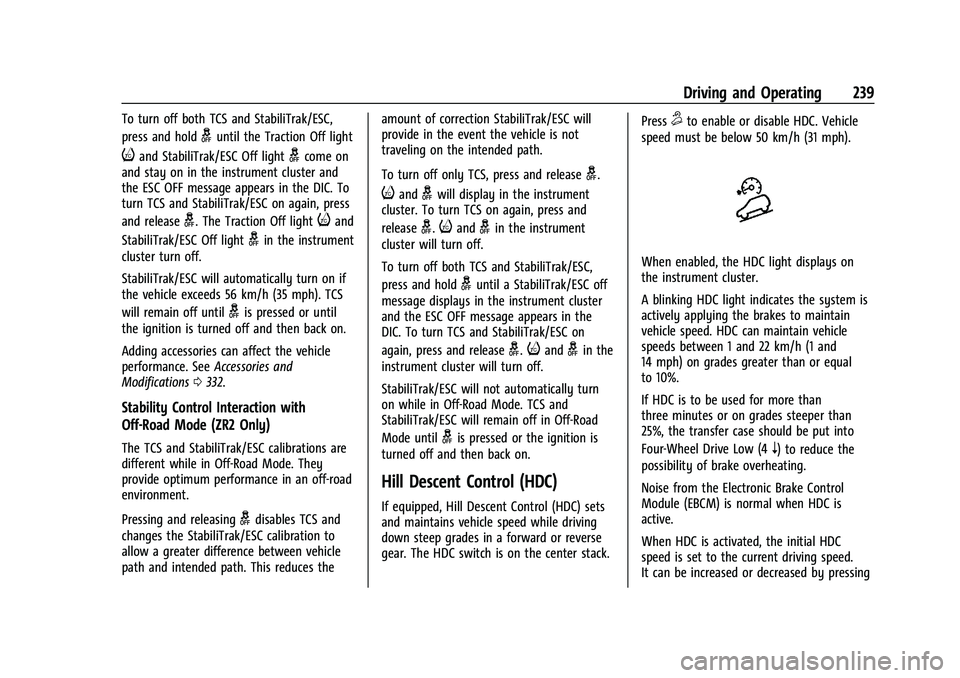
gear. The HDC switch is on the center stack. Press
5to enable or disable HDC. Vehicle
speed must be below 50 km/h (31 mph).
When enabled, the HDC light displays on
the instrument cluster.
A blinking HDC light indicates the system is
actively applying the brakes to maintain
vehicle speed. HDC can maintain vehicle
speeds between 1 and 22 km/h (1 and
14 mph) on grades greater than or equal
to 10%.
If HDC is to be used for more than
three minutes or on grades steeper than
25%, the transfer case should be put into
Four-Wheel Drive Low (4
n) to reduce the
possibility of brake overheating.
Noise from the Electronic Brake Control
Module (EBCM) is normal when HDC is
active.
When HDC is activated, the initial HDC
speed is set to the current driving speed.
It can be increased or decreased by pressing
Page 245 of 463
Chevrolet Silverado 1500 Owner Manual (GMNA-Localizing-U.S./Canada/
Mexico/Paraguay-16515119) - 2023 - CRC - 6/2/22
244 Driving and Operating
vehicles with the limited-slip differential,
driven under severe conditions, the rear axle
fluid should be changed. SeeMaintenance
Schedule 0417.
Locking Rear Axle
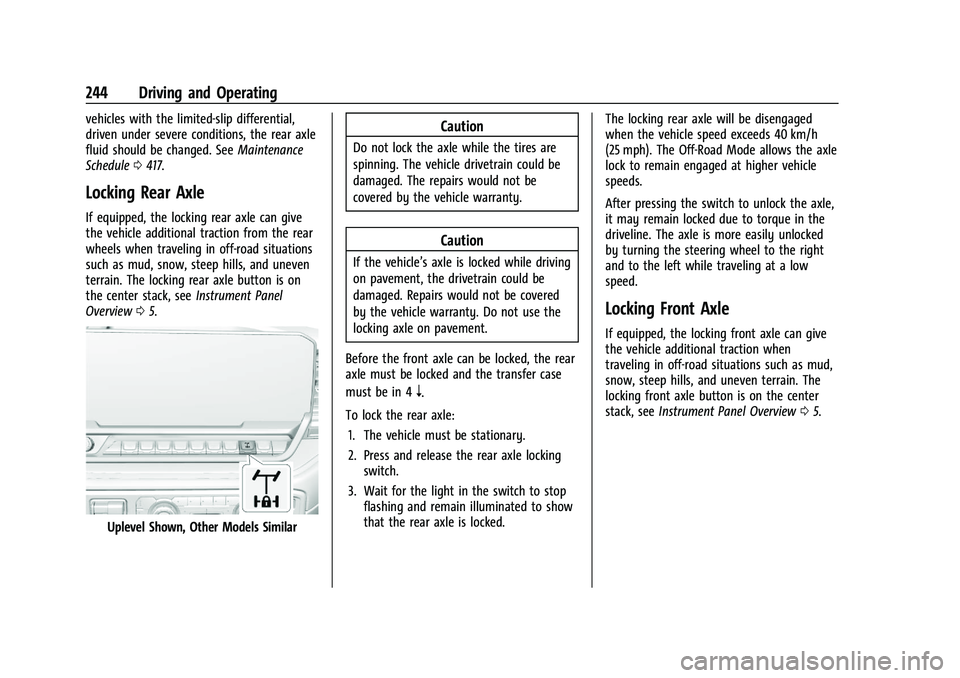
If equipped, the locking rear axle can give
the vehicle additional traction from the rear
wheels when traveling in off-road situations
such as mud, snow, steep hills, and uneven
terrain. The locking rear axle button is on
the center stack, see Instrument Panel
Overview 05.
Uplevel Shown, Other Models Similar
Caution
Do not lock the axle while the tires are
spinning. The vehicle drivetrain could be
damaged. The repairs would not be
covered by the vehicle warranty.
Caution
If the vehicle’s axle is locked while driving
on pavement, the drivetrain could be
damaged. Repairs would not be covered
by the vehicle warranty. Do not use the
locking axle on pavement.
Before the front axle can be locked, the rear
axle must be locked and the transfer case
must be in 4
n.
To lock the rear axle: 1. The vehicle must be stationary.
2. Press and release the rear axle locking switch.
3. Wait for the light in the switch to stop flashing and remain illuminated to show
that the rear axle is locked. The locking rear axle will be disengaged
when the vehicle speed exceeds 40 km/h
(25 mph). The Off-Road Mode allows the axle
lock to remain engaged at higher vehicle
speeds.
After pressing the switch to unlock the axle,
it may remain locked due to torque in the
driveline. The axle is more easily unlocked
by turning the steering wheel to the right
and to the left while traveling at a low
speed.
Locking Front Axle
If equipped, the locking front axle can give
the vehicle additional traction when
traveling in off-road situations such as mud,
snow, steep hills, and uneven terrain. The
locking front axle button is on the center
stack, see
Instrument Panel Overview 05.