2023 CHEVROLET MALIBU stop start
[x] Cancel search: stop startPage 196 of 332
Chevrolet Malibu Owner Manual (GMNA-Localizing-U.S./Canada-
16273584) - 2023 - CRC - 9/28/22
Driving and Operating 195
When the vehicle ahead drives away, press
+RES or the accelerator pedal to resume
ACC. If stopped for more than two minutes
or if the driver door is opened and the
driver seat belt is unbuckled, the ACC
automatically applies the Electric Parking
Brake (EPB) to hold the vehicle. The EPB
status light will turn on. SeeElectric Parking
Brake 0185. To release the EPB, press the
accelerator pedal.
A DIC warning message may display
indicating to shift to P (Park) before exiting
the vehicle. See Vehicle Messages 0100.
{Warning
If ACC has stopped the vehicle, and if ACC
is disengaged, turned off, or canceled, the
vehicle will no longer be held at a stop.
The vehicle can move. When ACC is
holding the vehicle at a stop, always be
prepared to manually apply the brakes.
{Warning
Leaving the vehicle without placing it in
P (Park) can be dangerous. Do not leave
the vehicle while it is being held at a
(Continued)
Warning (Continued)
stop by ACC. Always place the vehicle in
P (Park) and turn off the ignition before
leaving the vehicle.
ACC Override
If using the accelerator pedal while ACC is
active, the ACC indicator turns blue on the
instrument cluster to indicate that automatic
braking will not occur. ACC will resume
operation when the accelerator pedal is not
being pressed.
{Warning
The ACC will not automatically apply the
brakes if your foot is resting on the
accelerator pedal. You could crash into a
vehicle ahead of you.
Curves in the Road
{Warning
On curves, ACC may not detect a vehicle
ahead in your lane. You could be startled
if the vehicle accelerates up to the set
speed, especially when following a vehicle (Continued)
Warning (Continued)
exiting or entering exit ramps. You could
lose control of the vehicle or crash. Do
not use ACC while driving on an entrance
or exit ramp. Always be ready to use the
brakes if necessary.
{Warning
On curves, ACC may respond to a vehicle
in another lane, or may not have time to
react to a vehicle in your lane. You could
crash into a vehicle ahead of you, or lose
control of your vehicle. Give extra
attention in curves and be ready to use
the brakes if necessary. Select an
appropriate speed while driving in curves.
ACC may operate differently in a sharp
curve. It may reduce the vehicle speed if the
curve is too sharp. ACC automatically slows
the vehicle down while navigating the curve
and may increase speed out of the curve,
but will not exceed the set speed.
Page 209 of 332
Chevrolet Malibu Owner Manual (GMNA-Localizing-U.S./Canada-
16273584) - 2023 - CRC - 9/28/22
208 Driving and Operating
are also warned of vehicles rapidly
approaching from up to 70 m (230 ft) behind
the vehicle.
How the System Works
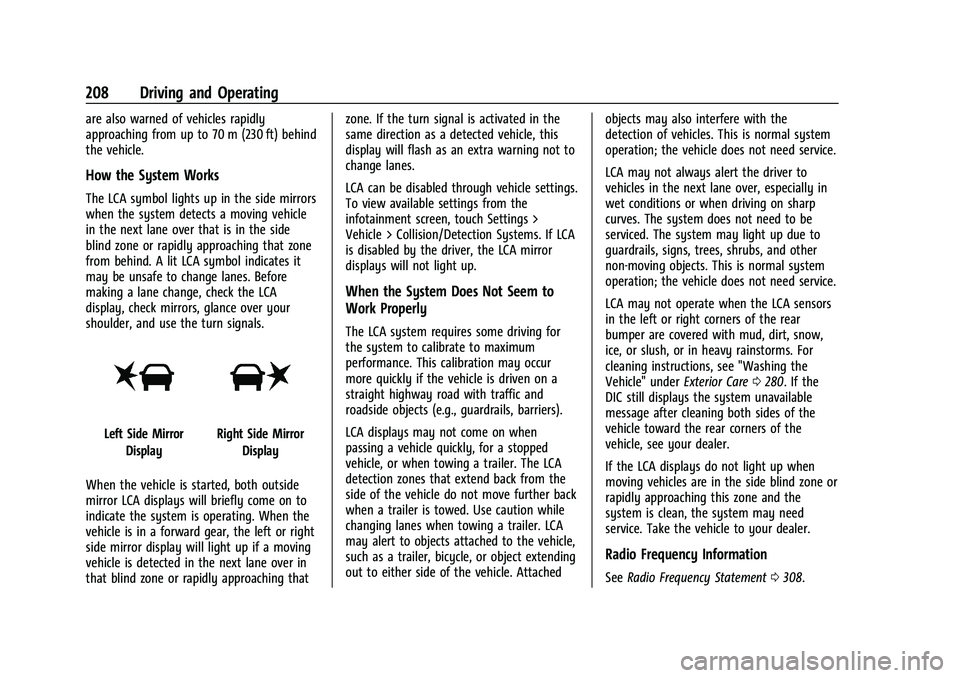
The LCA symbol lights up in the side mirrors
when the system detects a moving vehicle
in the next lane over that is in the side
blind zone or rapidly approaching that zone
from behind. A lit LCA symbol indicates it
may be unsafe to change lanes. Before
making a lane change, check the LCA
display, check mirrors, glance over your
shoulder, and use the turn signals.
Left Side MirrorDisplayRight Side Mirror Display
When the vehicle is started, both outside
mirror LCA displays will briefly come on to
indicate the system is operating. When the
vehicle is in a forward gear, the left or right
side mirror display will light up if a moving
vehicle is detected in the next lane over in
that blind zone or rapidly approaching that zone. If the turn signal is activated in the
same direction as a detected vehicle, this
display will flash as an extra warning not to
change lanes.
LCA can be disabled through vehicle settings.
To view available settings from the
infotainment screen, touch Settings >
Vehicle > Collision/Detection Systems. If LCA
is disabled by the driver, the LCA mirror
displays will not light up.
When the System Does Not Seem to
Work Properly
The LCA system requires some driving for
the system to calibrate to maximum
performance. This calibration may occur
more quickly if the vehicle is driven on a
straight highway road with traffic and
roadside objects (e.g., guardrails, barriers).
LCA displays may not come on when
passing a vehicle quickly, for a stopped
vehicle, or when towing a trailer. The LCA
detection zones that extend back from the
side of the vehicle do not move further back
when a trailer is towed. Use caution while
changing lanes when towing a trailer. LCA
may alert to objects attached to the vehicle,
such as a trailer, bicycle, or object extending
out to either side of the vehicle. Attached
objects may also interfere with the
detection of vehicles. This is normal system
operation; the vehicle does not need service.
LCA may not always alert the driver to
vehicles in the next lane over, especially in
wet conditions or when driving on sharp
curves. The system does not need to be
serviced. The system may light up due to
guardrails, signs, trees, shrubs, and other
non-moving objects. This is normal system
operation; the vehicle does not need service.
LCA may not operate when the LCA sensors
in the left or right corners of the rear
bumper are covered with mud, dirt, snow,
ice, or slush, or in heavy rainstorms. For
cleaning instructions, see "Washing the
Vehicle" under
Exterior Care0280. If the
DIC still displays the system unavailable
message after cleaning both sides of the
vehicle toward the rear corners of the
vehicle, see your dealer.
If the LCA displays do not light up when
moving vehicles are in the side blind zone or
rapidly approaching this zone and the
system is clean, the system may need
service. Take the vehicle to your dealer.
Radio Frequency Information
See Radio Frequency Statement 0308.
Page 213 of 332
Chevrolet Malibu Owner Manual (GMNA-Localizing-U.S./Canada-
16273584) - 2023 - CRC - 9/28/22
212 Driving and Operating
Warning (Continued)
.Keep children away from the fuel
pump and never let children
pump fuel.
.Before touching the fill nozzle, touch a
metallic object to discharge static
electricity from your body.
.Fuel can spray out if the fill nozzle is
inserted too quickly. This spray can
happen if the tank is nearly full, and is
more likely in hot weather. Insert the
fill nozzle slowly and wait for any hiss
noise to stop before beginning to
flow fuel.
To open the fuel door, push and release the
rearward center edge of the door.
The capless refueling system does not have
a fuel cap. Fully insert and latch the fill
nozzle, begin fueling.
{Warning
Overfilling the fuel tank by more than
three clicks of a standard fill nozzle may
cause:
.Vehicle performance issues, including
engine stalling and damage to the fuel
system.
.Fuel spills.
.Under certain conditions, fuel fires.
Be careful not to spill fuel. Wait five seconds
after you have finished pumping before
removing the fill nozzle. Clean fuel from
painted surfaces as soon as possible. See
Exterior Care 0280. Push the fuel door
closed until it latches.
{Warning
If a fire starts while you are refueling, do
not remove the fill nozzle. Shut off the
flow of fuel by shutting off the pump or
by notifying the station attendant. Leave
the area immediately.
Filling the Tank with a Portable Fuel
Container
If the vehicle runs out of fuel and must be
filled from a portable fuel container:
1. Locate the capless funnel adapter from under the carpet in the trunk.
2. Insert and latch the funnel into the capless fuel system.
Page 217 of 332
Chevrolet Malibu Owner Manual (GMNA-Localizing-U.S./Canada-
16273584) - 2023 - CRC - 9/28/22
216 Driving and Operating
Parking on Hills
{Warning
To prevent serious injury or death,
always park your vehicle and trailer on a
level surface when possible.
When parking your vehicle and your trailer
on a hill: 1. Press the brake pedal, but do not shift into P (Park). Turn the wheels into the
curb if facing downhill or into traffic if
facing uphill.
2. Have someone place chocks under the trailer wheels.
3. When the wheel chocks are in place, gradually release the brake pedal to
allow the chocks to absorb the load of
the trailer.
4. Reapply the brake pedal. Then apply the parking brake and shift into P (Park).
5. Release the brake pedal.
Leaving After Parking on a Hill
1. Apply and hold the brake pedal.
.Start the engine.
.Shift into the desired gear.
.Release the parking brake. 2. Let up on the brake pedal.
3. Drive slowly until the trailer is clear of
the chocks.
4. Stop and have someone pick up and store the chocks.
Maintenance When Trailer Towing
The vehicle needs service more often when
used to tow trailers. See Maintenance
Schedule 0290. It is especially important to
check the automatic transmission fluid,
engine oil, axle lubricant, belts, cooling
system, and brake system before and during
each trip.
Check periodically that all nuts and bolts on
the trailer hitch are tight.
Engine Cooling When Trailer Towing
The cooling system may temporarily
overheat during severe operating conditions.
See Engine Overheating 0232.
Trailer Towing
Caution
Towing a trailer improperly can damage
the vehicle and result in costly repairs
not covered by the vehicle warranty. To
(Continued)
Caution (Continued)
tow a trailer correctly, follow the
directions in this section and see your
dealer for important information about
towing a trailer with the vehicle.
Trailer Weight
{Warning
Never exceed the towing capacity for
your vehicle.
Safe trailering requires monitoring the
weight, speed, altitude, road grades, outside
temperature, dimensions of the front of the
trailer, and how frequently the vehicle is
used to tow a trailer.
Before towing a trailer, always separately
weigh:
.The fully loaded vehicle and trailer
combination.
.The trailer.
.The trailer tongue.
Page 221 of 332
Chevrolet Malibu Owner Manual (GMNA-Localizing-U.S./Canada-
16273584) - 2023 - CRC - 9/28/22
220 Vehicle Care
Vehicle Care
General Information
General Information . . . . . . . . . . . . . . . . . . . 221
California Perchlorate MaterialsRequirements . . . . . . . . . . . . . . . . . . . . . . . . 221
Accessories and Modifications . . . . . . . . . 221
Vehicle Checks
Doing Your Own Service Work . . . . . . . . . 222
Hood . . . . . . . . . . . . . . . . . . . . . . . . . . . . . . . . . . 222
Engine Compartment Overview . . . . . . . . 224
Engine Oil . . . . . . . . . . . . . . . . . . . . . . . . . . . . . 225
Engine Oil Life System . . . . . . . . . . . . . . . . . 227
Automatic Transmission Fluid . . . . . . . . . 228
Engine Air Filter Life System . . . . . . . . . . 228
Engine Air Cleaner/Filter . . . . . . . . . . . . . . . 228
Cooling System . . . . . . . . . . . . . . . . . . . . . . . 229
Engine Overheating . . . . . . . . . . . . . . . . . . . . 232
Washer Fluid . . . . . . . . . . . . . . . . . . . . . . . . . . 233
Brakes . . . . . . . . . . . . . . . . . . . . . . . . . . . . . . . . . 234
Brake Fluid . . . . . . . . . . . . . . . . . . . . . . . . . . . . 234
Battery - North America . . . . . . . . . . . . . . . 235
Automatic Transmission Shift Lock Control Function Check . . . . . . . . . . . . . . 236
Park Brake and P (Park) Mechanism Check . . . . . . . . . . . . . . . . . . . . . . . . . . . . . . . . 237
Wiper Blade Replacement . . . . . . . . . . . . . 237
Windshield Replacement . . . . . . . . . . . . . . 238
Gas Strut(s) . . . . . . . . . . . . . . . . . . . . . . . . . . . 238
Headlamp Aiming
Front Headlamp Aiming . . . . . . . . . . . . . . . 239
Bulb Replacement
Bulb Replacement . . . . . . . . . . . . . . . . . . . . . 239
Halogen Bulbs . . . . . . . . . . . . . . . . . . . . . . . . . 239
LED Lighting . . . . . . . . . . . . . . . . . . . . . . . . . . . 239
Headlamps, Front Turn Signal, Sidemarker, and Parking Lamps . . . . . . 239
Taillamps, Turn Signal, Stoplamps, and Back-Up Lamps (LS and LT) . . . . . . . . . . 240
Taillamps, Turn Signal, Stoplamps, and Back-Up Lamps (LT and Premier) . . . . . 241
License Plate Lamp . . . . . . . . . . . . . . . . . . . . 242
Electrical System
High Voltage Devices and Wiring . . . . . . 242
Electrical System Overload . . . . . . . . . . . . 243
Fuses and Circuit Breakers . . . . . . . . . . . . . 244
Engine Compartment Fuse Block . . . . . . 245
Instrument Panel Fuse Block . . . . . . . . . . 249
Wheels and Tires
Tires . . . . . . . . . . . . . . . . . . . . . . . . . . . . . . . . . . . 251
All-Season Tires . . . . . . . . . . . . . . . . . . . . . . . . 251
Winter Tires . . . . . . . . . . . . . . . . . . . . . . . . . . . 252
Low-Profile Tires . . . . . . . . . . . . . . . . . . . . . . . 252
Tire Sidewall Labeling . . . . . . . . . . . . . . . . . 252
Tire Designations . . . . . . . . . . . . . . . . . . . . . . 254
Tire Terminology and Definitions . . . . . . 255
Tire Pressure . . . . . . . . . . . . . . . . . . . . . . . . . . 257 Tire Pressure for High-Speed
Operation . . . . . . . . . . . . . . . . . . . . . . . . . . . 258
Tire Pressure Monitor System . . . . . . . . . 259
Tire Pressure Monitor Operation . . . . . . 260
Tire Inspection . . . . . . . . . . . . . . . . . . . . . . . . 263
Tire Rotation . . . . . . . . . . . . . . . . . . . . . . . . . . 263
When It Is Time for New Tires . . . . . . . . 264
Buying New Tires . . . . . . . . . . . . . . . . . . . . . 265
Different Size Tires and Wheels . . . . . . . 266
Uniform Tire Quality Grading . . . . . . . . . 266
Wheel Alignment and Tire Balance . . . . 268
Wheel Replacement . . . . . . . . . . . . . . . . . . . 268
Tire Chains . . . . . . . . . . . . . . . . . . . . . . . . . . . . 268
If a Tire Goes Flat . . . . . . . . . . . . . . . . . . . . . 269
Tire Changing . . . . . . . . . . . . . . . . . . . . . . . . . 270
Compact Spare Tire . . . . . . . . . . . . . . . . . . . . 275
Jump Starting
Jump Starting - North America . . . . . . . . 275
Towing the Vehicle
Transporting a Disabled Vehicle . . . . . . . 278
Recreational Vehicle Towing . . . . . . . . . . . 279
Appearance Care
Exterior Care . . . . . . . . . . . . . . . . . . . . . . . . . . 280
Interior Care . . . . . . . . . . . . . . . . . . . . . . . . . . 284
Floor Mats . . . . . . . . . . . . . . . . . . . . . . . . . . . . 287
Page 223 of 332
Chevrolet Malibu Owner Manual (GMNA-Localizing-U.S./Canada-
16273584) - 2023 - CRC - 9/28/22
222 Vehicle Care
Vehicle Checks
Doing Your Own Service Work
{Warning
It can be dangerous to work on your
vehicle if you do not have the proper
knowledge, service manual, tools,
or parts. Always follow owner’s manual
procedures and consult the service
manual for your vehicle before doing any
service work.
If doing some of your own service work, use
the proper service manual. It tells you much
more about how to service the vehicle than
this manual can. To order the proper service
manual, see Publication Ordering
Information 0308.
This vehicle has an airbag system. Before
attempting to do your own service work,
see Servicing the Airbag-Equipped Vehicle
0 53.
If equipped with remote vehicle start, open
the hood before performing any service
work to prevent remote starting the vehicle
accidentally. See Remote Vehicle Start 013. Keep a record with all parts receipts and list
the mileage and the date of any service
work performed. See
Maintenance Records
0 296.
Caution
Even small amounts of contamination can
cause damage to vehicle systems. Do not
allow contaminants to contact the fluids,
reservoir caps, or dipsticks.
Hood
{Warning
For vehicles with auto engine stop/start,
turn the vehicle off before opening the
hood. If the vehicle is on, the engine will
start when the hood is opened. You or
others could be injured.
{Warning
Components under the hood can get hot
from running the engine. To help avoid
the risk of burning unprotected skin,
never touch these components until they
have cooled, and always use a glove or
towel to avoid direct skin contact. Clear any snow from the hood before
opening.
To open the hood:
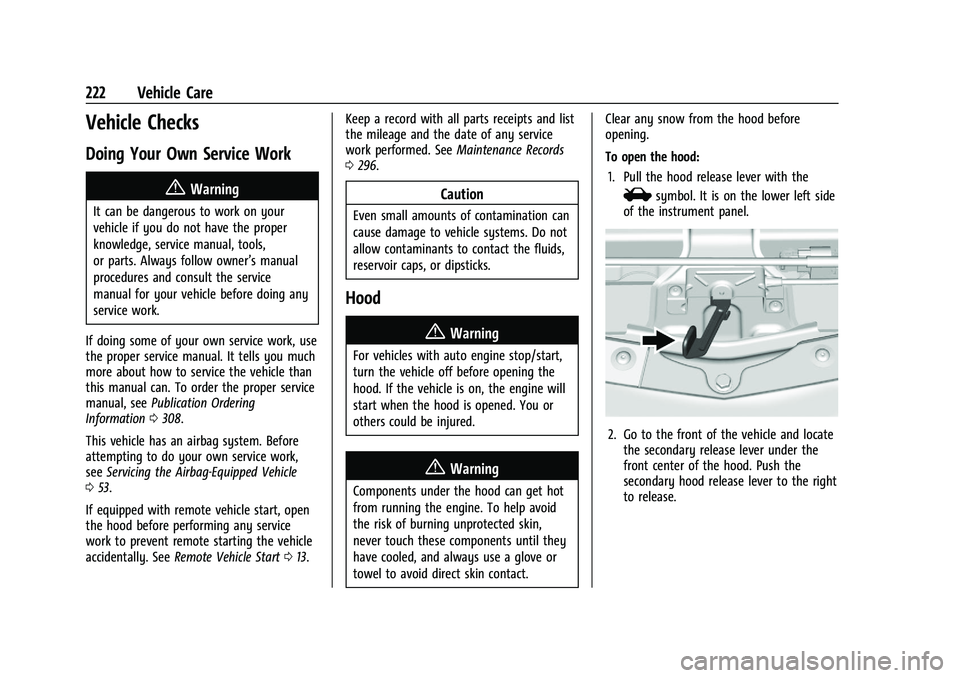
1. Pull the hood release lever with the
isymbol. It is on the lower left side
of the instrument panel.
2. Go to the front of the vehicle and locate the secondary release lever under the
front center of the hood. Push the
secondary hood release lever to the right
to release.
Page 233 of 332
Chevrolet Malibu Owner Manual (GMNA-Localizing-U.S./Canada-
16273584) - 2023 - CRC - 9/28/22
232 Vehicle Care
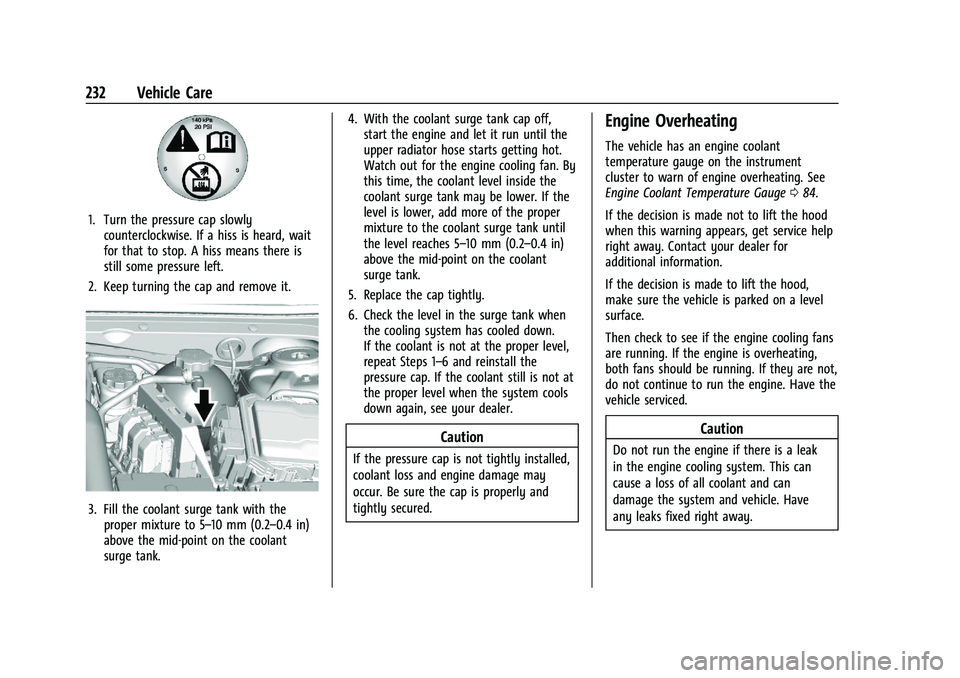
1. Turn the pressure cap slowlycounterclockwise. If a hiss is heard, wait
for that to stop. A hiss means there is
still some pressure left.
2. Keep turning the cap and remove it.
3. Fill the coolant surge tank with the proper mixture to 5–10 mm (0.2–0.4 in)
above the mid-point on the coolant
surge tank. 4. With the coolant surge tank cap off,
start the engine and let it run until the
upper radiator hose starts getting hot.
Watch out for the engine cooling fan. By
this time, the coolant level inside the
coolant surge tank may be lower. If the
level is lower, add more of the proper
mixture to the coolant surge tank until
the level reaches 5–10 mm (0.2–0.4 in)
above the mid-point on the coolant
surge tank.
5. Replace the cap tightly.
6. Check the level in the surge tank when the cooling system has cooled down.
If the coolant is not at the proper level,
repeat Steps 1–6 and reinstall the
pressure cap. If the coolant still is not at
the proper level when the system cools
down again, see your dealer.
Caution
If the pressure cap is not tightly installed,
coolant loss and engine damage may
occur. Be sure the cap is properly and
tightly secured.
Engine Overheating
The vehicle has an engine coolant
temperature gauge on the instrument
cluster to warn of engine overheating. See
Engine Coolant Temperature Gauge 084.
If the decision is made not to lift the hood
when this warning appears, get service help
right away. Contact your dealer for
additional information.
If the decision is made to lift the hood,
make sure the vehicle is parked on a level
surface.
Then check to see if the engine cooling fans
are running. If the engine is overheating,
both fans should be running. If they are not,
do not continue to run the engine. Have the
vehicle serviced.
Caution
Do not run the engine if there is a leak
in the engine cooling system. This can
cause a loss of all coolant and can
damage the system and vehicle. Have
any leaks fixed right away.
Page 237 of 332
Chevrolet Malibu Owner Manual (GMNA-Localizing-U.S./Canada-
16273584) - 2023 - CRC - 9/28/22
236 Vehicle Care
Stop/Start System
Your vehicle is a equipped with a Stop/Start
system to shut off the engine to help
conserve fuel. SeeStop/Start System 0177.
Your vehicle may be equipped with an
Absorbed Glass Mat (AGM) 12-volt battery.
Installation of a standard 12-volt battery will
result in reduced 12-volt battery life.
When using a 12-volt battery charger on the
12-volt AGM battery, some chargers have an
AGM battery setting on the charger.
If available, use the AGM setting on the
charger, to limit charge voltage to 14.8 volts.
{Warning
WARNING: Battery posts, terminals and
related accessories can expose you to
chemicals including lead and lead
compounds, which are known to the
State of California to cause cancer and
birth defects or other reproductive harm.
Wash hands after handling. For more
information go to
www.P65Warnings.ca.gov.
See California Proposition 65 Warning 01.
Vehicle Storage
{Warning
Batteries have acid that can burn you and
gas that can explode. You can be badly
hurt if you are not careful. Always wear
eye protection. See Jump Starting - North
America 0275 for tips on working around
a battery without getting hurt.
Infrequent Usage: Remove the 12-volt
battery black, negative (−) cable from the
battery to keep the battery from
running down.
Extended Storage: Remove the 12-volt
battery black, negative (−) cable from the
battery or use a battery trickle charger.
Remember to reconnect the battery when
ready to drive the vehicle.
Automatic Transmission Shift Lock
Control Function Check
{Warning
When you are doing this inspection, the
vehicle could move suddenly. If the
vehicle moves, you or others could be
injured.
1. Before starting this check, be sure there is enough room around the vehicle.
It should be parked on a level surface.
2. Apply the parking brake. Be ready to apply the regular brake immediately if
the vehicle begins to move.
3. With the engine off, turn the ignition on, but do not start the engine. Without
applying the regular brake, try to move
the shift lever out of P (Park) with
normal effort. If the shift lever moves
out of P (Park), contact your dealer for
service.