2023 CHEVROLET MALIBU engine
[x] Cancel search: enginePage 241 of 332
Chevrolet Malibu Owner Manual (GMNA-Localizing-U.S./Canada-
16273584) - 2023 - CRC - 9/28/22
240 Vehicle Care
3. For the passenger side bulb, remove theengine air cleaner housing by gripping
firmly and pulling straight up.
4. Remove the cover from the back of the headlamp assembly by turning it
counterclockwise.
5. Press the retaining tab on the electrical connector to disconnect.
6. Remove the bulb from the lamp assembly by turning counterclockwise.
7. Replace the bulb and reverse Steps 1–6 to reinstall.
Headlamps (Premier)
See your dealer for replacement.
Front Turn Signal and Parking Lamps
See your dealer for replacement.
Taillamps, Turn Signal, Stoplamps,
and Back-Up Lamps (LS and LT)
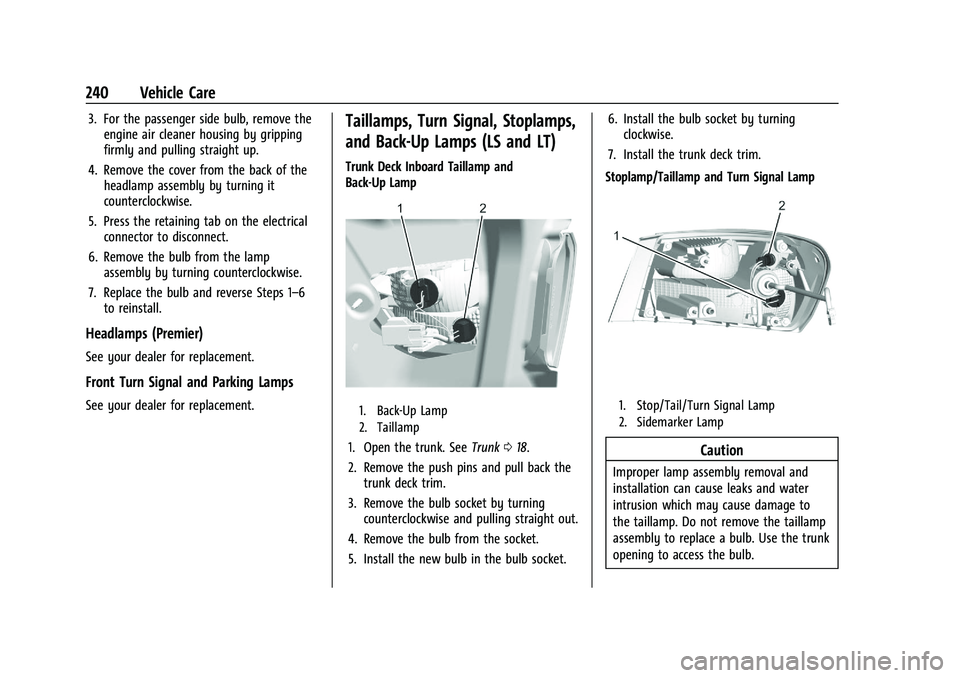
Trunk Deck Inboard Taillamp and
Back-Up Lamp
1. Back-Up Lamp
2. Taillamp
1. Open the trunk. See Trunk018.
2. Remove the push pins and pull back the trunk deck trim.
3. Remove the bulb socket by turning counterclockwise and pulling straight out.
4. Remove the bulb from the socket.
5. Install the new bulb in the bulb socket. 6. Install the bulb socket by turning
clockwise.
7. Install the trunk deck trim.
Stoplamp/Taillamp and Turn Signal Lamp
1. Stop/Tail/Turn Signal Lamp
2. Sidemarker Lamp
Caution
Improper lamp assembly removal and
installation can cause leaks and water
intrusion which may cause damage to
the taillamp. Do not remove the taillamp
assembly to replace a bulb. Use the trunk
opening to access the bulb.
Page 244 of 332
Chevrolet Malibu Owner Manual (GMNA-Localizing-U.S./Canada-
16273584) - 2023 - CRC - 9/28/22
Vehicle Care 243
Electrical System Overload
The vehicle has fuses and circuit breakers to
protect against an electrical system
overload.
When the current electrical load is too
heavy, the circuit breaker opens and closes,
protecting the circuit until the current load
returns to normal or the problem is fixed.
This greatly reduces the chance of circuit
overload and fire caused by electrical
problems.
Fuses and circuit breakers protect power
devices in the vehicle.
If there is a problem on the road and a fuse
needs to be replaced, the same amperage
fuse can be borrowed. Choose some feature
of the vehicle that is not needed to use and
replace it as soon as possible.
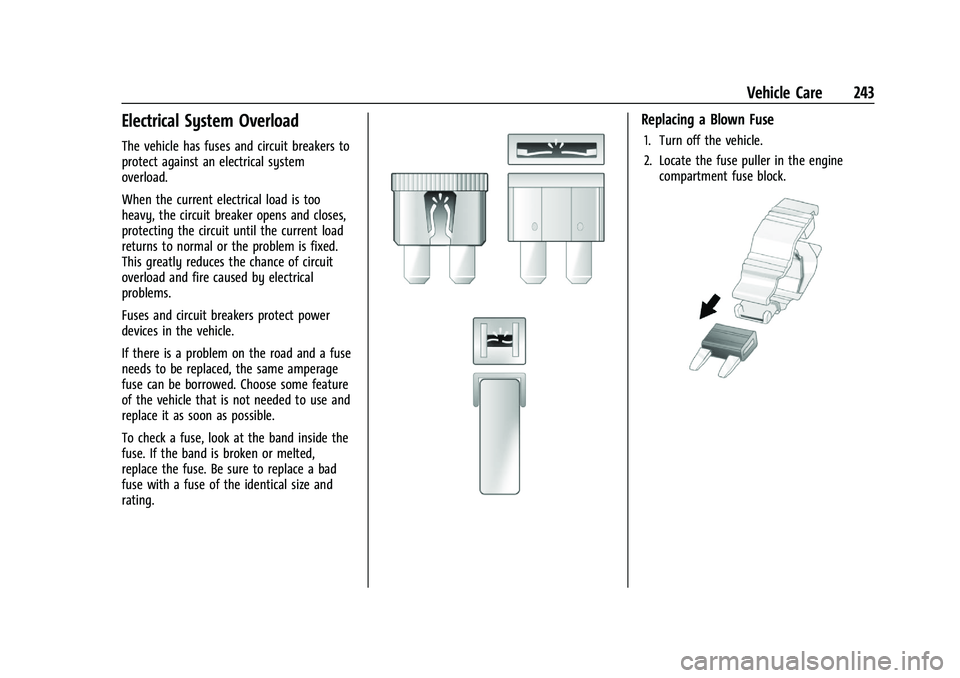
To check a fuse, look at the band inside the
fuse. If the band is broken or melted,
replace the fuse. Be sure to replace a bad
fuse with a fuse of the identical size and
rating.
Replacing a Blown Fuse
1. Turn off the vehicle.
2. Locate the fuse puller in the enginecompartment fuse block.
Page 246 of 332
Chevrolet Malibu Owner Manual (GMNA-Localizing-U.S./Canada-
16273584) - 2023 - CRC - 9/28/22
Vehicle Care 245
{Warning
Installation or use of fuses that do not
meet GM’s original fuse specifications is
dangerous. The fuses could fail, and result
in a fire. You or others could be injured
or killed, and the vehicle could be
damaged.
See Accessories and Modifications 0221 and
General Information 0221.
To check or replace a blown fuse, see
Electrical System Overload 0243.
Engine Compartment Fuse Block
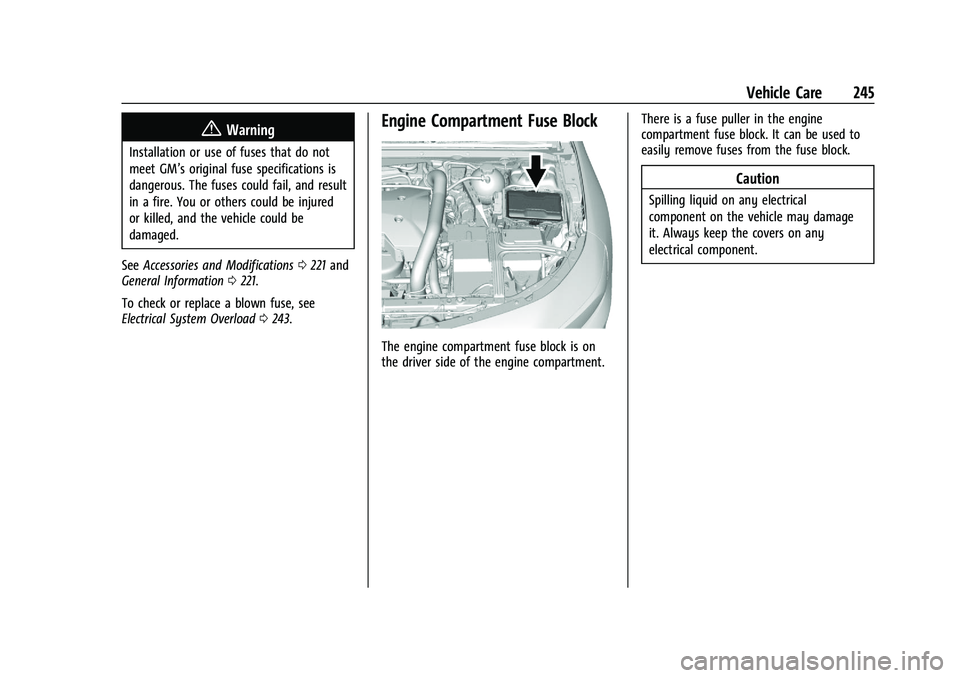
The engine compartment fuse block is on
the driver side of the engine compartment. There is a fuse puller in the engine
compartment fuse block. It can be used to
easily remove fuses from the fuse block.
Caution
Spilling liquid on any electrical
component on the vehicle may damage
it. Always keep the covers on any
electrical component.
Page 248 of 332
Chevrolet Malibu Owner Manual (GMNA-Localizing-U.S./Canada-
16273584) - 2023 - CRC - 9/28/22
Vehicle Care 247
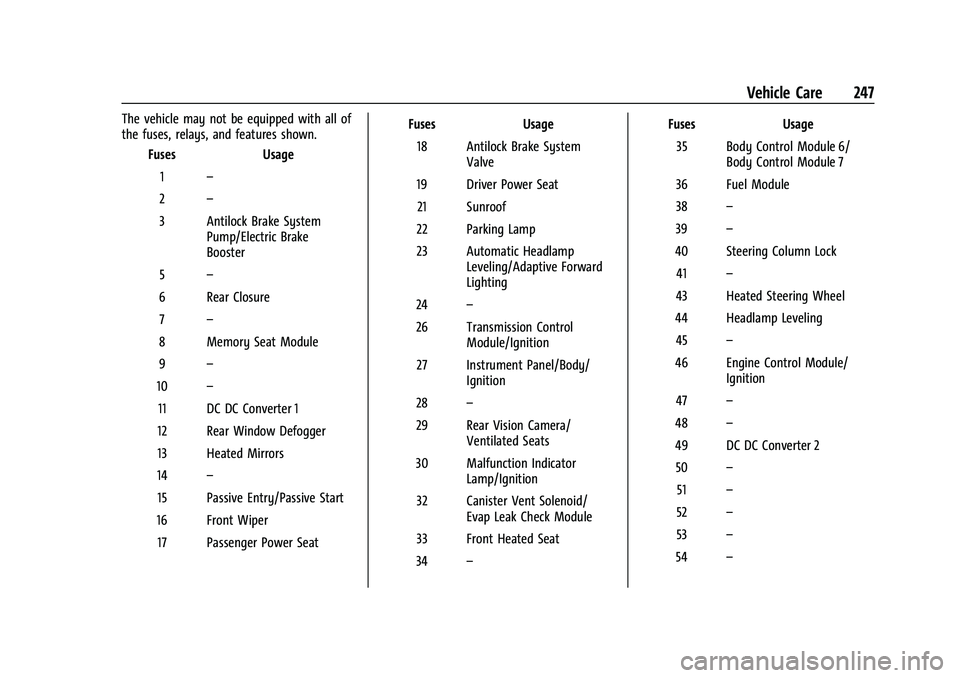
The vehicle may not be equipped with all of
the fuses, relays, and features shown.Fuses Usage
1 –
2 –
3 Antilock Brake System Pump/Electric Brake
Booster
5 –
6 Rear Closure 7 –
8 Memory Seat Module
9 –
10 –
11 DC DC Converter 1
12 Rear Window Defogger
13 Heated Mirrors
14 –
15 Passive Entry/Passive Start
16 Front Wiper 17 Passenger Power Seat Fuses
Usage
18 Antilock Brake System Valve
19 Driver Power Seat 21 Sunroof
22 Parking Lamp
23 Automatic Headlamp Leveling/Adaptive Forward
Lighting
24 –
26 Transmission Control Module/Ignition
27 Instrument Panel/Body/ Ignition
28 –
29 Rear Vision Camera/ Ventilated Seats
30 Malfunction Indicator Lamp/Ignition
32 Canister Vent Solenoid/ Evap Leak Check Module
33 Front Heated Seat
34 – Fuses
Usage
35 Body Control Module 6/ Body Control Module 7
36 Fuel Module
38 –
39 –
40 Steering Column Lock 41 –
43 Heated Steering Wheel
44 Headlamp Leveling 45 –
46 Engine Control Module/ Ignition
47 –
48 –
49 DC DC Converter 2 50 –
51 –
52 –
53 –
54 –
Page 249 of 332
Chevrolet Malibu Owner Manual (GMNA-Localizing-U.S./Canada-
16273584) - 2023 - CRC - 9/28/22
248 Vehicle Care
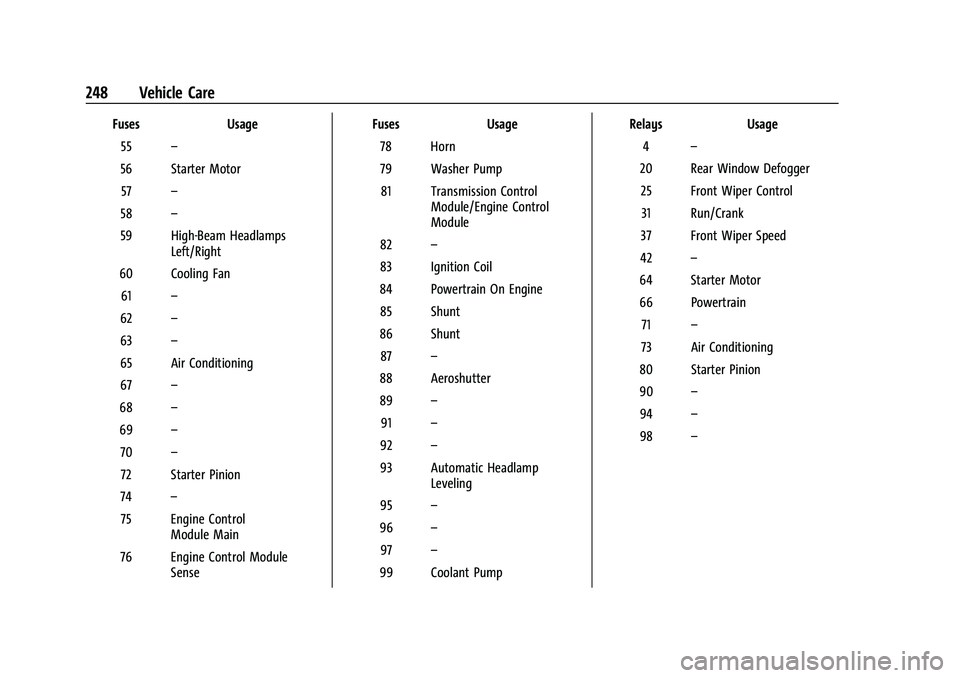
FusesUsage
55 –
56 Starter Motor 57 –
58 –
59 High-Beam Headlamps Left/Right
60 Cooling Fan 61 –
62 –
63 –
65 Air Conditioning
67 –
68 –
69 –
70 –
72 Starter Pinion
74 –
75 Engine Control Module Main
76 Engine Control Module Sense Fuses
Usage
78 Horn
79 Washer Pump 81 Transmission Control Module/Engine Control
Module
82 –
83 Ignition Coil
84 Powertrain On Engine 85 Shunt
86 Shunt 87 –
88 Aeroshutter
89 –
91 –
92 –
93 Automatic Headlamp Leveling
95 –
96 –
97 –
99 Coolant Pump Relays
Usage
4 –
20 Rear Window Defogger 25 Front Wiper Control31 Run/Crank
37 Front Wiper Speed
42 –
64 Starter Motor
66 Powertrain 71 –
73 Air Conditioning
80 Starter Pinion
90 –
94 –
98 –
Page 255 of 332
Chevrolet Malibu Owner Manual (GMNA-Localizing-U.S./Canada-
16273584) - 2023 - CRC - 9/28/22
254 Vehicle Care
(3) Tire Identification Number (TIN):
The letters and numbers following the
DOT (Department of Transportation)
code are the Tire Identification Number
(TIN). The TIN shows the manufacturer
and plant code, tire size, and date the
tire was manufactured. The TIN is
molded onto both sides of the tire,
although only one side may have the
date of manufacture.
(4) Maximum Cold Inflation Load
Limit
:Maximum load that can be
carried and the maximum pressure
needed to support that load.
(5) Tire Inflation
:The temporary use
tire or compact spare tire should be
inflated to 420 kPa (60 psi). For more
information on tire pressure and
inflation see Tire Pressure 0257.
(6) Tire Size
:A combination of letters
and numbers define a tire's width,
height, aspect ratio, construction type,
and service description. The letter “T”as
the first character in the tire size means
the tire is for temporary use only. (7) TPC Spec (Tire Performance Criteria
Specification)
:Original equipment tires
designed to GM's specific tire
performance criteria have a TPC
specification code molded onto the
sidewall. GM's TPC specifications meet
or exceed all federal safety guidelines.
Tire Designations
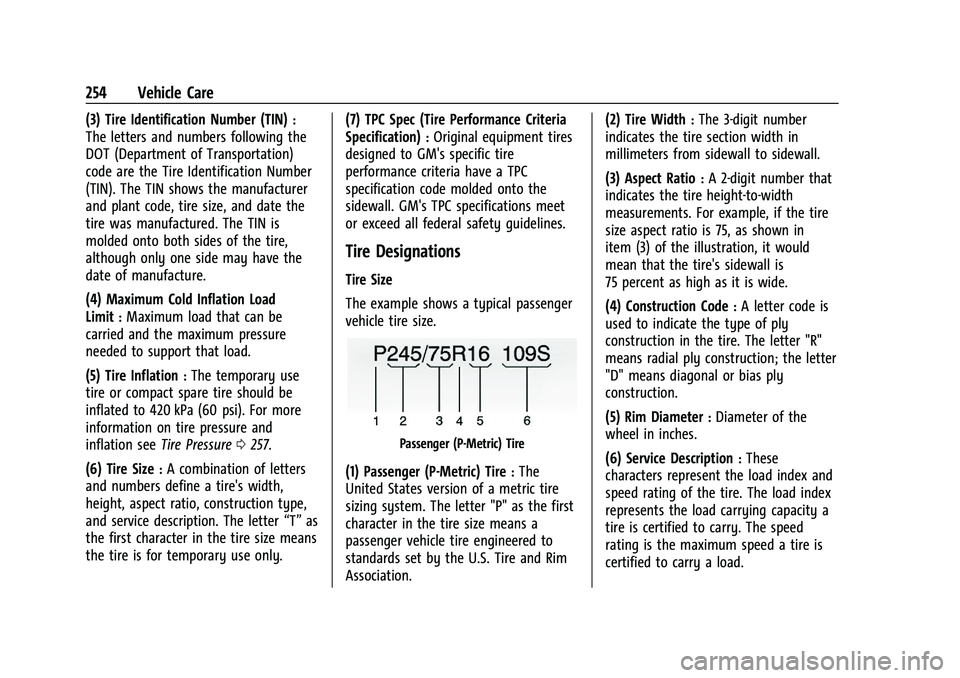
Tire Size
The example shows a typical passenger
vehicle tire size.
Passenger (P-Metric) Tire
(1) Passenger (P-Metric) Tire:The
United States version of a metric tire
sizing system. The letter "P" as the first
character in the tire size means a
passenger vehicle tire engineered to
standards set by the U.S. Tire and Rim
Association. (2) Tire Width
:The 3-digit number
indicates the tire section width in
millimeters from sidewall to sidewall.
(3) Aspect Ratio
:A 2-digit number that
indicates the tire height-to-width
measurements. For example, if the tire
size aspect ratio is 75, as shown in
item (3) of the illustration, it would
mean that the tire's sidewall is
75 percent as high as it is wide.
(4) Construction Code
:A letter code is
used to indicate the type of ply
construction in the tire. The letter "R"
means radial ply construction; the letter
"D" means diagonal or bias ply
construction.
(5) Rim Diameter
:Diameter of the
wheel in inches.
(6) Service Description
:These
characters represent the load index and
speed rating of the tire. The load index
represents the load carrying capacity a
tire is certified to carry. The speed
rating is the maximum speed a tire is
certified to carry a load.
Page 258 of 332
Chevrolet Malibu Owner Manual (GMNA-Localizing-U.S./Canada-
16273584) - 2023 - CRC - 9/28/22
Vehicle Care 257
Tire Pressure
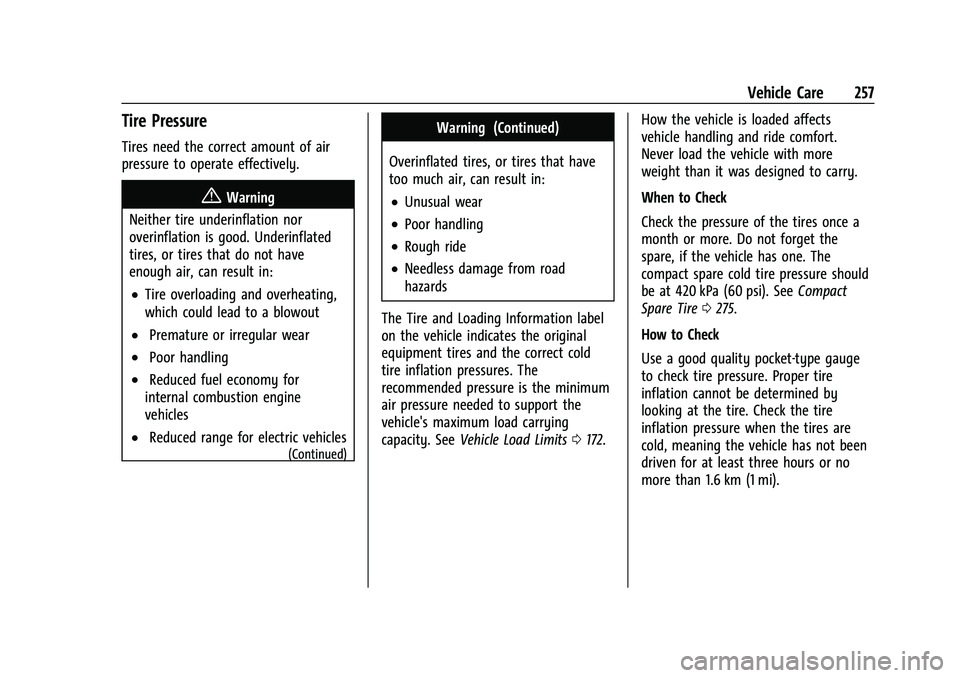
Tires need the correct amount of air
pressure to operate effectively.
{Warning
Neither tire underinflation nor
overinflation is good. Underinflated
tires, or tires that do not have
enough air, can result in:
.Tire overloading and overheating,
which could lead to a blowout
.Premature or irregular wear
.Poor handling
.Reduced fuel economy for
internal combustion engine
vehicles
.Reduced range for electric vehicles
(Continued)
Warning (Continued)
Overinflated tires, or tires that have
too much air, can result in:
.Unusual wear
.Poor handling
.Rough ride
.Needless damage from road
hazards
The Tire and Loading Information label
on the vehicle indicates the original
equipment tires and the correct cold
tire inflation pressures. The
recommended pressure is the minimum
air pressure needed to support the
vehicle's maximum load carrying
capacity. See Vehicle Load Limits 0172. How the vehicle is loaded affects
vehicle handling and ride comfort.
Never load the vehicle with more
weight than it was designed to carry.
When to Check
Check the pressure of the tires once a
month or more. Do not forget the
spare, if the vehicle has one. The
compact spare cold tire pressure should
be at 420 kPa (60 psi). See
Compact
Spare Tire 0275.
How to Check
Use a good quality pocket-type gauge
to check tire pressure. Proper tire
inflation cannot be determined by
looking at the tire. Check the tire
inflation pressure when the tires are
cold, meaning the vehicle has not been
driven for at least three hours or no
more than 1.6 km (1 mi).
Page 278 of 332
Chevrolet Malibu Owner Manual (GMNA-Localizing-U.S./Canada-
16273584) - 2023 - CRC - 9/28/22
Vehicle Care 277
3. Set the parking brake firmly on bothvehicles. Put an automatic transmission
in P (Park) or a manual transmission in
Neutral before setting the parking brake.
Caution
If any accessories are left on or plugged
in during the jump starting procedure,
they could be damaged. The repairs
would not be covered by the vehicle
warranty. Whenever possible, turn off or
unplug all accessories on either vehicle
when jump starting.
4. Turn the ignition off and switch off all lights and accessories in both vehicles,
except the hazard warning flashers if
needed.
{Warning
An electric fan can start up even when
the engine is not running and can injure
you. Keep hands, clothing, and tools
away from any underhood electric fan.
{Warning
Using a match near a battery can cause
battery gas to explode. People have been
hurt doing this, and some have been
blinded. Use a flashlight if you need
more light.
Battery fluid contains acid that can burn
you. Do not get it on you. If you
accidentally get it in your eyes or on
your skin, flush the place with water and
get medical help immediately.
{Warning
Fans or other moving engine parts can
injure you badly. Keep your hands away
from moving parts once the engine is
running.
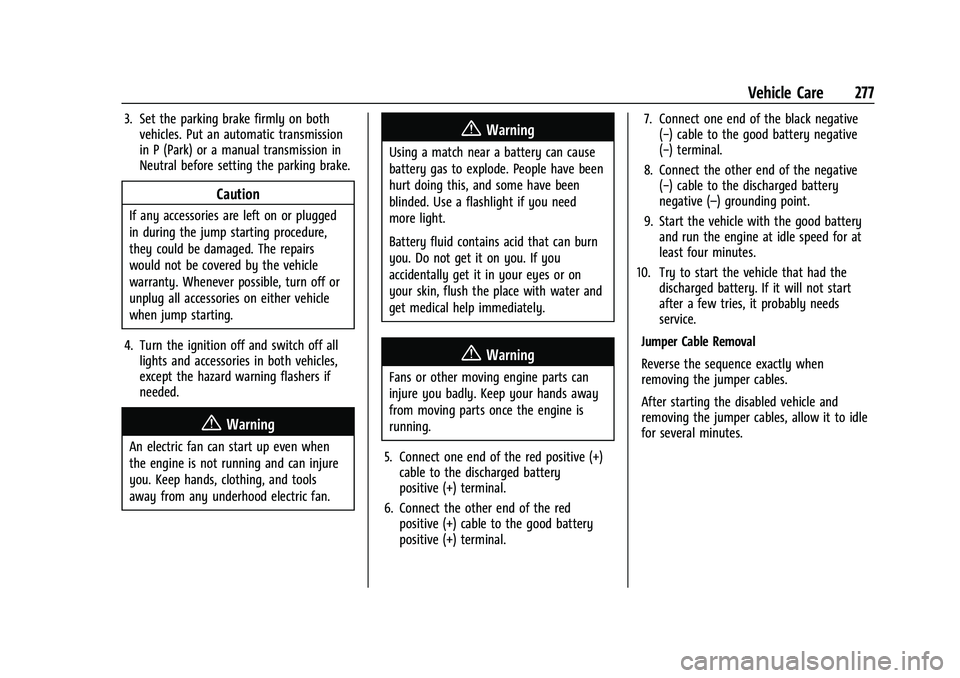
5. Connect one end of the red positive (+) cable to the discharged battery
positive (+) terminal.
6. Connect the other end of the red positive (+) cable to the good battery
positive (+) terminal. 7. Connect one end of the black negative
(−) cable to the good battery negative
(−) terminal.
8. Connect the other end of the negative (−) cable to the discharged battery
negative (–) grounding point.
9. Start the vehicle with the good battery and run the engine at idle speed for at
least four minutes.
10. Try to start the vehicle that had the discharged battery. If it will not start
after a few tries, it probably needs
service.
Jumper Cable Removal
Reverse the sequence exactly when
removing the jumper cables.
After starting the disabled vehicle and
removing the jumper cables, allow it to idle
for several minutes.