2023 CHEVROLET CORVETTE oil change
[x] Cancel search: oil changePage 81 of 351
Chevrolet Corvette Owner Manual (GMNA-Localizing-U.S./Canada/Mexico-
16287457) - 2023 - CRC - 3/10/22
80 Instruments and Controls
Performance
Press the thumbwheel to enter the
Performance menu. Scroll through the
available items.
G-force :Gives the driver an indication of
the vehicle performance in cornering. The
G-force gauge will show as an info tile on
the left side of the cluster, if selected.
Friction Bubble : A four quadrant visual
display, indicative of the four corners of the
car, with a “bubble”showing where the
most inertia is being exerted on the vehicle.
Launch Control : If equipped, the Launch
Control display allows the driver to adjust
the parameters of the Launch Control
System. See Track Events and Competitive
Driving 0172.
Performance Timer : Press the thumbwheel
to enter the setup menu, then select Set
Start Speed. Scroll to desired Start Speed,
then press the thumbwheel to save it. While
on this menu, to change the End Speed,
scroll to End Speed and use the thumbwheel
to scroll to desired End Speed. Press the
thumbwheel to save it. On the next
acceleration, the performance timer will record the time. Pressing the thumbwheel
while the timer is running will cancel the
timer if done before reaching the End Speed.
Lap Timer (without PDR) :
Press
Twhen
Lap Timer is displayed to start, stop, or reset
the lap timer. Press the thumbwheel while
the Lap Timer page is active to start the
timer. If the lap timer is active, pressing the
thumbwheel will stop the current lap timer
and start a new lap. Pressing the
thumbwheel within 10 seconds after
completing the last lap (Stop Lap Timer
option is displayed), the Lap Timer will stop.
Lap Timer (with PDR) : The lap times
recorded with the PDR system will
automatically be displayed in this window.
This only happens if a track has been
selected in the PDR system and a video
recording is started. See Performance Data
Recorder (PDR) 0138.
Oil Temperature : Shows the current oil
temperature in either degrees Celsius (°C) or
degrees Fahrenheit (°F).
Oil Pressure : Shows the current oil pressure
in either kilopascal (kPa) or in pounds per
square inch (psi).
Battery Voltage : Shows the current battery
voltage. Transmission Fluid Temperature :
Shows the
temperature of the transmission fluid in
either degrees Celsius (°C) or degrees
Fahrenheit (°F).
Tire Status : Shows individual tire pressures
and overall temperature as either Cold, Cool,
Normal, Warm, or Hot. Normal is typical for
normal driving while Warm is typical for
aggressive driving. Unknown may be
displayed if tire temperature information is
unavailable.
eLSD : If equipped, displays the amount of
rear differential coupling when the Electronic
Limited-Slip Differential (eLSD) is active and
functioning during vehicle operation.
A reading of 1% is an open differential and
100% is locked. It is normal for the value to
make small or large changes due to driving
conditions and driver inputs. See Limited-Slip
Differential (Stingray Models Without Z51
Performance Package) 0218 or
Limited-Slip Differential (Stingray With Z51
Performance Package and Z06 model) 0219.
Front Lift : During a driver requested Front
Lift (if equipped), the driver may
"remember" using the
S, or dismiss the
display by pressing the thumbwheel. When
the Front Lift is Raised due to location, the
Page 82 of 351
Chevrolet Corvette Owner Manual (GMNA-Localizing-U.S./Canada/Mexico-
16287457) - 2023 - CRC - 3/10/22
Instruments and Controls 81
driver may delete that stored location using
the
S, or dismiss the display by pressing
the thumbwheel.
See Front Lift System 0214.
Audio
Use the thumbwheel to scroll through audio
presets.
Options
Use the thumbwheel to scroll through items
in the Options menu.
Units
Press the thumbwheel while Units is
displayed to enter the Units menu. Choose
US or metric units by pressing the
thumbwheel while the desired item is
highlighted. A selected mark will be
displayed next to the selected item.
Display Themes
Press the thumbwheel to enter the Display
menu. There are seven instrument cluster
display configurations to choose from. Sport,
Tour, Track, Weather, My Mode, Z-Mode,
and Stealth. The style of the cluster will
change depending on the theme selected. Default is linked to Driver mode. Other
display themes can be set
If in Z-Mode or My Mode then those
displays plus HUD (if equipped) can be set.
Stealth Mode is enabled when the
Instrument Panel Illumination Control is set
to the minimum level. See
Instrument Panel
Illumination Control 0105.
.Sport/Z-Mode: Displays Coolant
Temperature, Fuel Gauge, Compass, Drive
Mode Indicator, Odometer, Speed,
Tachometer, Electronic Transmission
Range, Current Gear, Active Fuel
Management (AFM), Peak Performance,
Performance Shift Lights, Speed Limit, Info
Area, and Interaction Area.
.Tour/Weather/My Mode: Displays Coolant
Temperature, Fuel Gauge, Compass, Drive
Mode Indicator, Odometer, Speed,
Tachometer, Electronic Transmission
Range, Current Gear, Active Fuel
Management (AFM), Peak Performance,
Speed Limit, Info Area, and
Interaction Area.
.Track: Displays Coolant Temperature, Fuel
Gauge, Performance Traction
Management, Drive Mode Indicator, Speed, Tachometer, Electronic
Transmission Range, Current Gear, Info
Area, and Interactive Area.
.Stealth: Displays Coolant Temperature,
Fuel Gauge, and Digital Speed.
Preset info tiles shown on each layout:
Sport : G-Force, Oil Temperature
Track : Oil Pressure, Transmissions Fluid
Temperature, Tire Pressure & Tire
Temperature, Oil Temperature
Tour : Time & Outside Air Temperature, Oil
Pressure
Weather : Time & Outside Air Temperature,
Tire Status
Z-Mode : Oil Temperature, G-Force
My Mode : Economy Trend, Oil Pressure
Stealth : None
Head-Up Display (HUD) Rotation
Press the thumbwheel while Adjust Rotation
is highlighted to enter Adjust Mode. Scroll
to adjust the angle of the HUD display.
Press the thumbwheel to confirm and save
the setting. This feature may only be
available in P (Park).
Page 94 of 351
Chevrolet Corvette Owner Manual (GMNA-Localizing-U.S./Canada/Mexico-
16287457) - 2023 - CRC - 3/10/22
Instruments and Controls 93
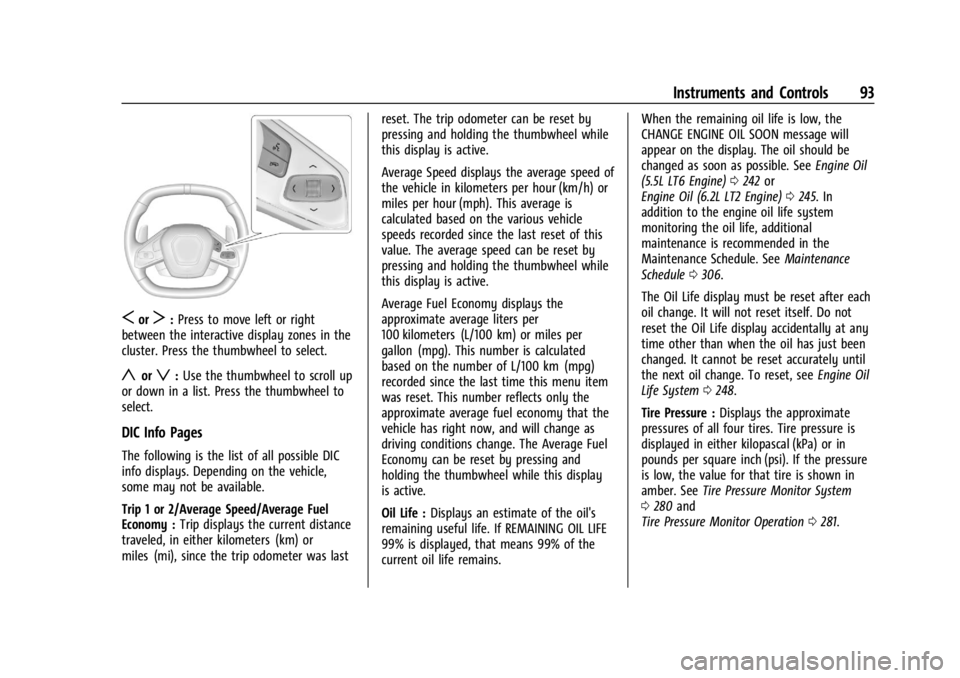
SorT:Press to move left or right
between the interactive display zones in the
cluster. Press the thumbwheel to select.
yorz: Use the thumbwheel to scroll up
or down in a list. Press the thumbwheel to
select.
DIC Info Pages
The following is the list of all possible DIC
info displays. Depending on the vehicle,
some may not be available.
Trip 1 or 2/Average Speed/Average Fuel
Economy : Trip displays the current distance
traveled, in either kilometers (km) or
miles (mi), since the trip odometer was last reset. The trip odometer can be reset by
pressing and holding the thumbwheel while
this display is active.
Average Speed displays the average speed of
the vehicle in kilometers per hour (km/h) or
miles per hour (mph). This average is
calculated based on the various vehicle
speeds recorded since the last reset of this
value. The average speed can be reset by
pressing and holding the thumbwheel while
this display is active.
Average Fuel Economy displays the
approximate average liters per
100 kilometers (L/100 km) or miles per
gallon (mpg). This number is calculated
based on the number of L/100 km (mpg)
recorded since the last time this menu item
was reset. This number reflects only the
approximate average fuel economy that the
vehicle has right now, and will change as
driving conditions change. The Average Fuel
Economy can be reset by pressing and
holding the thumbwheel while this display
is active.
Oil Life :
Displays an estimate of the oil's
remaining useful life. If REMAINING OIL LIFE
99% is displayed, that means 99% of the
current oil life remains. When the remaining oil life is low, the
CHANGE ENGINE OIL SOON message will
appear on the display. The oil should be
changed as soon as possible. See
Engine Oil
(5.5L LT6 Engine) 0242 or
Engine Oil (6.2L LT2 Engine) 0245. In
addition to the engine oil life system
monitoring the oil life, additional
maintenance is recommended in the
Maintenance Schedule. See Maintenance
Schedule 0306.
The Oil Life display must be reset after each
oil change. It will not reset itself. Do not
reset the Oil Life display accidentally at any
time other than when the oil has just been
changed. It cannot be reset accurately until
the next oil change. To reset, see Engine Oil
Life System 0248.
Tire Pressure : Displays the approximate
pressures of all four tires. Tire pressure is
displayed in either kilopascal (kPa) or in
pounds per square inch (psi). If the pressure
is low, the value for that tire is shown in
amber. See Tire Pressure Monitor System
0 280 and
Tire Pressure Monitor Operation 0281.
Page 175 of 351

Chevrolet Corvette Owner Manual (GMNA-Localizing-U.S./Canada/Mexico-
16287457) - 2023 - CRC - 3/10/22
174 Driving and Operating
Engine Cooling
If reduced performance is experienced during
track events or competitive driving, turning
off the A/C will help to improve engine
performance.
Maintain a mixture of 40% DEX-COOL
coolant and 60% clean, drinkable water to
optimize engine performance.
Fuel
Unleaded gasoline, rated at 93 octane or
higher, is required.
Caution
Some high octane fuels contain additives
and compounds that may damage the
vehicle and void the vehicle warranty. See
Prohibited Fuels0227.
Dual Clutch Transmission (DCT) Fluid
The transmission fluid and external canister
filter should be changed after every 24 hours
of track use. Change the fluid and external
canister filter as soon as possible if
prompted by the transmission fluid life
monitor that remaining fluid life is low. Stingray
Add an additional 2 L (2 qt) of DCT
transmission fluid before track use. It is not
required to remove the additional 2 L (2 qt)
of DCT fluid after the track event.
Any transmission level set or change should
be performed at your dealer.
Z06
Additional transmission fluid is not required
for the Z06. The Z06 comes track ready
from the factory.
Brakes
Battery Disconnect
Disconnect the battery before servicing the
hydraulic brake system. It is critical to
disconnect the battery before bleeding the
system, replacing the pads, or any other
work. The battery must be disconnected to
prevent the brake master cylinder from
pressurizing the hydraulic system during its
automated self diagnostic tests that can
occur when a door is opened or the remote
key is present.
{Warning
To avoid personal injury and/or vehicle
damage, always disconnect the battery
before performing service work on the
hydraulic brake system. Bleeding the
brake system with the battery connected
can lead to the system diagnosing a leak
or air in the braking system. A Diagnostic
Trouble Code (DTC) may set and vehicle
speed may be limited.
Brake Fluid
Replace existing brake fluid with a qualified
high performance DOT 4 brake fluid from a
sealed container. Brake fluid with a dry
boiling point >310 °C (590 °F) is qualified.
If high performance brake fluid is used,
replace it with GM approved brake fluid
before driving on public roads. If high
performance brake fluid is in the vehicle and
the age of the brake fluid is over a month
old or unknown, replace the brake fluid
before track events and competitive driving.
Do not use silicone or DOT-5 brake fluids.
Check the fluid level before each competitive
driving event.
Page 182 of 351
Chevrolet Corvette Owner Manual (GMNA-Localizing-U.S./Canada/Mexico-
16287457) - 2023 - CRC - 3/10/22
Driving and Operating 181
Shock Spring Seat Adjustment
The front shocks, on vehicles without
hydraulic front lift and rear shocks, have
threaded spring seats that allow adjustment
of the preload on the coil springs. The
vehicle corner weights can be adjusted for
track use. If the vehicle trim height is
modified, it should be returned to normal
trim height before street use.
The spring seat can be adjusted
approximately 20 mm (0.8 in) up or down
from the nominal position. Each complete
turn of the spring seat will change the
vehicle height approximately 1.5 mm
(0.06 in). When adjusting the seat to the
upper limit, lift the dust boot and ensure
the seat does not thread off the center
support tube (stop adjustment when threads
no longer visible). When adjusting the seat
to the lower limit, leave approximately
10 mm (0.4 in) of thread visible for the
lower lock nut to have full thread
engagement.
The following procedure can be complex and
should only be performed by trained
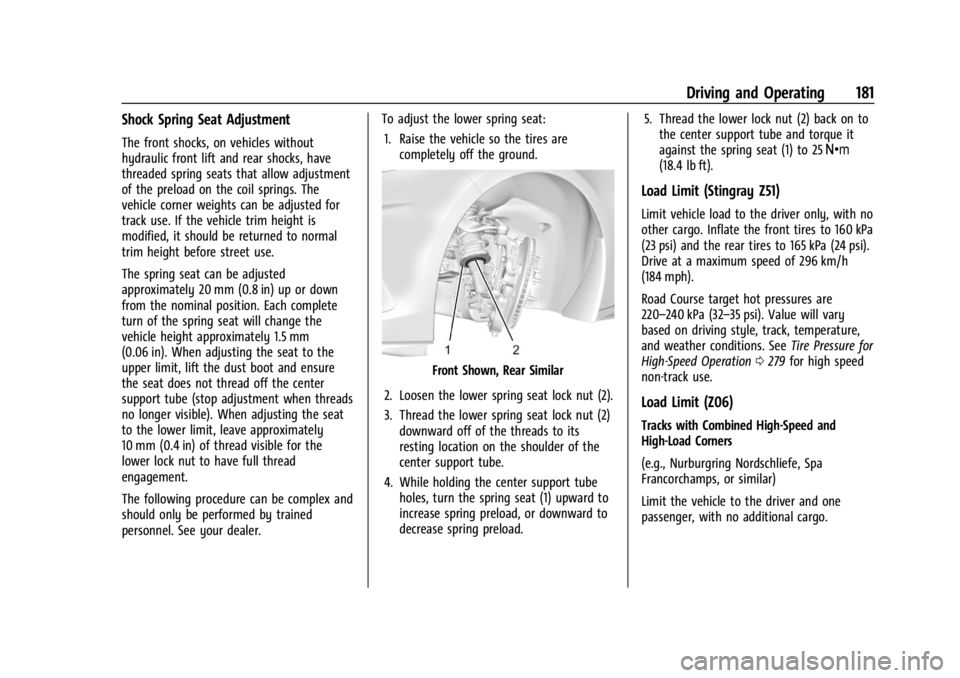
personnel. See your dealer.To adjust the lower spring seat:
1. Raise the vehicle so the tires are completely off the ground.
Front Shown, Rear Similar
2. Loosen the lower spring seat lock nut (2).
3. Thread the lower spring seat lock nut (2) downward off of the threads to its
resting location on the shoulder of the
center support tube.
4. While holding the center support tube holes, turn the spring seat (1) upward to
increase spring preload, or downward to
decrease spring preload. 5. Thread the lower lock nut (2) back on to
the center support tube and torque it
against the spring seat (1) to 25 Y
(18.4 lb ft).
Load Limit (Stingray Z51)
Limit vehicle load to the driver only, with no
other cargo. Inflate the front tires to 160 kPa
(23 psi) and the rear tires to 165 kPa (24 psi).
Drive at a maximum speed of 296 km/h
(184 mph).
Road Course target hot pressures are
220–240 kPa (32–35 psi). Value will vary
based on driving style, track, temperature,
and weather conditions. See Tire Pressure for
High-Speed Operation 0279 for high speed
non-track use.
Load Limit (Z06)
Tracks with Combined High-Speed and
High-Load Corners
(e.g., Nurburgring Nordschliefe, Spa
Francorchamps, or similar)
Limit the vehicle to the driver and one
passenger, with no additional cargo.
Page 229 of 351
Chevrolet Corvette Owner Manual (GMNA-Localizing-U.S./Canada/Mexico-
16287457) - 2023 - CRC - 3/10/22
228 Driving and Operating
Caution (Continued)
.Fuel with a posted octane rating of
less than the recommended fuel. Using
this fuel will lower fuel economy and
performance, and may decrease the
life of the emissions catalyst.
Fuels in Foreign Countries
The U.S., Canada, and Mexico post fuel
octane ratings in anti-knock index (AKI). For
fuel not to use in a foreign country, see
Prohibited Fuels0227.
Fuel Additives
TOP TIER Detergent Gasoline is highly
recommended for use with your vehicle.
If your country does not have TOP TIER
Detergent Gasoline, add ACDelco Fuel
System Treatment Plus−Gasoline to the
vehicle’s gasoline fuel tank at every oil
change or 15 000 km (9,000 mi), whichever
occurs first. TOP TIER Detergent Gasoline
and ACDelco Fuel System Treatment
Plus−Gasoline will help keep your vehicle’s
engine fuel deposit free and performing
optimally.
Filling the Tank
An arrow on the fuel gauge indicates which
side of the vehicle the fuel door is on. See
Fuel Gauge 082.
{Warning
Fuel vapors and fuel fires burn violently
and can cause injury or death.
Follow these guidelines to help avoid
injuries to you and others:
.Read and follow all the instructions on
the fuel pump island.
.Turn off the engine when refueling.
.Keep sparks, flames, and smoking
materials away from fuel.
.Do not leave the fuel pump
unattended.
.Avoid using electronic devices while
refueling.
.Do not re-enter the vehicle while
pumping fuel.
.Keep children away from the fuel
pump and never let children
pump fuel.
(Continued)
Warning (Continued)
.Before touching the fill nozzle, touch a
metallic object to discharge static
electricity from your body.
.Fuel can spray out if the fill nozzle is
inserted too quickly. This spray can
happen if the tank is nearly full, and is
more likely in hot weather. Insert the
fill nozzle slowly and wait for any hiss
noise to stop before beginning to
flow fuel.
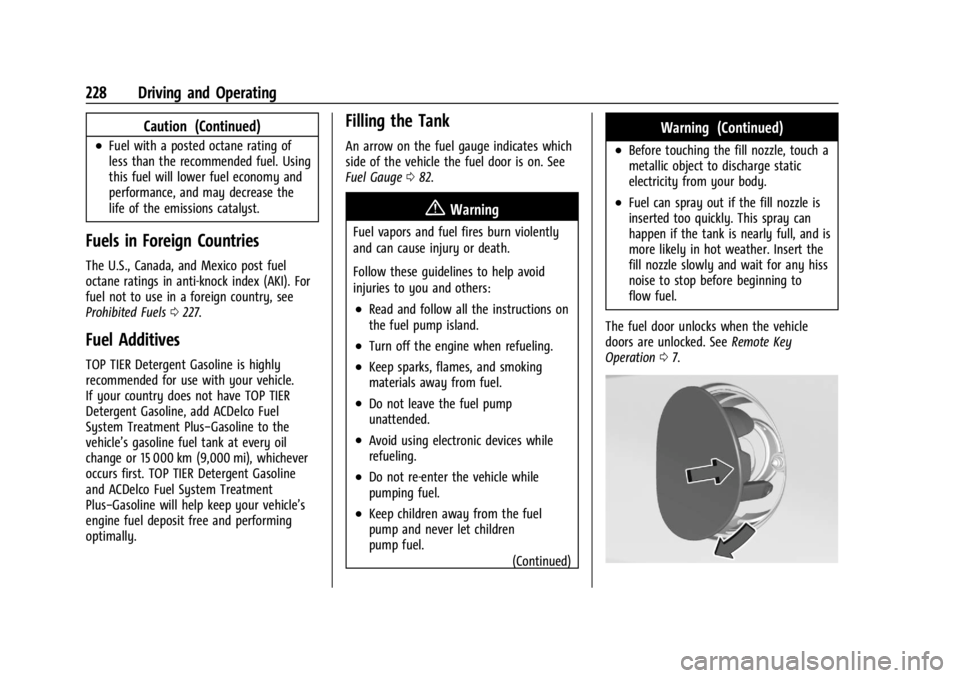
The fuel door unlocks when the vehicle
doors are unlocked. See Remote Key
Operation 07.
Page 243 of 351

Chevrolet Corvette Owner Manual (GMNA-Localizing-U.S./Canada/Mexico-
16287457) - 2023 - CRC - 3/10/22
242 Vehicle Care
1. Engine Cooling Fan (Out of View). SeeCooling System 0252.
2. Engine Air Cleaner/Filter (Under Access Panel). See Engine Air Cleaner/Filter
0 251.
3. Dry Sump Engine Oil Tank and Fill Cap. See Engine Oil (5.5L LT6 Engine) 0242 or
Engine Oil (6.2L LT2 Engine) 0245.
4. Engine Oil Dipstick. See Engine Oil (5.5L
LT6 Engine) 0242 or
Engine Oil (6.2L LT2 Engine) 0245.
5. Coolant Surge Tank and Pressure Cap. See Cooling System 0252.
Engine Oil (5.5L LT6 Engine)
To ensure proper engine performance and
long life, pay careful attention to engine oil.
Follow these important steps:
.Use engine oil approved to the proper
specification and of the proper viscosity
grade. See “Selecting the Right Engine
Oil” later in this section.
.Check the engine oil level regularly and
maintain the proper oil level. See
“Checking Engine Oil” and“When to Add
Engine Oil” later in this section.
.Change the engine oil at the appropriate
time. SeeEngine Oil Life System 0248.
.Always dispose of engine oil properly. See
“What to Do with Used Oil” in this
section.
Checking the Engine Oil
1. Engine Oil Dipstick
2. Engine Oil Fill Cap
Check the engine oil level regularly, every
650 km (400 mi), especially prior to a long
trip. To get an accurate reading, the vehicle
must be parked on a level ground.
The engine oil dipstick handle is a loop. See
Engine Compartment Overview 0235 for the
location.
The vehicle has a racetrack-ready dry sump
engine lubrication system. This high
performance system operates differently
than a standard engine lubrication system and requires a special procedure when
checking the engine oil level. Follow this
procedure closely.
The engine oil level must be checked when
the engine is warm. Cold oil level in the dry
sump tank may not indicate the actual
amount of oil in the system. Engine oil is
contained in an external tank, separate from
the engine. Under normal operating
conditions, the oil pan under the engine
does not store any oil. If the vehicle has
been parked for an extended period without
the engine being started, some oil will seep
back into the oil pan. This will reduce the
amount of oil held in the dry sump tank
and there could be no engine oil on the
dipstick. This is normal since the dipstick is
designed to read the engine oil level only
after the engine has run long enough to
reach normal operating temperature. Do not
add engine oil based on cold engine dipstick
readings. The engine oil level on the dipstick
must be checked while the engine is running
at idle.
To check the engine oil:
1. Turn the engine on and let it warm up to at least 80 °C (175 °F).
2. Once the engine is warm, check the oil while the engine is running at idle.
Page 244 of 351

Chevrolet Corvette Owner Manual (GMNA-Localizing-U.S./Canada/Mexico-
16287457) - 2023 - CRC - 3/10/22
Vehicle Care 243
{Warning
The engine oil dipstick handle may be
hot; it could burn you. Use a towel or
glove to touch the dipstick handle.
3. Remove the dipstick and wipe it with a clean lint-free paper towel or a cloth.
Re-insert the dipstick and push it all the
way in until it stops.
4. Remove the dipstick again and read the level on the cross-hatched area. Re-insert
the dipstick and push it all the way in
until it stops.
5. Turn the engine off.
When to Add Engine Oil
If the oil is below the cross-hatched area at
the tip of the dipstick, add 1 L (1 qt) of the
recommended oil through the oil fill cap
opening in the oil tank fill tube and then
recheck the level. See “Selecting the Right
Engine Oil” later in this section for the type of oil to use. For engine oil crankcase
capacity, see
Capacities and Specifications
0 315.
Caution
Do not add too much oil. Oil levels above
or below the acceptable operating range
shown on the dipstick are harmful to the
engine. If the oil level is above the
operating range (i.e., the engine has so
much oil that the oil level gets above the
cross-hatched area that shows the proper
operating range), the engine could be
damaged. Drain the excess oil or limit
driving of the vehicle, and seek a service
professional to remove the excess oil.
See Engine Compartment Overview 0235 for
the location of the external engine oil tank
dipstick and fill cap.
Add enough oil to put the level somewhere
in the proper operating range. Push the
dipstick all the way back into the oil tank
tube when finished.
Changing the Engine Oil and Filter
The vehicle requires a special procedure
when changing the engine oil and filter.
Follow this procedure closely.
1. Engine Oil Drain Plug
2. Drain Plug O-ring Seal
3. Engine Oil Drain Plug
4. Drain Plug O-ring Seal
5. Engine Oil Filter Cap
6. Engine Oil Filter Cap O-ring Seal
7. Engine Oil Filter Element
To change the engine oil and filter:
1. Run the engine at idle for about 20 seconds to return all of the oil back
into the dry sump oil tank.
2. Turn the engine off prior to draining the oil and remove the oil fill cap so the oil
tank can breathe while it’s draining.