2023 CHEVROLET CORVETTE remote start
[x] Cancel search: remote startPage 42 of 351
Chevrolet Corvette Owner Manual (GMNA-Localizing-U.S./Canada/Mexico-
16287457) - 2023 - CRC - 3/10/22
Seats and Restraints 41
recalls may be cancelled at any time during
the recall. See“Cancel Memory Seating
Recalls” later in this section.
Identifying Driver Number
The vehicle identifies the current driver by
their remote key number 1–8. The current
remote key number may be identified by
Driver Information Center (DIC) welcome
message, “You are driver x for memory
recalls.” This message is displayed the first
few times the vehicle is turned on when a
different remote key is used. For Seat Entry
Memory to work properly, save positions to
the 1 or 2 memory button matching the
driver number of this welcome message. To
aid in identifying remote key IDs, it is
recommended to only carry one remote key
when entering the vehicle. Perform the
following if the welcome message is not
displayed:
1. Move all remote keys away from the vehicle.
2. Start the vehicle with another remote key. A DIC welcome message should
display indicating the driver number of
the other remote key. Turn the vehicle
off and remove the other remote key
from the vehicle. 3. Start the vehicle with the initial remote
key. The DIC welcome message should
display the driver number of the initial
remote key.
Saving Seating Positions
Read these instructions completely before
saving memory positions.
To save preferred driving positions to
1 and 2: 1. Turn the vehicle on. A DIC welcome message may indicate the driver number
of the current remote key. See
“Identifying Driver Number” previously in
this section.
2. Adjust all available memory features to the desired driving position.
3. Press and release SET; a beep will sound.
4. Immediately upon releasing SET, press and hold memory button 1 or 2 matching
the current Driver’s remote key number
until two beeps sound. If too much time
passes between releasing SET and
pressing 1 or 2, the two beeps will not
sound indicating memory position were
not saved. Repeat Steps 3 and 4 to try
again. 5. Repeat Steps 1–4 for the other remote
key 1 or 2 using the other 1 or 2 memory
button.
It is recommended to save the preferred
driving positions to both 1 and 2 if you are
the only driver.
To save the common exit seating position to
Bthat is used by all drivers for Manually
Recalling Seating Positions and Auto Seat
Exit Memory Recall features, repeat Steps 1–
4 using
B, the exit button.
Manually Recalling Seating Positions
Press and hold 1, 2, or
Bbutton until the
recall is complete, to recall the positions
previously saved to that button.
Manual Memory recall movement for 1, 2 or
Bbuttons may be initiated and will
complete to the saved memory position if
the vehicle is in or out of P (Park).
Enabling Automatic Recalls
.Seat Entry Memory moves the driver seat
to the selected 1 or 2 position when the
vehicle is started. Select Settings > Vehicle
> Seating Position > Seat Entry Memory >
ON or OFF. See “Auto Seat Entry Memory
Recall” later in this section.
Page 45 of 351
Chevrolet Corvette Owner Manual (GMNA-Localizing-U.S./Canada/Mexico-
16287457) - 2023 - CRC - 3/10/22
44 Seats and Restraints
If equipped with a heated steering wheel,
the auto heated steering wheel activation
will follow the heated seat auto activation
and the heated wheel indicator will follow
the state of the steering wheel heat.
Remote Start Heated and Ventilated Seats
During a remote start (if equipped), the
heated or ventilated seats can be turned on
automatically. When it is cold outside, the
heated seats turn on, and when it is hot
outside the ventilated seats turn on. The
heated and ventilated seat indicators and
heated steering wheel indicator may come
on during this operation. The heated or
ventilated seats are canceled when the
vehicle is turned on. Press the heated or
ventilated seat button to use the heated or
ventilated seats after the vehicle is started.
The temperature performance of an
unoccupied seat may be reduced. This is
normal.
To enable or disable remote start heated or
ventilated seats, select Settings > Vehicle >
Remote Lock, Unlock, and Start > Remote
Start Auto Heat Seats or Remote Start Auto
Cool Seats > ON or OFF. SeeRemote Vehicle
Start 012.Seat Belts
This section describes how to use seat belts
properly, and some things not to do.
{Warning
Do not let anyone ride where a seat belt
cannot be worn properly. In a crash,
if you or your passenger(s) are not
wearing seat belts, injuries can be much
worse than if you are wearing seat belts.
You can be seriously injured or killed by
hitting things inside the vehicle harder or
by being ejected from the vehicle. In
addition, anyone who is not buckled up
can strike other passengers in the vehicle.
It is extremely dangerous to ride in a
cargo area, inside or outside of a vehicle.
In a collision, passengers riding in these
areas are more likely to be seriously
injured or killed. Do not allow passengers
to ride in any area of the vehicle that is
not equipped with seats and seat belts.
Always wear a seat belt, and check that
all passenger(s) are restrained
properly too. This vehicle has indicators as a reminder to
buckle the seat belts. See
Seat Belt
Reminders 084.
Why Seat Belts Work
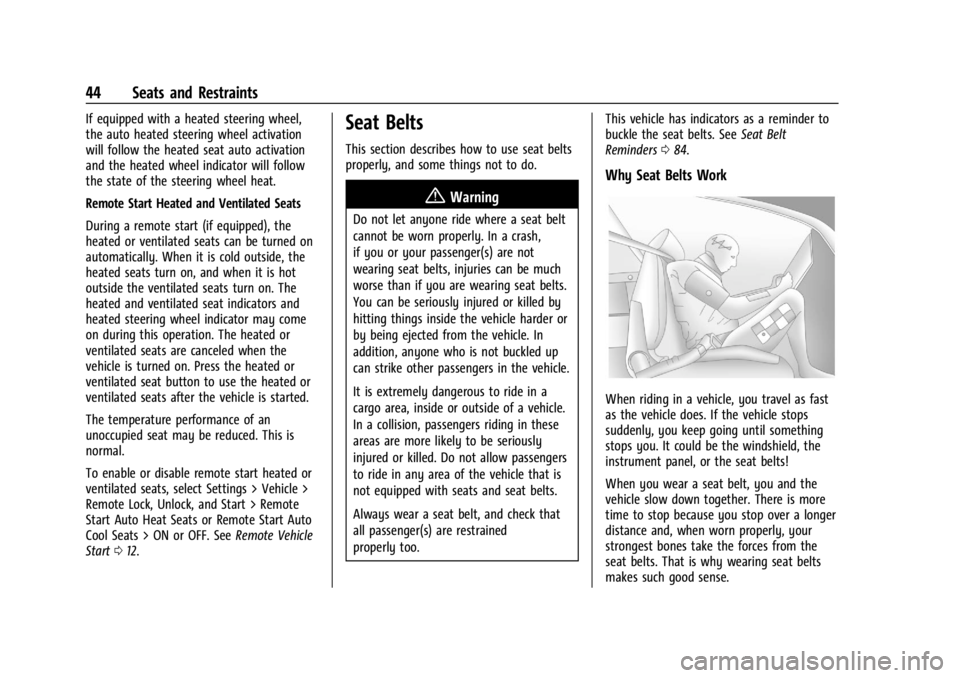
When riding in a vehicle, you travel as fast
as the vehicle does. If the vehicle stops
suddenly, you keep going until something
stops you. It could be the windshield, the
instrument panel, or the seat belts!
When you wear a seat belt, you and the
vehicle slow down together. There is more
time to stop because you stop over a longer
distance and, when worn properly, your
strongest bones take the forces from the
seat belts. That is why wearing seat belts
makes such good sense.
Page 74 of 351
Chevrolet Corvette Owner Manual (GMNA-Localizing-U.S./Canada/Mexico-
16287457) - 2023 - CRC - 3/10/22
Instruments and Controls 73
Controls
Steering Wheel Adjustment
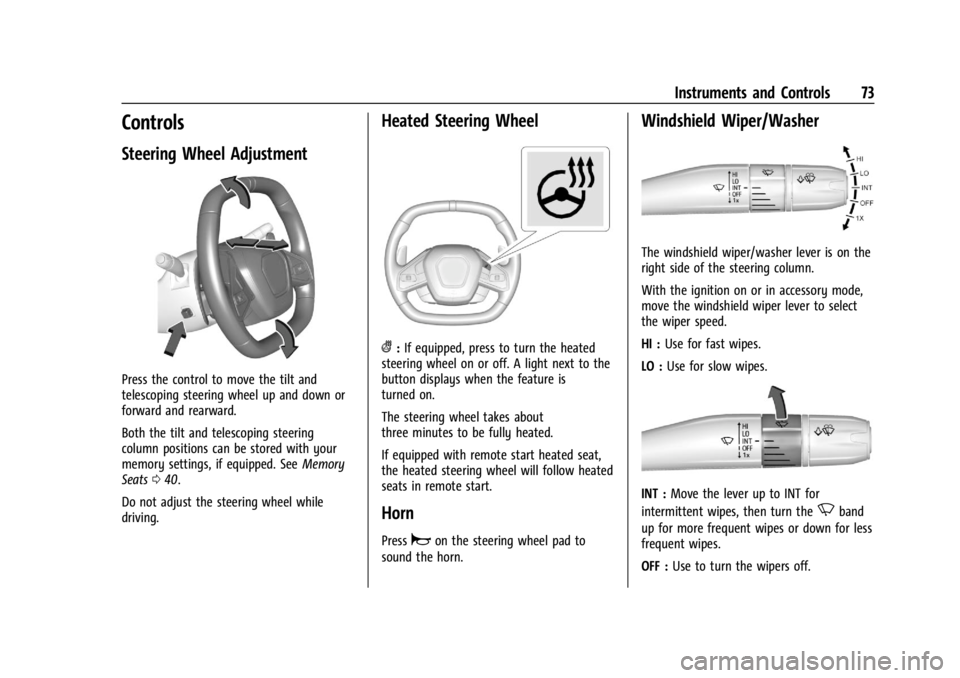
Press the control to move the tilt and
telescoping steering wheel up and down or
forward and rearward.
Both the tilt and telescoping steering
column positions can be stored with your
memory settings, if equipped. SeeMemory
Seats 040.
Do not adjust the steering wheel while
driving.
Heated Steering Wheel
(: If equipped, press to turn the heated
steering wheel on or off. A light next to the
button displays when the feature is
turned on.
The steering wheel takes about
three minutes to be fully heated.
If equipped with remote start heated seat,
the heated steering wheel will follow heated
seats in remote start.
Horn
Pressaon the steering wheel pad to
sound the horn.
Windshield Wiper/Washer
The windshield wiper/washer lever is on the
right side of the steering column.
With the ignition on or in accessory mode,
move the windshield wiper lever to select
the wiper speed.
HI : Use for fast wipes.
LO : Use for slow wipes.
INT : Move the lever up to INT for
intermittent wipes, then turn the
Nband
up for more frequent wipes or down for less
frequent wipes.
OFF : Use to turn the wipers off.
Page 100 of 351
Chevrolet Corvette Owner Manual (GMNA-Localizing-U.S./Canada/Mexico-
16287457) - 2023 - CRC - 3/10/22
Instruments and Controls 99
driven. The vehicle may be driven while this
message is on, but maximum acceleration
and speed may be reduced. Anytime this
message stays on, or displays repeatedly,
the vehicle should be taken to your dealer
for service as soon as possible.
Under certain operating conditions,
propulsion will be disabled. Try restarting
after the ignition has been off for
two minutes.
Vehicle Speed Messages
SPEED LIMITED TO XXX KM/H (MPH)
This message shows that the vehicle speed
has been limited to the speed displayed. The
limited speed is a protection for various
propulsion and vehicle systems, such as
lubrication, thermal, brakes, suspension,
Teen Driver if equipped, or tires.
Universal Remote System
SeeRadio Frequency Statement 0327.
The FCC Grant of Equipment Authorization
Certificate number is NZLSAHL5B.
The Canadian Registration ID number is
4112A-SAHL5B.
Universal Remote System
Programming
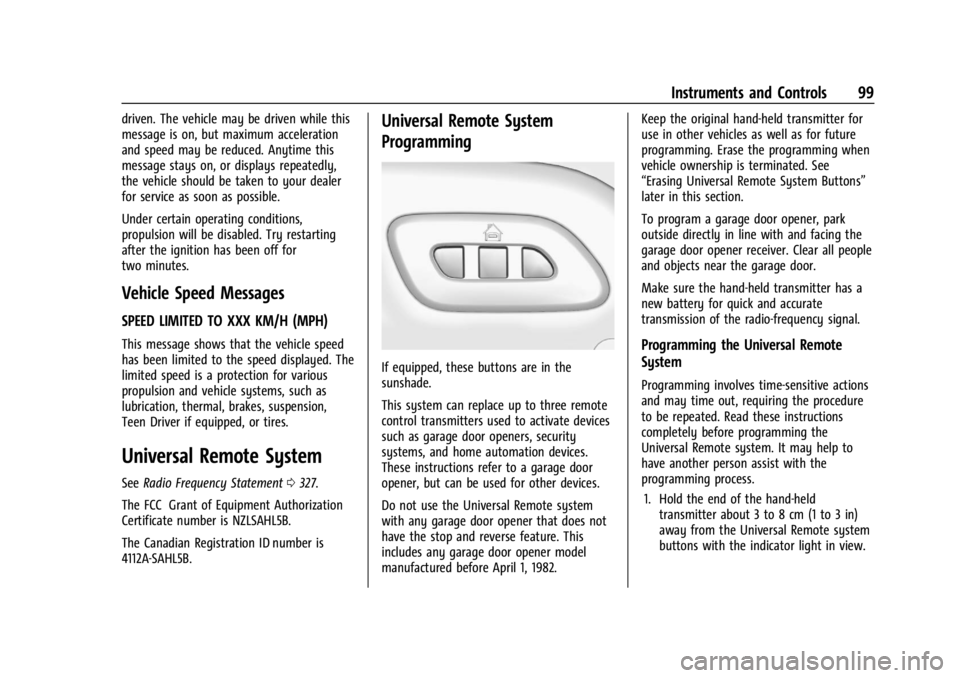
If equipped, these buttons are in the
sunshade.
This system can replace up to three remote
control transmitters used to activate devices
such as garage door openers, security
systems, and home automation devices.
These instructions refer to a garage door
opener, but can be used for other devices.
Do not use the Universal Remote system
with any garage door opener that does not
have the stop and reverse feature. This
includes any garage door opener model
manufactured before April 1, 1982. Keep the original hand-held transmitter for
use in other vehicles as well as for future
programming. Erase the programming when
vehicle ownership is terminated. See
“Erasing Universal Remote System Buttons”
later in this section.
To program a garage door opener, park
outside directly in line with and facing the
garage door opener receiver. Clear all people
and objects near the garage door.
Make sure the hand-held transmitter has a
new battery for quick and accurate
transmission of the radio-frequency signal.
Programming the Universal Remote
System
Programming involves time-sensitive actions
and may time out, requiring the procedure
to be repeated. Read these instructions
completely before programming the
Universal Remote system. It may help to
have another person assist with the
programming process.
1. Hold the end of the hand-held transmitter about 3 to 8 cm (1 to 3 in)
away from the Universal Remote system
buttons with the indicator light in view.
Page 106 of 351

Chevrolet Corvette Owner Manual (GMNA-Localizing-U.S./Canada/Mexico-
16287457) - 2023 - CRC - 3/10/22
Lighting 105
Raise or lower the lever until the arrow
starts to flash to signal a lane change. Hold
it there until the lane change is complete.
If the lever is briefly pressed and released,
the turn signal flashes three times. If more
flashes are desired, continue to hold the
lever.
The lever returns to its starting position
when it is released.
If after signaling a turn or lane change the
arrows flash rapidly or do not come on, a
turn signal indicator light failure may have
occurred.
If a turn signal has failed, the lamp may
need to be replaced. See your dealer.
Turn Signal on Chime
A chime sounds if the turn signal has been
on for more than 1.2 km (0.75 mi) of driving.
If you need to leave the turn signal on for
more than 1.2 km (0.75 mi), turn off the
signal and then turn it back on.Interior Lighting
Instrument Panel Illumination
Control
This feature adjusts the brightness of all
illuminated controls. The knob for this
feature is on the left side of the instrument
panel.
Turn the knob clockwise or counterclockwise
to brighten or dim the lights.
The knob is functional at night, or when
headlamps or the parking lamps are ON.
Night Mode
At night, when the knob is turned all the
way to the off position, the instrument
cluster will show minimum feature content
(digital speed, gear indication, coolant
temperature, and the fuel gauge) withmuted colors to reduce light emission for
better visibility. The Infotainment System
display and the interior lighting are off.
Courtesy Lamps
The interior lamps will come on when any
door is opened,
Kon the remote key is
pressed, or when the ignition is
switched off.
The hatch/trunk lamps only come on when
the rear compartment is opened.
Reading Lamps
If equipped, the reading lamps are in the
overhead console. The lamps go on when
any door is opened,
Kon the remote key is
pressed, or when the vehicle is turned off.
When the doors are closed, press the lamp
buttons to turn on each lamp.
Page 107 of 351
Chevrolet Corvette Owner Manual (GMNA-Localizing-U.S./Canada/Mexico-
16287457) - 2023 - CRC - 3/10/22
106 Lighting
To operate, the vehicle must be on, in
accessory mode, or using Retained Accessory
Power (RAP).
Engine Compartment Lamp
If equipped, the engine compartment lamp
will turn on briefly when:
.Kis pressed on the key.
.Keyless Access is used to unlock the door.
.Any door is opened.
.The engine compartment hatch is opened.
The engine compartment lamp will turn
off when:
.All doors and the engine compartment
hatch are closed.
.Qis pressed on the key.
.The vehicle begins to move after shifting
out of P (Park).
.The vehicle is started, or turned from off
to accessory mode.
If any door or the engine compartment
hatch/trunk remains open, while the vehicle
is off, a timer will turn the lamp off.
Lighting Features
Entry Lighting
The interior lamps turn on when pressingK
on the remote key or opening any doors,
and the dome lamp control is in the DOOR
position.
Some exterior lamps also turn on when
pressing
Kon the remote key or opening
any doors. Low-beam lamps will only turn
on briefly at night, or in areas with limited
lighting.
All lamps will gradually fade out after about
30 seconds.
Entry lighting can be disabled manually by
closing all doors, pressing
Qon the remote
key, or starting the vehicle.
This feature can be changed. On the
infotainment home screen, select the
Settings icon
TVehicleTVehicle Locator
Lights.
Exit Lighting
Some exterior lamps and interior lamps turn
on when the driver door is opened after the
vehicle is turned off.
The exterior and interior lamps remain on
for a set amount of time, then automatically
turn off.
The interior lights turn on when the vehicle
is turned off.
The exterior lamps turn off immediately by
turning the exterior lamp control off.
This feature can be changed. On the
infotainment home screen, select the
Settings icon
TVehicleTExit Lighting.
Battery Power Protection
This feature helps prevent the battery from
being drained, if the interior courtesy lamps
or reading lamps are accidentally left on.
If any of these lamps are left on, they
automatically turn off after 10 minutes,
if the ignition is off. The lamps will not
come back on again until one of the
following occurs:
.The ignition is turned on.
.The doors are closed and then re-opened.
Page 153 of 351
Chevrolet Corvette Owner Manual (GMNA-Localizing-U.S./Canada/Mexico-
16287457) - 2023 - CRC - 3/10/22
152 Infotainment System
Return to Factory Settings
Allows resetting the infotainment system
settings in the vehicle.
Apps
The menu may contain the following:
Android Auto
Allows interacting directly with a mobile
device on the infotainment display. See
Apple CarPlay and Android Auto0148.
Apple CarPlay
This feature allows you to interact directly
with your mobile device on the infotainment
display. See Apple CarPlay and Android Auto
0 148.
Apps
Shows app settings and information.
Audio
Adjusts different audio settings.
Climate
Adjusts different climate settings.
Navigation
Adjusts different navigation settings.
See Using the Navigation System 0122. Phone
Adjusts different phone settings.
Vehicle
The menu may contain the following:
Buckle to Drive
This feature can prevent shifting out of Park
when the driver, and if applicable the front
passenger, seat belt is not buckled. See
Buckle To Drive
045.
Driver Mode Customization
See “Driver Mode Customization” inDriver
Mode Control 0208.
Climate and Air Quality
Adjusts different climate settings.
Collision/Detection Systems
Adjusts different driver assistance system
settings.
Comfort and Convenience
Adjusts different comfort and convenience
settings.
Lighting
Adjusts different lighting settings. Power Door Locks
Adjusts different door lock settings.
Remote Lock, Unlock, and Start
Adjusts different remote lock settings.
Ride Height
See
Front Lift System 0214.
Seating Position
Adjusts different seat settings.
Teen Driver
See Teen Driver 0153.
Valet Mode
This will lock the infotainment system and
steering wheel controls. It may also limit
access to vehicle storage locations,
if equipped.
To enable valet mode: 1. Enter a four-digit code on the keypad.
2. Select Enter to go to the confirmation screen.
3. Re-enter the four-digit code.
Touch Lock or Unlock to lock or unlock the
system. Touch Back to go back to the
previous menu.
Page 154 of 351
Chevrolet Corvette Owner Manual (GMNA-Localizing-U.S./Canada/Mexico-
16287457) - 2023 - CRC - 3/10/22
Infotainment System 153
To configure the Performance Data Recorder
(PDR) to automatically record in Valet mode,
see“Settings” inPerformance Data Recorder
(PDR) 0138.
Personal
If equipped, this menu allows adjustment of
different user profile settings. See “Users”in
Using the System 0112 for information on
setting up user profiles.
The menu may contain the following:
Name
Touch to edit your user name that will be
displayed in the vehicle.
Vehicle Account Information
Touch to view the vehicle account
information and to change the account
password.
An “unverified user account” pop-up will
display until the account information
verification process has been completed on
the Internet. Check your registered e-mail
account for an activation e-mail to complete
the verification process.
Profile Picture
Touch to choose or change your profile
picture. Profile Identifiers
Touch to have the vehicle recognize the
identifier you choose.
Touch Vehicle Key 1 and/or Vehicle Key 2.
If the remote key is lost or stolen, see your
dealer.
Security
Touch to have your profile secured with
a PIN.
Touch No or Yes.
Vehicle Name
Touch to edit your vehicle name.
Vehicle Account
Touch to view the vehicle account
information and to change the account
password.
Delete Profile
Touch to remove the profile from the
vehicle.
Touch Remove or Cancel.
Teen Driver
If equipped, this allows multiple keys to be
registered for beginner drivers to encourage
safe driving habits. When the vehicle is
started with a Teen Driver key, it will
automatically activate certain safety
systems, allow setting of some features, and
limit the use of others. The Report Card will
record vehicle data about driving behavior
that can be viewed later. When the vehicle
is started with a registered key, the Driver
Information Center (DIC) displays a message
that Teen Driver is active.
To access:
1. Touch Settings on the Home Page, then touch Vehicle, and then Teen Driver.
2. Create a Personal Identification Number (PIN) by choosing a four-digit PIN.
Re-enter the PIN to confirm. To change
the PIN, touch Change PIN.
The PIN is required to:
.Set up/Add or remove keys.
.Change Teen Driver settings.
.Change or clear the Teen Driver PIN.
.Access or delete Report Card data.