2023 ALFA ROMEO STELVIO steering
[x] Cancel search: steeringPage 89 of 268

87
PANIC button not pushed.
System not disabled from previous remote
start event.
Vehicle Security System indicator flashing.
Ignition in the OFF position (if equipped with
keyless ignition system).
Fuel level meets minimum requirement.
Remote Start Comfort Systems — If Equipped
When Remote Start is activated, the heated
steering wheel and driver heated seat features
will automatically turn on in cold weather.
These features will stay on through the duration
of remote start until the ignition is placed in the
ON/RUN position.
Remote Start Windshield Wiper De–Icer
Activation — If Equipped
When remote start is active and the outside
ambient temperature is less than 39°F (4°C), the
Windshield Wiper De-Icer will be enabled. Exiting
remote start will resume previous operation,
except if the Windshield Wiper De-Icer is active.
The Windshield Wiper De-Icer timer and operation
will continue.
COLD WEATHER OPERATION
To prevent possible engine damage while starting
at low temperatures, this vehicle will inhibit
engine cranking when the ambient temperature
is less than –22°F (–30°C) and the oil
temperature sensor reading indicates an
engine block heater has not been used. An
externally-powered electric engine block heater is
available as optional equipment or from an
authorized dealer. The message “Plug In Engine Heater” will be
displayed in the instrument cluster when the
ambient temperature is below 5°F (–15°C) at
the time the engine is shut off as a reminder to
avoid possible crank delays at the next cold start.
EXTENDED PARK STARTING
If the vehicle has not been started or driven for at
least 30 days, see the following instructions:
To start the engine, proceed as follows:
1. Install a battery charger or jumper cables to
the battery to ensure a full battery charge
during the crank cycle
Ú
page 192.
2. Briefly push the ignition button.
3. If the engine does not start, wait five seconds and let the starter cool down and then repeat
the starting procedure.
4. If the engine does not start after eight attempts, let the starter cool down for at least
10 seconds, and then repeat the starting
procedure. If the problem persists, contact an
authorized dealer.
IF ENGINE FAILS TO START
Starting the Engine with Key Fob Battery Run
Down or Drained
If the ignition does not respond when the button
is pushed, the key fob battery might be run down
or drained. Therefore, the system does not detect
the presence of the key fob in the vehicle, and will
display a dedicated message
Ú
page 22.
CAUTION!
Use of the recommended oil and adhering to
the prescribed oil change intervals is
important to prevent engine damage and
ensure satisfactory starting in cold conditions.
WARNING!
Never pour fuel or other flammable liquid
into the throttle body air inlet opening in an
attempt to start the vehicle. This could result
in flash fire causing serious personal injury.
Do not attempt to push or tow your vehicle to
get it started. Vehicles equipped with an
automatic transmission cannot be started
this way. Unburned fuel could enter the
catalytic converter and once the engine has
started, ignite and damage the converter
and vehicle.
If the vehicle has a discharged battery,
booster cables may be used to obtain a start
from a booster battery or the battery in
another vehicle. This type of start can be
dangerous if done improperly
Ú
page 192.
CAUTION!
To prevent damage to the starter, do not
continuously crank the engine for more than
25 seconds at a time. Wait 60 seconds before
trying again.
23_GU_OM_EN_USC_t.book Page 87
Page 90 of 268

STARTING AND OPERATING
88
AFTER STARTING — WARMING UP THE
E
NGINE
Proceed as follows:
Travel slowly, letting the engine run at a
reduced RPM, without accelerating suddenly.
It is recommended to wait until the digital
engine coolant temperature indicator starts to
rise for maximum performance.
STOPPING THE ENGINE
To stop the engine, proceed as follows:
1. Park the vehicle in a position that is not
dangerous for oncoming traffic.
2. Engage the PARK (P) mode.
3. With engine idling, push the ENGINE START/ STOP button on the steering wheel to stop the
engine.
NOTE:
Do not leave the ignition in ACC position when the
engine is off.
To shut off the engine with vehicle speed greater
than 5 mph (8 km/h), you must push and hold
the ignition or push the ENGINE START/STOP
button three times consecutively within a few
seconds. The engine will shut down, and the
ignition will be placed in the ACC position.
With the keyless ignition system, it is possible to
exit the vehicle taking the key fob with you,
without the engine switching off. The vehicle will
inform about the absence of the key on board,
when the doors are closed. After the engine has stopped (cycling from the
ACC to the OFF position) the accessories are still
powered for about three minutes, or until a door
is opened.
When the ignition is in the OFF position, the
window switches remain active for three minutes.
Opening a front door will cancel this function.
After severe driving, idle the engine to allow the
temperature inside the engine compartment to
cool before shutting off the engine.
TURBOCHARGER COOL DOWN
It is recommended before switching the vehicle
off, to keep the engine idling for a few minutes so
that the turbocharger can be suitably lubricated.
This procedure is particularly recommended after
severe driving.
After a full load operation, keep the engine idling
for three to five minutes before switching it off.
This time allows the lubricating oil and the engine
coolant to eliminate the excessive heat from
combustion chamber, bearings, inner
components and turbocharger.
ENGINE BLOCK HEATER —
IF EQUIPPED
The engine block heater warms the engine and
permits quicker starts in cold weather.
Connect the cord to a 110-115 Volt AC electrical
outlet with a grounded, three-wire extension cord.
For ambient temperatures below 0°F (-18°C),
the engine block heater is recommended. For
ambient temperatures below -20°F (-29°C), the
engine block heater is required.
See the following steps to properly use the engine
block heater:
1. Locate the engine block heater cord (access
door on the passenger side wiper cowl).
2. Pull the cord to the front of the vehicle and plug it into a grounded, three-wire extension
cord.
3. After the vehicle is running, properly stow the cord away behind the access door on the
passenger side wiper cowl.
NOTE:
The engine block heater cord is a factory
installed option. If your vehicle is not equipped,
heater cords are available from an authorized
dealer.
The engine block heater will require 110 Volt
AC and 6.5 Amps to activate the heater
element.
The engine block heater must be plugged in at
least one hour to have a warming effect on the
engine and at least four hours to have a
warming effect when ambient temperatures
are below -20°F (-29°C).
WARNING!
Remember to disconnect the engine block
heater cord before driving. Damage to the
110-115 Volt electrical cord could cause
electrocution.
23_GU_OM_EN_USC_t.book Page 88
Page 92 of 268
STARTING AND OPERATING
90
In addition to engaging the EPB, along with
steering and positioning chocks in front of the
wheels (when on a steep slope), you must always
place the vehicle in the PARK (P) mode before
leaving.
Should the vehicle battery be faulty, the battery
must be replaced in order to unlock the EPB.
Engaging The EPB Manually
Briefly pull the switch located on the center
console to manually engage the EPB when the
vehicle is stationary.
Noise may be heard from the rear of the vehicle
when engaging the EPB.
A slight movement of the brake pedal may be
detected when engaging the EPB with the brake
pedal pressed.
With the EPB engaged, the Brake Warning Light
on the instrument cluster display and the switch
will illuminate.
If, under exceptional circumstances, the use of
the brake is required with the vehicle in motion,
keep the switch on the center console pulled as
long as the brake action is necessary.
The Brake Warning Light may turn on with the
hydraulic system temporarily unavailable; in this
case, braking is controlled by the motors.The brake lights will also automatically turn on in
the same way as normal braking with the use of
the brake pedal.
Release the switch on the center console to stop
the braking action with the vehicle in motion.
If, through this procedure, the vehicle is braked
until a speed below 1.9 mph (2.0 km/h) is
reached and the switch is kept pulled, the parking
brake will definitively engage.
Disengaging The EPB Manually
In order to manually release the parking brake,
the ignition should be in the ACC position. Press
the brake pedal, and then push the switch on the
center console briefly.
Noise may be heard from the rear of the vehicle,
and a slight movement of the brake pedal may be
detected during disengagement.
After disengaging the EPB, the Brake Warning
Light on the instrument cluster display and the
light on the switch will turn off.
If the Brake Warning Light on the instrument
cluster display remains on with the EPB
disengaged, this indicates a fault: in this case,
contact an authorized dealer.
CAUTION!
With the Electronic Parking Brake failure
warning light on, some functions of the EPB
are deactivated. In this case the driver is
responsible for engaging the EPB manually to
ensure the vehicle is safely and properly
parked
WARNING!
Driving the vehicle with the parking brake
engaged, or repeated use of the parking brake
to slow the vehicle may cause serious damage
to the brake system. Be sure the parking brake
is fully disengaged before driving; failure to do
so can lead to brake failure and a collision.
WARNING!
Never use the PARK position as a substitute
for the parking brake. Always apply the
parking brake fully when parked to guard
against vehicle movement and possible
injury or damage.
When exiting the vehicle, always turn the
ignition OFF, secure the key fob, and lock
your vehicle.
Never leave children alone in a vehicle, or
with access to an unlocked vehicle. Allowing
children to be in a vehicle unattended is
dangerous for a number of reasons. A child
or others could be seriously or fatally injured.
Children should be warned not to touch the
parking brake, brake pedal or the gear
selector.
Do not leave the key fob in or near the
vehicle, or in a location accessible to
children, and do not leave a vehicle
equipped with a keyless ignition system in
the ON/RUN position. A child could operate
power windows, other controls, or move the
vehicle.
Be sure the parking brake is fully disengaged
before driving; failure to do so can lead to
brake failure and a collision.
Always fully apply the parking brake when
leaving your vehicle, or it may roll and cause
damage or injury. Also be certain to leave the
transmission in PARK. Failure to do so may
allow the vehicle to roll and cause damage or
injury.
23_GU_OM_EN_USC_t.book Page 90
Page 96 of 268
STARTING AND OPERATING
94
REVERSE (R)
Select this mode only with the vehicle at a
standstill.
NEUTRAL (N)
Use this range when the vehicle is standing for
prolonged periods with the engine running. The
engine may be started in this range. Apply the
EPB and shift the transmission into PARK (P) if
you must leave the vehicle.DRIVE (D)
Use this mode in normal driving conditions.
Shifting from DRIVE (D) to PARK (P) or REVERSE
(R) modes must take place only after releasing
the accelerator pedal, with vehicle at a standstill
and brake pedal pressed.
This mode ensures automatic engagement of the
most suitable gears for driving needs and
maximum fuel economy in terms of consumption.
In this position, the transmission shifts the gears
automatically, selecting the most suitable for
forward driving among those available as you go.
In this way the vehicle's optimal driving character
-
istics are provided for all conditions.
AutoStick
In the case of frequent shifting (e.g. for sport
driving, when the vehicle is driven with a heavy
load, on slopes, when towing heavy trailers), it is
recommended to use the AutoStick (sequential
shifting) mode to select and keep a lower fixed
ratio.
In these conditions, the use of a lower gear
improves vehicle performance and prevents
overheating.
It is possible to shift from DRIVE (D) mode to
AutoStick mode regardless of vehicle speed.
Activation
Starting from DRIVE (D) mode, to activate the
sequential drive mode, move the gear selector to
the left (– and + indication of the trim). The gear
engaged will be shown on the display. Shifting is made by moving the gear selector
forward, toward symbol – or backward, toward
symbol +.
Steering Column Mounted Shift Paddles —
If Equipped
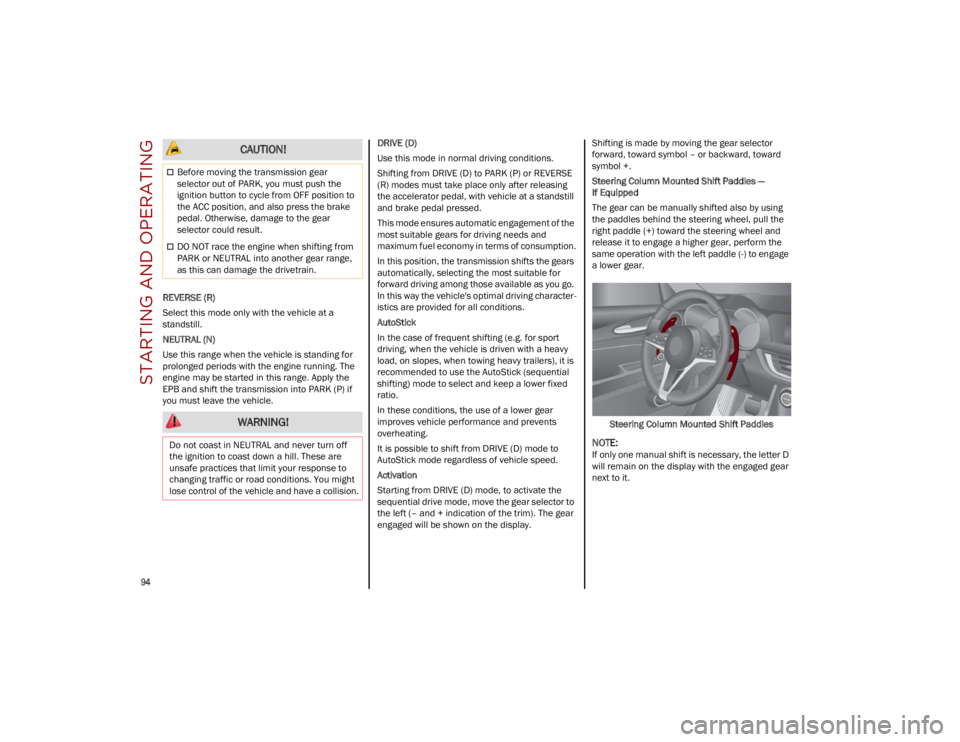
The gear can be manually shifted also by using
the paddles behind the steering wheel, pull the
right paddle (+) toward the steering wheel and
release it to engage a higher gear, perform the
same operation with the left paddle (-) to engage
a lower gear.
Steering Column Mounted Shift Paddles
NOTE:
If only one manual shift is necessary, the letter D
will remain on the display with the engaged gear
next to it.
CAUTION!
Before moving the transmission gear
selector out of PARK, you must push the
ignition button to cycle from OFF position to
the ACC position, and also press the brake
pedal. Otherwise, damage to the gear
selector could result.
DO NOT race the engine when shifting from
PARK or NEUTRAL into another gear range,
as this can damage the drivetrain.
WARNING!
Do not coast in NEUTRAL and never turn off
the ignition to coast down a hill. These are
unsafe practices that limit your response to
changing traffic or road conditions. You might
lose control of the vehicle and have a collision.
23_GU_OM_EN_USC_t.book Page 94
Page 102 of 268
STARTING AND OPERATING
100
STOP/START SYSTEM
The Stop/Start system automatically shuts off
the engine during a vehicle stop if the required
conditions are met. Releasing the brake pedal or
pressing the accelerator pedal will automatically
restart the engine.
The function was designed to increase vehicle
efficiency by reducing fuel consumption, gas
emissions, and sound pollution.
NOTE:
When the Stop/Start system stops the engine,
the power steering is also disabled.
OPERATING MODE
Stopping The Engine
With the vehicle at a standstill and brake pedal
pressed, the Stop/Start system shuts off the
engine if the gear selector is in a position other
than REVERSE (R).
The system does not operate when the gear
selector is in REVERSE (R), in order to make
parking maneuvers easier.
In the event of uphill stops, the Stop/Start system
is disabled to make the “Hill Start Assist” function
available (works only with running engine).
NOTE:
The engine can only be automatically stopped
after having run at about 6 mph (10 km/h). After
an automatic restart, the vehicle only needs to
exceed a speed of 0.3 mph (0.5 km/h) to stop the engine.
Engine stopping is signaled by the symbol
lighting up on the instrument cluster display. Restarting The Engine
To restart the engine, release the brake pedal or,
turn the steering wheel slightly (if equipped).
With the brake pressed and the transmission in
automatic mode DRIVE (D), the engine will restart
by shifting to REVERSE (R), to PARK (P) or to
“AutoStick”
Ú
page 93.
With brake pressed if the gear selector is in
“AutoStick” mode, the engine will restart by
shifting to PARK (P) or by moving the selector
to + or -
Ú
page 93.
SYSTEM MANUAL ACTIVATION/
D
EACTIVATION
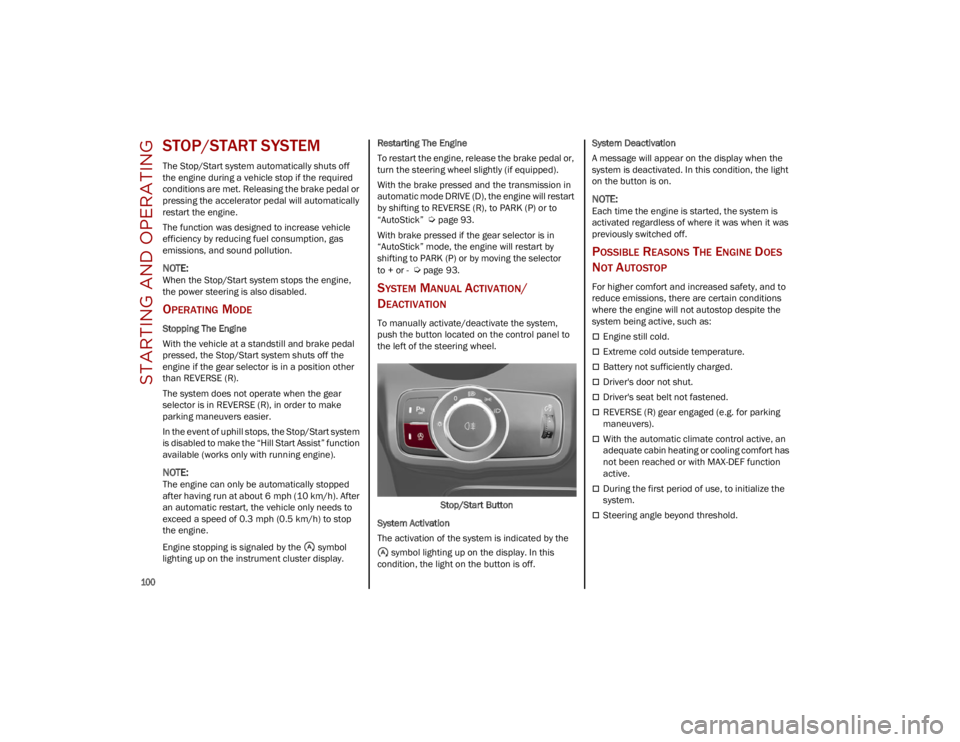
To manually activate/deactivate the system,
push the button located on the control panel to
the left of the steering wheel.
Stop/Start Button
System Activation
The activation of the system is indicated by the symbol lighting up on the display. In this
condition, the light on the button is off. System Deactivation
A message will appear on the display when the
system is deactivated. In this condition, the light
on the button is on.
NOTE:
Each time the engine is started, the system is
activated regardless of where it was when it was
previously switched off.
POSSIBLE REASONS THE ENGINE DOES
N
OT AUTOSTOP
For higher comfort and increased safety, and to
reduce emissions, there are certain conditions
where the engine will not autostop despite the
system being active, such as:
Engine still cold.
Extreme cold outside temperature.
Battery not sufficiently charged.
Driver's door not shut.
Driver's seat belt not fastened.
REVERSE (R) gear engaged (e.g. for parking
maneuvers).
With the automatic climate control active, an
adequate cabin heating or cooling comfort has
not been reached or with MAX-DEF function
active.
During the first period of use, to initialize the
system.
Steering angle beyond threshold.
23_GU_OM_EN_USC_t.book Page 100
Page 105 of 268
103
CRUISE CONTROL
When engaged, the Cruise Control takes over
accelerator operations at speeds greater than
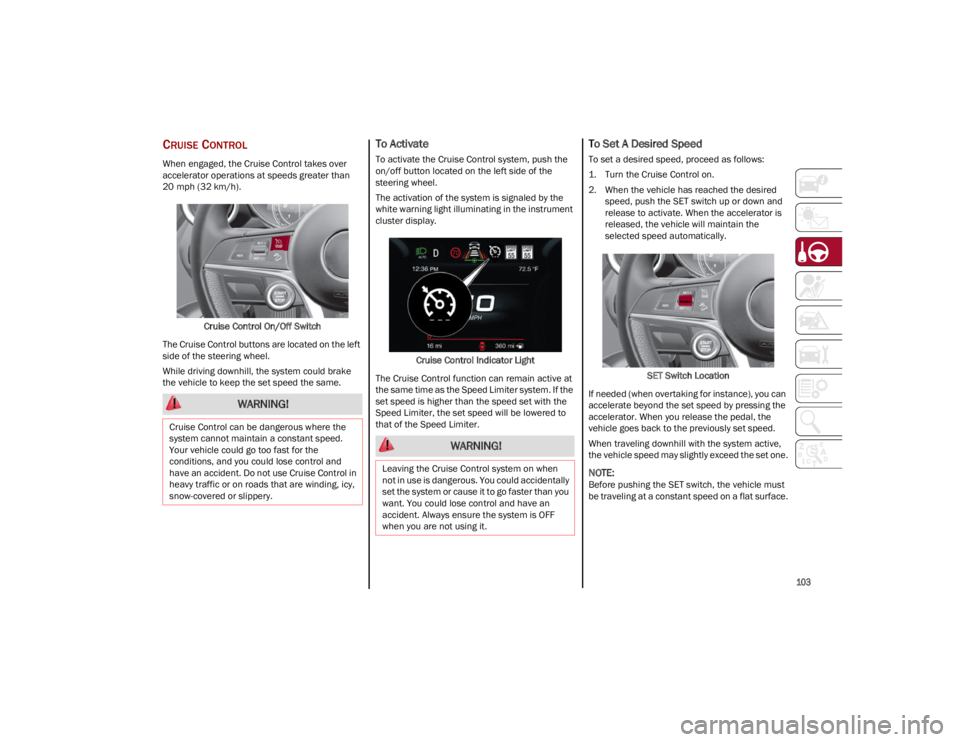
20 mph (32 km/h).Cruise Control On/Off Switch
The Cruise Control buttons are located on the left
side of the steering wheel.
While driving downhill, the system could brake
the vehicle to keep the set speed the same.
To Activate
To activate the Cruise Control system, push the
on/off button located on the left side of the
steering wheel.
The activation of the system is signaled by the
white warning light illuminating in the instrument
cluster display.
Cruise Control Indicator Light
The Cruise Control function can remain active at
the same time as the Speed Limiter system. If the
set speed is higher than the speed set with the
Speed Limiter, the set speed will be lowered to
that of the Speed Limiter.
To Set A Desired Speed
To set a desired speed, proceed as follows:
1. Turn the Cruise Control on.
2. When the vehicle has reached the desired speed, push the SET switch up or down and
release to activate. When the accelerator is
released, the vehicle will maintain the
selected speed automatically.
SET Switch Location
If needed (when overtaking for instance), you can
accelerate beyond the set speed by pressing the
accelerator. When you release the pedal, the
vehicle goes back to the previously set speed.
When traveling downhill with the system active,
the vehicle speed may slightly exceed the set one.
NOTE:
Before pushing the SET switch, the vehicle must
be traveling at a constant speed on a flat surface.
WARNING!
Cruise Control can be dangerous where the
system cannot maintain a constant speed.
Your vehicle could go too fast for the
conditions, and you could lose control and
have an accident. Do not use Cruise Control in
heavy traffic or on roads that are winding, icy,
snow-covered or slippery.
WARNING!
Leaving the Cruise Control system on when
not in use is dangerous. You could accidentally
set the system or cause it to go faster than you
want. You could lose control and have an
accident. Always ensure the system is OFF
when you are not using it.
23_GU_OM_EN_USC_t.book Page 103
Page 108 of 268

STARTING AND OPERATING
106
Activating Adaptive Cruise Control (ACC)
The minimum set speed for the ACC system is
19 mph (30 km/h) and the maximum is 110 mph
(180 km/h).
The system cannot be activated:
When pressing the brake pedal.
When the brakes are overheated.
When the Electric Park Brake has been
operated.
When either PARK, REVERSE or NEUTRAL is
engaged.
When the engine RPM is above a maximum
threshold.
When the vehicle speed is not within the
operational speed range.
When the Electronic Stability Control (ESC)
(or Anti-Lock Brake System (ABS) or other
stability control systems) are operating or
have just operated.
When the ESC system is off.
When the Forward Collision Warning system
(if equipped) is braking automatically.
In the event of a system failure.
When the engine is off.
In case of obstruction of the radar sensor (in
this case the bumper area where it is located
must be cleaned).
If the system is set, the conditions described
above also cause a cancellation or deactivation
of the system. These situations may vary
according to the conditions.
NOTE:
The system will not be deactivated when speeds
higher than those set are reached by pressing the
accelerator pedal above 110 mph (180 km/h). In
these situations, the system may not work
correctly and it is recommended to deactivate it.
The driver should always obey traffic laws and
speed limits. Never drive above applicable speed
limit restrictions.
To Activate/Deactivate
The system has four operating states:
Enabled (speed not set)
Activated (speed set)
Paused
Deactivated
To Activate
To enable the system, push and release the on/
off button located on the left side on the steering
wheel.
On/Off Button
The ACC system:• Does not react to pedestrians, oncoming
vehicles, and stationary objects (e.g., a stopped vehicle in a traffic jam or a disabled vehicle).
• Cannot take street, traffic, and weather
conditions into account, and may be limited upon adverse sight distance conditions.
• Does not always fully recognize complex
dri ving conditions, whi c
h can result in
wrong or missing distance warnings.
• Will bring the vehicle to a complete stop
while following a vehicle ahead and holdthe vehicle for approximately twominutes in the stop position. If thevehicle ahead does not start movingwithin two minutes, the parking brakewill be activated and the ACC system will be canceled.
You should switch off the ACC system:
When driving in fog, heavy rain, heavy snow,
sleet, heavy traffic, and complex driving
situations (i.e., in highway construction
zones).
When entering a turn lane or highway
off-ramp; when driving on roads that are
winding, icy, snow-covered, slippery, or have
steep uphill or downhill slopes.
While towing a trailer.
When circumstances do not allow safe
driving at a constant speed.
WARNING!
23_GU_OM_EN_USC_t.book Page 106
Page 113 of 268
111
This equipment has been tested and found to
comply with the limits for a Class A digital device,
pursuant to Part 15 of the FCC Rules. These limits
are designed to provide reasonable protection
against harmful interference when the
equipment is operated in a commercial
environment. This equipment generates, uses,
and can radiate radio frequency energy and, if not
installed and used in accordance with the
instruction manual, may cause harmful
interference to radio communications. Operation
of this equipment in a residential area is likely to
cause harmful interference in which case the
user will be required to correct the interference at
his own expense.
Toutes modifications apportées à cet
équipement qui ne sont pas expressément
homologuées par Robert BOSCH GmbH peuvent
annuler l'autorisation de la FCC de faire
fonctionner cet équipement.
Cet appareil a été vérifié et s'est révélé conforme
aux normes applicables aux appareils
numériques de catégorie A, en vertu de la section
15 des règlements de la FCC. Ces normes sont
définies pour fournir une protection raisonnable
contre les interférences nuisibles lorsque
l'équipement est utilisé dans les installations
résidentielles. Cet appareil génère, utilise et peut
émettre des ondes radioélectriques et, s'il n'est
pas installé et utilisé conformément au manuel
d’instruction, peut causer un brouillage radioélec-
trique nuisible aux communications radio. Le
fonctionnement de cet équipement dans une
zone résidentielle est susceptible de causer des
interférences nuisibles; dans ce cas, l'usager doit
corriger les interférences à ses propres frais. Radio Frequency Exposure Information
This equipment complies with FCC radiation
exposure limits set forth for an uncontrolled
environment. This equipment should be installed
and operated with minimum distance of 20 cm
between the radiator and your body.
This transmitter must not be co-located or
operating in conjunction with any other antenna
or transmitter.
Déclaration d’exposition aux radiations
Cet équipement est conforme aux limites
d'exposition aux rayonnements IC établies pour
un environnement non contrôlé. Cet équipement
doit être installé et utilisé avec un minimum de
20 cm de distance entre la source de
rayonnement et votre corps.
Ce transmetteur ne doit pas etre place au meme
endroit ou utilise simultanement avec un autre
transmetteur ou antenne.
HIGHWAY ASSIST SYSTEM
(HAS) — IF EQUIPPED
The Highway Assist System (HAS) is a driving
assistance system that is only available when
driving on highways. The system operates up to
speeds of 90 mph (145 km/h).
The system uses information from the front
camera and radar to help keep the vehicle in the
center of the lane and at a constant speed.
HAS combines Adaptive Cruise Control (ACC)
functions with lane centering logic to control the
trajectory of the vehicle. HAS requires the driver’s
hands to remain on the steering wheel. Once HAS is activated, a dedicated screen will
appear on the instrument cluster display.
TO ACTIVATE/DEACTIVATE
To Activate
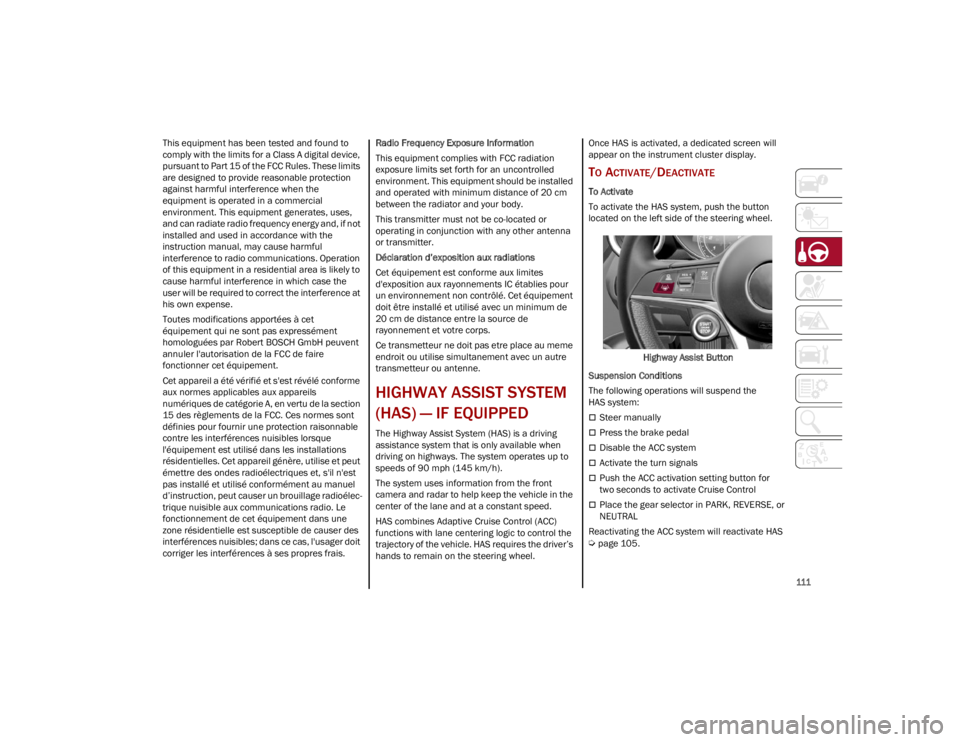
To activate the HAS system, push the button
located on the left side of the steering wheel.
Highway Assist Button
Suspension Conditions
The following operations will suspend the
HAS system:
Steer manually
Press the brake pedal
Disable the ACC system
Activate the turn signals
Push the ACC activation setting button for
two seconds to activate Cruise Control
Place the gear selector in PARK, REVERSE, or
NEUTRAL
Reactivating the ACC system will reactivate HAS
Ú
page 105.
23_GU_OM_EN_USC_t.book Page 111