2022 TOYOTA VENZA HYBRID Changing a flat tire
[x] Cancel search: Changing a flat tirePage 219 of 548

2194-3. Operating the lights and wipers
4
Driving
by another vehicle
• When vehicles ahead are hidden from sight due to repeated curves,
road dividers or roadside trees
• When vehicles ahead appear from the faraway lane on a wide road
• When vehicles ahead have no lights
●The high beams may be turned off
if a vehicle ahead that is using fog
lights without using the headlights
is detected.
●House lights, street lights, traffic
signals, and illumi nated billboards
or signs may cause the high
beams to switch to the low beams,
or the low beams to remain on.
●The following factors may affect
the amount of time taken to turn
the high beams on or off:
• The brightness of headlights, fog
lights, and tail lig hts of vehicles
ahead
• The movement and direction of
vehicles ahead
• When a vehicle ahead only has operational lights on one side
• When a vehicle ahead is a two- wheeled vehicle
• The condition of the road (gradi-
ent, curve, condi tion of the road
surface etc.)
• The number of passengers and
amount of luggage
●The high beams may be turned on
or off when the driver does not
expect it.
●Bicycles or similar objects may not
be detected.
●In the situations shown below, the
system may not be able to accu-
rately detect surrounding bright-
ness levels. This may cause the
low beams to remain on or the
high beams to cause problems for
pedestrians, vehicles ahead or
other parties. In these cases,
manually switch between the high
and low beams.
• In bad weather (rain, snow, fog, sandstorms, etc.)
• The windshield is obscured by fog, mist, i
ce, dirt, etc.
• The windshield is cracked or dam- aged
• The front camera is deformed or dirty
• When the temperature of the front
camera is extremely high
• Surrounding brightness levels are equal to those of headlights, tail
lights or fog lights
• When headlights or tail lights of vehicles ahead are turned off,
dirty, changing color, or not aimed
properly
• When the vehicle is hit by water,
snow, dust, etc. from a preceding
vehicle
• When driving through an area of
intermittently changing brightness
and darkness
• When frequently and repeatedly
driving ascending/descending
roads, or roads with rough, bumpy
or uneven surfaces (such as
stone-paved roads, gravel roads,
etc.)
• When frequently and repeatedly
taking curves or driving on a wind-
ing road
• There is a highly reflective object
ahead of the vehicle, such as a
sign or mirror
• The back of a vehicle ahead is
highly reflective, such as a con-
tainer on a truck
• The vehicle’s headlights are dam-
aged or dirty, or are not aimed
properly
• The vehicle is listing or titling due
to a flat tire, a trailer being towed,
etc.
• The high beams and low beams
are repeatedly being switched
between in an abnormal manner
• The driver believes that the high
beams may be causing problems
or distress to other drivers or
pedestrians nearby
■If “Headlight System Malfunc-
tion Visit Your Dealer” is dis-
played on the multi-information
display
The system may be malfunctioning.
Page 238 of 548
2384-5. Using the driving support systems
■Enabling/disabling the pre-
collision system
The pre-collision system can be
enabled/disabled on the
screen ( P.102, 113) of the
multi-information display.
The system is automatically
enabled each time the power
switch is turned to ON.
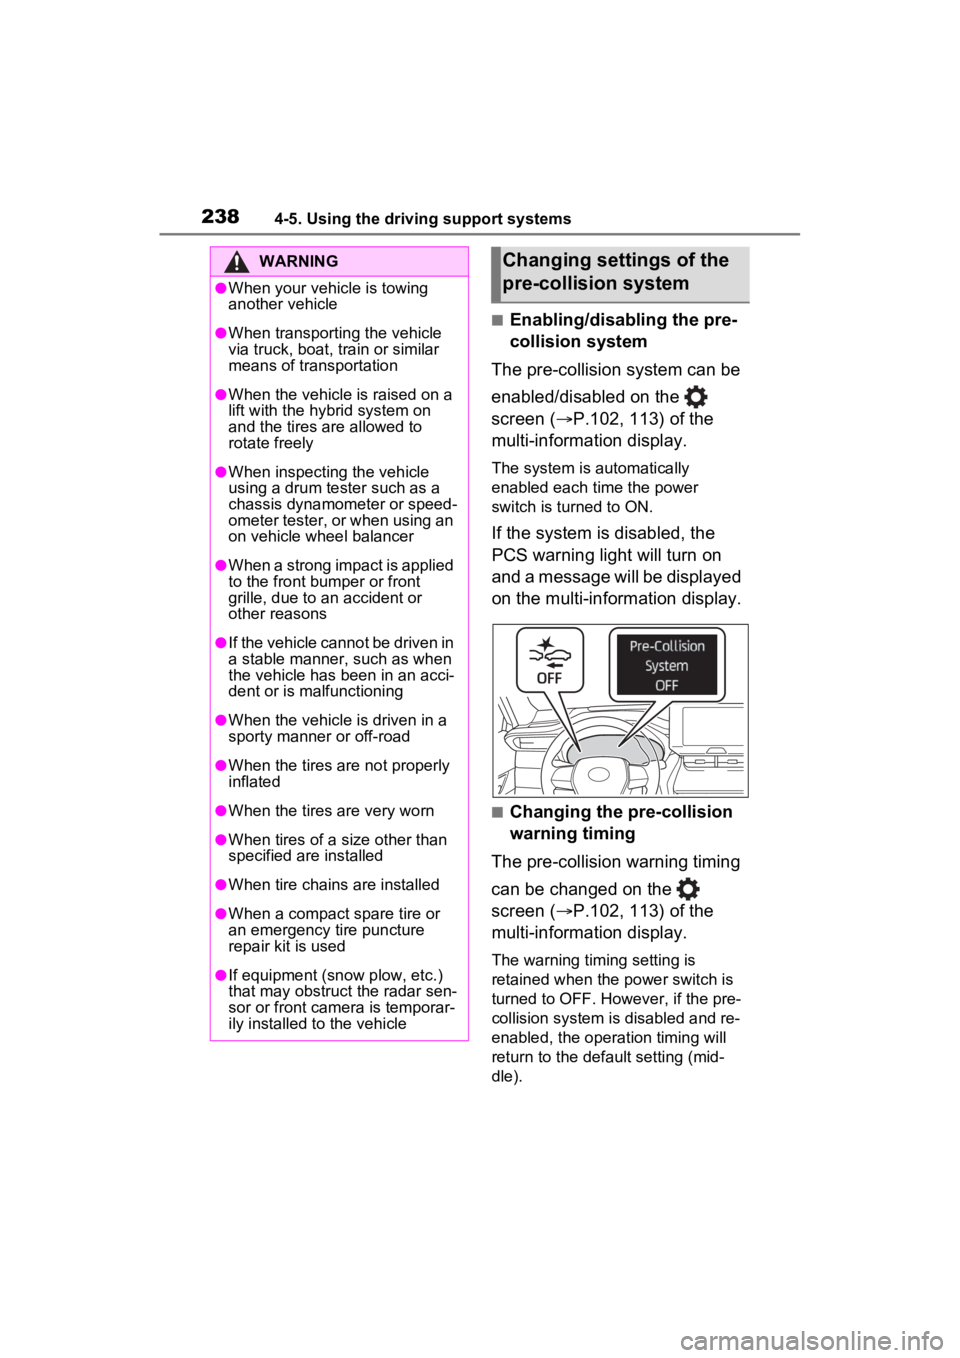
If the system is disabled, the
PCS warning light will turn on
and a message will be displayed
on the multi-information display.
■Changing the pre-collision
warning timing
The pre-collision warning timing
can be changed on the
screen ( P.102, 113) of the
multi-information display.
The warning timing setting is
retained when the power switch is
turned to OFF. However, if the pre-
collision system is disabled and re-
enabled, the operation timing will
return to the default setting (mid-
dle).
WARNING
●When your vehicle is towing
another vehicle
●When transporting the vehicle
via truck, boat, train or similar
means of transportation
●When the vehicle is raised on a
lift with the hybrid system on
and the tires are allowed to
rotate freely
●When inspecting the vehicle
using a drum tester such as a
chassis dynamometer or speed-
ometer tester, or when using an
on vehicle wheel balancer
●When a strong impact is applied
to the front bumper or front
grille, due to a n accident or
other reasons
●If the vehicle cannot be driven in
a stable manner, such as when
the vehicle has been in an acci-
dent or is malfunctioning
●When the vehicle is driven in a
sporty manner or off-road
●When the tires are not properly
inflated
●When the tires are very worn
●When tires of a size other than
specified are installed
●When tire chains are installed
●When a compact spare tire or
an emergency tire puncture
repair kit is used
●If equipment (snow plow, etc.)
that may obstruct the radar sen-
sor or front camera is temporar-
ily installed to the vehicle
Changing settings of the
pre-collision system
Page 400 of 548
4006-3. Do-it-yourself maintenance
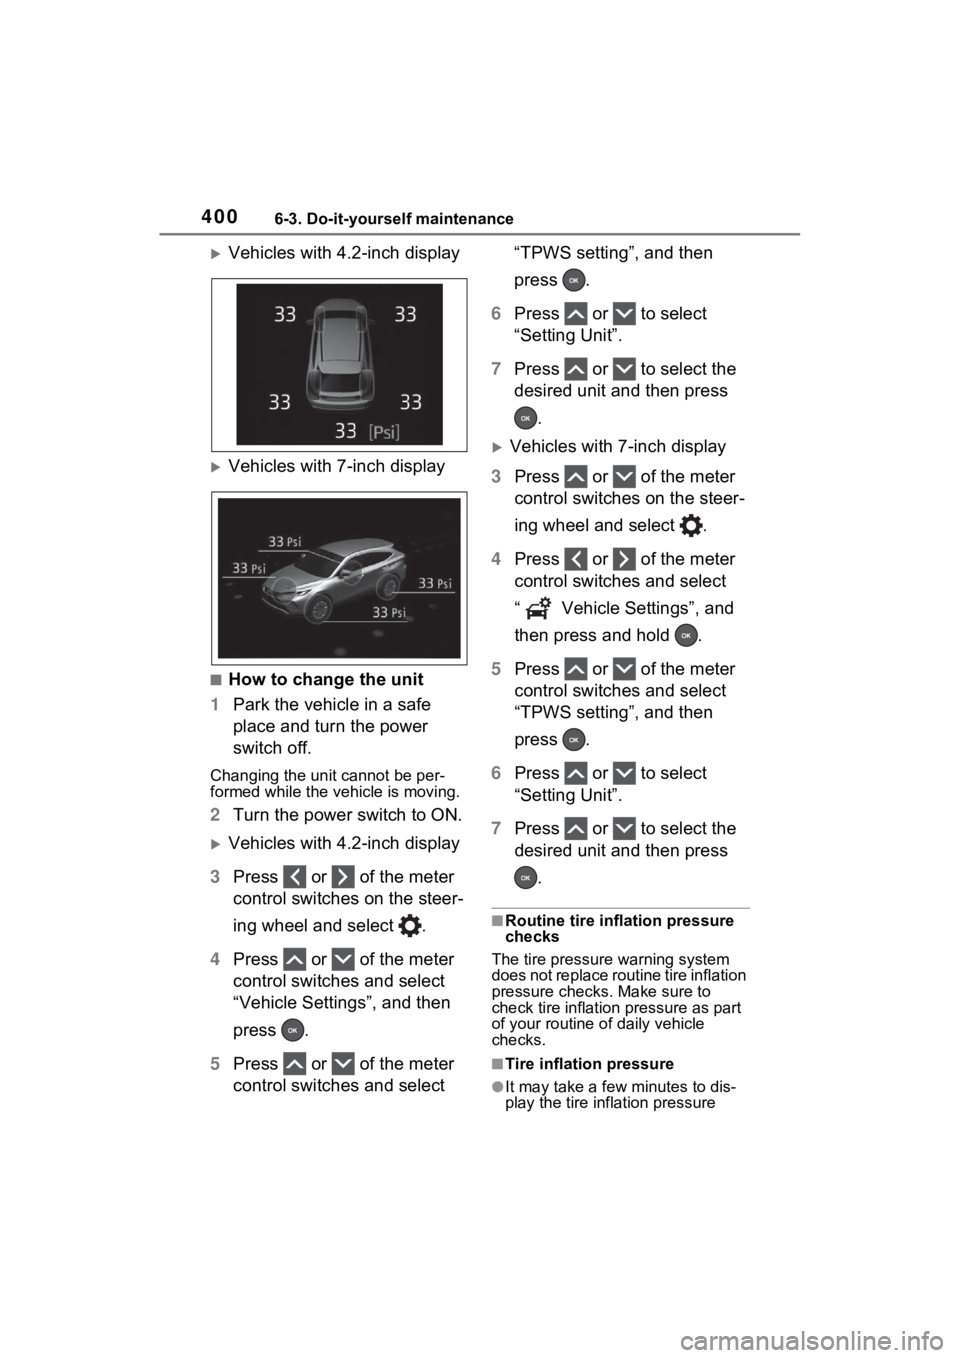
Vehicles with 4.2-inch display
Vehicles with 7-inch display
■How to change the unit
1 Park the vehicle in a safe
place and turn the power
switch off.
Changing the unit cannot be per-
formed while the vehicle is moving.
2Turn the power switch to ON.
Vehicles with 4.2-inch display
3 Press or of the meter
control switches on the steer-
ing wheel and select .
4 Press or of the meter
control switches and select
“Vehicle Settings”, and then
press .
5 Press or of the meter
control switches and select “TPWS setting”, and then
press .
6 Press or to select
“Setting Unit”.
7 Press or to select the
desired unit and then press
.
Vehicles with 7-inch display
3 Press or of the meter
control switches on the steer-
ing wheel and select .
4 Press or of the meter
control switches and select
“ Vehicle Settings”, and
then press and hold .
5 Press or of the meter
control switches and select
“TPWS setting”, and then
press .
6 Press or to select
“Setting Unit”.
7 Press or to select the
desired unit and then press
.
■Routine tire inflation pressure
checks
The tire pressure warning system
does not replace routine tire inflation
pressure checks . Make sure to
check tire inflation pressure as part
of your routine o f daily vehicle
checks.
■Tire inflation pressure
●It may take a few minutes to dis-
play the tire inflation pressure
Page 401 of 548

4016-3. Do-it-yourself maintenance
6
Maintenance and care
after the power switch is turned to
ON. It may also take a few min-
utes to display the tire inflation
pressure after inflation pressure
has been adjusted.
●Tire inflation pressure changes
with temperature.
The displayed values may also be
different from th e values mea-
sured using a tire pressure gauge.
■Situations in which the tire
pressure warning system may
not operate properly
●In the following cases, the tire
pressure warning system may not
operate properly.
• If non-genuine Toyota wheels are
used.
• A tire has been replaced with a tire that is not an OE (Original
Equipment) tire.
• A tire has been replaced with a tire that is not of the specified size.
• Tire chains, etc. are equipped.
• An auxiliary-supported run-flat tire is equipped.
• If a window tint that affects the radio wave signals is installed.
• If there is a lot of snow or ice on
the vehicle, particularly around the
wheels or wheel housings.
• If the tire inflation pressure is
extremely higher than the speci-
fied level.
• If wheels without tire pressure
warning valves a nd transmitters
are used.
• If the ID code on the tire pressure
warning valves and transmitters is
not registered in the tire pressure
warning computer.
●Performance may be affected in
the following situations.
• Near a TV tower, electric power plant, gas station , radio station,
large display, airpo rt or other facil-
ity that generates strong radio
waves or electrical noise
• When carrying a portable radio, cellular phone, cordless phone or
other wireless communication
device If tire position info
rmation is not cor-
rectly displayed due to the radio
wave conditions, the display may be
corrected by driving and changing
the radio wave conditions.
●When the vehicle is parked, the
time taken for the warning to start
or go off could be extended.
●When tire inflation pressure
declines rapidly for example when
a tire has burst, the warning may
not function.
■Warning performance of the tire
pressure warning system
The warning of the tire pressure
warning system w ill change in
accordance with the conditions
under which it was initialized. For
this reason, the system may give a
warning even if th e tire pressure
does not reach a low enough level,
or if the pressure is higher than the
pressure that was adjusted to when
the system was initialized.
Page 403 of 548
4036-3. Do-it-yourself maintenance
6
Maintenance and care
be initialized. (P.406)
■When replacing the tires and
wheels
If the ID code of the tire pressure
warning valve and transmitter is not
registered, the tire pressure warning
system will not work properly . After
driving for about 20 minutes, the tire
pressure warning light blinks for 1
minute and stays on to indicate a
system malfunction.
■The tire pressure warning
system must be initialized
in the following circum-
stances:
When rotating the tires.
When changing the tires.
After registering the ID codes.
( P.406)
When changing between two
registered wheel sets.
When the tire pressure warning
system is initialized, the current
tire inflation pressure is set as
the benchmark pressure.
■How to initialize the tire
pressure warning system
Vehicles with 4.2-inch display
1 Park the vehicle in a safe
place and stop the hybrid
system for 20 minutes or
more.
Initialization cannot be performed
while the vehicle is moving.
NOTICE
■Repairing or replacing tires,
wheels, tire pressure warn-
ing valves, transmitters and
tire valve caps
●When removing or fitting the
wheels, tires or the tire pressure
warning valves and transmit-
ters, contact your Toyota dealer
as the tire pr essure warning
valves and transmitters may be
damaged if not handled cor-
rectly.
●Make sure to install the tire
valve caps. If the tire valve caps
are not installed, water could
enter the tire pressure warning
valves and the tire pressure
warning valves could be bound.
●When replacing ti re valve caps,
do not use tire valve caps other
than those specified.
The cap may become stuck.
■To avoid damage to the tire
pressure warning valves and
transmitters
When a tire is repa ired with liquid
sealants, the tire pressure warn-
ing valve and transmitter may not
operate properly. If a liquid seal-
ant is used, contact your Toyota
dealer or other qualified service
shop as soon as possible. Make
sure to replace the tire pressure
warning valve and transmitter
when replacing the tire. ( P.402)
Initializing the tire pres-
sure warning system
Page 457 of 548
4577-2. Steps to take in an emergency
7
When trouble arises
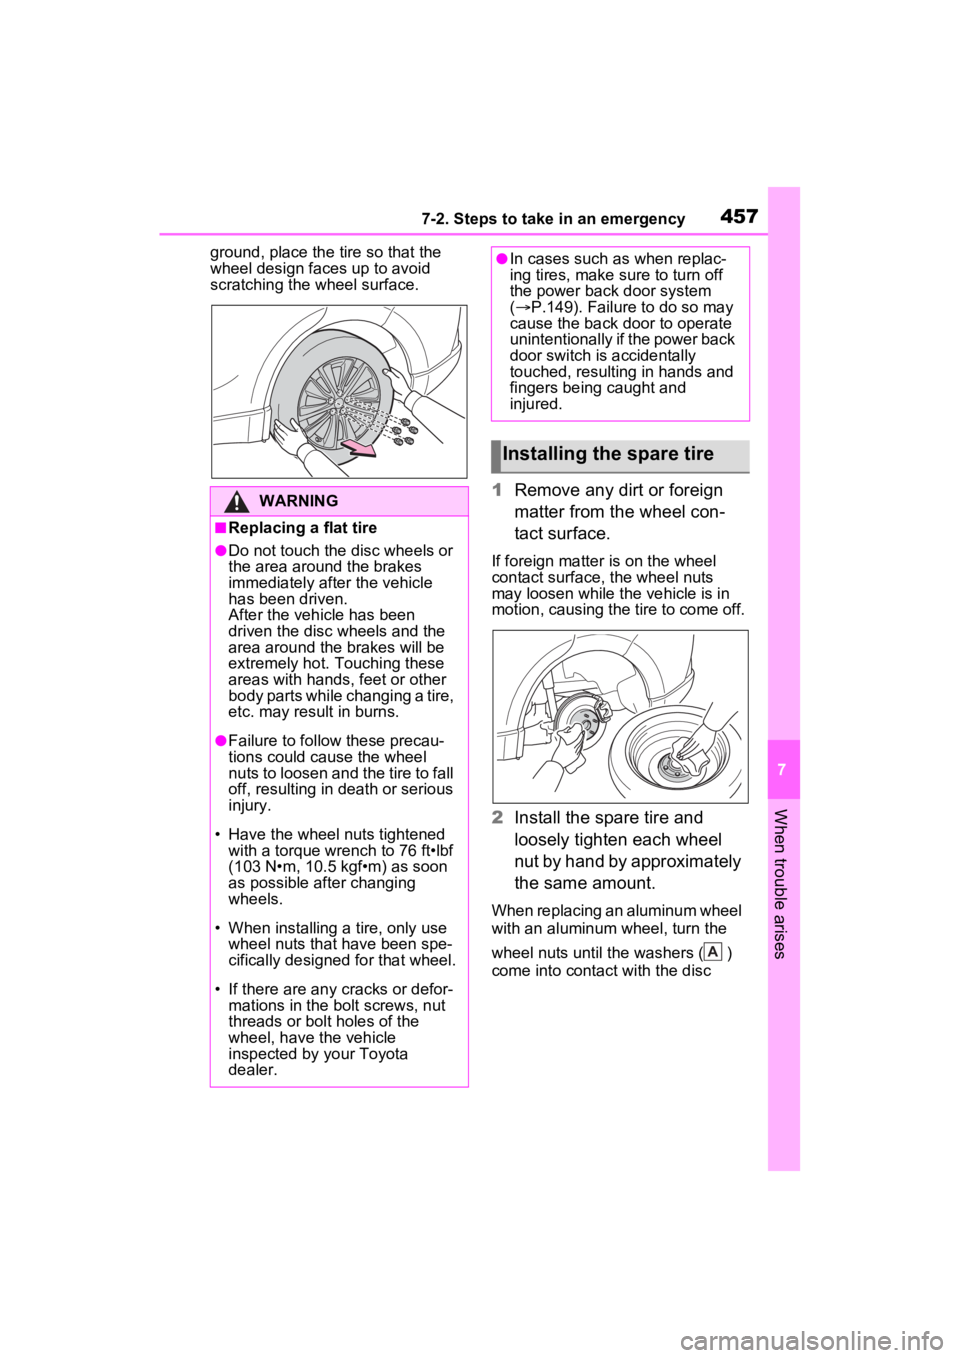
ground, place the tire so that the
wheel design faces up to avoid
scratching the wheel surface.
1 Remove any dirt or foreign
matter from the wheel con-
tact surface.
If foreign matter is on the wheel
contact surface, the wheel nuts
may loosen while the vehicle is in
motion, causing the tire to come off.
2 Install the spare tire and
loosely tighten each wheel
nut by hand by approximately
the same amount.
When replacing an aluminum wheel
with an aluminum wheel, turn the
wheel nuts until the washers ( )
come into contact with the disc
WARNING
■Replacing a flat tire
●Do not touch the disc wheels or
the area around the brakes
immediately after the vehicle
has been driven.
After the vehicle has been
driven the disc wheels and the
area around the brakes will be
extremely hot. Touching these
areas with hands , feet or other
body parts while changing a tire,
etc. may result in burns.
●Failure to follow these precau-
tions could cause the wheel
nuts to loosen and the tire to fall
off, resulting in death or serious
injury.
• Have the wheel nuts tightened with a torque wrench to 76 ft•lbf
(103 N•m, 10.5 kgf•m) as soon
as possible after changing
wheels.
• When installing a tire, only use wheel nuts that have been spe-
cifically designed for that wheel.
• If there are any cracks or defor- mations in the bolt screws, nut
threads or bolt holes of the
wheel, have the vehicle
inspected by your Toyota
dealer.
●In cases such as when replac-
ing tires, make sure to turn off
the power back door system
( P.149). Failure to do so may
cause the back door to operate
unintentionally if the power back
door switch is accidentally
touched, resulting in hands and
fingers being caught and
injured.
Installing the spare tire
A