Page 447 of 600

4476-3. Do-it-yourself maintenance
6
Maintenance and care
Blown fuse
Type BNormal fuse
Blown fuse
Type CNormal fuse
Blown fuse
■After a fuse is replaced
●When installing the lid, make sure
that the tab is installed securely.
●If the lights do n ot turn on even
after the fuse has been replaced,
a bulb may need replacement.
( P.448)
●If the replaced fuse blows again,
have the vehicle inspected by
your Toyota dealer.
■If there is an overload in a cir-
cuit
The fuses are designed to blow,
protecting the wiring harness from damage.
■When replacing light bulbs
Toyota recommends that you use
genuine Toyota products designed
for this vehicle. Because certain
bulbs are connected to circuits
designed to prevent overload, non-
genuine parts or parts not designed
for this vehicle may be unusable.
B
A
B
A
B
WARNING
■To prevent system break-
downs and vehicle fire
Observe the following precau-
tions.
Failure to do so may cause dam-
age to the vehicle, and possibly a
fire or injury.
●Never use a fuse of a higher
amperage rating than that indi-
cated, or use any other object in
place of a fuse.
●Always use a genuine Toyota
fuse or equivalent.
Never replace a fuse with a
wire, even as a temporary fix.
●Do not modify the fuses or fuse
boxes.
NOTICE
■Before replacing fuses
Have the cause of electrical over-
load determined and repaired by
your Toyota dealer as soon as
possible.
■To prevent damage to the
engine compartment fuse box
cover
When opening the fuse box, com-
pletely release the claw locks
before lifting up the cover. Other-
wise, the claws may be damaged.
Page 448 of 600

4486-3. Do-it-yourself maintenance
Check the wattage of the light
bulb to be replaced. ( P.524)
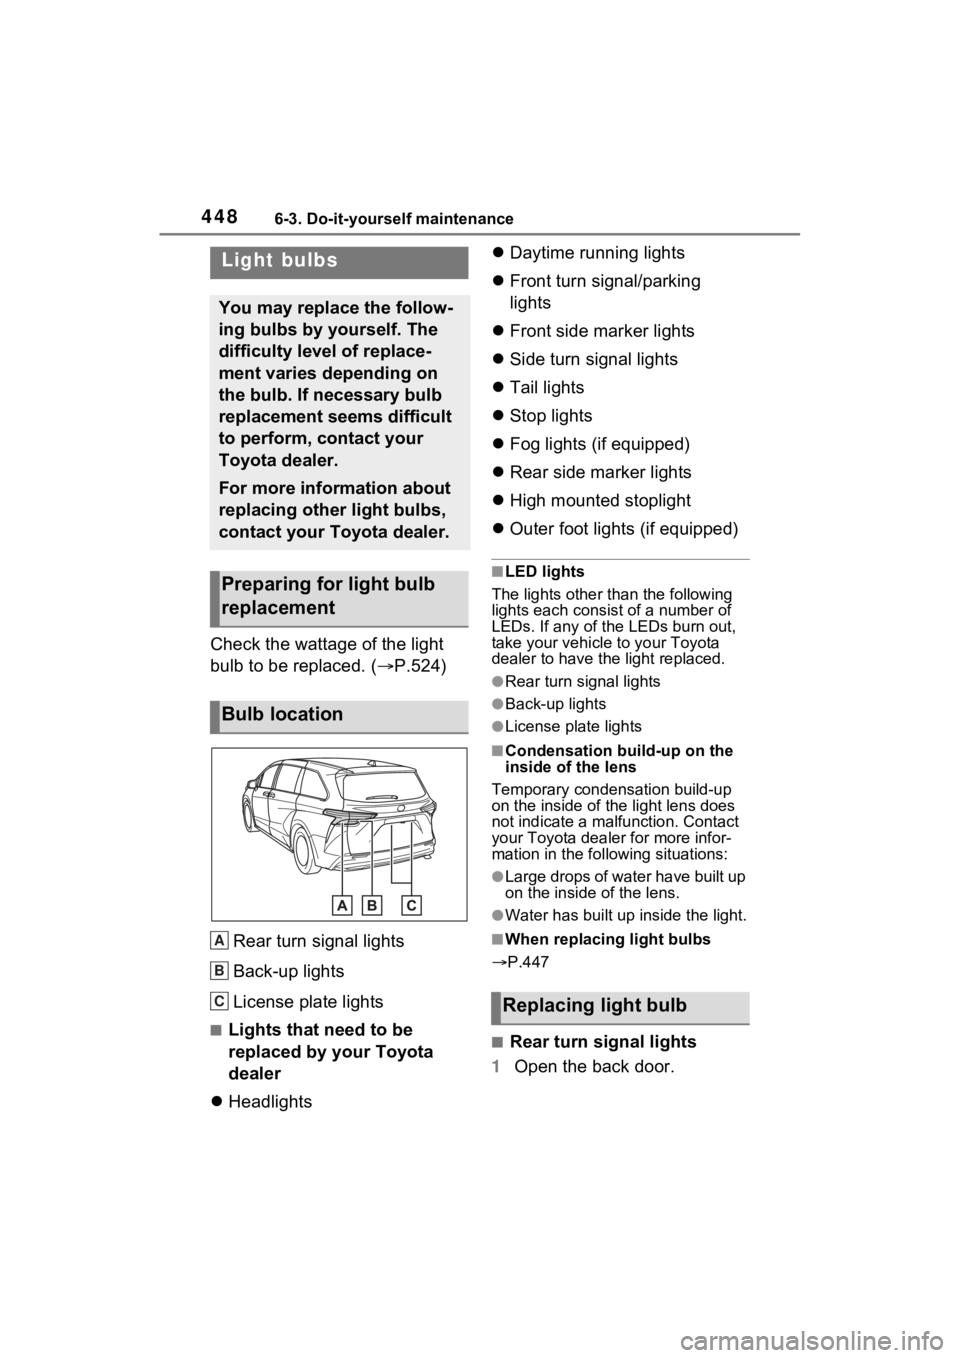
Rear turn signal lights
Back-up lights
License plate lights
■Lights that need to be
replaced by your Toyota
dealer
Headlights
Daytime running lights
Front turn signal/parking
lights
Front side marker lights
Side turn signal lights
Tail lights
Stop lights
Fog lights (if equipped)
Rear side marker lights
High mounted stoplight
Outer foot lights (if equipped)
■LED lights
The lights other than the following
lights each consist of a number of
LEDs. If any of t he LEDs burn out,
take your vehicle to your Toyota
dealer to have the light replaced.
●Rear turn signal lights
●Back-up lights
●License plate lights
■Condensation build-up on the
inside of the lens
Temporary condensation build-up
on the inside of the light lens does
not indicate a mal function. Contact
your Toyota dealer for more infor-
mation in the following situations:
●Large drops of water have built up
on the inside of the lens.
●Water has built up inside the light.
■When replacing light bulbs
P.447
■Rear turn signal lights
1 Open the back door.
Light bulbs
You may replace the follow-
ing bulbs by yourself. The
difficulty level of replace-
ment varies depending on
the bulb. If necessary bulb
replacement seems difficult
to perform, contact your
Toyota dealer.
For more information about
replacing other light bulbs,
contact your Toyota dealer.
Preparing for light bulb
replacement
Bulb location
A
B
C�5�H�S�O�D�F�L�Q�J���O�L�J�\
K�W���E�X�O�E
Page 450 of 600
4506-3. Do-it-yourself maintenance
pletely secured.
8Reinstall the screws.
■Back-up lights
1 Open the back door and
remove the cover.
To prevent damag e to the cover,
wrap the tip of the screwdriver with
a rag, etc.
2 Turn the bulb base counter-
clockwise.
3 Remove the light bulb.
4 Install a new light bulb.
5 Install the bulb base to the
light unit by inserting it and
Page 451 of 600
4516-3. Do-it-yourself maintenance
6
Maintenance and care
turning the bulb base clock-
wise.
6 Reinstall the cover.
■License plate lights
1 Remove the cover.
Using a flathead screwdriver,
remove the cover.
To prevent damage to the vehicle,
wrap the tip of the flathead screw-
driver with tape, etc.
2 Remove the lens.
Lens
Hook
1 Insert a small flathead screw-
driver, etc. into either the
right or left hole of the lens.
2 Push the screwdriver side-
ways in the direction of the
arrow shown in the illustra-
tion, disengage the hook, and
then remove the lens.
To prevent damage to the vehicle,
wrap the tip of th e screwdriver with
tape, etc.
A
B
Page 456 of 600
4567-1. Essential information
7-1.Essential information
Press the switch.
All the turn signal lights will flash.
To turn them off, press the switch
once again.
■Emergency flashers
●If the emergency flashers are
used for a long time while the
hybrid system is not operating
(while the “READY” indicator is
not illuminated), the 12-volt bat-
tery may discharge.
●If any of the SRS airbags deploy
(inflate) or in the event of a strong
rear impact, the emergency flash-
ers will turn on automatically.
The emergency flashers will turn
off automatically after operating
for approximatel y 20 minutes. To
manually turn t he emergency
flashers off, press the switch
twice. (The emergency flashers
may not turn on automatically
depending on the force of the
impact and conditions of the colli- sion.)
Emergency flashers
The emergency flashers are
used to warn other drivers
when the vehicle has to be
stopped in the road due to a
breakdown, etc.
Operating instructions
Page 464 of 600

4647-2. Steps to take in an emergency
■Brake system warning light (warning buzzer)
■Brake system warning light
■Charging system warning light*
*: This light illuminates on the mu lti-information display with a message.
If a warning light turns on or a warning buzzer
sounds
Calmly perform the following actions if any of the warning
lights comes on or flashes. If a light comes on or flashes, but
then goes off, this does not necessarily indicate a malfunc-
tion in the system. However, if this continues to occur, have
the vehicle inspected by your Toyota dealer.
Actions to the warning lights or warning buzzers
Warning lightDetails/Actions
(U.S.A.)
(Red)
(Canada)
Indicates that:
The brake fluid level is low; or
The brake system is malfunctioning
Immediately stop the vehicle in a safe place and
contact your Toyota dealer. Continuing to drive
the vehicle may be dangerous.
Warning lightDetails/Actions
(Yellow)
Indicates a malfunction in:
The parking brake system;
The regenerative braking system; or
The electronically controlled brake system
Have the vehicle insp ected by your Toyota
dealer immediately.
Warning lightDetails/Actions
Indicates a malfunction in the vehicle’s charging sys-
tem
Immediately stop the vehicle in a safe place and
contact your Toyota dealer.
Page 473 of 600

4737-2. Steps to take in an emergency
7
When trouble arises
■Conditions that the tire pres-
sure warning system may not
function properly
P.425
WARNING
■If both the ABS and the brake
system warning lights remain
on
Stop your vehicle in a safe place
immediately and contact your
Toyota dealer. The vehicle will
become extremely unstable
during braking, and the ABS sys-
tem may fail, which could cause
an accident resulting in death or
serious injury.
■When the electric power
steering system warning light
comes on
When the light comes on yellow,
the assist to the power steering is
restricted. When the light comes
on red, the assist to the power
steering is lost and handling oper-
ations of the steering wheel
become extremely heavy.
When steering wheel operations
are heavier than usual, grip the
steering wheel firmly and operate
it using more force than usual.
■If the tire pressure warning
light comes on
Be sure to observe the following
precautions. Failure to do so
could cause a loss of vehicle con-
trol and result in death or serious
injury.
●Stop your vehicle in a safe
place as soon as possible.
Adjust the tire inflation pressure
immediately.
●If the tire pressure warning light
comes on even after tire infla-
tion pressure adjustment, it is
probable that you have a flat
tire. Check the tires. If a tire is
flat, change it with the spare tire
and have the flat tire repaired by
the nearest Toyota dealer.
●Avoid abrupt maneuvering and
braking. If the vehicle tires dete-
riorate, you could lose control of
the steering wheel or the
brakes.
■If a blowout or sudden air
leakage should occur
The tire pressure warning system
may not activate immediately.
■Maintenance of the tires
Each tire, includi ng the spare (if
provided), should be checked
monthly when cold and inflated to
the inflation pressure recom-
mended by the vehicle manufac-
turer on the vehicle placard or tire
inflation pressure label (tire and
load information label). (If your
vehicle has tires of a different size
than the size indicated on the
vehicle placard or tire inflation
pressure label [tire and load infor-
mation label], you should deter-
mine the proper tire inflation
pressure for those tires.)
Page 476 of 600

4767-2. Steps to take in an emergency
The warning lights and warning buzzers operate as follows depend-
ing on the content of the message. If a message indicates the need
for inspection by a dealer, have the vehicle inspected by your Toyota
dealer immediately.
*: A buzzer sounds the first time a message is show n on the multi-informa-
tion display.
■Warning messages
The warning messages explained
below may differ from the actual
messages according to operation
conditions and vehicle specifica-
tions.
■Warning buzzer
In some cases, the buzzer may not
be heard due to being in a noisy
location or audio sound.
■If a message that indicates the
need for visiting your Toyota
dealer is displayed
The system or part shown on the
multi-information di splay is malfunc-
tioning. Have the vehicle inspected
by your Toyota dea ler immediately.
■If a message that indicates the
need for referring to Owner’s
Manual is displayed
●If “Engine Coolant Temp High
Stop in a Safe Place See Owner’s
Manual” is shown, follow the
Messages and warnings
Warning lightWarning buzzer*Warning
Sounds
• Indicates an import ant situation, such
as when a system related to driving is
malfunctioning or that danger may
result if the correction procedure is not
performed
• Indicates a situat ion, such as when
damage to the vehicle or danger may
result
Comes on or flashesSounds
Indicates an importan t situation, such as
when the systems shown on the multi-
information display may be malfunction-
ing
Does not sound
• Indicates a condition, such as malfunc- tion of electrical components, their con-
dition, or indicat es the need for
maintenance
• Indicates a situatio n, such as when an
operation has been performed incor-
rectly, or indicates how to perform an
operation correctly