2022 TOYOTA RAV4 HYBRID fuel
[x] Cancel search: fuelPage 225 of 752

2254-3. Operating the lights and wipers
4
Driving
Canada
1 The side marker, park-
ing, tail, license plate, instru-
ment panel lights, daytime
running lights and LED
accessory lights (if equipped)
( P.225) turn on.
2 The headlights and all
lights listed above (except
daytime running lights) turn
on.
3 The headlights, daytime
running lights, LED acces-
sory lights (if equipped)
( P.225) and all the lights
listed above turn on and off
automatically.
■AUTO mode can be used when
The power swit ch is in ON.
■Daytime running light system
●Vehicles with multi-LED head-
lights and LED projector head-
lights with bulb type front turn
signal lights: The daytime running
lights illuminate u sing the same
lights as the low beam headlights
and illuminate d immer than the low beam headlights.
●Vehicles with LED projector head-
lights with LED type front turn sig-
nal lights: The daytime running
lights illuminate using the same
lights as the parking lights and illu-
minate brighter than the parking
lights.
●To make your vehicle more visible
to other drivers
during daytime
driving, the daytime running lights
turn on automatically when all of
the following conditions are met.
(The daytime running lights are
not designed for use at night.)
• The hybrid system is operating
• The parking brake is released
• For the U. S. A.: The headlight
switch is in the , or
*
position
• For Canada: The headlight switch
is in the or
* position
*: When the surroundings are bright
The daytime running lights remain
on after they illumi nate, even if the
parking brake is set again.
●For the U.S.A.: Daytime running
lights can be turned off by operat-
ing the switch.
●Compared to turning on the head-
lights, the daytime running light
system offers greater durability
and consumes less electricity, so
it can help improve fuel economy.
■LED accessory lights (if
equipped)
To make your vehicle more visible
to other drivers dur ing daytime driv-
ing, the LED accesso ry lights turn
on automatically when the parking
brake is released while the hybrid
system is operating.
When the parking lights are turned
on, the LED accessory lights dim.
■Headlight control sensor (if
equipped)
The sensor may not function prop-
erly if an object is placed on the sen-
Page 236 of 752

2364-4. Refueling
4-4.Refueling
Close all the doors and win-
dows, and turn the power
switch to OFF.
Confirm the type of fuel.
■Fuel types
P.675
■Fuel tank opening for unleaded
gasoline
To help prevent incorrect fueling,
your vehicle has a fuel tank opening
that only accommodates the spe-
cial nozzle on unle aded fuel pumps.
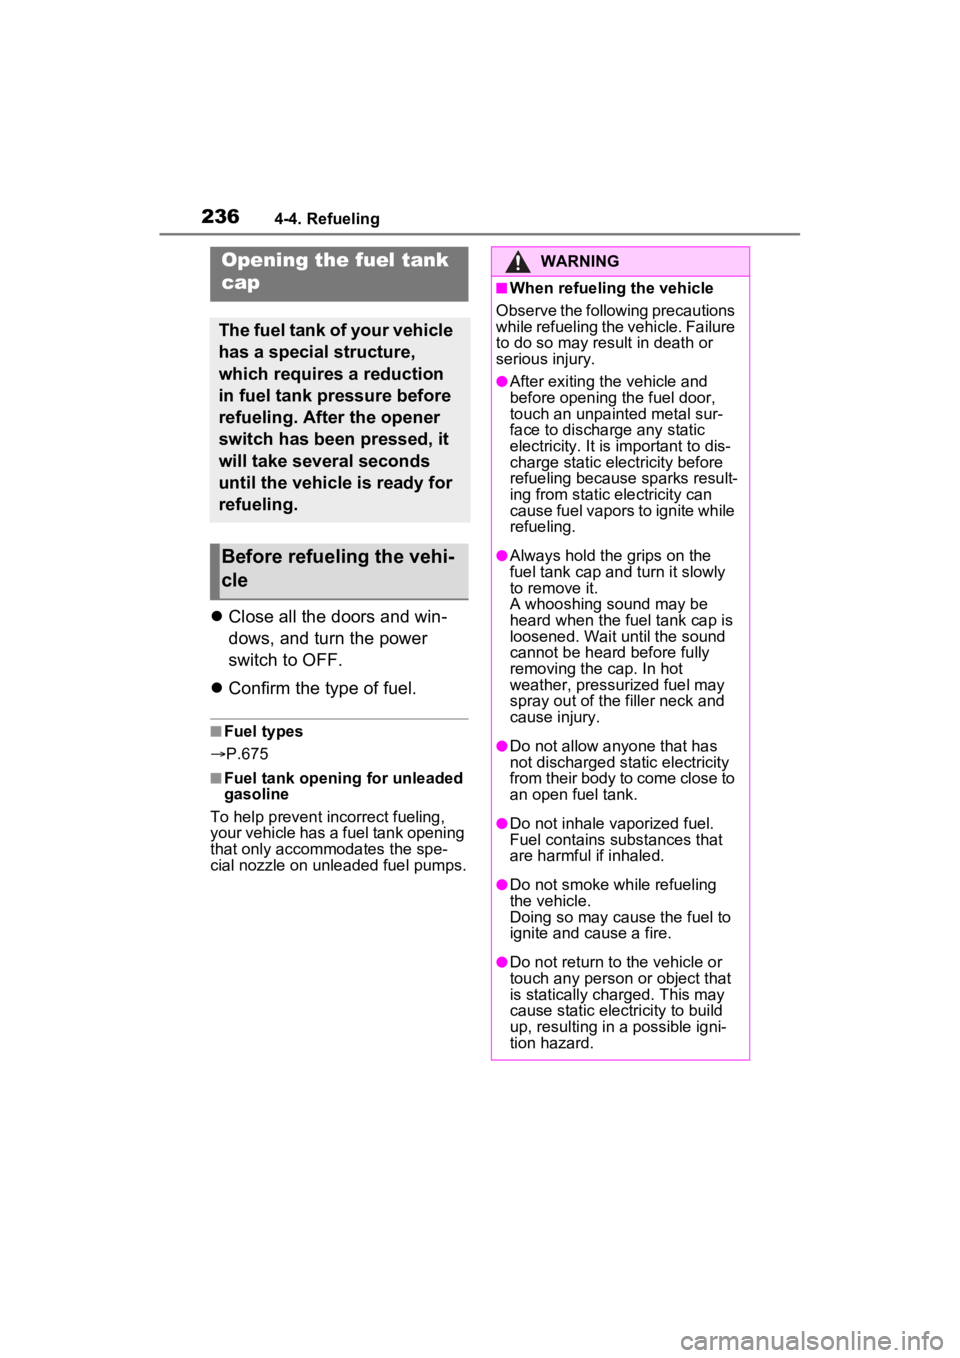
Opening the fuel tank
cap
The fuel tank of your vehicle
has a special structure,
which requires a reduction
in fuel tank pressure before
refueling. After the opener
switch has been pressed, it
will take several seconds
until the vehicle is ready for
refueling.
Before refueling the vehi-
cle
WARNING
■When refueling the vehicle
Observe the following precautions
while refueling the vehicle. Failure
to do so may result in death or
serious injury.
●After exiting the vehicle and
before opening the fuel door,
touch an unpainted metal sur-
face to discharge any static
electricity. It is important to dis-
charge static electricity before
refueling because sparks result-
ing from static electricity can
cause fuel vapors to ignite while
refueling.
●Always hold the grips on the
fuel tank cap and turn it slowly
to remove it.
A whooshing sound may be
heard when the f uel tank cap is
loosened. Wait until the sound
cannot be heard before fully
removing the cap. In hot
weather, pressurized fuel may
spray out of the filler neck and
cause injury.
●Do not allow anyone that has
not discharged static electricity
from their body to come close to
an open fuel tank.
●Do not inhale vaporized fuel.
Fuel contains substances that
are harmful if inhaled.
●Do not smoke while refueling
the vehicle.
Doing so may cause the fuel to
ignite and cause a fire.
●Do not return to the vehicle or
touch any person or object that
is statically charged. This may
cause static electricity to build
up, resulting in a possible igni-
tion hazard.
Page 237 of 752

2374-4. Refueling
4
Driving
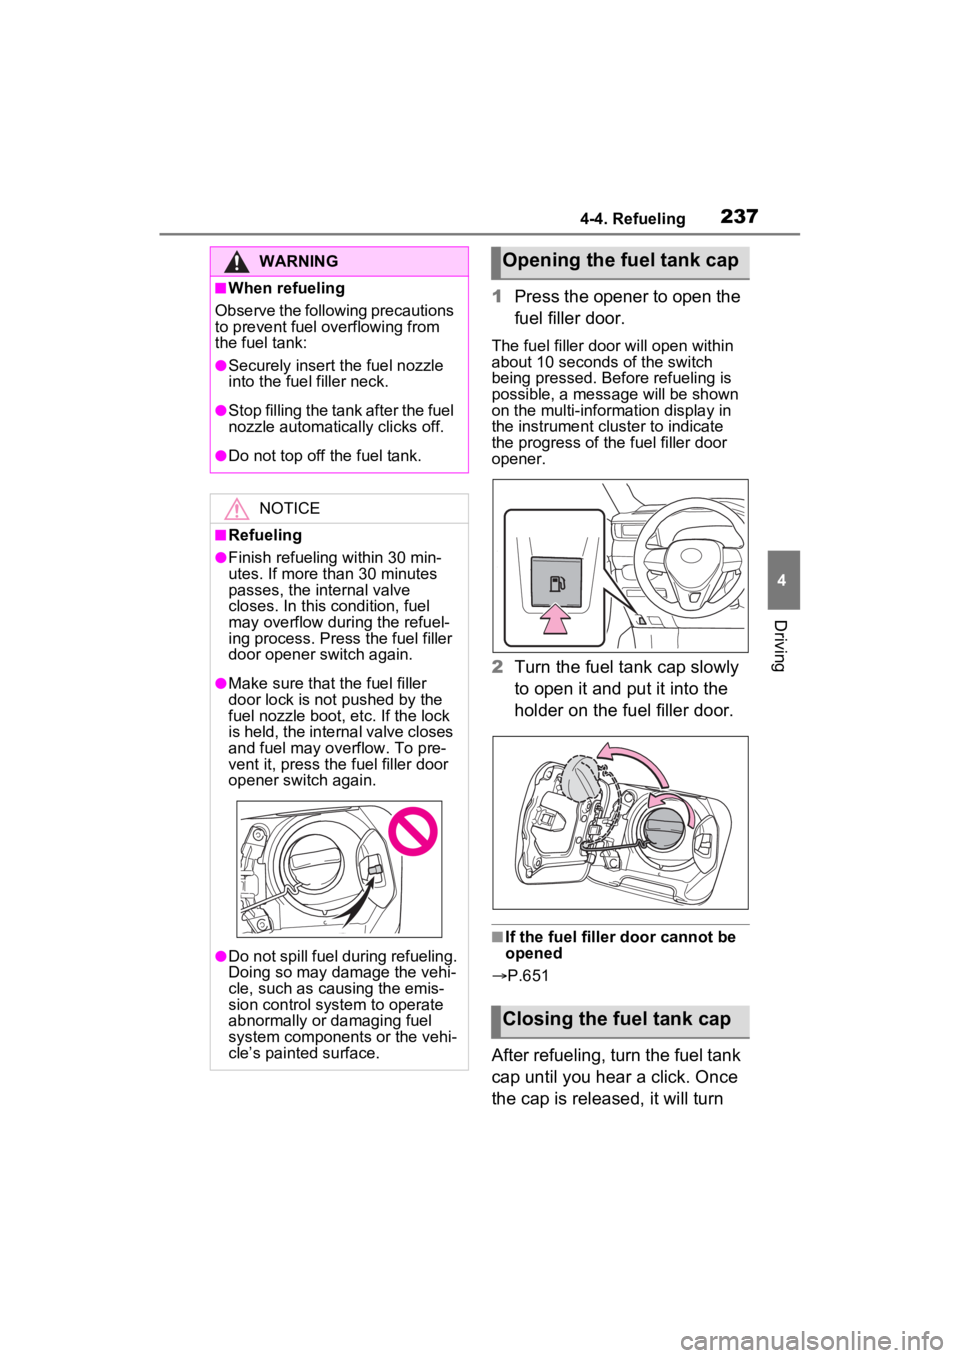
1Press the opener to open the
fuel filler door.
The fuel filler door will open within
about 10 seconds of the switch
being pressed. Before refueling is
possible, a message will be shown
on the multi-information display in
the instrument cluster to indicate
the progress of the fuel filler door
opener.
2Turn the fuel tank cap slowly
to open it and put it into the
holder on the fuel filler door.
■If the fuel filler door cannot be
opened
P.651
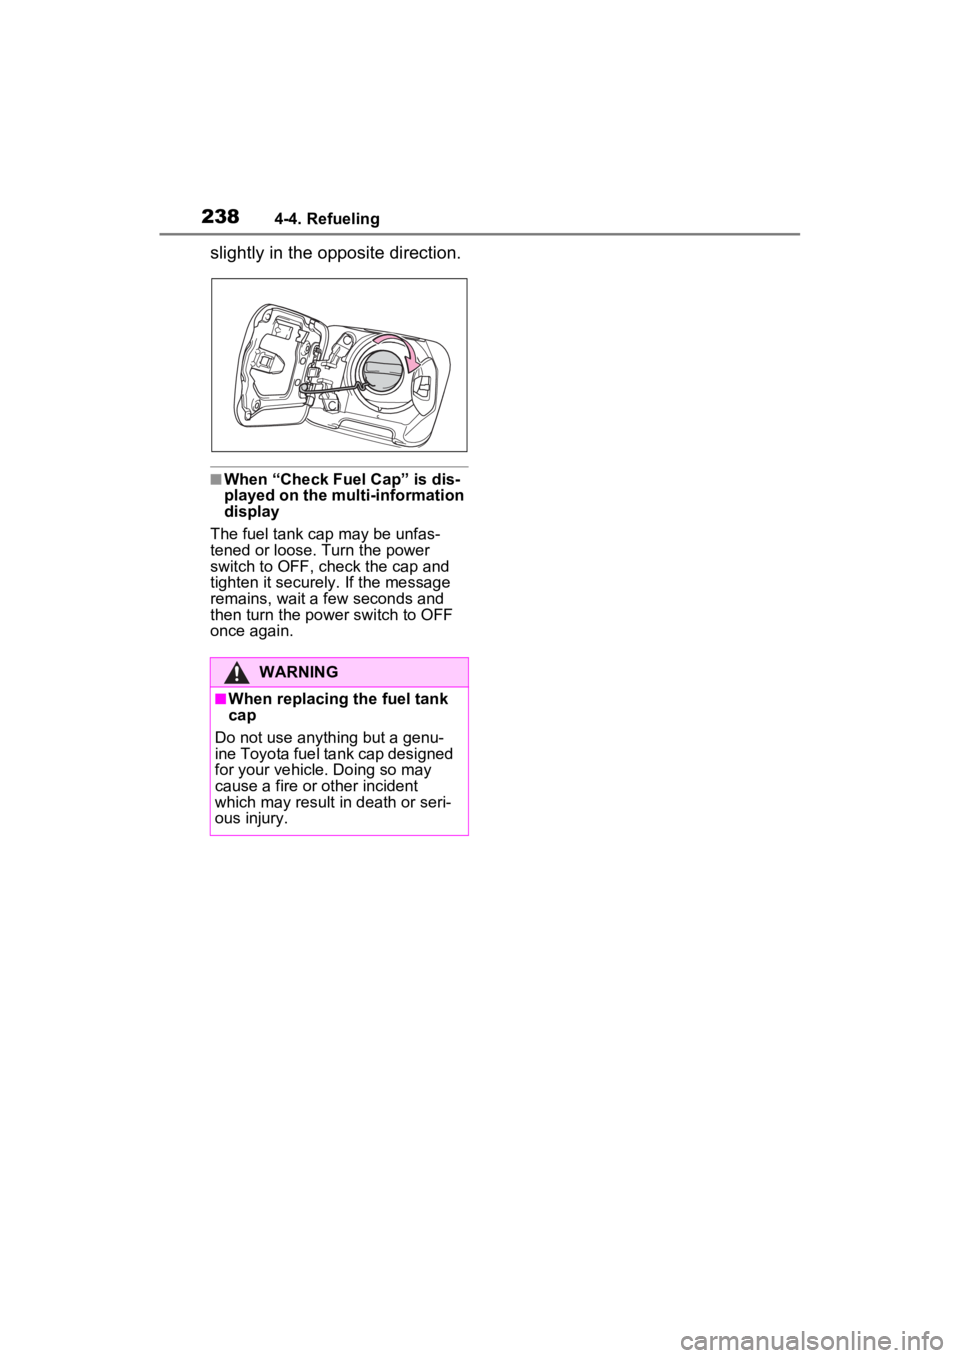
After refueling, turn the fuel tank
cap until you hear a click. Once
the cap is released, it will turn
WARNING
■When refueling
Observe the following precautions
to prevent fuel overflowing from
the fuel tank:
●Securely insert the fuel nozzle
into the fuel filler neck.
●Stop filling the tank after the fuel
nozzle automatically clicks off.
●Do not top off the fuel tank.
NOTICE
■Refueling
●Finish refueling within 30 min-
utes. If more than 30 minutes
passes, the internal valve
closes. In this condition, fuel
may overflow during the refuel-
ing process. Press the fuel filler
door opener switch again.
●Make sure that the fuel filler
door lock is not pushed by the
fuel nozzle boot, etc. If the lock
is held, the internal valve closes
and fuel may overflow. To pre-
vent it, press the fuel filler door
opener switch again.
●Do not spill fuel during refueling.
Doing so may damage the vehi-
cle, such as causing the emis-
sion control system to operate
abnormally or damaging fuel
system components or the vehi-
cle’s painted surface.
Opening the fuel tank cap
Closing the fuel tank cap
Page 238 of 752

2384-4. Refueling
slightly in the opposite direction.
■When “Check Fuel Cap” is dis-
played on the multi-information
display
The fuel tank cap may be unfas-
tened or loose. Turn the power
switch to OFF, check the cap and
tighten it securely. If the message
remains, wait a few seconds and
then turn the power switch to OFF
once again.
WARNING
■When replacing the fuel tank
cap
Do not use anything but a genu-
ine Toyota fuel tank cap designed
for your vehicle. Doing so may
cause a fire or other incident
which may result in death or seri-
ous injury.
Page 347 of 752

3474-5. Using the driving support systems
4
Driving
Parts of objects which extend above a certain height cannot be
displayed on the screen.
●As the images obtained from four cameras are processed and displayed
on the standard of a flat road s urface; the panoramic view/moving
view/see through view may be displayed as follows.
• Objects may look collapsed; t hinner or bigger than usual.
• An object with a higher positi on than the road surface may look farther
away than it actually is or may not appear at all.
• Tall objects may appear protrudi ng from the non-displayed areas of the
image.
●Variations in the brightness of the image may appear for every camera.
●The displayed image may be shift ed by inclination of the vehicle body,
change in vehicle height, etc., d epending on the number of pass engers,
amount of luggage, fuel quantity, etc.
●If the front door s or back door are not c ompletely closed; neither the
image nor the guide lines are displayed.
●The position relations of the ve hicle icon and the road surface or obstacle
may differ from the actual positions.
●The black areas of the vicinity of the vehicle icon are areas t hat are not
captured by the camera.
●Images like the following are combined, thus some areas may be difficult
to view.
A
Page 358 of 752

3584-5. Using the driving support systems
1Eco drive mode
Suitable for driving to improve fuel
economy by more smoothly gener-
ating torque in response to acceler-
ator pedal operations compared to
normal mode and restraining air
conditioning system operations
(heating/cooling).
When the switch is turned to the left
while not in Eco drive mode, the
system switches to Eco drive mode
and the Eco drive mode indicator
illuminates on the mu lti-information
display.
2 Normal mode
Suitable for n ormal driving.
The driving mode returns to normal
mode if the switch i s pressed while
in Eco drive mode or sport mode.
3 Sport mode
Controls the steering feeling and
hybrid system to create an acceler-
ation response tha t is suitable for
sporty driving. Suitable for when
crisp handling is desired, such as
when driving on mountainous
roads.
When the switch is turned to the
right while not in sport mode, the
system switches to sport mode and
the sport mode indicator illuminates
on the multi-information display.
■When changing to a driving
mode other than normal mode
●The background color of the multi-
information display changes
according to the selected driving
mode.
●When the speedometer is set to
analog display, the speedometer
display color also changes. (For
vehicles with the 7-inch multi-
information di splay only)
●The color of the switch changes
according to the selected driving
mode. (For vehicles with the 7-
inch multi-information display
only)
■Air conditioning system opera-
tion in Eco drive mode
In Eco drive mode, heating/cooling
operations and the fan speed is con-
trolled to improve fuel efficiency.
Perform the following procedures to
increase the air conditioning perfor-
mance.
●Turn eco air conditioning mode off
( P.515)
●Adjust the fan speed ( P.515)
●Cancel Eco drive mode
Driving mode select
switch
The driving modes can be
selected to suit the driving
and usage conditions.
Selecting a driving mode
Page 360 of 752

3604-5. Using the driving support systems
If the tires are spinning, the slip
indicator flashes to indicate that
the Trail Mode is controlling the
spinning of the tires.
■Trail Mode
●Trail Mode controls the vehicle so
that it can use the maximum
amount of drive force when driving
on rough roads.
As a result, fuel efficiency may
diminish when compared to driv-
ing with Trail Mode off.
●If Trail Mode is continuously used
for a long period of time, depend-
ing on the driving conditions, the
load on related parts increases
and the system may not function
correctly.
In this case, “Traction Control
Turned OFF” will be shown on the
multi-information display but the
vehicle can be driven normally.
The “Traction Control Turned OFF” on the multi-
information dis-
play will turn off after a short while
and the system will operate prop-
erly.
■When Trail Mode is canceled
In the following situations, Trail
Mode is automatically canceled
even if it is selected:
●When the driving mode is
changed. ( P.358)
●When the hybrid system is
restarted.
■Sounds and vibrations when
driving in Trail Mode
Any of the following conditions may
occur when Trail Mode is operating.
None of these indicates that a mal-
function has occurred:
●Vibrations may be felt throughout
the vehicle or steering
●Sounds may be heard from the
engine compartment
■When the Trail Mode indicator
does not illuminate
When the Trail Mode indicator does
not illuminate even though the Trail
Mode switch is pressed, the system
may be malfunctioning. Have the
vehicle inspected by your Toyota
dealer immediately.
When the Trail Mode is
operating
NOTICE
■In order to ensure that Trail
Mode operates properly
Do not continuously use the Trail
Mode for a long period of time.
Depending on the driving condi-
tions, the load on related parts
increases and the system may not
operate properly.
Page 367 of 752

3674-6. Driving tips
4
Driving
4-6.Driving tips
When using Eco drive mode, the
torque corresponding to the
accelerator pedal depression
amount can be generated more
smoothly than it is in normal
conditions. In addition, the oper-
ation of the air conditioning sys-
tem (heating/cooling) will be
minimized, improving the fuel
economy. (P.358)
The Eco-friendly driving is pos-
sible by keeping the indicator of
Hybrid System Indicator within
Eco area. ( P.93, 98)
Shift the shift lever to D when
stopped at a traffic light, or driv-
ing in heavy traffic etc. Shift the
shift lever to P when parking.
When using the N position,
there is no positive effect on fuel
consumption. In the N position,
the gasoline engine operates
but electricity cannot be gener-
ated. Also, when using the air conditioning system, etc., the
hybrid battery (traction battery)
power is consumed.
Drive your vehicle smoothly.
Avoid abrupt acceleration and
deceleration. Gradual accel-
eration and deceleration will
make more effective use of
the electric motor (traction
motor) without having to use
gasoline engine power.
Avoid repeated acceleration.
Repeated acceleration con-
sumes hybrid battery (trac-
tion battery) power, resulting
in poor fuel consumption. Bat-
tery power can be restored by
driving with the accelerator
pedal slightly released.
Make sure to operate the brakes
gently and in a timely manner. A
greater amount of electrical
energy can be regenerated
when slowing down.
Repeated acceleration and
deceleration, as well as long
waits at traffic lights, will lead to
bad fuel economy. Check traffic
reports before leaving and avoid
delays as much as possible.
Hybrid Electric Vehi-
cle driving tips
For economical and ecolog-
ical driving, pay attention to
the following points:
Using Eco drive mode
Use of Hybrid System
Indicator
Shift lever operation
Accelerator pedal/brake
pedal operation
When braking
Delays