2022 TOYOTA PROACE CITY VERSO height adjustment
[x] Cancel search: height adjustmentPage 2 of 320
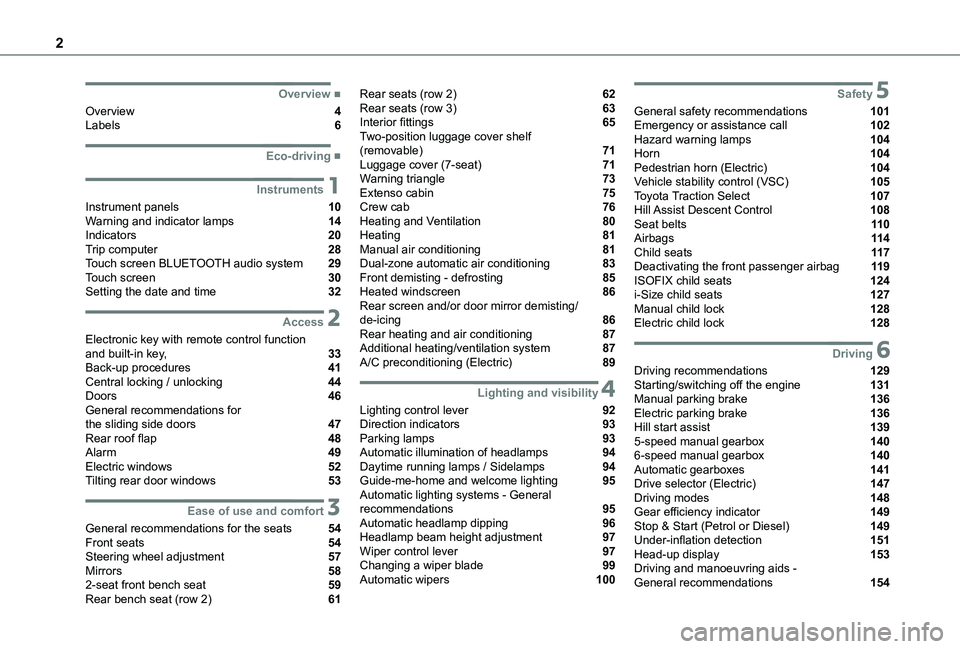
2
■Overview
Overview 4Labels 6
■Eco-driving
1Instruments
Instrument panels 10Warning and indicator lamps 14Indicators 20Trip computer 28Touch screen BLUETOOTH audio system 29Touch screen 30Setting the date and time 32
2Access
Electronic key with remote control function and built-in key, 33Back-up procedures 41Central locking / unlocking 44Doors 46General recommendations for the sliding side doors 47Rear roof flap 48Alarm 49Electric windows 52Tilting rear door windows 53
3Ease of use and comfort
General recommendations for the seats 54Front seats 54Steering wheel adjustment 57Mirrors 582-seat front bench seat 59Rear bench seat (row 2) 61
Rear seats (row 2) 62Rear seats (row 3) 63Interior fittings 65Two-position luggage cover shelf (removable) 71Luggage cover (7-seat) 71Warning triangle 73Extenso cabin 75Crew cab 76Heating and Ventilation 80Heating 81Manual air conditioning 81Dual-zone automatic air conditioning 83Front demisting - defrosting 85Heated windscreen 86Rear screen and/or door mirror demisting/de-icing 86Rear heating and air conditioning 87Additional heating/ventilation system 87A/C preconditioning (Electric) 89
4Lighting and visibility
Lighting control lever 92Direction indicators 93Parking lamps 93Automatic illumination of headlamps 94Daytime running lamps / Sidelamps 94Guide-me-home and welcome lighting 95Automatic lighting systems - General recommendations 95Automatic headlamp dipping 96Headlamp beam height adjustment 97Wiper control lever 97Changing a wiper blade 99Automatic wipers 100
5Safety
General safety recommendations 101Emergency or assistance call 102Hazard warning lamps 104Horn 104Pedestrian horn (Electric) 104Vehicle stability control (VSC) 105Toyota Traction Select 107Hill Assist Descent Control 108Seat belts 11 0Airbags 11 4Child seats 11 7Deactivating the front passenger airbag 11 9ISOFIX child seats 124i-Size child seats 127Manual child lock 128Electric child lock 128
6Driving
Driving recommendations 129Starting/switching off the engine 131Manual parking brake 136Electric parking brake 136Hill start assist 1395-speed manual gearbox 1406-speed manual gearbox 140Automatic gearboxes 141Drive selector (Electric) 147Driving modes 148Gear efficiency indicator 149Stop & Start (Petrol or Diesel) 149Under-inflation detection 151Head-up display 153Driving and manoeuvring aids - General recommendations 154
Page 5 of 320
5
Overview
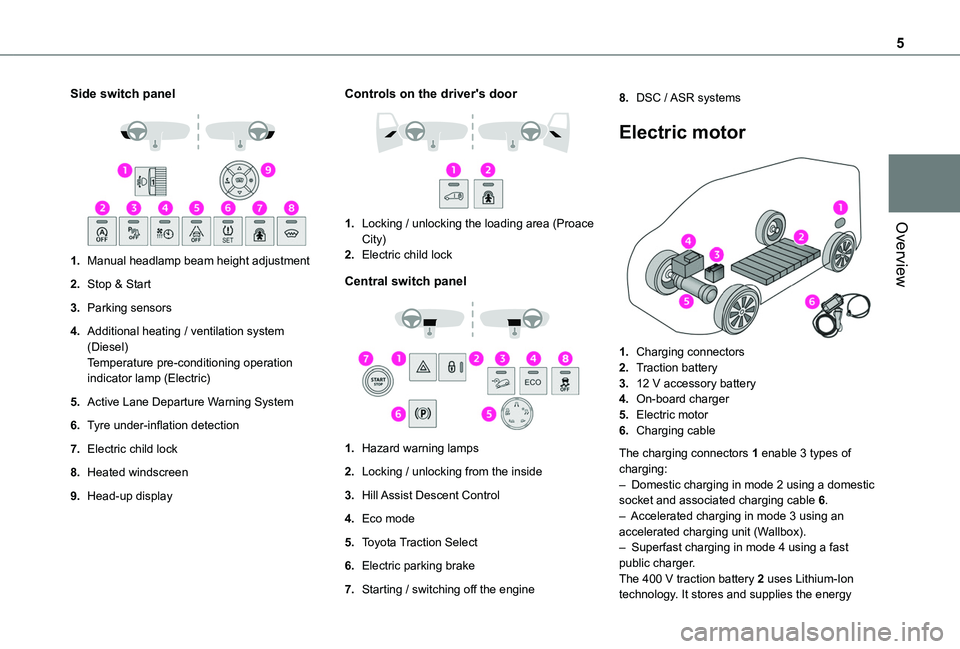
Side switch panel
1.Manual headlamp beam height adjustment
2.Stop & Start
3.Parking sensors
4.Additional heating / ventilation system (Diesel)Temperature pre-conditioning operation indicator lamp (Electric)
5.Active Lane Departure Warning System
6.Tyre under-inflation detection
7.Electric child lock
8.Heated windscreen
9.Head-up display
Controls on the driver's door
1.Locking / unlocking the loading area (Proace City)
2.Electric child lock
Central switch panel
1.Hazard warning lamps
2.Locking / unlocking from the inside
3.Hill Assist Descent Control
4.Eco mode
5.Toyota Traction Select
6.Electric parking brake
7.Starting / switching off the engine
8.DSC / ASR systems
Electric motor
1.Charging connectors
2.Traction battery
3.12 V accessory battery
4.On-board charger
5.Electric motor
6.Charging cable
The charging connectors 1 enable 3 types of charging:– Domestic charging in mode 2 using a domestic socket and associated charging cable 6.– Accelerated charging in mode 3 using an accelerated charging unit (Wallbox).– Superfast charging in mode 4 using a fast public charger.The 400 V traction battery 2 uses Lithium-Ion technology. It stores and supplies the energy
Page 54 of 320
54
General
recommendations for the
seats
WARNI NG
For safety reasons, seat adjustments must only be made when the vehicle is stationary.
WARNI NG
Folding or unfolding the seat backrests must only be done with the vehicle stationary.
WARNI NG
Before moving the seat backwards, ensure that there is no person or object that might prevent the full travel of the seat.There is a risk of trapping or pinching
passengers if present in the rear seats or of jamming the seat if large objects are placed on the floor behind the seat.
WARNI NG
Do not place hard or heavy objects on the backrests forming a table. They could become
dangerous projectiles in the event of sudden braking or a collision.– Do not remove a head restraint without stowing it; secure it to a support inside the vehicle.– Check that the seat belts remain accessible to the passenger and easy to fasten.– Passengers must never take their seat without adjusting and fastening their seat belt.– In row 3, be careful not to leave your feet under the row 2 seat while it is being tilted.– When a row 3 seat is in the fully folded position, ensure that the strap is correctly hooked to the Top Tether fixing of the row 2 backrest: risk of unexpected tipping of the seat.
WARNI NG
Before carrying out the manoeuvres, check that nothing and no one is obstructing the moving elements and their locking.
To avoid sudden folding, take care to hold the backrest and support it until it is horizontal.Never put your hand underneath the seat cushion to guide the seat downwards or upwards, you could get your fingers trapped. Place your hand on the grip/strap (depending on equipment) at the top of the seat cushion.
WARNI NG
Please note: an incorrectly latched backrest compromises the safety of passengers in the event of sudden braking or an impact.The contents of the boot may be thrown forward - risk of severe injury!
Front seats
Correct driving position
Before taking to the road and to make the most of the ergonomic layout of the instruments and controls, carry out these adjustments in the following order:– head restraint height.– seat backrest angle.– seat cushion height.– longitudinal seat position.– steering wheel height and reach.– rear view mirror and door mirrors.
Page 55 of 320
55
Ease of use and comfort
3
WARNI NG
Once these adjustments have been made, check that the instrument panel can be viewed correctly from your driving position.
Adjustments
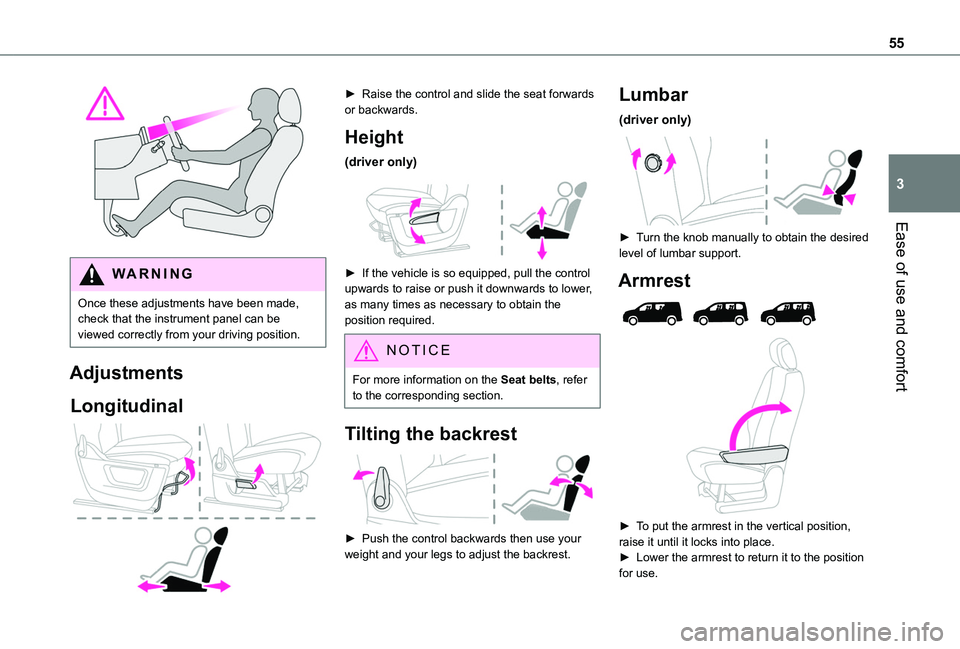
Longitudinal
► Raise the control and slide the seat forwards or backwards.
Height
(driver only)
► If the vehicle is so equipped, pull the control upwards to raise or push it downwards to lower, as many times as necessary to obtain the position required.
NOTIC E
For more information on the Seat belts, refer to the corresponding section.
Tilting the backrest
► Push the control backwards then use your weight and your legs to adjust the backrest.
Lumbar
(driver only)
► Turn the knob manually to obtain the desired level of lumbar support.
Armrest
► To put the armrest in the vertical position, raise it until it locks into place.
► Lower the armrest to return it to the position for use.
Page 57 of 320
57
Ease of use and comfort
3
Heated seat control
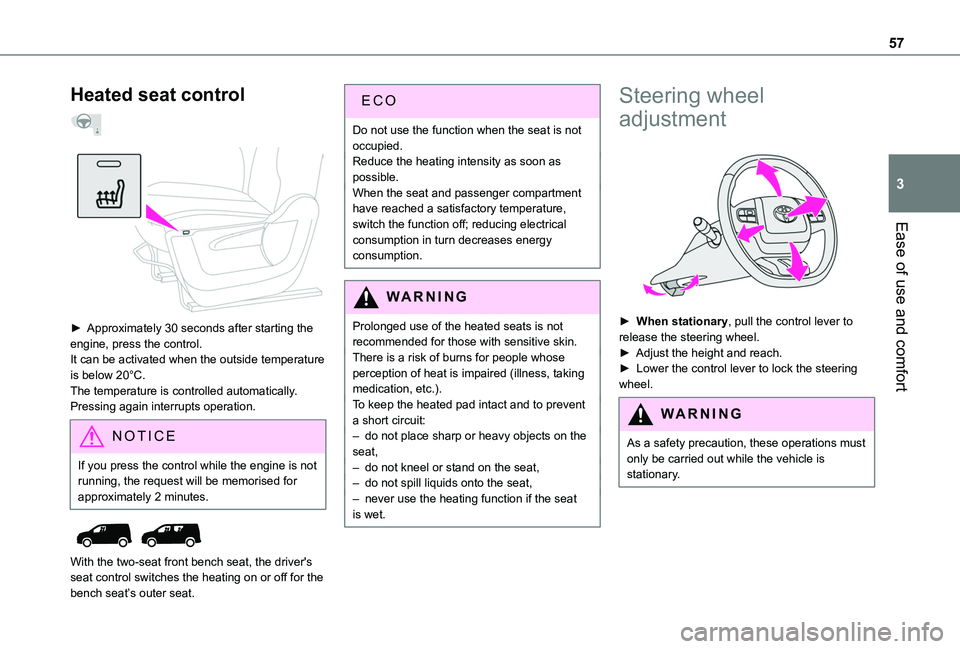
► Approximately 30 seconds after starting the engine, press the control.It can be activated when the outside temperature is below 20°C.The temperature is controlled automatically.Pressing again interrupts operation.
NOTIC E
If you press the control while the engine is not running, the request will be memorised for approximately 2 minutes.
With the two-seat front bench seat, the driver's seat control switches the heating on or off for the bench seat’s outer seat.
ECO
Do not use the function when the seat is not occupied.Reduce the heating intensity as soon as possible.When the seat and passenger compartment have reached a satisfactory temperature, switch the function off; reducing electrical consumption in turn decreases energy consumption.
WARNI NG
Prolonged use of the heated seats is not recommended for those with sensitive skin.There is a risk of burns for people whose perception of heat is impaired (illness, taking medication, etc.).To keep the heated pad intact and to prevent a short circuit:– do not place sharp or heavy objects on the
seat,– do not kneel or stand on the seat,– do not spill liquids onto the seat,– never use the heating function if the seat is wet.
Steering wheel
adjustment
► When stationary, pull the control lever to release the steering wheel.► Adjust the height and reach.► Lower the control lever to lock the steering wheel.
WARNI NG
As a safety precaution, these operations must only be carried out while the vehicle is stationary.
Page 64 of 320
64
Fully folded position
L2
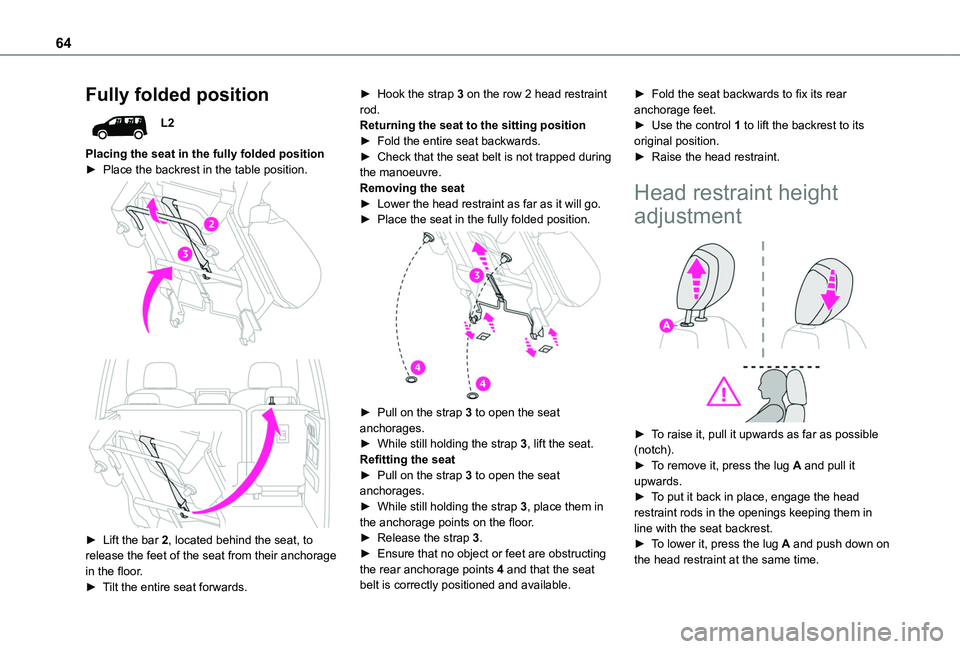
Placing the seat in the fully folded position► Place the backrest in the table position.
► Lift the bar 2, located behind the seat, to release the feet of the seat from their anchorage in the floor.► Tilt the entire seat forwards.
► Hook the strap 3 on the row 2 head restraint rod.Returning the seat to the sitting position► Fold the entire seat backwards.► Check that the seat belt is not trapped during the manoeuvre.Removing the seat► Lower the head restraint as far as it will go.► Place the seat in the fully folded position.
► Pull on the strap 3 to open the seat anchorages.► While still holding the strap 3, lift the seat.
Refitting the seat► Pull on the strap 3 to open the seat anchorages.► While still holding the strap 3, place them in the anchorage points on the floor.► Release the strap 3.► Ensure that no object or feet are obstructing the rear anchorage points 4 and that the seat belt is correctly positioned and available.
► Fold the seat backwards to fix its rear anchorage feet.► Use the control 1 to lift the backrest to its original position.► Raise the head restraint.
Head restraint height
adjustment
► To raise it, pull it upwards as far as possible (notch).► To remove it, press the lug A and pull it upwards.► To put it back in place, engage the head restraint rods in the openings keeping them in line with the seat backrest.► To lower it, press the lug A and push down on
the head restraint at the same time.
Page 97 of 320
97
Lighting and visibility
4
– If the "AUTO" and "Dipped beam" indicator lamps were on, the system changes to main beam.– If the "AUTO" and "Main beam" indicator lamps were on, the system changes to dipped beam.► To reactivate the function, once again switch the headlamps manually between dipped and main beam.
NOTIC E
The system may be disrupted or not work correctly:– When visibility conditions are poor (snowfall, heavy rain, etc.).– If the windscreen in front of the camera is dirty, misted or obscured (for example, by a sticker).– If the vehicle is facing highly reflective signs.When the system detects thick fog, it temporarily deactivates the function.
The system is not able to detect:– Road users that do not have their own lighting, such as pedestrians.– Vehicles whose lighting is obscured (for example, vehicles driving behind a safety barrier on a motorway).– Vehicles at the top or bottom of a steep slope, on winding roads, on crossroads.
WARNI NG
Clean the windscreen regularly, particularly the area in front of the camera.The internal surface of the windscreen can also become misted around the camera. In humid and cold weather, demist the windscreen regularly.Do not allow snow to accumulate on the bonnet or roof of the vehicle as this could obstruct the detection camera.
Headlamp beam height
adjustment
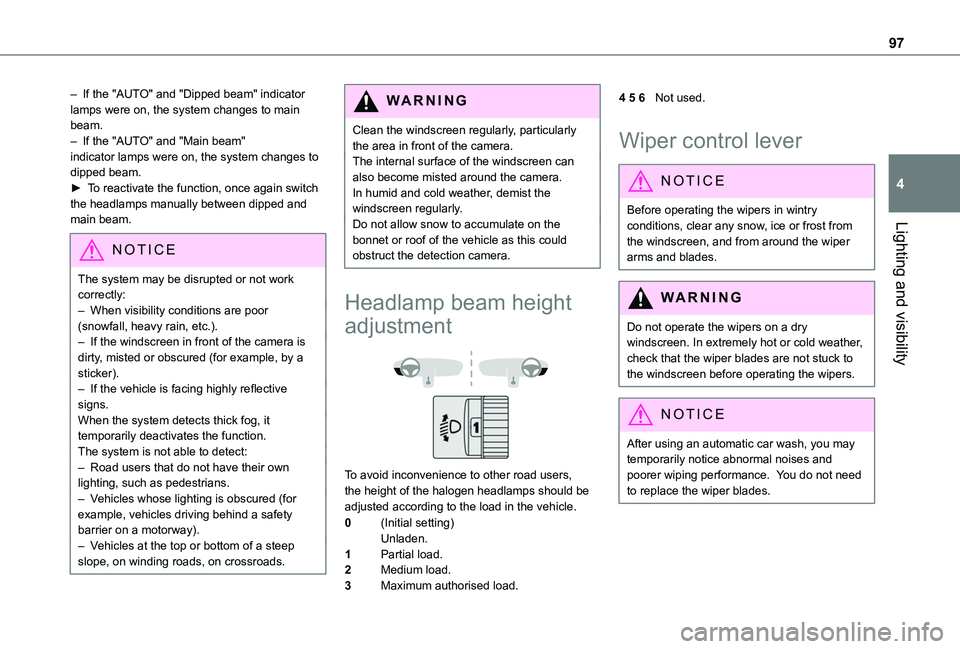
To avoid inconvenience to other road users, the height of the halogen headlamps should be adjusted according to the load in the vehicle.
0(Initial setting)Unladen.
1Partial load.
2Medium load.
3Maximum authorised load.
4 5 6Not used.
Wiper control lever
NOTIC E
Before operating the wipers in wintry conditions, clear any snow, ice or frost from the windscreen, and from around the wiper arms and blades.
WARNI NG
Do not operate the wipers on a dry windscreen. In extremely hot or cold weather, check that the wiper blades are not stuck to the windscreen before operating the wipers.
NOTIC E
After using an automatic car wash, you may temporarily notice abnormal noises and poorer wiping performance. You do not need to replace the wiper blades.
Page 154 of 320
154
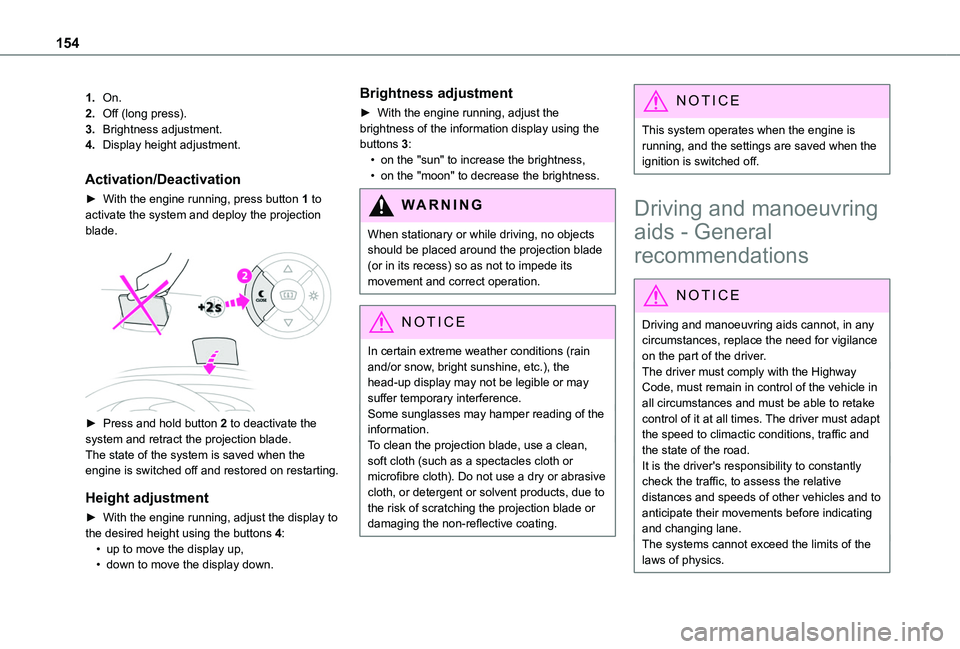
1.On.
2.Off (long press).
3.Brightness adjustment.
4.Display height adjustment.
Activation/Deactivation
► With the engine running, press button 1 to activate the system and deploy the projection blade.
► Press and hold button 2 to deactivate the system and retract the projection blade.
The state of the system is saved when the engine is switched off and restored on restarting.
Height adjustment
► With the engine running, adjust the display to the desired height using the buttons 4:• up to move the display up,• down to move the display down.
Brightness adjustment
► With the engine running, adjust the brightness of the information display using the buttons 3:• on the "sun" to increase the brightness,• on the "moon" to decrease the brightness.
W ARNI NG
When stationary or while driving, no objects
should be placed around the projection blade (or in its recess) so as not to impede its movement and correct operation.
NOTIC E
In certain extreme weather conditions (rain and/or snow, bright sunshine, etc.), the head-up display may not be legible or may suffer temporary interference.Some sunglasses may hamper reading of the information.To clean the projection blade, use a clean, soft cloth (such as a spectacles cloth or microfibre cloth). Do not use a dry or abrasive cloth, or detergent or solvent products, due to the risk of scratching the projection blade or damaging the non-reflective coating.
NOTIC E
This system operates when the engine is running, and the settings are saved when the ignition is switched off.
Driving and manoeuvring
aids - General
recommendations
NOTIC E
Driving and manoeuvring aids cannot, in any circumstances, replace the need for vigilance on the part of the driver.The driver must comply with the Highway Code, must remain in control of the vehicle in all circumstances and must be able to retake control of it at all times. The driver must adapt the speed to climactic conditions, traffic and
the state of the road.It is the driver's responsibility to constantly check the traffic, to assess the relative distances and speeds of other vehicles and to anticipate their movements before indicating and changing lane.The systems cannot exceed the limits of the laws of physics.