2022 TOYOTA PROACE CITY VERSO parking brake
[x] Cancel search: parking brakePage 227 of 320
227
In the event of a breakdown
8
Spare wheel
NOTIC E
For more information on the Tool kit, refer to the corresponding section.
► Park the vehicle, taking care to avoid obstructing traffic, and apply the parking brake.► Follow the safety instructions (hazard warning lamps, warning triangle, wearing high visibility vest, etc.) according to the legislation in force in the country where you are driving.► Switch off the ignition.
Access to the spare wheel
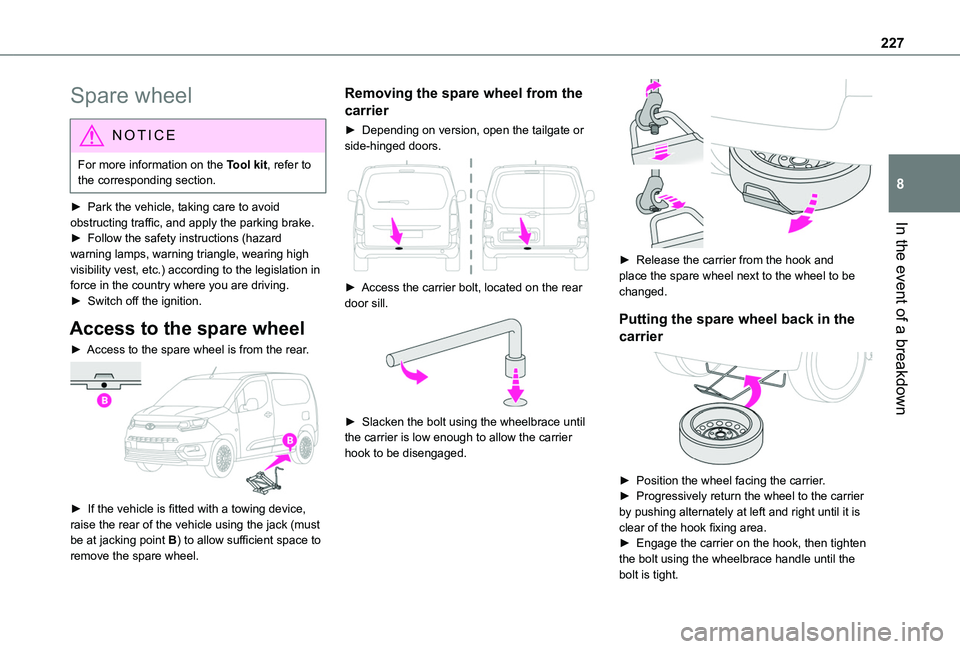
► Access to the spare wheel is from the rear.
► If the vehicle is fitted with a towing device, raise the rear of the vehicle using the jack (must be at jacking point B) to allow sufficient space to
remove the spare wheel.
Removing the spare wheel from the
carrier
► Depending on version, open the tailgate or side-hinged doors.
► Access the carrier bolt, located on the rear door sill.
► Slacken the bolt using the wheelbrace until the carrier is low enough to allow the carrier hook to be disengaged.
► Release the carrier from the hook and place the spare wheel next to the wheel to be changed.
Putting the spare wheel back in the
carrier
► Position the wheel facing the carrier.► Progressively return the wheel to the carrier by pushing alternately at left and right until it is clear of the hook fixing area.► Engage the carrier on the hook, then tighten the bolt using the wheelbrace handle until the bolt is tight.
Page 228 of 320
228
Removing a wheel
WARNI NG
Parking the vehicleImmobilise the vehicle where it does not obstruct traffic: the ground must be level, stable and non-slippery.With a manual gearbox, engage first gear to lock the wheels, apply the parking brake, unless it is programmed to be in automatic mode, and switch off the ignition.With an automatic gearbox, select mode P to lock the wheels, apply the parking brake, unless it is programmed to be in automatic mode, and switch off the ignition.Check for the fixed illumination of the parking brake warning lamps in the instrument panel.The occupants must get out of the vehicle and wait where they are safe.If necessary, place a chock under the wheel diagonally opposite the wheel to be changed.Never go underneath a vehicle raised using a
jack; use an axle stand.
NOTIC E
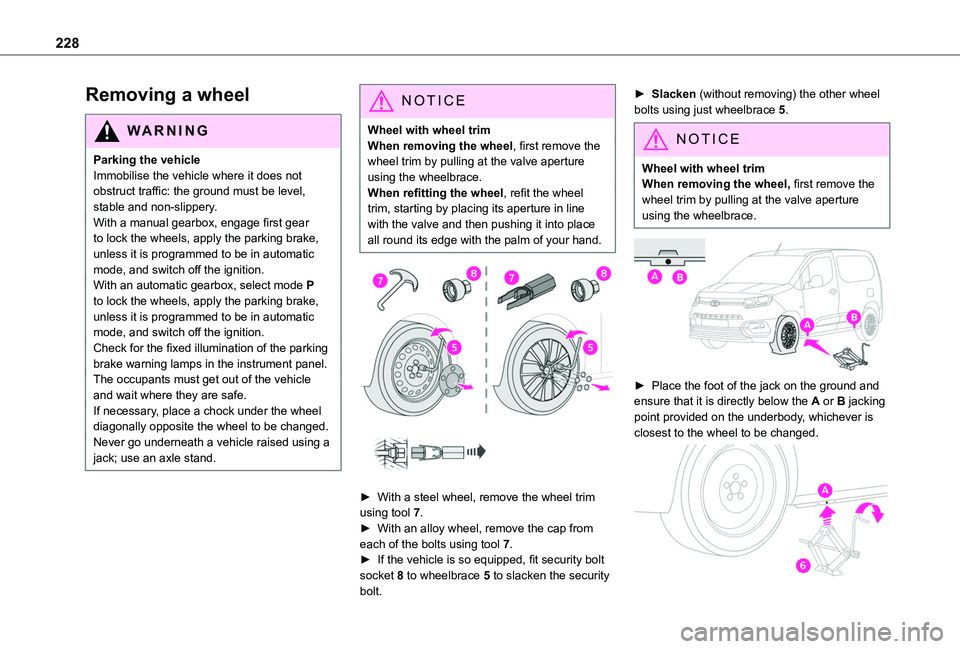
Wheel with wheel trimWhen removing the wheel, first remove the wheel trim by pulling at the valve aperture using the wheelbrace.When refitting the wheel, refit the wheel trim, starting by placing its aperture in line with the valve and then pushing it into place all round its edge with the palm of your hand.
► With a steel wheel, remove the wheel trim using tool 7.► With an alloy wheel, remove the cap from each of the bolts using tool 7.
► If the vehicle is so equipped, fit security bolt socket 8 to wheelbrace 5 to slacken the security bolt.
► Slacken (without removing) the other wheel bolts using just wheelbrace 5.
NOTIC E
Wheel with wheel trimWhen removing the wheel, first remove the wheel trim by pulling at the valve aperture using the wheelbrace.
► Place the foot of the jack on the ground and ensure that it is directly below the A or B jacking point provided on the underbody, whichever is closest to the wheel to be changed.
Page 241 of 320
241
In the event of a breakdown
8
Towing
Procedure for having your vehicle towed or for towing another vehicle using the towing eye.
NOTIC E
General recommendationsObserve the legislation in force in the country where you are driving.Ensure that the weight of the towing vehicle is higher than that of the towed vehicle.The driver must remain at the wheel of the towed vehicle and must have a valid driving licence.When towing a vehicle with all four wheels on the ground, always use an approved towbar; ropes and straps are prohibited.
The towing vehicle must move off gently.When the vehicle is towed with its engine off, there is no longer braking and steering assistance.
WARNI NG
A professional recovery service must be called if:– broken down on a motorway or main road;
– not possible to put the gearbox into neutral, unlock the steering, or release the parking brake;– not possible to tow a vehicle with an automatic gearbox, with the engine running;– towing with only two wheels on the ground;– four-wheel drive vehicle;– no approved towbar available.
WARNI NG
Before towing the vehicle, it is essential to put the vehicle in free-wheeling mode.For more information on Free-wheeling, refer to the corresponding section.
NOTIC E
Electric motorAn electric vehicle cannot under any circumstances be used to tow another vehicle.However, it may be used, for example, to exit a rut.
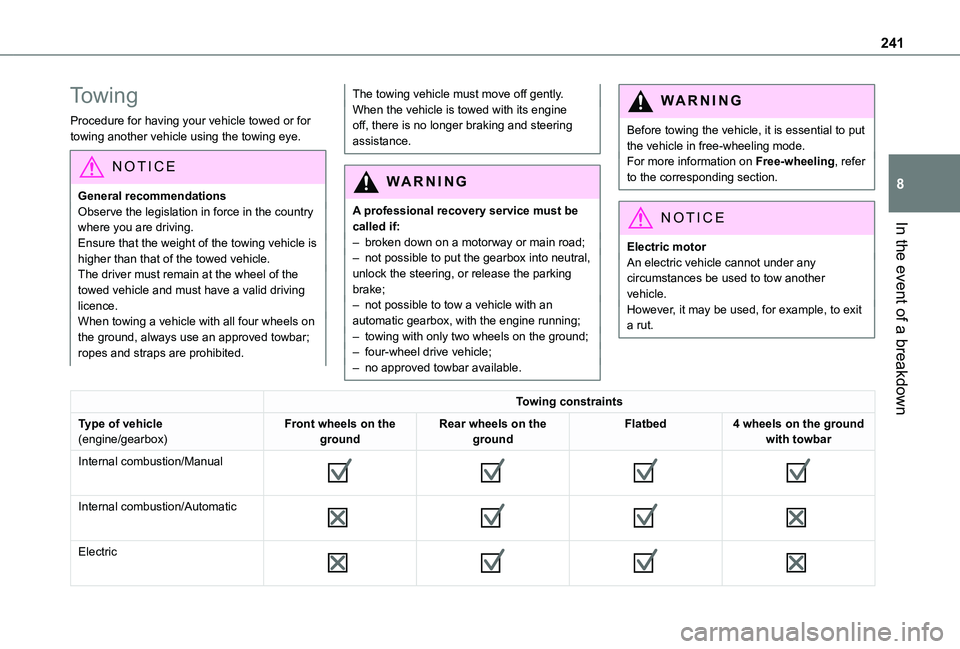
Towing constraints
Type of vehicle(engine/gearbox)Front wheels on the groundRear wheels on the groundFlatbed4 wheels on the ground with towbar
Internal combustion/Manual
Internal combustion/Automatic
Electric
Page 242 of 320
242
NOTIC E
In case of battery or electric parking brake failure, it is essential to call a professional using flatbed recovery vehicles (excluding manual gearbox).
Accessing the eye
NOTIC E
For more information on the Tool kit, refer to the corresponding section.
WARNI NG
With a manual gearbox, move the gear lever into neutral.With an automatic gearbox, place the gear selector into position N.Failure to adhere to this instruction may lead to damage to braking system components and the lack of braking assistance on restarting the engine.
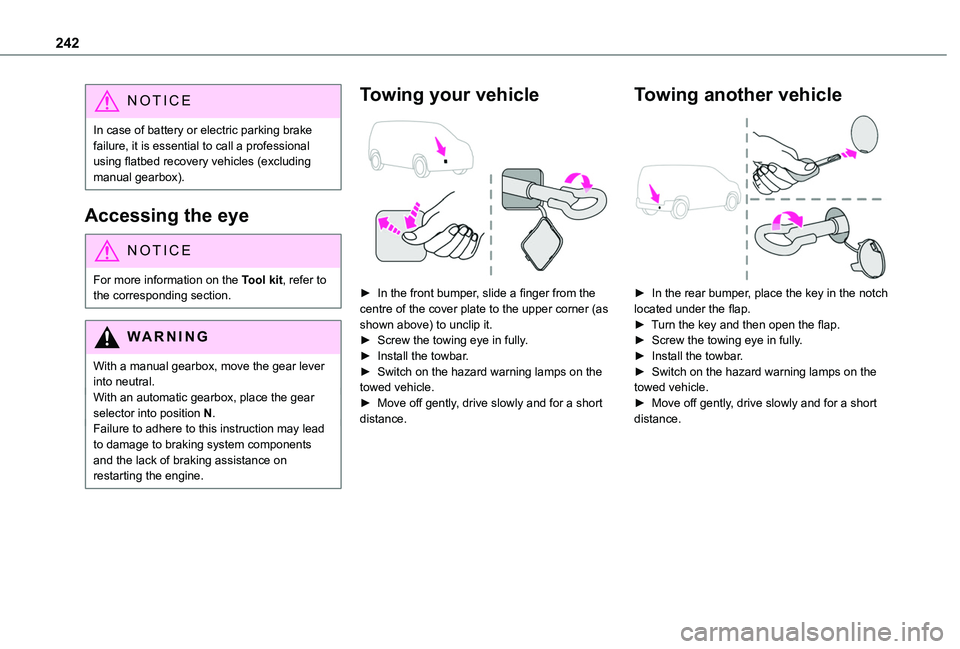
Towing your vehicle
► In the front bumper, slide a finger from the centre of the cover plate to the upper corner (as shown above) to unclip it.► Screw the towing eye in fully.► Install the towbar.► Switch on the hazard warning lamps on the towed vehicle.► Move off gently, drive slowly and for a short distance.
Towing another vehicle
► In the rear bumper, place the key in the notch located under the flap.► Turn the key and then open the flap.► Screw the towing eye in fully.► Install the towbar.► Switch on the hazard warning lamps on the towed vehicle.► Move off gently, drive slowly and for a short distance.
Page 309 of 320
309
Alphabetical index
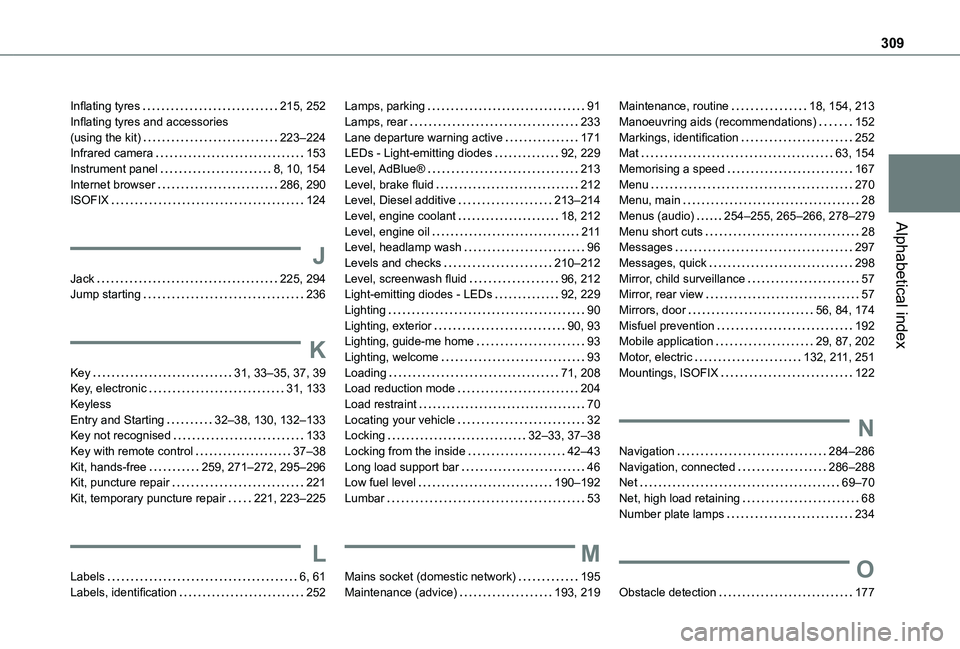
Inflating tyres 215, 252Inflating tyres and accessories (using the kit) 223–224Infrared camera 153Instrument panel 8, 10, 154Internet browser 286, 290ISOFIX 124
J
Jack 225, 294Jump starting 236
K
Key 31, 33–35, 37, 39Key, electronic 31, 133Keyless Entry and Starting 32–38, 130, 132–133Key not recognised 133
Key with remote control 37–38Kit, hands-free 259, 271–272, 295–296Kit, puncture repair 221Kit, temporary puncture repair 221, 223–225
L
Labels 6, 61Labels, identification 252
Lamps, parking 91Lamps, rear 233Lane departure warning active 171LEDs - Light-emitting diodes 92, 229Level, AdBlue® 213Level, brake fluid 212Level, Diesel additive 213–214Level, engine coolant 18, 212Level, engine oil 2 11Level, headlamp wash 96Levels and checks 210–212Level, screenwash fluid 96, 212Light-emitting diodes - LEDs 92, 229Lighting 90Lighting, exterior 90, 93Lighting, guide-me home 93Lighting, welcome 93Loading 71, 208Load reduction mode 204Load restraint 70Locating your vehicle 32Locking 32–33, 37–38
Locking from the inside 42–43Long load support bar 46Low fuel level 190–192Lumbar 53
M
Mains socket (domestic network) 195Maintenance (advice) 193, 219
Maintenance, routine 18, 154, 213Manoeuvring aids (recommendations) 152Markings, identification 252Mat 63, 154Memorising a speed 167Menu 270Menu, main 28Menus (audio) 254–255, 265–266, 278–279Menu short cuts 28Messages 297Messages, quick 298Mirror, child surveillance 57Mirror, rear view 57Mirrors, door 56, 84, 174Misfuel prevention 192Mobile application 29, 87, 202Motor, electric 132, 2 11, 251Mountings, ISOFIX 122
N
Navigation 284–286Navigation, connected 286–288Net 69–70Net, high load retaining 68Number plate lamps 234
O
Obstacle detection 177
Page 310 of 320
310
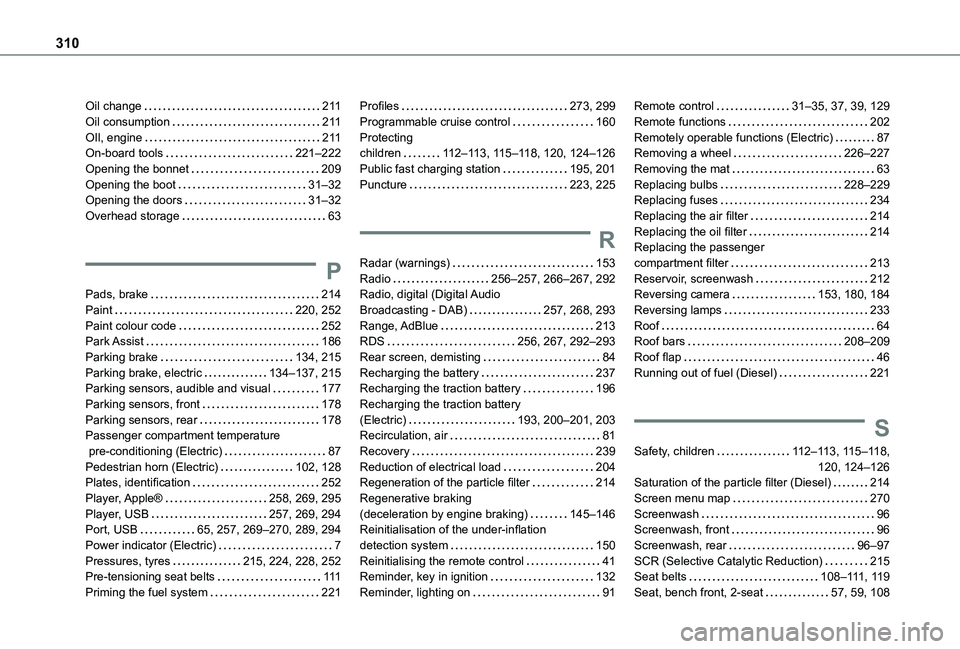
Oil change 2 11Oil consumption 2 11OIl, engine 2 11On-board tools 221–222Opening the bonnet 209Opening the boot 31–32Opening the doors 31–32Overhead storage 63
P
Pads, brake 214Paint 220, 252Paint colour code 252Park Assist 186Parking brake 134, 215Parking brake, electric 134–137, 215Parking sensors, audible and visual 177Parking sensors, front 178Parking sensors, rear 178Passenger compartment temperature
pre-conditioning (Electric) 87Pedestrian horn (Electric) 102, 128Plates, identification 252Player, Apple® 258, 269, 295Player, USB 257, 269, 294Port, USB 65, 257, 269–270, 289, 294Power indicator (Electric) 7Pressures, tyres 215, 224, 228, 252Pre-tensioning seat belts 111Priming the fuel system 221
Profiles 273, 299Programmable cruise control 160Protecting children 11 2–11 3, 11 5–11 8, 120, 124–126Public fast charging station 195, 201Puncture 223, 225
R
Radar (warnings) 153Radio 256–257, 266–267, 292Radio, digital (Digital Audio Broadcasting - DAB) 257, 268, 293Range, AdBlue 213RDS 256, 267, 292–293Rear screen, demisting 84Recharging the battery 237Recharging the traction battery 196Recharging the traction battery (Electric) 193, 200–201, 203Recirculation, air 81
Recovery 239Reduction of electrical load 204Regeneration of the particle filter 214Regenerative braking (deceleration by engine braking) 145–146Reinitialisation of the under-inflation detection system 150Reinitialising the remote control 41Reminder, key in ignition 132Reminder, lighting on 91
Remote control 31–35, 37, 39, 129Remote functions 202Remotely operable functions (Electric) 87Removing a wheel 226–227Removing the mat 63Replacing bulbs 228–229Replacing fuses 234Replacing the air filter 214Replacing the oil filter 214Replacing the passenger compartment filter 213Reservoir, screenwash 212Reversing camera 153, 180, 184Reversing lamps 233Roof 64Roof bars 208–209Roof flap 46Running out of fuel (Diesel) 221
S
Safety, children 11 2–11 3, 11 5–11 8, 120, 124–126Saturation of the particle filter (Diesel) 214Screen menu map 270Screenwash 96Screenwash, front 96Screenwash, rear 96–97SCR (Selective Catalytic Reduction) 215Seat belts 108–111, 11 9Seat, bench front, 2-seat 57, 59, 108