2022 TOYOTA PROACE CITY parking
[x] Cancel search: parkingPage 227 of 320
227
In the event of a breakdown
8
Spare wheel
NOTIC E
For more information on the Tool kit, refer to the corresponding section.
► Park the vehicle, taking care to avoid obstructing traffic, and apply the parking brake.► Follow the safety instructions (hazard warning lamps, warning triangle, wearing high visibility vest, etc.) according to the legislation in force in the country where you are driving.► Switch off the ignition.
Access to the spare wheel
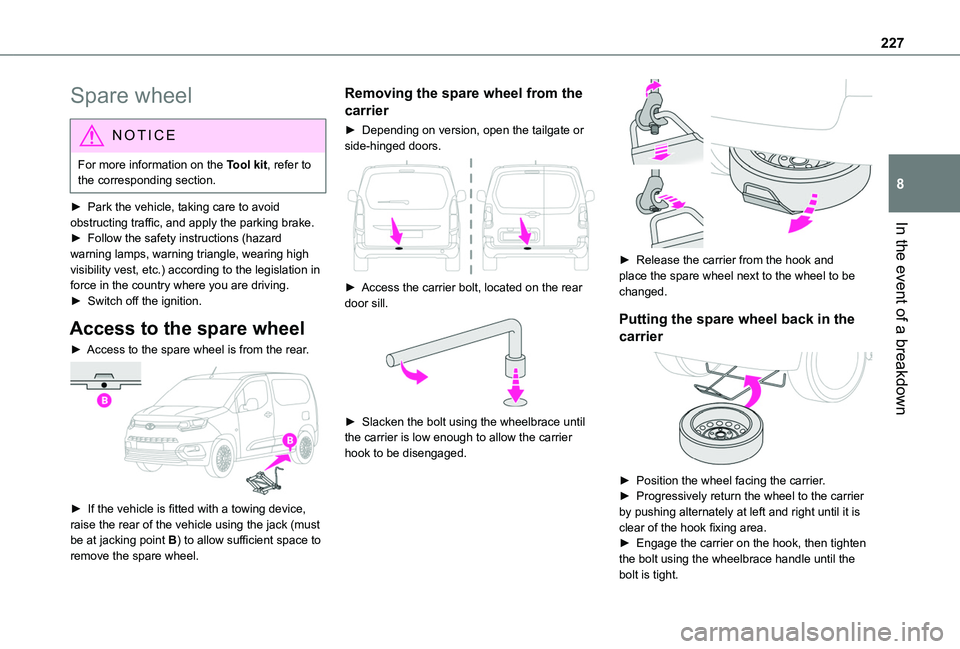
► Access to the spare wheel is from the rear.
► If the vehicle is fitted with a towing device, raise the rear of the vehicle using the jack (must be at jacking point B) to allow sufficient space to
remove the spare wheel.
Removing the spare wheel from the
carrier
► Depending on version, open the tailgate or side-hinged doors.
► Access the carrier bolt, located on the rear door sill.
► Slacken the bolt using the wheelbrace until the carrier is low enough to allow the carrier hook to be disengaged.
► Release the carrier from the hook and place the spare wheel next to the wheel to be changed.
Putting the spare wheel back in the
carrier
► Position the wheel facing the carrier.► Progressively return the wheel to the carrier by pushing alternately at left and right until it is clear of the hook fixing area.► Engage the carrier on the hook, then tighten the bolt using the wheelbrace handle until the bolt is tight.
Page 228 of 320
228
Removing a wheel
WARNI NG
Parking the vehicleImmobilise the vehicle where it does not obstruct traffic: the ground must be level, stable and non-slippery.With a manual gearbox, engage first gear to lock the wheels, apply the parking brake, unless it is programmed to be in automatic mode, and switch off the ignition.With an automatic gearbox, select mode P to lock the wheels, apply the parking brake, unless it is programmed to be in automatic mode, and switch off the ignition.Check for the fixed illumination of the parking brake warning lamps in the instrument panel.The occupants must get out of the vehicle and wait where they are safe.If necessary, place a chock under the wheel diagonally opposite the wheel to be changed.Never go underneath a vehicle raised using a
jack; use an axle stand.
NOTIC E
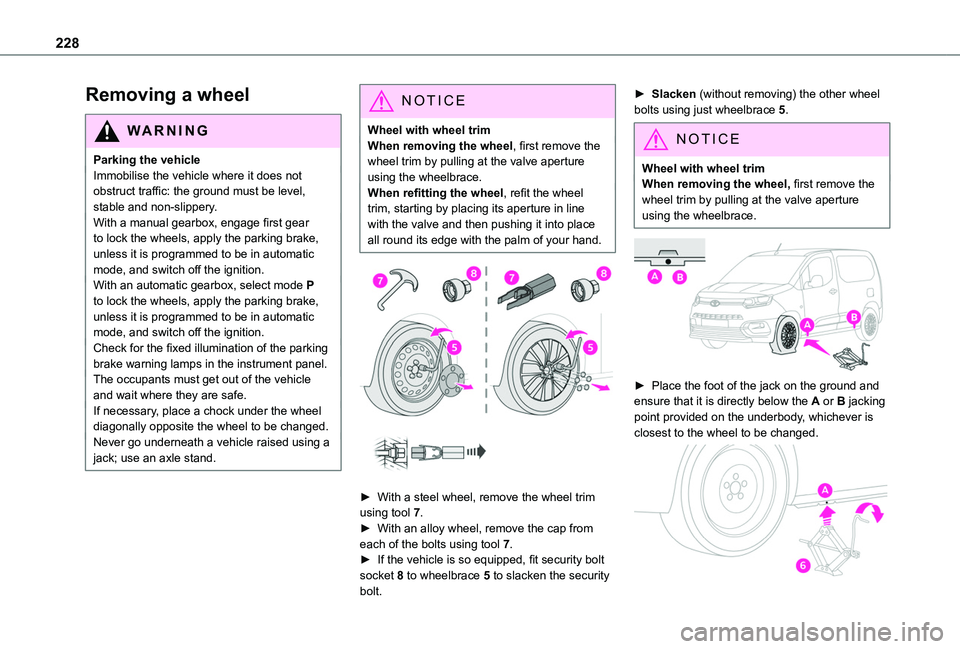
Wheel with wheel trimWhen removing the wheel, first remove the wheel trim by pulling at the valve aperture using the wheelbrace.When refitting the wheel, refit the wheel trim, starting by placing its aperture in line with the valve and then pushing it into place all round its edge with the palm of your hand.
► With a steel wheel, remove the wheel trim using tool 7.► With an alloy wheel, remove the cap from each of the bolts using tool 7.
► If the vehicle is so equipped, fit security bolt socket 8 to wheelbrace 5 to slacken the security bolt.
► Slacken (without removing) the other wheel bolts using just wheelbrace 5.
NOTIC E
Wheel with wheel trimWhen removing the wheel, first remove the wheel trim by pulling at the valve aperture using the wheelbrace.
► Place the foot of the jack on the ground and ensure that it is directly below the A or B jacking point provided on the underbody, whichever is closest to the wheel to be changed.
Page 241 of 320
241
In the event of a breakdown
8
Towing
Procedure for having your vehicle towed or for towing another vehicle using the towing eye.
NOTIC E
General recommendationsObserve the legislation in force in the country where you are driving.Ensure that the weight of the towing vehicle is higher than that of the towed vehicle.The driver must remain at the wheel of the towed vehicle and must have a valid driving licence.When towing a vehicle with all four wheels on the ground, always use an approved towbar; ropes and straps are prohibited.
The towing vehicle must move off gently.When the vehicle is towed with its engine off, there is no longer braking and steering assistance.
WARNI NG
A professional recovery service must be called if:– broken down on a motorway or main road;
– not possible to put the gearbox into neutral, unlock the steering, or release the parking brake;– not possible to tow a vehicle with an automatic gearbox, with the engine running;– towing with only two wheels on the ground;– four-wheel drive vehicle;– no approved towbar available.
WARNI NG
Before towing the vehicle, it is essential to put the vehicle in free-wheeling mode.For more information on Free-wheeling, refer to the corresponding section.
NOTIC E
Electric motorAn electric vehicle cannot under any circumstances be used to tow another vehicle.However, it may be used, for example, to exit a rut.
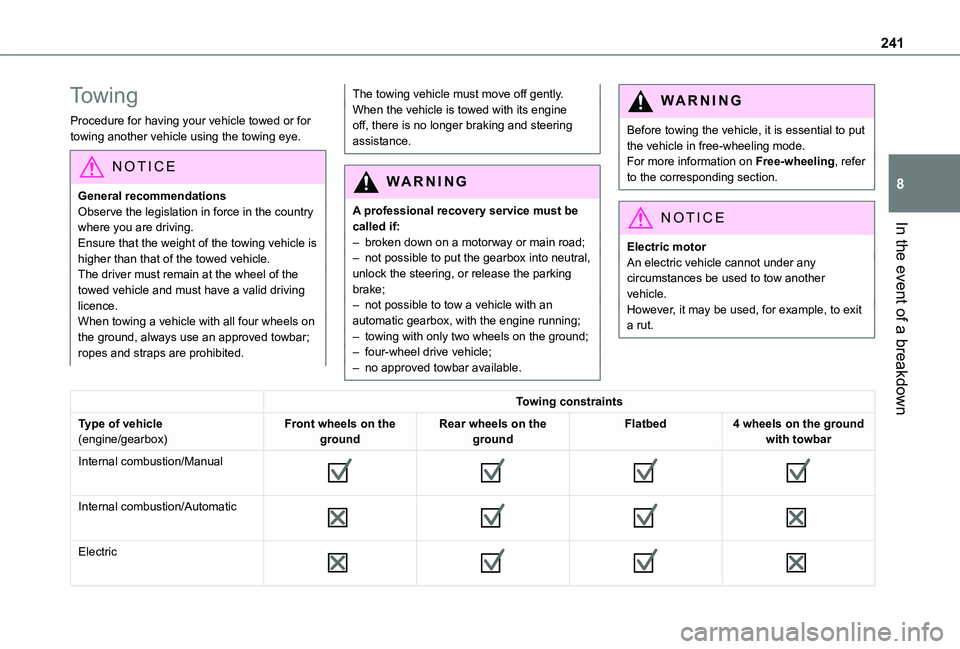
Towing constraints
Type of vehicle(engine/gearbox)Front wheels on the groundRear wheels on the groundFlatbed4 wheels on the ground with towbar
Internal combustion/Manual
Internal combustion/Automatic
Electric
Page 242 of 320
242
NOTIC E
In case of battery or electric parking brake failure, it is essential to call a professional using flatbed recovery vehicles (excluding manual gearbox).
Accessing the eye
NOTIC E
For more information on the Tool kit, refer to the corresponding section.
WARNI NG
With a manual gearbox, move the gear lever into neutral.With an automatic gearbox, place the gear selector into position N.Failure to adhere to this instruction may lead to damage to braking system components and the lack of braking assistance on restarting the engine.
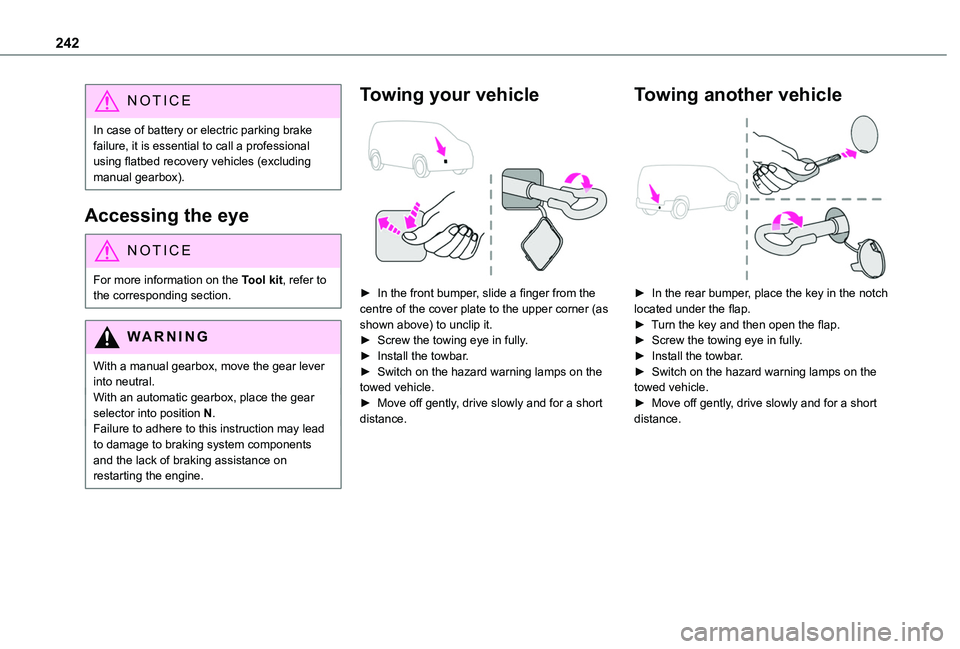
Towing your vehicle
► In the front bumper, slide a finger from the centre of the cover plate to the upper corner (as shown above) to unclip it.► Screw the towing eye in fully.► Install the towbar.► Switch on the hazard warning lamps on the towed vehicle.► Move off gently, drive slowly and for a short distance.
Towing another vehicle
► In the rear bumper, place the key in the notch located under the flap.► Turn the key and then open the flap.► Screw the towing eye in fully.► Install the towbar.► Switch on the hazard warning lamps on the towed vehicle.► Move off gently, drive slowly and for a short distance.
Page 262 of 320
262
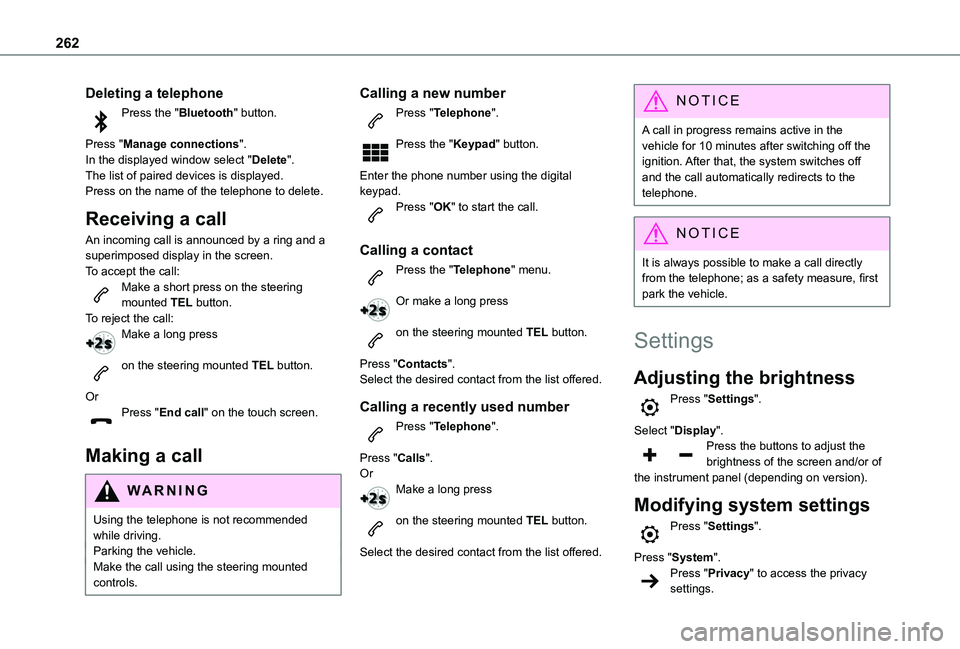
Deleting a telephone
Press the "Bluetooth" button.
Press "Manage connections".In the displayed window select "Delete".The list of paired devices is displayed.Press on the name of the telephone to delete.
Receiving a call
An incoming call is announced by a ring and a superimposed display in the screen.To accept the call:Make a short press on the steering mounted TEL button.To reject the call:Make a long press
on the steering mounted TEL button.
OrPress "End call" on the touch screen.
Making a call
WARNI NG
Using the telephone is not recommended while driving.Parking the vehicle.Make the call using the steering mounted controls.
Calling a new number
Press "Telephone".
Press the "Keypad" button.
Enter the phone number using the digital keypad.Press "OK" to start the call.
Calling a contact
Press the "Telephone" menu.
Or make a long press
on the steering mounted TEL button.
Press "Contacts".Select the desired contact from the list offered.
Calling a recently used number
Press "Telephone".
Press "Calls".OrMake a long press
on the steering mounted TEL button.
Select the desired contact from the list offered.
NOTIC E
A call in progress remains active in the vehicle for 10 minutes after switching off the ignition. After that, the system switches off and the call automatically redirects to the telephone.
NOTIC E
It is always possible to make a call directly from the telephone; as a safety measure, first park the vehicle.
Settings
Adjusting the brightness
Press "Settings".
Select "Display".Press the buttons to adjust the brightness of the screen and/or of the instrument panel (depending on version).
Modifying system settings
Press "Settings".
Press "System".Press "Privacy" to access the privacy settings.
Page 275 of 320
275
TOYOTA Connect Radio
11
on the steering mounted PHONE button to reject the call.OrPress "End call".
Making a call
WARNI NG
Using the telephone is not recommended while driving.Parking the vehicle.Make the call using the steering mounted controls.
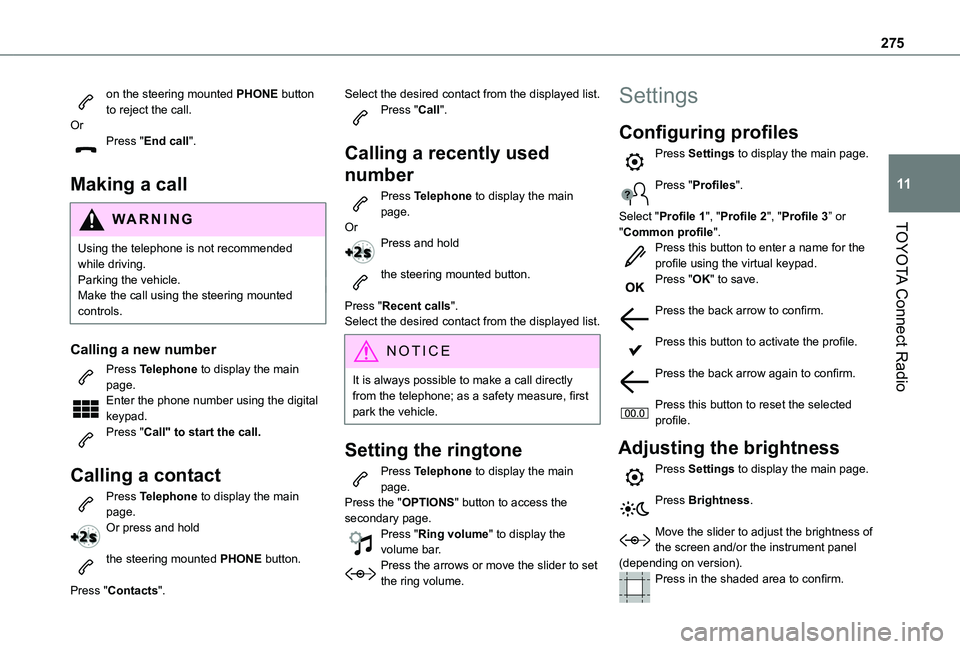
Calling a new number
Press Telephone to display the main page. Enter the phone number using the digital keypad.Press "Call" to start the call.
Calling a contact
Press Telephone to display the main page. Or press and hold
the steering mounted PHONE button.
Press "Contacts".
Select the desired contact from the displayed list.Press "Call".
Calling a recently used
number
Press Telephone to display the main page.OrPress and hold
the steering mounted button.
Press "Recent calls".Select the desired contact from the displayed list.
NOTIC E
It is always possible to make a call directly from the telephone; as a safety measure, first park the vehicle.
Setting the ringtone
Press Telephone to display the main page. Press the "OPTIONS" button to access the secondary page.Press "Ring volume" to display the volume bar.Press the arrows or move the slider to set the ring volume.
Settings
Configuring profiles
Press Settings to display the main page.
Press "Profiles".
Select "Profile 1", "Profile 2", "Profile 3” or "Common profile".Press this button to enter a name for the profile using the virtual keypad.Press "OK" to save.
Press the back arrow to confirm.
Press this button to activate the profile.
Press the back arrow again to confirm.
Press this button to reset the selected profile.
Adjusting the brightness
Press Settings to display the main page.
Press Brightness.
Move the slider to adjust the brightness of the screen and/or the instrument panel (depending on version).Press in the shaded area to confirm.
Page 283 of 320
283
TOYOTA Connect Nav
12
some examples or take you through it step by step. There's more information available in "novice" mode. You can set the dialogue mode to "expert" when you feel comfortable.
Global voice commands
Voice commands
Set dialogue mode as novice - expertSelect user 1 / Select profile JohnIncrease temperatureDecrease temperatureHelp messages
There are lots of topics I can help you with. You can say: "help with phone", "help with navigation", "help with media" or "help with radio". For an overview on how to use voice controls, you can say "help with voice controls".Say "yes" if I got that right. Otherwise, say "no" and we'll start that again.
"Navigation" voice
commands
Voice commands
Navigate homeNavigate to workNavigate to preferred address, Tennis clubNavigate to contact, John MillerNavigate to address 11 regent street, London
Help messages
To plan a route, say "navigate to" followed by the address, the contact name or an intersection. For example, "navigate to address 11 Regent Street, London", "navigate to contact, John Miller", or "navigate to intersection of Regent Street, London". You can specify if it's a preferred address, or a Point of Interest. For example, say "navigate to preferred address, Tennis club", or "navigate to POI Heathrow Airport in London". Or, you can just say, "navigate home". To see Points of Interest on a map, you can say things like "show POI hotels in Banbury". For more information say "help with points of interest" or "help with route guidance".To choose a destination, say something like "navigate to line three" or "select line two". If you can't find the destination but the street's right, say for example "select the street in line three". To move around a displayed list, you can say "next page" or "previous page". You can undo your last action and start over by saying "undo",
or say "cancel" to cancel the current action.Voice commands
Tell me the remaining distanceTell me the remaining timeTell me the arrival timeStop route guidanceHelp messages
You can say "stop" or "resume route guidance". To get information about your current route, you can say "tell me the remaining time", "remaining distance" or "arrival time". To learn more commands, try saying "help with navigation". Voice commands
Show POI ''hotel'' at the destinationShow nearby POI petrol stationNavigate to POI Heathrow Airport in LondonNavigate to POI petrol station along the routeHelp messages
To see points of interest on a map, you can say things like "show hotels in Banbury", "show nearby parking", "show hotel at the destination" or "show petrol station along the route". If you prefer to navigate directly to a point of interest, you can say "navigate to nearby petrol station". If you feel you are not being well understood, try to say the word "POI" in front of the point of interest. For example say "navigate to POI restaurant at the destination".
To choose a POI, say something like "select line 2". If you've searched for a Point of Interest and don't see the one you're after, you can filter further by saying something like "select POI in line 2", or "select the city in line 3". You can also scroll through the list by saying "next page" or "previous page".
Page 309 of 320
309
Alphabetical index
Inflating tyres 215, 252Inflating tyres and accessories (using the kit) 223–224Infrared camera 153Instrument panel 8, 10, 154Internet browser 286, 290ISOFIX 124
J
Jack 225, 294Jump starting 236
K
Key 31, 33–35, 37, 39Key, electronic 31, 133Keyless Entry and Starting 32–38, 130, 132–133Key not recognised 133
Key with remote control 37–38Kit, hands-free 259, 271–272, 295–296Kit, puncture repair 221Kit, temporary puncture repair 221, 223–225
L
Labels 6, 61Labels, identification 252
Lamps, parking 91Lamps, rear 233Lane departure warning active 171LEDs - Light-emitting diodes 92, 229Level, AdBlue® 213Level, brake fluid 212Level, Diesel additive 213–214Level, engine coolant 18, 212Level, engine oil 2 11Level, headlamp wash 96Levels and checks 210–212Level, screenwash fluid 96, 212Light-emitting diodes - LEDs 92, 229Lighting 90Lighting, exterior 90, 93Lighting, guide-me home 93Lighting, welcome 93Loading 71, 208Load reduction mode 204Load restraint 70Locating your vehicle 32Locking 32–33, 37–38
Locking from the inside 42–43Long load support bar 46Low fuel level 190–192Lumbar 53
M
Mains socket (domestic network) 195Maintenance (advice) 193, 219
Maintenance, routine 18, 154, 213Manoeuvring aids (recommendations) 152Markings, identification 252Mat 63, 154Memorising a speed 167Menu 270Menu, main 28Menus (audio) 254–255, 265–266, 278–279Menu short cuts 28Messages 297Messages, quick 298Mirror, child surveillance 57Mirror, rear view 57Mirrors, door 56, 84, 174Misfuel prevention 192Mobile application 29, 87, 202Motor, electric 132, 2 11, 251Mountings, ISOFIX 122
N
Navigation 284–286Navigation, connected 286–288Net 69–70Net, high load retaining 68Number plate lamps 234
O
Obstacle detection 177