2022 TOYOTA PROACE CITY ad blue
[x] Cancel search: ad bluePage 219 of 320
219
Practical information
7
If swallowed, immediately wash out the mouth with clean water and then drink plenty of water.In certain conditions (high temperature, for example), the risk of release of ammonia cannot be excluded: do not inhale the fluid. Ammonia vapours have an irritant effect on mucous membranes (eyes, nose and throat).
WARNI NG
Store AdBlue® out of the reach of children, in
its original container.
Precautions for use
AdBlue® is a urea-based solution. This fluid is non-flammable, colourless and odourless (when kept in a cool place).In the event of contact with the skin, wash the affected area with soap and running water. In the event of contact with the eyes, immediately rinse the eyes with large amounts of water or with an eye wash solution for at least 15 minutes. Seek medical attention if you feel a persistent burning sensation or irritation.If swallowed, immediately wash out the mouth with clean water and then drink plenty of water.In certain conditions (high temperature, for example), the risk of release of ammonia cannot be excluded: do not inhale the fluid. Ammonia vapours have an irritant effect on mucous membranes (eyes, nose and throat).
WARNI NG
Store AdBlue® out of the reach of children, in its original container.
Procedure
Before starting the top-up procedure, ensure that the vehicle is parked on a flat and level surface.In wintry conditions, ensure that the temperature of the vehicle is above -11°C. Otherwise the AdBlue® may be frozen and so cannot be poured into the tank. Park the vehicle in a warmer area for a few hours to allow the top-up to be carried out.
WARNI NG
Never pour the AdBlue® into the Diesel fuel tank.
WARNI NG
If any AdBlue® is splashed, or if there are any spillages on the bodywork, rinse immediately with cold water or wipe with a damp cloth.If the fluid has crystallised, clean it off using a sponge and hot water.
WARNI NG
Important: in the event of a top-up after a breakdown because of a lack of AdBlue, it is essential to wait around 5 minutes before switching on the ignition, without opening the driver’s door, unlocking the vehicle, inserting the key into the ignition switch, or bringing the key for the "Keyless Entry and Starting" system into the passenger compartment.Switch on the ignition, then wait for 10 seconds before starting the engine.
► Switch off the ignition and remove the key from the switch to switch off the engine.or► With Keyless Entry and Starting, press the "START/STOP" button to switch off the engine.
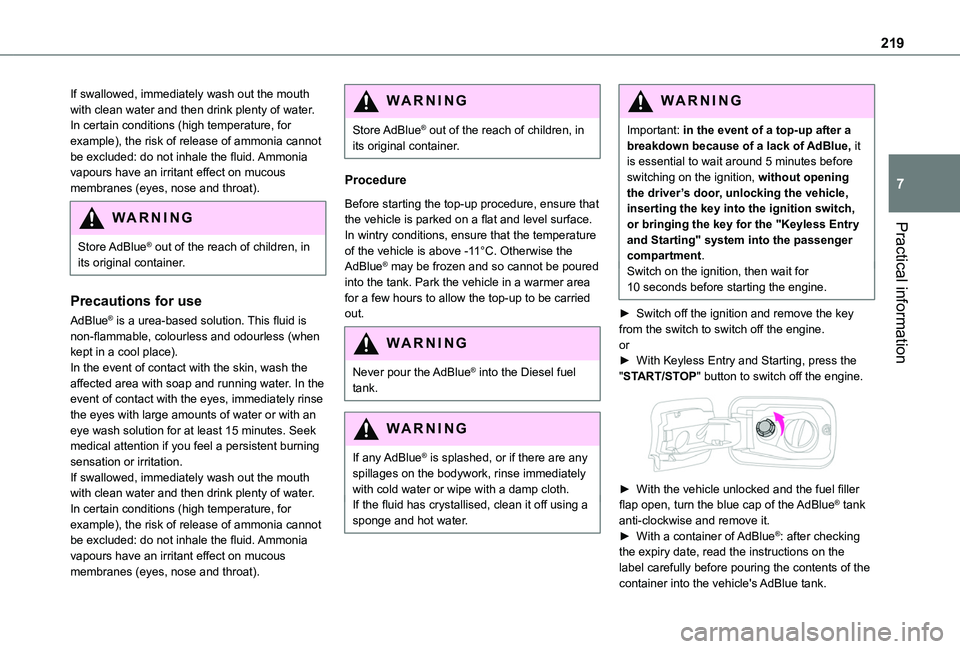
► With the vehicle unlocked and the fuel filler flap open, turn the blue cap of the AdBlue® tank anti-clockwise and remove it.► With a container of AdBlue®: after checking the expiry date, read the instructions on the label carefully before pouring the contents of the container into the vehicle's AdBlue tank.
Page 220 of 320
220
► With an AdBlue® pump: insert the nozzle and fill the tank until the nozzle automatically cuts out.
WARNI NG
In order not to overfill the AdBlue® tank:– Add between 10 and 13 litres using AdBlue® containers.– Stop after the nozzle’s first automatic cut-
out, if you are refilling at a service station.The system only registers AdBlue® top-ups of 5 litres or more.
WARNI NG
If the AdBlue® tank is completely empty – which is confirmed by the message "Top up AdBlue: Starting impossible" – it is essential to add at least 5 litres.
After refilling
► Refit the blue cap to the tank filler and turn it clockwise, as far as it will go.► Close the fuel filler flap.
Do not dispose of AdBlue® bottles or containers in the household waste.Place them in a container reserved for this purpose or take them back to where you purchased them.
Free-wheeling
In certain situations, you must allow the vehicle to free-wheel (while being towed, on a rolling road, in an automatic car wash, or being transported by rail or sea freight, etc.).The procedure varies according to the type of gearbox and parking brake.
WARNI NG
Do not leave the vehicle unattended while coasting.
With a manual gearbox and
electric parking brake /
To release them
► With the engine running and while depressing the brake pedal, move the gear selector to the neutral position.
► While depressing the brake pedal, switch off the ignition.► Release the brake pedal, then switch on the ignition again.► While depressing the brake pedal, press the control lever to release the parking brake.► Release the brake pedal, then switch off the ignition.
Reverting to normal operation
► While depressing the brake pedal, restart the engine.
With an automatic gearbox
and electric parking brake /
To release them
► With the engine running and while depressing the brake pedal, set the gear selector to N.► While depressing the brake pedal, switch off the ignition.
► Release the brake pedal, then switch on the ignition again.► While depressing the brake pedal, press the control lever to release the parking brake.► Release the brake pedal, then switch off the ignition.
Reverting to normal operation
► While depressing the brake pedal, restart the engine, then set the gear selector to P.
Page 255 of 320
255
Touch screen BLUETOOTH audio system
10
Touch screen
BLUETOOTH audio
system
Multimedia audio system -
Bluetooth® telephone
NOTIC E
The functions and settings described vary according to the vehicle version and configuration.
WARNI NG
For safety reasons and because they require sustained attention by the driver, the following operations must be carried out with the vehicle stationary and the ignition on:– Pairing the smartphone with the system in Bluetooth mode.– Using the smartphone.– Changing the system settings and configuration.
NOTIC E
The system is protected in such a way that it will only operate in the vehicle.The Energy Economy Mode message is displayed when the system is about to enter the corresponding mode.
First steps
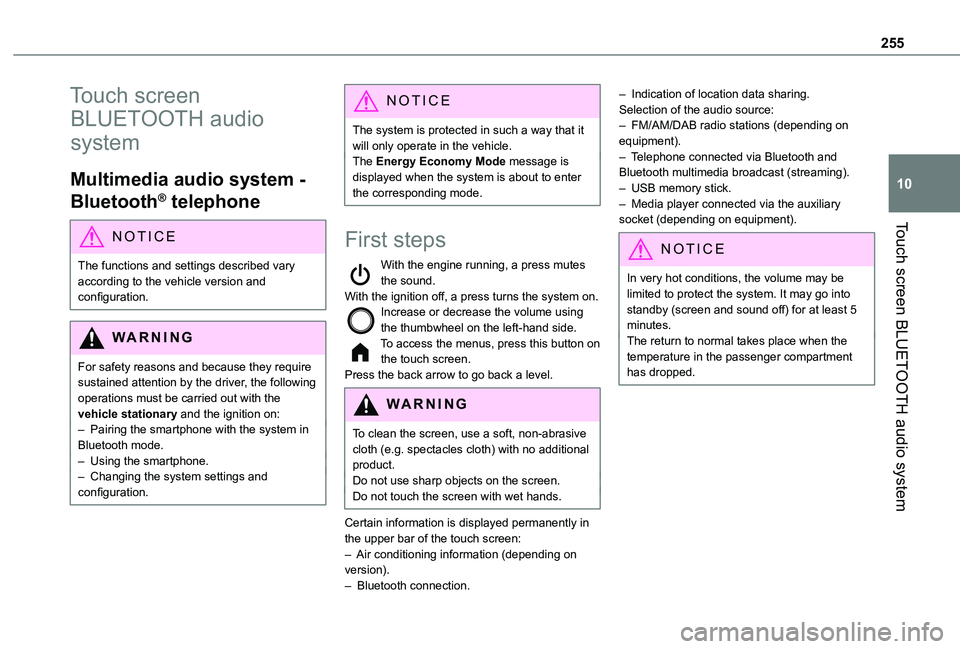
With the engine running, a press mutes the sound.With the ignition off, a press turns the system on.Increase or decrease the volume using the thumbwheel on the left-hand side.To access the menus, press this button on the touch screen.Press the back arrow to go back a level.
WARNI NG
To clean the screen, use a soft, non-abrasive cloth (e.g. spectacles cloth) with no additional product.Do not use sharp objects on the screen.Do not touch the screen with wet hands.
Certain information is displayed permanently in the upper bar of the touch screen:– Air conditioning information (depending on version).– Bluetooth connection.
– Indication of location data sharing.Selection of the audio source:– FM/AM/DAB radio stations (depending on equipment).– Telephone connected via Bluetooth and Bluetooth multimedia broadcast (streaming).– USB memory stick.– Media player connected via the auxiliary socket (depending on equipment).
NOTIC E
In very hot conditions, the volume may be limited to protect the system. It may go into standby (screen and sound off) for at least 5 minutes.The return to normal takes place when the temperature in the passenger compartment has dropped.
Page 257 of 320
257
Touch screen BLUETOOTH audio system
10
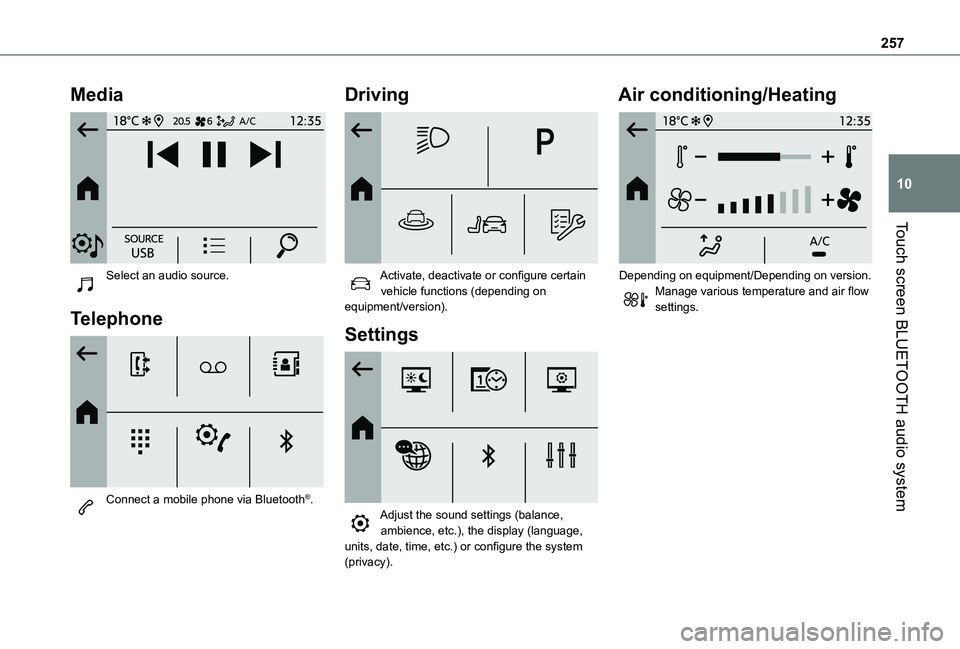
Media
Select an audio source.
Telephone
Connect a mobile phone via Bluetooth®.
Driving
Activate, deactivate or configure certain vehicle functions (depending on equipment/version).
Settings
Adjust the sound settings (balance, ambience, etc.), the display (language,
units, date, time, etc.) or configure the system (privacy).
Air conditioning/Heating
Depending on equipment/Depending on version.Manage various temperature and air flow settings.
Page 259 of 320
259
Touch screen BLUETOOTH audio system
10
DAB (Digital Audio
Broadcasting) radio
Terrestrial Digital Radio
Choosing the DAB radio
Terrestrial digital radio (DAB) provides higher quality reception.The different "multiplexes/ensembles" offer a choice of radio stations arranged in alphabetical order.Press the "Radio" menu.
Press the "SOURCE" button.In the list of available sources, choose "DAB Radio".
Activating FM-DAB Tracking
"DAB" does not cover 100% of the territory.When the digital radio signal is poor, the "FM-DAB tracking" allows you to continue listening to the same station, by automatically
switching to the corresponding "FM" analogue station (if there is one).Press the "Radio Settings" button.
Activate "DAB-FM".
NOTIC E
If "FM-DAB tracking" is activated, there may be a difference of a few seconds when the system switches to "FM" analogue radio with sometimes a variation in volume.Once the digital signal quality is restored, the system automatically changes back to "DAB".
WARNI NG
If the "DAB" station being listened to is not available on "FM", or if the "FM-DAB tracking" is not activated, the sound will cut out while the digital signal is too weak.
Media
Selecting the source
Press the "Media" menu.
Press the "SOURCE" button.Select the source (USB, Bluetooth or AUX, depending on equipment).
USB port
Insert the USB memory stick into the USB port or connect the USB device to the USB port using a suitable cable (not supplied).
WARNI NG
To protect the system, do not use a USB hub.
The system builds playlists (in temporary memory); this operation can take from a few seconds to several minutes at the first connection.Playlists are updated whenever a USB memory stick is connected or the contents of a particular USB memory stick are changed. The lists are memorised: if they are not modified, the subsequent loading time will be shorter.
Auxiliary (AUX) jack socket
Depending on equipmentConnect a portable device (MP3 player, etc.) to the auxiliary jack socket using an audio cable (not supplied).This source is only available if "Aux Amplification" has been selected in the audio settings.
First adjust the volume on the portable device (to a high level). Then adjust the volume of the audio system.Controls are managed via the portable device.
Page 260 of 320
260
Bluetooth®streaming
Streaming allows you to listen to music from your smartphone.The Bluetooth profile must be activated, first adjust the volume on the portable device (to a high level).Then adjust the volume of the system.If play does not start automatically, it may be necessary to start the audio playback from the smartphone.Control is from the portable device or by using the system's touch buttons.
WARNI NG
Once connected in Streaming mode, the smartphone is considered to be a media source.
Connecting Apple® players
Connect the Apple® player to the USB socket using a suitable cable (not supplied).Play starts automatically.Control is via the audio system.
NOTIC E
The classifications available are those of the portable device connected (artists/albums/
genres/playlists/audio books/podcasts). It is
also possible to use a classification structured in the form of a library.The default classification used is by artist. To modify the classification used, return to the first level of the menu then select the desired classification (playlists for example) and confirm to go down through the menu to the desired track.
The version of software in the audio system may not be compatible with the generation of the Apple® player.
Media settings
Press the "Media Settings" button.
Activate/deactivate track playback options and access the audio settings.
NOTIC E
The audio settings are the same as the audio settings for the radio. For more information on the "Audio settings", refer to the corresponding section.
Information and advice
The system supports USB mass storage devices, BlackBerry® devices or Apple® players via the USB ports. The adapter cable is not supplied.
Devices are managed using the audio system controls.Other devices, not recognised on connection, must be connected to the auxiliary socket using a jack cable (not supplied) or via Bluetooth streaming, if compatible.
WARNI NG
To protect the system, do not use a USB hub.
The audio system will only play audio files with ".wav", ".wma", ".aac", ".mp3", ".mp4", ".m4a", ".flac", ".ogg" file extensions and with a bit rate of between 32 Kbps and 320 Kbps (300 Kbps maximum for ".flac" files).It also supports VBR (Variable Bit Rate) mode.All ".wma" files must be standard WMA 9 files.The supported sampling rates are 11, 22, 44 and 48 KHz.To avoid reading and display problems, we recommend choosing file names less than 20 characters long that do not contain any special characters (e.g. “ ? . ; ù).Use only USB memory sticks in FAT or FAT32 format (File Allocation Table).
NOTIC E
We recommend using the original USB cable for the portable device.
Page 261 of 320
261
Touch screen BLUETOOTH audio system
10
Telephone
Pairing a Bluetooth®
telephone
Up to 10 phones can be paired to the system.Activate the Bluetooth function on the telephone beforehand and ensure that it is "visible to all" (telephone configuration).To complete the pairing, whichever procedure is used (from the telephone or from the system), ensure that the code is the same in the system and in the telephone.
WARNI NG
The services available depend on the network, the SIM card and the compatibility of the Bluetooth devices used. Check for services availability in the phone's manual and with the operator.
NOTIC E
The profiles compatible with the system are: HFP, OPP, PBAP, DID, A2DP, AVRCP, SPP and PAN.
Go to the Brand's website for more information
(compatibility, additional help, etc.).
Procedure from the telephone
Select the name of the system in the list of devices detected.In the system, accept the connection request from the telephone.
Procedure from the system
Press the Home button to access the menus.Select the "Telephone" menu.
Press "Manage connections".The list of telephones detected is displayed.Select the name of the telephone in the list.The system offers to connect the telephone with two profiles:– as "Telephone": hands-free kit, telephone only.– as "Streaming": wireless playing of audio files on the telephone.
WARNI NG
The system cannot be connected to multiple telephones with the same profile.No more than 2 phones can be connected simultaneously (1 per profile).
NOTIC E
The Bluetooth profiles chosen on the phone have priority over the profiles selected on the system.
If the pairing procedure fails, it is recommended that you deactivate and then reactivate the Bluetooth function on the telephone.
NOTIC E
Depending on the type of telephone, the option is given to accept or not accept the transfer of contacts and the call log.
Automatic reconnection
On return to the vehicle, if the last telephone connected is present again, it is automatically recognised and within about 30 seconds of switching on the ignition, the pairing is established automatically (Bluetooth activated).
Managing paired telephones
To connect or disconnect a paired telephone:Select the "Telephone" menu.
Press "Bluetooth" to display the list of paired devices.Press on the name of the telephone chosen in the list to disconnect it.Press again to connect it.
Page 262 of 320
262
Deleting a telephone
Press the "Bluetooth" button.
Press "Manage connections".In the displayed window select "Delete".The list of paired devices is displayed.Press on the name of the telephone to delete.
Receiving a call
An incoming call is announced by a ring and a superimposed display in the screen.To accept the call:Make a short press on the steering mounted TEL button.To reject the call:Make a long press
on the steering mounted TEL button.
OrPress "End call" on the touch screen.
Making a call
WARNI NG
Using the telephone is not recommended while driving.Parking the vehicle.Make the call using the steering mounted controls.
Calling a new number
Press "Telephone".
Press the "Keypad" button.
Enter the phone number using the digital keypad.Press "OK" to start the call.
Calling a contact
Press the "Telephone" menu.
Or make a long press
on the steering mounted TEL button.
Press "Contacts".Select the desired contact from the list offered.
Calling a recently used number
Press "Telephone".
Press "Calls".OrMake a long press
on the steering mounted TEL button.
Select the desired contact from the list offered.
NOTIC E
A call in progress remains active in the vehicle for 10 minutes after switching off the ignition. After that, the system switches off and the call automatically redirects to the telephone.
NOTIC E
It is always possible to make a call directly from the telephone; as a safety measure, first park the vehicle.
Settings
Adjusting the brightness
Press "Settings".
Select "Display".Press the buttons to adjust the brightness of the screen and/or of the instrument panel (depending on version).
Modifying system settings
Press "Settings".
Press "System".Press "Privacy" to access the privacy settings.