2022 TOYOTA PROACE CITY warning lights
[x] Cancel search: warning lightsPage 19 of 320

19
Instruments
1
SCR emissions control system (Diesel)Fixed when the ignition is switched on, accompanied by an audible signal and a message.A malfunction involving the SCR emissions control system has been detected.This alert disappears once the exhaust emissions return to normal levels.Flashing AdBlue® warning lamp on switching on the ignition, with the Service and Engine self-diagnostics warning lamps on fixed, accompanied by an audible signal and a message indicating the driving range.Depending on the message displayed, it may be possible to drive for up to 1,100 km (685 miles) before the engine immobiliser is triggered.Carry out (3) without delay, to avoid starting being prevented.Flashing AdBlue® warning lamp on switching on the ignition, with the Service and Engine self-diagnostics warning lamps on fixed,
accompanied by an audible signal and a message indicating that starting is prevented.The engine immobiliser prevents the engine from restarting (over the authorised driving limit after confirmation of an emissions control system malfunction).To start the engine, carry out (2).
ServiceTemporarily on, accompanied by the display of a message.One or more minor faults have been detected for which there is no specific warning lamp.Identify the cause of the fault using the message displayed in the instrument panel.You may be able to deal with some faults yourself, such as changing the battery in the remote control.For any other problems, such as a fault with the tyre under-inflation detection system, carry out (3).Fixed, accompanied by the display of a message.One or more major faults for which there is no specific warning lamp have been detected.Identify the cause of the anomaly using the message displayed in the instrument panel, then carry out (3).Fixed, accompanied by the message ‘Parking brake fault’.Automatic release of the electric parking brake is
unavailable.Carry out (2).Service warning lamp fixed and service spanner flashing then fixed.The servicing interval has been exceeded.The vehicle must be serviced as soon as possible.Only with Diesel engines.
Rear foglampFixed.The lamp is on.
Green warning/indicator lamps
Stop & StartFixed.When the vehicle stops the Stop & Start puts the engine into STOP mode.Flashing temporarily.STOP mode is momentarily unavailable or START mode is automatically triggered.For more information, refer to the Driving section.
Vehicle ready to drive (Electric)Fixed, accompanied by an audible signal when it comes on.The vehicle is ready to drive and the thermal comfort systems are available.The indicator lamp goes out upon reaching a speed of approximately 3 mph (5 km/h) and lights up again when the vehicle stops moving.The lamp will go out when you turn off the
engine and exit the vehicle.
Hill Assist Descent ControlFixed.The system has been activated, but the conditions for regulation are not met (gradient, speed too high, gear engaged).Flashing indicator.The function is starting regulation.The vehicle is being braked; the brake lamps
come on during the descent.
Page 21 of 320
21
Instruments
1
Service spannerLights up temporarily when the ignition is switched on.Between 3,000 km (1,800 miles) and 1,000 km (600 miles) remain before the next service is due.Fixed, when the ignition is switched on.The service is due in less than 1,000 km (600 miles).Have your vehicle serviced very soon.
Service spanner flashingFlashing then fixed, when the ignition is switched on.(With Diesel engines, combined with the Service warning lamp.)The servicing interval has been exceeded.Have your vehicle serviced as soon as possible.
Resetting the service indicator
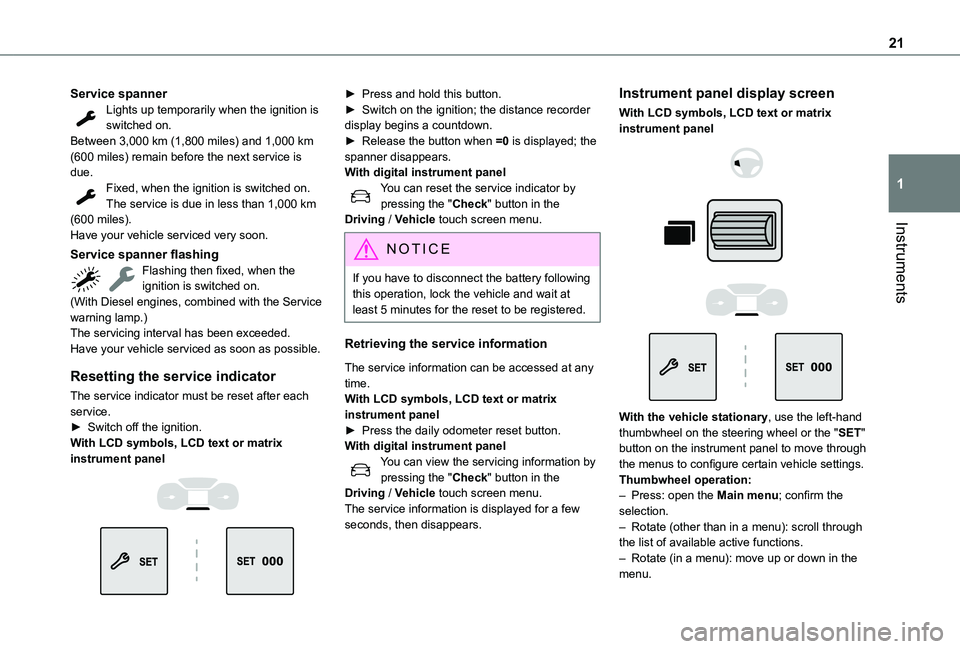
The service indicator must be reset after each service.► Switch off the ignition.With LCD symbols, LCD text or matrix
instrument panel
► Press and hold this button.► Switch on the ignition; the distance recorder display begins a countdown.► Release the button when =0 is displayed; the spanner disappears.With digital instrument panelYou can reset the service indicator by pressing the "Check" button in the Driving / Vehicle touch screen menu.
NOTIC E
If you have to disconnect the battery following this operation, lock the vehicle and wait at least 5 minutes for the reset to be registered.
Retrieving the service information
The service information can be accessed at any time.With LCD symbols, LCD text or matrix instrument panel► Press the daily odometer reset button.With digital instrument panelYou can view the servicing information by pressing the "Check" button in the Driving / Vehicle touch screen menu.The service information is displayed for a few seconds, then disappears.
Instrument panel display screen
With LCD symbols, LCD text or matrix instrument panel
With the vehicle stationary, use the left-hand thumbwheel on the steering wheel or the "SET" button on the instrument panel to move through the menus to configure certain vehicle settings.
Thumbwheel operation:– Press: open the Main menu; confirm the selection.– Rotate (other than in a menu): scroll through the list of available active functions.– Rotate (in a menu): move up or down in the menu.
Page 24 of 320
24
miles and 0 miles)), a warning lamp lights up when the ignition is switched on and an estimate of the distance that can be travelled before engine starting is prevented is displayed in the instrument panel.
WARNI NG
The engine starting prevention system required by regulations is activated
automatically once the AdBlue® tank is empty.
It is then no longer possible to start the engine until the minimum level of AdBlue® has been topped up.
Manual display of the range
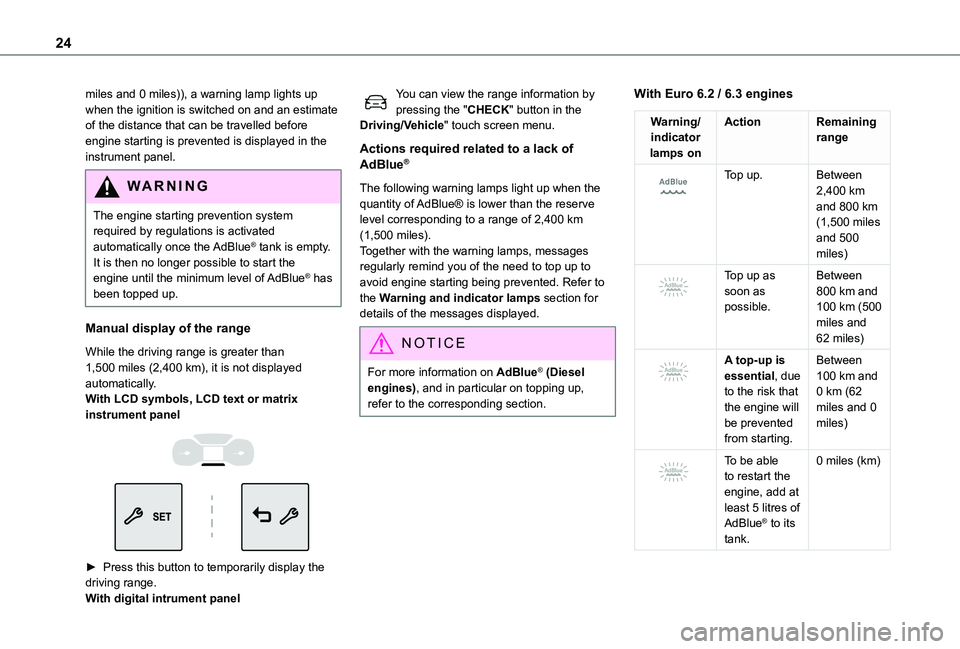
While the driving range is greater than 1,500 miles (2,400 km), it is not displayed automatically.With LCD symbols, LCD text or matrix instrument panel
► Press this button to temporarily display the driving range. With digital intrument panel
You can view the range information by pressing the "CHECK" button in the Driving/Vehicle" touch screen menu.
Actions required related to a lack of AdBlue®
The following warning lamps light up when the quantity of AdBlue® is lower than the reserve level corresponding to a range of 2,400 km (1,500 miles).Together with the warning lamps, messages regularly remind you of the need to top up to avoid engine starting being prevented. Refer to the Warning and indicator lamps section for details of the messages displayed.
NOTIC E
For more information on AdBlue® (Diesel engines), and in particular on topping up, refer to the corresponding section.
With Euro 6.2 / 6.3 engines
Warning/indicator lamps on
ActionRemaining range
Top up.Between 2,400 km and 800 km (1,500 miles and 500
miles)
Top up as soon as possible.
Between 800 km and 100 km (500 miles and 62 miles)
A top-up is essential, due to the risk that the engine will be prevented from starting.
Between 100 km and 0 km (62 miles and 0 miles)
To be able to restart the engine, add at least 5 litres of AdBlue® to its tank.
0 miles (km)
Page 98 of 320
98
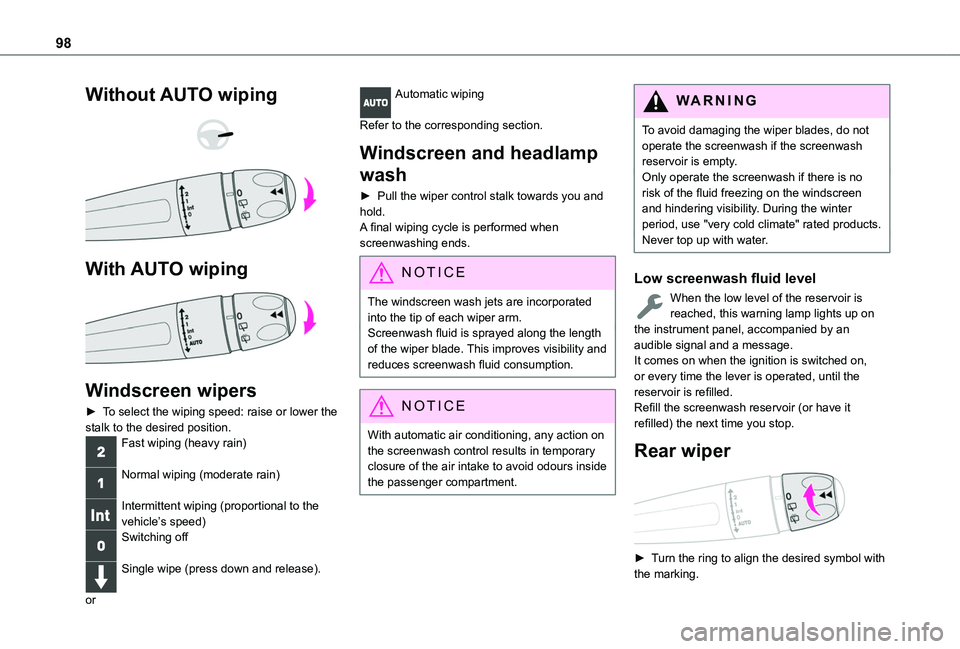
Without AUTO wiping
With AUTO wiping
Windscreen wipers
► To select the wiping speed: raise or lower the stalk to the desired position.Fast wiping (heavy rain)
Normal wiping (moderate rain)
Intermittent wiping (proportional to the vehicle’s speed)Switching off
Single wipe (press down and release).
or
Automatic wiping
Refer to the corresponding section.
Windscreen and headlamp
wash
► Pull the wiper control stalk towards you and hold.A final wiping cycle is performed when screenwashing ends.
NOTIC E
The windscreen wash jets are incorporated into the tip of each wiper arm.Screenwash fluid is sprayed along the length of the wiper blade. This improves visibility and reduces screenwash fluid consumption.
NOTIC E
With automatic air conditioning, any action on the screenwash control results in temporary closure of the air intake to avoid odours inside the passenger compartment.
WARNI NG
To avoid damaging the wiper blades, do not operate the screenwash if the screenwash reservoir is empty.Only operate the screenwash if there is no risk of the fluid freezing on the windscreen and hindering visibility. During the winter period, use "very cold climate" rated products.Never top up with water.
Low screenwash fluid level
When the low level of the reservoir is reached, this warning lamp lights up on the instrument panel, accompanied by an audible signal and a message.It comes on when the ignition is switched on, or every time the lever is operated, until the reservoir is refilled.Refill the screenwash reservoir (or have it refilled) the next time you stop.
Rear wiper
► Turn the ring to align the desired symbol with the marking.
Page 107 of 320
107
Safety
5
Malfunction
If a fault occurs, this warning lamp lights up on the instrument panel, accompanied by a message and an audible signal.To continue towing a trailer, reduce speed and drive carefully!Have it checked by any authorized Toyota retailer or Toyota authorized repairer, or any reliable repairer.
WARNI NG
The trailer stability control system provides an extra safety feature under normal driving conditions, when following the recommendations for use of trailers and current legislation in force in your country. It must not encourage the driver to take extra risks, such as using a trailer in unsuitable conditions of operation (e.g. excessive load, exceeded nose weight, worn or under-inflated tyres, faulty braking system) or driving at excessive speed.In certain cases, the system may not detect trailer snaking, particularly with a light trailer.When driving on slippery or poor surfaces, the system may not be able to prevent sudden trailer snaking.
Toyota Traction Select
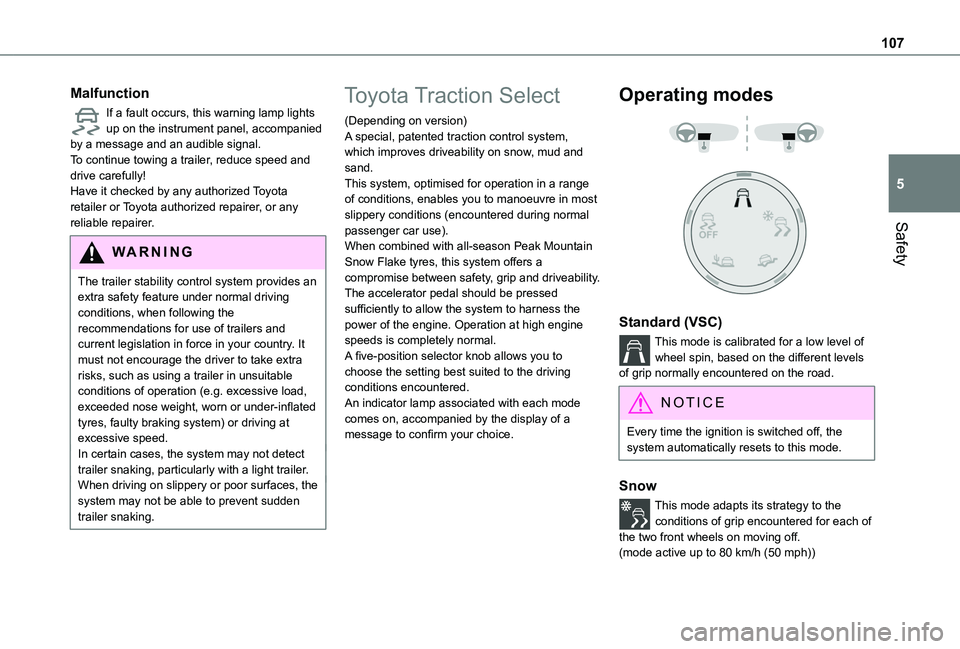
(Depending on version)A special, patented traction control system, which improves driveability on snow, mud and sand.This system, optimised for operation in a range of conditions, enables you to manoeuvre in most slippery conditions (encountered during normal passenger car use).When combined with all-season Peak Mountain Snow Flake tyres, this system offers a compromise between safety, grip and driveability.The accelerator pedal should be pressed sufficiently to allow the system to harness the power of the engine. Operation at high engine speeds is completely normal.A five-position selector knob allows you to choose the setting best suited to the driving conditions encountered.An indicator lamp associated with each mode comes on, accompanied by the display of a message to confirm your choice.
Operating modes
Standard (VSC)
This mode is calibrated for a low level of wheel spin, based on the different levels of grip normally encountered on the road.
NOTIC E
Every time the ignition is switched off, the system automatically resets to this mode.
Snow
This mode adapts its strategy to the conditions of grip encountered for each of the two front wheels on moving off.
(mode active up to 80 km/h (50 mph))
Page 109 of 320
109
Safety
5
NOTIC E
The system is no longer available if the speed of the vehicle is:– Above 70 km/h (43 mph).– Managed by the Adaptive Cruise Control, depending on the type of gearbox.
Switching on
By default, the system is not selected.The state of the function is not saved when the ignition is switched off.
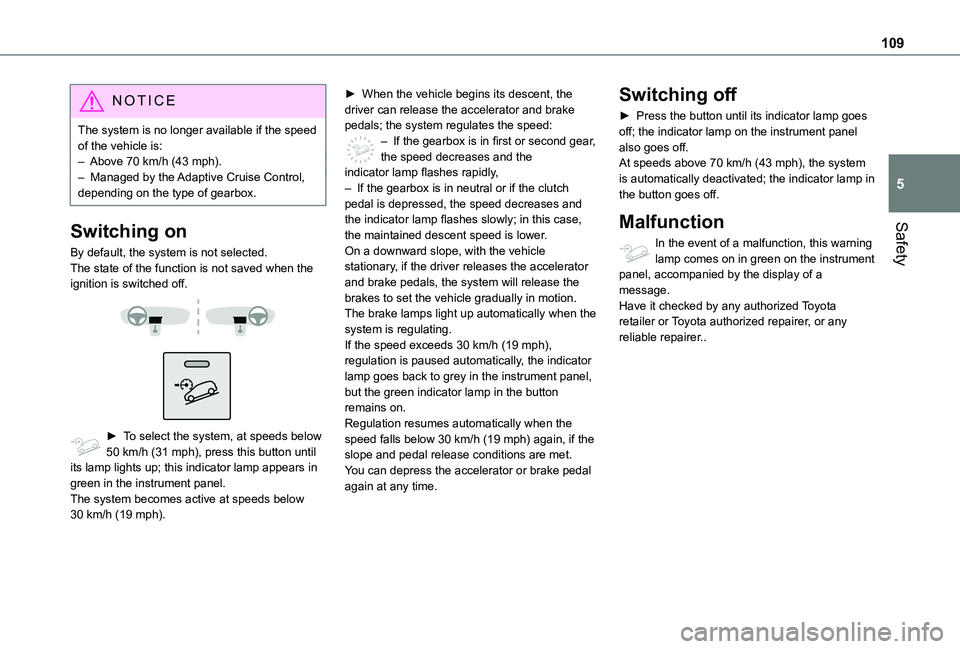
► To select the system, at speeds below 50 km/h (31 mph), press this button until its lamp lights up; this indicator lamp appears in green in the instrument panel.The system becomes active at speeds below 30 km/h (19 mph).
► When the vehicle begins its descent, the driver can release the accelerator and brake pedals; the system regulates the speed:– If the gearbox is in first or second gear, the speed decreases and the indicator lamp flashes rapidly,– If the gearbox is in neutral or if the clutch pedal is depressed, the speed decreases and the indicator lamp flashes slowly; in this case, the maintained descent speed is lower.On a downward slope, with the vehicle stationary, if the driver releases the accelerator and brake pedals, the system will release the brakes to set the vehicle gradually in motion.The brake lamps light up automatically when the system is regulating.If the speed exceeds 30 km/h (19 mph), regulation is paused automatically, the indicator lamp goes back to grey in the instrument panel, but the green indicator lamp in the button remains on.Regulation resumes automatically when the speed falls below 30 km/h (19 mph) again, if the
slope and pedal release conditions are met.You can depress the accelerator or brake pedal again at any time.
Switching off
► Press the button until its indicator lamp goes off; the indicator lamp on the instrument panel also goes off.At speeds above 70 km/h (43 mph), the system is automatically deactivated; the indicator lamp in the button goes off.
Malfunction
In the event of a malfunction, this warning lamp comes on in green on the instrument panel, accompanied by the display of a message.Have it checked by any authorized Toyota retailer or Toyota authorized repairer, or any reliable repairer..
Page 112 of 320
11 2
Rear seat belts (row 3)
These seat belts are not fitted with a pyrotechnic pretensioning system or force limiter.
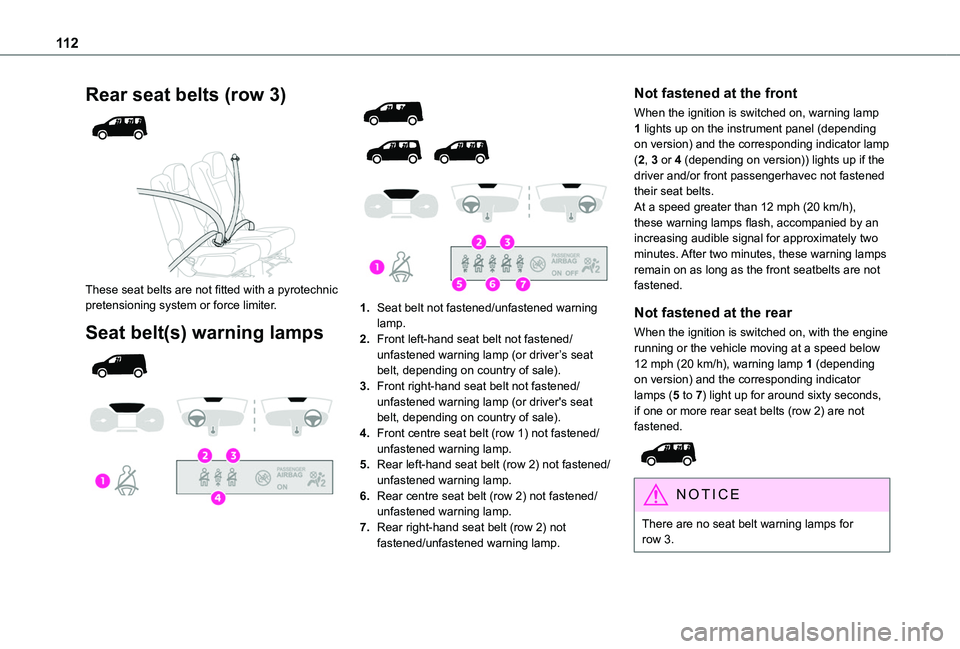
Seat belt(s) warning lamps
1.Seat belt not fastened/unfastened warning lamp.
2.Front left-hand seat belt not fastened/unfastened warning lamp (or driver’s seat belt, depending on country of sale).
3.Front right-hand seat belt not fastened/unfastened warning lamp (or driver's seat belt, depending on country of sale).
4.Front centre seat belt (row 1) not fastened/unfastened warning lamp.
5.Rear left-hand seat belt (row 2) not fastened/unfastened warning lamp.
6.Rear centre seat belt (row 2) not fastened/unfastened warning lamp.
7.Rear right-hand seat belt (row 2) not fastened/unfastened warning lamp.
Not fastened at the front
When the ignition is switched on, warning lamp 1 lights up on the instrument panel (depending on version) and the corresponding indicator lamp (2, 3 or 4 (depending on version)) lights up if the driver and/or front passengerhavec not fastened their seat belts.At a speed greater than 12 mph (20 km/h), these warning lamps flash, accompanied by an increasing audible signal for approximately two minutes. After two minutes, these warning lamps remain on as long as the front seatbelts are not fastened.
Not fastened at the rear
When the ignition is switched on, with the engine running or the vehicle moving at a speed below 12 mph (20 km/h), warning lamp 1 (depending on version) and the corresponding indicator lamps (5 to 7) light up for around sixty seconds, if one or more rear seat belts (row 2) are not fastened.
NOTIC E
There are no seat belt warning lamps for row 3.
Page 134 of 320
134
Key left in the ignition
NOTIC E
When opening the driver's door, an alert message is displayed, accompanied by an audible signal, to remind you that the key is still in the ignition switch at position 1 (Stop).If the key has been left in the ignition switch at position 2 (Ignition on), the ignition will be
switched off automatically after one hour.To switch the ignition back on, turn the key to position 1 (Stop), then back to position 2 (Ignition on).
With Keyless Entry and Starting
► With the remote control in the recognition zone, press the "START/STOP" button.With a manual gearbox, the engine switches off and the steering column locks.With the EAT8 automatic gearbox, the engine switches off.
NOTIC E
If the vehicle is not immobilised, the engine will not stop.
WARNI NG
To avoid any risk of jamming the pedals:– only use mats which are suited to the fixings already present in the vehicle; these fixings must be used,– never place one mat on top of another.The use of mats not approved by TOYOTA may interfere with access to the pedals and hinder the operation of the cruise control / speed limiter.The mats approved by TOYOTA have two fixings located below the seat.
Starting/Switching off the
electric motor
Starting
The drive selector must be in mode P.► If using a conventional or remote control key, depress the brake pedal and turn the key to position 3 until the motor starts, without
depressing the accelerator. As soon as the motor starts, release the key so it returns to position 2.► If using Keyless Entry and Starting, depress the brake pedal and briefly press the "START/STOP" button.► Keep your foot on the brake pedal until the READY indicator lamp comes on and an audible signal is emitted, indicating that the vehicle is ready to drive.
► With your foot on the brake, select mode D or R.► Release the brake pedal, then accelerate.On starting, the instrument panel lights up and the power indicator cursor moves to the "neutral" position. The steering column automatically unlocks (you may hear a sound and feel the steering wheel move).
Switching off
► If using a conventional or remote control key, turn the key fully to position 1 (Stop).► If using Keyless Entry and Starting, press the "START/STOP" button.Before exiting the vehicle, check that:– The drive selector is in mode P.– The READY indicator lamp is off.
NOTIC E
The drive selector moves automatically to mode P when the motor is switched off or when the driver's door is opened.
NOTIC E
If the driver's door is opened while the required conditions for stopping are not satisfied, an audible signal is emitted,
accompanied by the display of a warning message.